How to Install RV Bumper Reinforcement Struts

ฝัง
- เผยแพร่เมื่อ 27 ก.พ. 2022
- In this video I show how install RV bumper reinforcement struts / brackets on a Grand Design Imagine XLT 21BHE Travel Trailer. Reinforcement Struts are always a good idea if you want to add any additional load to your bumper.
I have included amazon affiliate marketing links to the products I use and stand behind for a small commission of your support. If you enjoyed this content and want to see more How to and Review videos, please like this video and subscribe to my channel.
If you have any questions place them in the comments below to start a conversation.
Tools & Hardware
1. Safety Glasses
2. Drill and Titanium bits
3. Drill Driver
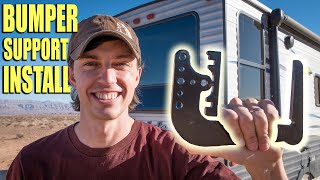
4. Safety Struts
5. C-clamp
6. WD40
7. Super Glue
8. Marker
9. Torque Wrench Optional
Product Links #Commissionsearned
Mount-n-Lock Safety Struts - amzn.to/35KBvCV
Mount-n-Lock Genny Go Generator Rack - amzn.to/3hXfd3f
Dewalt 20v Max Cordless Drill Combo Kit - amzn.to/3CwHwPy
Dewalt Titanium Drill bit set - amzn.to/3KwnJm6
Locktite Super Glue Ultra Gel - amzn.to/3Cw25vq
Follow us on Instagram - @ozarkfloating
Follow our other TH-cam Channel - @larisonlifestyle
Be sure to check out our website - www.ozarkfloating.com
If you have a product you would like for me to review, please reach out.
Ozarkfloating@gmail.com - ยานยนต์และพาหนะ


Great, outstanding step by step video. This is my next install.
Thank you! This is a huge upgrade if you're hauling anything off your rear bumper.
I added these to my 2020 Jayco JayFeather 24RL. I have two spares and a bike rack with two ebikes. I see no sign of welding fatigue on the bumper.
@jerryglobe867, that is awesome! These struts are incredible.
I have the same type of bumper on my Grand Design and was looking to doing the same but found a problem. The bumper is welded to a tube section and the tube section is then welded to the frame. You are attaching the structs to the tubular part of the bumper and not directly to the frame. Is this reinforcement actually providing additional strength? Where the tube frame part of the bumper is attached to the camper is just held by some spot weldings so I dont think this reinforcement provide any additional load capacity. Let me know how it is turning out so far. You may want to look for cracks down the roads on those spot weldings between the tubular section and the camper frame.
@Peter Her, I originally drove around 6,000 miles before adding the struts because I noticed the welds cracking at the bracket of the bumper and tube (where the struts cover now). I'm guessing from overturning moment from the generator rack bouncing on rough roads. The welds along the tube to frame have remained intact for me but that's a great point to keep an eye on. Since adding these struts we have driven another 7,000 miles without failure. In truth the best fix would be to run a fresh MiG welding bead down the entire length of the tube and frame on both sides in addition to the struts. Maybe Grand Design should hire us for R&D.
@@jacobsupgrades Im guessing you are not getting cracks at the frame and tube junction is probably because of the overturning moment is pushing up against the camper frame rather than pulling away from the frame. Maybe I just might add the structs just to help out at the bracket welds.
@hergundog...did you ever apply these supports to your GD trailer? Asking because I also have a GD and know exactly what youre talking about. Unless youre able to reinforce the short strut of tubing to the frame, I don't see how these brackets really augment your carrying capacity
What is the purpose of the spacer attached to it. It just gets in the way. Can I just remove it?
@Trevor Selch, I had to use the spacer because of the welded on bracket on the inside corner would not allow the struts to sit flush against the tube frame. Using the spacer allows the strut to sit square to the frame due to the welded on bracket. I'm sure you could install it without the spacers and not cause any issues.
As a retired machinist WD-40 is not a cutting fluid, it is a lubricate, use a cutting oil or fluid.
@@scottsbr8076 thank you for the input. I was just making do with what I had. Do you have a cutting oil or fluid you recommend?
Where did you get your rack that you mounted on top of the supports or did you make it? If you made it, can you elaborate on it?
@danadams3362, I ordered the rack through amazon Mount-n-Lock Genny Go Generator Rack - amzn.to/3hXfd3f It's a very cool rack that is modular and can be linked with two or more racks together for a larger hauling area. I turned the edge down closest to the camper in the "extended assembly" form to allow a deeper hauling area to mount our 4,500watt champion generator and spare tire.