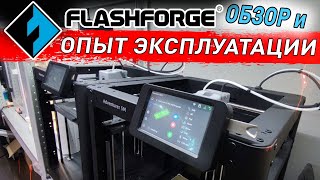
Unboxing, Setup and First Print on my new Flashforge Adventurer 5M

ฝัง
- เผยแพร่เมื่อ 21 เม.ย. 2024
- I finally took the plunge and bought an FDM printer!
I'll be using it mainly to print out organizational prints for organizing my modelling tools but also have some ideas for buildings on my model railroad.
Let me know in the comments below if you have an FDM printer, what kind, what do you print on it and any tips and experiences you've had. Or if you have any questions about FDM printing (just keep in mind I'm a newbie so might need to research your question).
If you liked this video, be sure to give it a thumbs up! Remember to subscribe to the channel and hit the notification bell so you can get notified when a new video is posted.
Here is a link to the Flashforge Adventurer 5M printer:
amzn.to/4aHNDkt
As an Amazon Associate I earn from qualifying purchases. - แนวปฏิบัติและการใช้ชีวิต


![ช้างศึกสู้ต่อไป!! พาเปียโน ดูบอลไทยครั้งแรก ตกรอบแบบโคตรเสียดาย!! l [Nickynachat]](http://i.ytimg.com/vi/4WloIH645Lg/mqdefault.jpg)

Once you have a FDM printer you'll wonder how you lived without it. Not sure if you are modeling your own items yet, but that is defiantly the way to go. I use the free version of Fusion360, but OnShape is a good one too. TinkerCAD is good for the basics.
Some recent items I have designed and printed. Custom pegboard holders, indexed risers for my laser cutter, and risers to lift the enclosure to allow proper distance for a camera. Solar finder for telescope, Servo mounts for switch turnouts, on model RR. IR sensor holders for model RR, TelradMouts for different telescopes, Duct adapters to vent laser fumes out window. Water filter system for airbrush booth as there is no window where it is, Well you get the idea.. You will always be finding things that need printed.
I have only been printing in PLA, and if you orient the objects right, and use enough infill/walls (I use about 20-20% for the "stronger: items, but 15% works well for smaller items. 4 walls for most) the parts will be plenty strong enough. I have tried a few things in PETG, and I find they really aren't all that much stronger.
Another tip, CA (super glue) is the most recommended glue for gluing PLA, and it does work well, bit I find that styrene cement, the water thin solvent for gluing styrene kits, sheets, rods, etc, works even better and is easier to use. It basically welds the pieces together. The material around it breaks before the joint does. CA is a bit brittle.
Also print a set calibration plugs/holes to see how your parts mate for when you design parts. My printer uses an offset of 0.1mm for tight fitting pieces, .2 for a snug fit, and .3 for a loose fit. This allows for larger prints than your bed can accept ( I use dove tail joints for this ) and allows you to design so all parts print for maximum strength, and/or less supports. You then simply glue the parts together. I have yet to have a part fail when using styrene solvent.
Awesome! Thanks for those insights and tips. I’m starting slow but as you said there’s always something you realize you need that you can print. We needed a new flap on our Toto washlet which I designed in Tinkercad and went through several iterations of prints until I got the right size and shape for the pegs that hinge the flap. And if it ever breaks again I can just print a new one.
@@pacificcoastminiatures Being able to design & print your own stuff is the best use for these printers, especially once you get the design -> CAD -> print -> test pipeline streamlined. Even more fun when you combine that with electronics / electromechanicals.
The best printer under $300 that you can buy
I agree! And there are lots of ways to upgrade it over time.
I just pulled the trigger on the Adventure 5m as well today :-D this will be my 3rd printer, and 2nd FDM one. It's been years though since the last height of my FDM days. Very excited! wishing you the best with your "adventures"! :-D
Awesome! Let me know how it goes with your "adventures" too. You'll find the 5M is a huge step up from your 1st FDM printer. I can't get over how fast it is once it gets going.
I also have a Mars 3 resin printer for all my N scale details. I think as a modeller having both is a plus if you can afford it. My next major tool purchase will likely be a laser engraver/cutter. Maybe next year.
Keep the box, it may be better to return it. The promises FLashforge made in their advertisement have been inflated. I got an adventurer 5M about 2 months ago and regret it. This is coming from a Bambu Labs A1 Mini and Creality K1. The software has been subpar from the get go and the new software (Flashmaker and Orca-Flashforge) are just barely functional. Make sure to get testing done prior to the return window ending, buying remorse for sure on my end.
@mwood2 I’ve been using Orcaslicer and it’s been working great. Give it a try before you completely give up on the 5M. Bambu has had their share of issues too so they are not perfect. As they say YMMV - everyone needs to do their own research like I did.
Just curious, did you have to bolt the table down at any stage? I see it really rocks the table. I've ordered one, but before it arrives, I need to build a table for it. Just wondering if I need to bolt it to the wall to prevent vibration or ghosting issues in the future.
Yes it does shake the stand quite a bit but so far no issues - I may move its location and then I should be able to secure the stand better. I just made do with what I had, it’s not perfect.
Thank you for sharing! Is there anything you need to do to calibrate the XYZ's on this? I have an older-design fast bedslinger printer at a different address, and it was necessary to edit the rotational distance (in the machine config) just to get the dimensions to print exactly.
Not that I’m aware of - I’m pretty happy with all the prints I’ve done so far. Obviously not as precise as my resin printer. There are some slicer settings I might tweak over time to get the best quality out of it. But I’m mainly printing functional parts so high quality isn’t as important.
@@pacificcoastminiatures Same. The things I design are physical replacement parts for motorcycles, functional enhancements to the printer, household fixes, electronics enclosures. For example, motorcycle handguard plastics are maybe $40/pair, but that $40 buys you two rolls of PETG, and that's enough to make 6-8 pairs of handguards. So hopefully no adjustment is needed to get the dimensions exact. The other printer (SV07+) is all dialed in now .. extremely exact XYZ dimensions.
@suzyamerica4679 that’s great! I think an FDM printer will soon be a household appliance because it is so versatile.
@@pacificcoastminiatures I love the way this tech upends the traditional supply chain .. there are people out there who get some new electronic components on a Friday, design the case and fixtures over the weekend, release the designs Monday, and by Tuesday the finished product is out on the street already all over the world. MalWart wouldn't have even gotten its design team moving in so short a space.
You really should wipe down the build plate really good with Alcohol before printing. It gets the oils and other particles off and helps with adhesion
I do give it a good wash with dish soap and hot water every few prints. Prints seem to stick fine although I had issues yesterday printing with a silk PLA but increasing the bed temperature helped.
@@pacificcoastminiatures Soap and water is good but Alcohol before each print conditions the plate. Soap or your hands have oil that will sit on the plate. Alcohol takes off that oil
I'll give that a try next time I use that Silk PLA again. For regular PLA soap and water seems to have cleaned the plate well enough.
What filament do I buy after
I would suggest buying PLA as this is the easiest filament to print with. After you get some experience with the printer you can try other ones such as PETG and TPU.
@@pacificcoastminiatures ok thanks
5M is nightmare for me, first time setup the controler cable pin defective, then they send a new cable but I dropped the cable latch on controller , so they were nice to send a new LCD controller. I also forgot to remove the screw and it too tricky to put back the screw, now leveling dont work. The leveling test should mentioned to remove the screw first.. Now it prinitng jsu strings....it should not be like this.
Sorry to hear about your issues. I agree the control panel cable should really be more robust. The screws I think are mentioned in the manual but not everyone reads that. I would reach out to them about the screw if you haven’t already. There may be a fix for that.
@@pacificcoastminiatures finallty got ahesion to work with just simple soap.
@Cordycep1 yes I find just washing the plate well with dish soap and hot water every few prints makes a big difference.
Curious about your software experience. Flash Print was abysmal in its ability to remote monitor and Orca Slicer had barely any remote capabilities. The new software of FlashMaker and Orca-Flashforge have also been broken for me. Spent the last 9 days with their tech support and made no progress rather then repeating myself over and over again.
My Creality K1 has been my most faithful workhorse and the BambuLabs A1 has some of the best print quality I have ever seen. If you dont need a huge print volume I would run from the Adventurer 5M and to the A1 Mini which is cheaper, more reliable and has refined software.
I’ve had no issues with the software yet. I’m only using Orca Slicer, the official version not the FlashForge one. And I had no issues setting up my printer with Flashmaker so that I can monitor prints when away from my office. I send jobs via wifi from Orca Slicer and it just prints.
@@pacificcoastminiatures You made a good purchase with the 5m, a lot of these new Klipper printers really do well out the box. The A1 mini is a nice printer, but the m5 should be reliable and I've heard it also prints TPU like a dream, you already have filtration and can complete the enclosure very easy, also with the 110c max bed temp you can print engineering grade filament that the A1 Mini will never dream of printing like Polycarbonate, Nylon, ABS, and ASA. Co print should release an AMS for Klipper printers this year so even that is a possibility in the future. Also, your device page on Orca Slicer has more remote capabilities than any Bambu labs printer owner would know what to do with. Klipper is the future. All this from an X1C owner for well over a year and half, they are amazing printers but impossible to work on when the time comes and most new Klipper printers have caught up in print speed and quality. Check my channel out I just posted some videos comparing a $299 Infimech TX printer to my X1C and its sad how close they are.
Thanks, I am very happy with the printer with very few issues despite some of the problems I've heard that others have had. I even updated to the latest firmware a few days ago and had no issues continuing to print through Orca Slicer.
I am interested in trying TPU to print out some tires for car models, just have to get a spool.
I'm only interested in a AMS or MMU if it doesn't create too much waste. I did try printing a bookmark for my daughter by pausing the printer at the correct layer and swapping filaments and it worked quite well. I prefer models where different coloured parts are separate and then you either pin/snap or glue them together.
And I heard about the Infimech TX printer on another channel, will check out your video. I do plan on enclosing the printer at some point so I can print with some of the engineering filaments. Bambu Lab printers are top of class but like with cars, not everyone needs nor can afford the most expensive. It's good that we're getting more affordable coreXY printers - competition is always good to see.
@@pacificcoastminiatures How did you get the Flashmaker app to add the printer?
I don’t remember the exact steps but there is a QR code you scan in the printer with the Flashmaker app. It was quite easy.