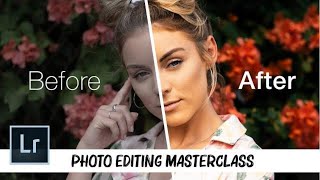
How to make your photos LOOK BETTER FAST! Photoshop Tutorial

ฝัง
- เผยแพร่เมื่อ 19 มิ.ย. 2024
- Lightroom PRESET PACKS: goo.gl/1CfEKF
The Music I use in All my videos: bit.ly/2KJwcVG - AMAZING for TH-camrs!
Color Graded with my PM LUTS Pack : goo.gl/JmUrM7
PM MERCH & COFFEE! : goo.gl/TkzM6S
My 2020 KIT for Filmmaking, Photography & Vlogs:
MY ND FILTERS (A MUST!) bit.ly/2VmXXZd
The Best Camera Bag Available: bit.ly/2JxGXug
Battery Pouch with Indicators: bit.ly/2xHZEIM
ND FILTER BAG: bit.ly/2UNHo8U
Accessory Camera Box of Life: bit.ly/2Ux4D8d
Camera Cube Magic Folding Bag : bit.ly/2UNHA88
GoPro Hero 7 : amzn.to/2M7WSzV
MAIN Super Powered STUDIO LIGHT (Only one I use): amzn.to/2Jya3tg
SWITCHPOD Vlog Stick: amzn.to/3ayS1D6
My Drone : amzn.to/2spuHDx
My Smaller Drone : amzn.to/2MdxOHF
ND's For my Drone: amzn.to/2VSwkHl
Main Vlog Camera: amzn.to/2RMov6D
Photo / Timelapse Camera 2: amzn.to/2M8W0uS
VLOG LENS! : amzn.to/2Fsiuqi
Magic ZOOM LENS OF LIFE: amzn.to/2ChiDZi
Gnarly 28-70 Lens: amzn.to/2ChiJA8
DOPE B Roll Lens: amzn.to/2VUQVeb
Small Roll of Gaff Tape: amzn.to/2RPUJy6.
Aputure AL-MX Light: amzn.to/2VSj9pJ
3 Legged Thing Tripod: amzn.to/2D9dd4v
Cheap alternative to expensive Time-lapse remote: amzn.to/2Dava2z
Expensive Time-lapse Remote: amzn.to/2VUq6GI
Rode Video Mic Pro Plus: amzn.to/2RMROWF
Think Tank Memory Card Organizers: amzn.to/2st9bO2
Think Tank SD Organizers: amzn.to/2Mgvlwl
Samsung T5 SSD Drive: amzn.to/2MbSqQp
FOLLOW ME:
Instagram: / petermckinnon
Twitter: / petermckinnon
Facebook: / petermckinnonphoto
Website: www.petermckinnon.com


Top tip for beginners:
Watch this a few times and try pausing it and giving each step a try as you go.
Then when you edit your next few photos have this playing in the background and following his instructions from just listening. Really helps you pick it all up!
thanks=)
why do some much timepass. you can do it one hit i guess
Let's move in together sometime.
Real tip for beginners: Ignore this video
broo my bruch doesn't take away anything it just put some more at 13:28 !!! pleas can anyone tell me how to make the bruch do the same thing as him not adding more !!
WINDOWS:
Shift+Option+Command+N: Shift+Ctrl+Alt+N
Shift+Option+Command+E: Shift+Ctrl+Alt+E
Content Aware Box: Shift+F5
GJ Saeeeeeeeeeeeeeeeeeeeed !!
thanks
Alt+F4
thank you for the content aware box
Thannk you!
Legit love how u talk (explain things). You go straight to the point and don’t make things hard to understand. I have adhd and I can’t listen to some people, either they talk too much and do less work and makes things way more complicated then it needs to be! I love the speed and how clean your explanations are!!! I’ve learned so much from you, keep up the good work!!!!
This got me started on editing in photoshop - I stayed in Lightroom because PS was too daunting. Thank you for giving me that confidence boost I needed, Peter!
yo its been 2 years, hows the photoshop?
Just some notes I wrote down if anybody wants them
2:15 Tweaking the overalls
3:16 Cleaning up minor un-wanted items in the photo with Spot Healing Brush Tool
4:22 Layers
5:34 The pre-sharpening (blurring the image)
6:40 Sharpening - Lightness and darkness
7:52 (Optional) if you want more sharpness
8:35 Warmth
10:01 Making his eyes or mountains in the background lighter or darker
14:35 Slight overall bump in brightness
Reminder these settings are all personal preferences
Skilter30 Nice man
13:30 do you know what does he do? painting with what
okay so earlier on he split the image into two sections, (an adjustment layer), so that he could change the brightness of only the mountains. but u can notice how there is a line between the two sections, so what he does is grabs the burn to too soften that line so it looks natural
*sorry he uses the Brush tool not the burn tool
He uses a normal brush with hardness set to 0%, then paints on black (to the adjustment layer)
Black = Shows the Effect
White = Hides the Effect
So you can flip between white and black to get it looking the way you want it. Using a large brush not only makes this step faster but also with the hardness set to 0% gives a nice gradient effect to it, effectively blending the seam out of view.
For content aware box in Windows, instead of Shift + Del,
it is Shift + F5
Sarah Denise Barbin thanks 👌🙌
Sarah Denise Barbin Thank you 😘😘😘
thanks!!
Here's a great photo editing tutorial that you can check out: HootPhoto.info
it's also *shift-backspace*
This is 100% gold. Honestly, the first time I watched this, it was without PS open at all, just to watch and take it all in - and holy just watching it gets you super excited to edit, but there is for sure a lot to take in! The 2nd time through I paused during every step and tbh it's really not that hard if you do it this way and just take your time through 1 edit. I've used this video for a dozen or so edits now and each time I need to refer to the video less. Eventually I will 100% be doing it on my own - and I've even started to tweak some of the values he's shown in the vid to make it more my own! I get that this is just my learning process and everyone is different, but just wanted to share how I was able to learn from this. Regardless, I hope you keep making awesome content Peter, I truly appreciate the quality of yours and Matti's videos.
Getting into photo editing after taking some engineering classes where I learn the math behind all those effects and filters (like the high pass filter), I appreciate what it does a lot more. Weirdly it even helps me follow the tutorial better.
hands down the best tutorial guide for anything . i dont find myself falling asleep or wandering off. keep this up
please don't stop with youtube! I love your videos!
Please make more of these photoshop tutorials, yours are so much better than any other I've seen. Easier to understand for me, not annoying like most.
I love that you vocalize the keyboard short cuts. Thank you for ALL your tutorials.
What got me hooked on your channel is, that you get right to the point. That's so hard to find on TH-cam
please do one for Lightroom. thanks
I'm working on one now :)
RobertsonFilms could you do one on instagram edit functions. Thank you
spammy spam
Bilal Mazhar same exact options m8, except LR has shit clone stamp tool. I hate adobe for making a beast software with such a major downside to my workflow...
I'm not a photographer. But still find your videos amazing!
Love finding your older videos such as this one and watching you explain Ps. I'm getting more into using Ps, and these really do help. Thanks Pete!!!
This is still my best PS tutorial. That process of blurring colour and sharpening B&W works Magic Pete!
This dude's channel is going to blow up.
It has
What else do you know, time traveller? Why didn't you tell us about 2020?!?!
Tell us what else you know!
it did :)
YOU....YOU DIDNT TELL US YOU WERE FROM THE FUTURE....BUT WHY...WHY!? WHY HAVENT YOU TOLD US ABOUT THE PANDEMIC!!!?
Since 5 years ago he is now over 5 million subscribers
Some of the best content on YT right now. Really enjoying your work. Keep it up.
I not only learn, but I am truly entertained by your videos. I enjoy that you don't take yourself to seriously. Yet still make learning something enjoyable.
crazy! I am new to photoshop and just by watching this i feel like a pro already. thanks for sharing
i love your method of teaching... fun and fast no time to get bored...
Hello Peter! I love watching all of your videos. I appreciate all the time it takes for you to get these informative videos out to us. At 52 years old, it's hard for me to learn new things like lightroom and photoshop, but having your videos to look at over and over really helps. How did you ever learn all the things you do with these programs? Thanks so much and keep up the good work.
Dude, Pete.. you're so awesome! I've used this tutorial MULTIPLE TIMES for my photos! Thanks for helpin me bump my photos up to the next level!!!
Pet your amazing...this video here has boosted my confidence to a level where I can now think that I can do all my editing my self by learning them and practicing more. Thank you. Please keep uploading such awesome videos. Cheers!!
This is magic! Thanks
You got rid of a freckle but not the red bump ://
red bump lives matter
Jovan Nguyen lmao
I know, I think he wanted it to be edited but still look realistic, not like model photoshopped, it's like picture enhancing
It was too big for the tool he was using
If someone knows him it would be obvious he used Ps to delete it.
The saturation in the final product is gorgeous! Great photoshop work!
Sending loads of love Pete! Keep up your awesome works!
This is literally the most important video I have ever seen. Potentially life changing!
I love your photo style and the way you explained everything ! thank you for this video!!!
are you looking a photo editor? Fastest and Professional Photoshop Editing Service, contact here>
bit.ly/2Rl2VDm
If you don't mind the rambling that is.
*@Cristina Midea* Best photo editing software: HootPhoto.xyz
seriously, Pete, your style is uncanny. THANK YOU for being incredible.
I found this video sometime last year and I always come back to it. I love it cause I have learned so MUCH. THANK YOU
BTW Peter, Thank you so much for your tutorials!! They are amazing and they have helped so much!
Wow this literally took my basic photos and turned them into something amazing, thank you Peter! 👌
Thank you. This is perhaps one of the most informative and easiest to follow photo editing videos I have seen. Can't wait to try it out.
Your tutorials are fantastic and your personality is great! Thanks for showing me what is possible and showing me a better way to make a tutorial video ! You rule dude!
Shift+ Ctrl+Alt+N & Shift+Ctrl+Alt+E - Windows
Thanks!
Adam Benjamin Dude.. I love ya! Thanks!
Man you are a life saver. Thanks.
You are the true GOD
what about Shift+Command+U? Shift+Ctrl+Alt+U doesn't work.
I have watched this video a solid 20 times hahaha
& still don't understand shite. that will be me. hahahah
I've done about 10....goes on in the phone.... And m struggling on my pc. Lol
I can’t see shit 😑
How do you find it, has it helped ?
Same, trying to learn this technique, i love the results of it.
I CANNOT EMPHASIZE HOW HELPFUL THIS VIDEO HAS BEEN FOR MY EDITING!
Super helpful video man!! Using layers like that completely changes up the workflow!
Every new layer he added, I'm just like "Wooooooowwww"
Great work dude. Your videos are easy and fun to watch along with... Appreciate your work!
As someone who is just starting out with Photoshop (on a pc), the Shift+CtrL+Alt+N/E already makes me feel a little bit more like a pro :-)
Thanks for the Tutorials Peter, I have been binge-watching for a week now
I lost it at 9:36. 😂 Great tutorial, Peter! Thank you!
BMACadelic same:((
i am not a photoshop pro but you explain it in a very good way so i feel like i am a photoshop pro haha. anyway, thank you so so much for helping us out. this is what i need for my daily posts on IG or any other social media platform. i really appreciate it. keep up the very good work! much love from switzerland :D
This is gold. Thank you so much for this. Just made some of my drone landscape photos look amazeballs!
I played this video over and over for each photo I was editing (went for a hike, had a whole album) and they turned out amazing, just the way I wanted them! I wanna show them to everybody now! :D
This commend is a notepad for the next time i edit a game screenshot
5:44 BLUR
6:23 BLUR OPACITY
6:58 MAKE IT SAD
7:05 OVERLAY IT
7:15 FIX IT
8:54 WARM IT
9:30 SOFT LIGHT
9:41 OPACITY
12:20 LASO TOOL
12:39 CHANGE
12:44 S
12:59 TO RED
13:29 BRUSH IT
14:04 SAD AGAIN
14:22 OVERLAY AND THEN OPACITY
12:47 S AGAIN
thx bro
Thank you
broo my bruch doesn't take away anything it just put some more at 13:28 !!! pleas can anyone tell me how to make the bruch do the same thing as him not adding more !!
GOAT comment
@@eureka410 you right click on the brush and then select the last option
Dude you are sooo good at this!! lol
Just wanted to say that I've been watching your videos for a while bro, thanks so much for the tutorials, this one is by far my favorite.
Thank you for your upbeat energy and all of this information you are putting out!!! i love it
great video, i love your content, you're just so authentic and easy to watch :)
Thanks! Appreciate it!
Is there a reason you create a new blank layer before doing Shift + Option + Command + E? If you have the top layer selected (as you did), and do that command, it automatically makes a new layer at the top. In fact it will make a new layer above any layer you select so you can do this at the bottom layer and it'll give you a new layer of the whole composition above that layer, yet still below everything above.
I ♥ YOU love your Content Try to learn some stuff you know !! ♥
your videos a very useful and hilarious. keep up the good work
I absolutely love the last tidbit at the last minute when you talk about styles. You da bomb Peter
I absolutely LOVE this video man. I just learnt SO much and my edit is incredible. Thanks so much!
Honestly, thank you for repeating Shift-Option-Command-E/N over and over, I was one of the people who neeeded it because I kept forgetting.😭😭
mee to
I come back to this video time and again.
This was exactly that kind of tutorial I was looking for the style that I like. Thank you very much, I'll start to practice with it!
Thank you for creating these tutorials for the people, it really does help out.. TONS. A great artists shares ideas and inspires many.
Thank you so much for helping me get into photography! the skills I'm learning here are helping me to monetize my photography in a time where I'm absolutely desperate - so yeah you're awesome and thank you.
Damn man, you are amazing!
TNice tutorials is one of the best tutorials of ANYTNice tutorialNG that I've ever watched in my life! Thank you so much!
I found you about a month or two ago. I love the passion that you have, your skill set is above excellent and I have learned a ton by watching and re watching you channel. Way to go, and thank you for sharing your talent and knowledge
I've never been so sincere with a subscribe before.
I think u should start doing modeling. You look freaking DOPE!
damn true
lool
No homo, but I agree.
Talking to me? because that made no sense
If you want to learn pro photo editing techniques then go here: HootPhoto. info
you rock!! I'm so new to photography, that I haven't even used any editing yet. Just got my first camera for Christmas and This is helping me more then you could know.
WOwowww Blown away!!! I watch so many of your videos.. Basically everyday for the past year or so... but i have not seen footage this far back until now... Awesome to see the growth I mean Empty Plug Sockets and Empty Drink bottles , and don't forget the little piece of starbucks cup hanging in the side... now im far from perfect im new to serious photography, hints the year in of Peter McKinnon,... But its very inspirational to see how far you have come. Now i have to watch the video again to actually learn the tips... LOL Thanks! I appreciate what you do!
"If that's what you're going for... you're done." Haha, nice! Halloween is coming so thanks for that! ;D
haha.. amazing vid.. i really like your energy
I love this. And I use it every time I edit or sharpen my pics
Thanks Peter! Awesome video. Enjoyed it thoroughly!
Removes his natural freckles but his big forehead zit goes untouched. What kind of monster are you? xD
Thought the exact same thing! 😂 not the monster part though Peter! 😂
@@thebigbadedit953 Yeah it seems my comment ressonated with others, thinking the same thing :P He is pure evil you know ;P
He likes to keep it natural 😆
Look like cherry angiomas, not zits, but essentially the same as his freckles. Just part of his skin and strange to not erase those if you are going to erase freckles.
hahahaha
Love the tutorial! Quick question: At 10:19 when you "stamp that visible on there", which layer did you stamp from?
same question 3 years later. love the tutorial but stuck on this step
Re-watching many times this video. True knowledge should be shared, Thanks Peter! Thump up! nice work!
Great tutorial Peter! Thanks for the inspiration and knowledge.
The final edit looks like something you can do in Instagram. The raw footage looked waaaay better
Not photoshop related but... I like your humor🤣
Thanks for the tutorial Peter. I am brand new to Photoshop, but look forward to learning much!
Excellent tutorial. Thank you so much! I am needing to edit my pictures for my new blog endeavor and now I feel like I have the information to do it well.
“If this isn’t your CROP of tea” 😂
Bro you made me laugh so hard when you gave him zombie eyes that my snot came out
Boss video, Pete. Thanks for sharing your knowledge so freely!
I really like this video because it demonstrates how you and I edit in a similar fashion, in completely different ways.
Teach me how to take great pictures!
background matters most n quality
Question. alt+ctrl+shift+e makes a new layer and stamps the image automatically. Is it necessary to make a new layer then?
not really one would be enough
BlackEagle352 Wow thanks for this tip!!!!
Thanks for this, Pete didn't explain this in the video, had no idea. Which layer does it 'stamp'? It looks like it stamps all layers combined...
Thank you!! You are such an awesome teacher and had me laughing all throughout this video. This has helped me so much! I have found edits that more suit my style using this video and have become braver when editing!!
Thanks a lot for this man. You just got a new fan. This helped me loads. You’re amazing!
"sowrry."
- Peter McKinnon
would you prefer he said SAHRRY like a damn American
Yes! Finally his Canadian comes out. I definitely rewound and played that back a second time 🤣
If you just hit comand shift alt E it will make a stamp. No need to make a new layer first =]
What is Comand Shift Alt E on windows?
@@carlosmorales6985 "Control Shift Alt E" on Windows.
I love all your videos, your teaching style is so good and has me laughing every time! Love it
This is even doable for a pleb in Photoshop like myself. Brought my photo's back to life, used this tutorial but adjusted to my own liking. Very well explained thanks a lot!!!
hey Peter! Can you please tell that how will u record your screen with your audio and background music? please dude
Appu Venki he recorded his Mac screen with QuickTime player. The vocal audio is from whatever set up he’s using with his camera. He just detached the audio (in premiere, but this can be done in any video editing software) so you could hear it and see the computer screen. Cheers!
If you have a windows computer you can use OBS Studio to record video, audio, and background music plus its free and easy to use!
magic
You can try recording your screen then doing voice over and adding background music on premiere
Download video recoder only on laptop
Can you make a tutorial about how to make an Intro?
Keep up the good work!
I have been watching you for years, BIG BIG FAN, and if I have never said before (although I know I have lol but just for measures) I find your videos so soothing but educational. Literally am thanking you for staring a youtube page because you're 90% of the reason I know what I'm doing when I'm working on something. THANK YOU FOR THE AWESOMENESS!
First time ever commenting!!! Peter M ure stuff is so so good I literally use for motivation lately I am exactly how you were. I start something, a job or a hobby start and then next I know l give up chuck everything I bought for that thing and go out n to the next thing. And watching you I’ve been slowly feeling that maybe I do it, I just have to start it and see where it goes AND NOT GIVE UP. It’s photography that I’ve always been interested in I just see all the information needed to learn and I panic and don’t take the plunge. But you’re really getting me out of that stupid mentality. THANKS BRO OH AND OF COARSE I LOOOOOVE EVERY VLOG I’VE WATCHED. good luck and keep giving us you “magic “
rewatched - several times
AM STILL CONFUSED
Shots and rewatched
STILL DONT GET IT
stamp a what now?
I think you should use lightroom for this, it is based on editing photos. Or is there another reason that you are using photoshop ?
Would love to see you do this in Lightroom somewhere in the near future
Fabian Stroobants I was just thinking the same.
I think he could have done the same or a very similar edit on lr but let's give him the credits because the photo is really nice, the edit didn't take too long but yeah.. Would like to see a similar edit on lr
He could have done it better and faster in Lightroom. There was no need to use Photoshop for this, since he just added contrast in 15 different ways.
Fabian Stroobants he talk about photoshop but his place of presentation need lightings n not perfect in general for someone who teach us editing bla bla
He explains it in the video.
he did things you can't do on lightroom
thanks man finaly a tuturial that is straight to the point and quick!
Its so fun watching how other people edit! This is so different
take a shot every time he says "shift+option+command+end" haha