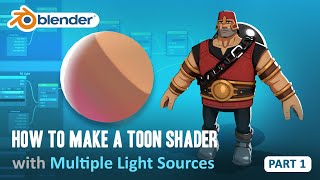
Toon Shader Tutorial - Part 3 - How to Make a Metallic Material (Blender 2.8/EEVEE)

ฝัง
- เผยแพร่เมื่อ 7 ก.ย. 2024
- Part 3 of our tutorial series on how to make a real-time Toon Shader in Blender 2.8
In this video, David from Lightning Boy Studio will show how to make a metallic material using a custom specular highlight and Matcap texture.
/ dinomancersproject
/ lightningboyst1
Watch Part 1 here :
• Toon Shader Tutorial -...
Watch Part 2 here :
• Toon Shader Tutorial -...
Opening Logo Sound Mix : Les Productions Underground
Download the .blend file from this tutorial:
drive.google.c...
Download the Matcap texture used in this tutorial:
drive.google.c...


![Turning Photo Realistic Textures into Anime Style Shaders in Blender [EEVEE] - Comfee Tutorial](/img/n.gif)
Finally a TH-cam channel that explains it properly. Underground videos are the best videos but you need to be on the surface. Take my sub and thank you for your amazing in dept tips.
Thanks for that! Helps a lot, and the more exposure we get, the sooner we can make this project fulltime.
In the meantime, we'll keep making videos like this one!
Kudos for shouting the keyboard shortcuts while doing the action. Great Blender learning 👌
It's a little detail but we know it helps. Glad you agree ; )
I can't even believe how much I've learned about shaders over these three episodes. It seems like I'm finally getting how things work. Thank you so much, you da BOSS!!!
Not only are these the best toon shader tutorials I've ever seen, they're some of the best Blender material tutorials. Some of those nodes are so complicated and abstract that it's hard to find a practical use for them, and here we have uses for all kinds of nodes I otherwise would have dismissed as too technical.
Again... great that you dig into explaining the "Why?" behind what you do! 💯
My mind was blown when you moved the faces of the sphere and the matcap reacted accordingly, great job mate!
I'm so glad I found your channel! I'm primarily a digital painter and animator, and I've been trying to use Blender as a tool to make 3D work that fits smoothly alongside my 2D work. These tutorials have been so incredibly helpful for that. I've been learning Blender for years, but up until now have never encountered tutorials that I feel meet my needs so well. The way you explain things leaves so much room for experimentation on my own-- because you explain what each node does in an easy-to-understand way that sticks with me! What previously seemed so convoluted and daunting now seems so much clearer. I think you could have a great career as a professor!
Thank you Kate! It takes longer to explain every node, but we thought it would be much more satisfying for a viewer to understand what they're doing instead of just mindlessly recreating the steps. Glad our method works for you!
Finally an artist with toon love....searched this for a looong time
Started with Part 4, because why not - what is all of this!?
Went back to Part 3 - now I understand how the nodes work. Very cool.
I dont understand why you make this stuff free. It deserves to be at least 10% per vid, i swear, you need and deserve every piece of exposure and popularity you can get
This is the most comprehensive and satisfying NPR / Toon shader I've used / built, including paid for / included with dcc toon shaders. Working with Unreal's post-processing, it's amazing that this is real-time too with great line quality. The pace of your tutorials are excellent and very informative too. I'm new to Blender, but long-time in 3D and this collection of tutorials really helped me to unpack the power of Blender's shading graph. Thank you!
Thanks for the kind words Mondo, glad we can help! :)
Sir, I am amazed at such work. The detail of handling 3 light sources through RGB and adding a matcap for metal reflection trick... Thank you very much. This tutorial was a wonderful and valuable lesson. And so finely explained!
I've been checking all the tutorials and I'm so happy with the results I got, It's so hard to find tutorials as fun as yours! Really gives me the hype for creating my own original content, it's just really inspiring. I really hope to see more coming from you, Thank you alot, your works are just extraordinary!
Thanks so much Frisk! These tutorials are a lot of work to put together so we really appreciate knowing that they are helpful to people! You're the best!
So far, I've been watching these to learn how to use blender's shader editor nodes, already knowing the process for these effects. However, that matcap metallic cheat was new to me, and it is super slick. I can imagine a lot of fun things you could do with that. I'm impressed. These videos are excellent.
THANK YOU SO MUCH, it's been months of trying to find a good toon shader tutorial and yours by far has been the best one. You don't only say plug this into that you actually go in detail of what the node function is and what its doing in relationship with the settings. Thats one of the main reasons I dont watch other tutorials because there's no real explanation of whats happening. Thanks again
Thanks so much Spokiy! Comments like yours give all the meaning to what we do! :)
Thanks for the tutorial! A small organizational improvement in your example would be to introduce a black "Specular Color" in your basic toon shader and have a separate "Toon Metal" node group which then could be combined with the basic toon shader via "Specular Color" attribute. That would increase reusability and separate things better.
I am your fan from China,your tutorials is really so great!I think it is the best tutorials in the TH-cam.It inspired me a lot to create the video.Thank you!!!
Man... Great tutorial series! Working on a project of my own and this helped a lot, so thanks very much! BUT When I started this part I spent like an hour trying to figure out why the hell there is only one specular spot on your sphere since mine had 3... It drove me nuts trying to fix the light angles to get it right playing with all the settings until I gave up and continued watching then 5 minutes in or so...
"... btw I turned off specular on the fill light and the back light..."
But still great tutorial!
Sorry about that! We should have added that precision right off the bat.
Quick hint: If you need to plug the first input of the node and it's occupied (but needs to be moved to second input), like at 05:30 - just be bold and put your input into 1st socket. Blender is smart enough to free it up for you and move the previuos occupant to 2nd socket!
10/10 tutorial series man! Been trying to make something super similar for a while, but the RGB separated bit was genius and what I was stuck on.
Thank you so much for the tutorials. You guys are awesome. Just found out that you can control the specular size too by changing the specular color, the second option of the Specular node. The brighter, the bigger.
I had to pause this video simply for the fact that you perfectly demonstrated what,why and how the metallic texture acts when it's facing the camera at TimeMarker 19:10
I absolutely love the way you teach! Thank you for explaining not only what to do, but WHY you do it. So so helpful ❤️
This is awesome -- really impressive tutorial; I've worked through at this point at least a dozen TH-camrs' toon shader tutorials, and none of the others are as comprehensive or carefully prepared as this one. Had not considered using RGB to isolate lights before; that works really nicely. I've tried to do something similar by using math-node thresholds to target lights operating at different intensities, but that requires a lot more model-specific fine-tuning and isn't nearly as elegant.
I seem to be having some trouble removing the specular contribution to just a single light, though---despite turning the specular down to 0 on the others, they still seem to contribute to the overall specularity. (I suppose I could limit the specularity to just the key light with the color channels, of course; it would be nice if there were some way to extend that cleanly beyond 3 lights, though!)
This is a great serie, keep it up mate!
I'd be curious to see how you'd tackle hair specularity for a cellshaded character in Blender.
Thanks! We haven't tried anistropic specular yet because it wasn't needed for any of our characters hairstyle, but maybe something to explore in the future!
I think that matcap might be what this one wii game I played did. Mercury Meltdown Revolution. I always noticed that no matter what angle you looked at it, the mercury blob would have a sort of image stretched over it, but always in the same orientation. Perplexed me as a kid, but this kinda makes sense now.
I came looking for Copper but I found Faux Specular Metallic Gold.
Thanks for this video. Really understood the process of layering lighting effects in 3D.
Thank you for all the great tutorials! I would personally love to see a tutorial series on how you make your characters.
You're not the first to ask! We're planning to do one this December once we release our new shader.
@@LightningBoyStudio Can't wait to buy it!
Thanks for putting out these tutorials David. Your videos are easy to follow and I've learned lots of cool tricks to use in the shade editor from your videos. Could you explain in a future tutorial how to shadow paint and maybe make a video on how you did your characters face with grease pencil plz
I second this motion! 😁
Amazing stuff. Finished part 1 yesterday and part 2 and 3 today. Really happy with results so far.
These popped into existence the perfect time for me, passed them around to everyone at work. Super thankful for these, thank you! Looking forward to seeing more!
Thanks so much Addison! Glad the tutorials were useful for you! :)
OOOH MAN THANK GOD FOR LETTING ME KNOW YOU BROOOOOOO...NICE WORK AND I WISH TO TEAM UP WITH YOU IN THE FUTURE
This video is like a divine light falling on my head
This tutorial series is absolute gold, thanks a lot for this wonderfull techniques, this helps to understand what's underneath a good toon shader !
Thanks Nicolas! Glad that people appreciate our in-depth tips and tricks!
What an awesome tutorial. It is the best one I've found that covers this topic, and I learnt a lot from it. Thank you for taking the time to produce it.I'm looking forward to the texture painting tutorial next. Now its time for me to take what you taught me and see if I can apply the technique to my own models.
Very interesting information, thank you very much!!
Great tutorial series - thank you so much!
You guys are true pros! I'l be hoping for your project to take off.
Thank you for the informative videos and the resources too. Much appreciated
You couod step the metallic resemblance a bit up by blurring it Ina a couple steps. Then use multiimage sequence and then use a value to use the frame. Now the blending between diffuse and metallic looks weird since we see a double image. If we use that blending mode form the sequence you could get s much nicer gradual step and transition between the two
thanks to you I started to like the nodes in blender (started with Maya before), and damn I'm surprised that the nodes work and look nice.
I was following this great tutorial from part 1 to here, so I still had the last 2 nodes reversed from part 2 and options like Outline Color, which is not present in this part.
But I can assure anyone wonder that you can still just add that Add node to connect the Specular frame and it will still work right as rain.
Thanks a whole lot for this video I am beginning with blender because I wanted to make background assets for 2D animation this really teaches me a whole lot and also makes my work faster
OOOOh man!!! i'm really happy that i find your channel :D thank you so much!
Blender is the absolute proof that open-source software can be awesome.
This channel is like a Blender Guru for toon shader. Thank you a lot for all the tutorials.
I'm still trying to make a donut and a coffee cup... LOL
BTW, a doubt just occurred me. What about a glass material in tool shader? Is it possible?
Definitely possible! That's something we'll talk about in future tutorials.
You can also add a parameter to the Fac input of the Add Node that combines the Specular with the rest of the shader. This way you have an input from 0 to 1 to turn on or off, or reduce the the intensity of the specular highlight. I thought I simply missed you doing that step and went back to look again, but it seems it's one you didn't add, so I just wanted to share it here.
Great suggestion! Since the specular is in additive, we tend to just darken the color of the specular to fade it off, but that's definitely not the most intuitive way to do it. Cheers!
Thank you for sharing such valuable knowledge, and done with such care
Thank you a lot for theese tutorials
one of the best tutorial of blender thankx alot you got my sub
19:15 Mind blown!! Excellent tutorial David, thanks for the tips. I'll attempt a similar thing in the new Unity Shader Graph :D
Thanks man! We've seen some very cool NPR shaders done in Unity. Let us know how it goes!
This is great! I am learning so much! Thank you.
Great tutorial! Looking forward to the texture painting one!
I'm fairly new to nodes so I get frustrated easily when I don't understand what most of this means, but I hear you just have to stick with it and eventually it makes sense.
Great tutorials! Please keep them coming.
great tutorials
So Nice, Finally i done here~ this tutorial series so great!! very useful!! thank you!!!
Just fabulous.
Thank you very much for this series of tutorials, they are so great!
I really wonder how you rigged the face, especially the mouth. If you can do a tutorial about it, or just explain it, it would be awesome.
thanks :)
It's already planned! One of the next few tutorials is going to be about facial rigging.
@@LightningBoyStudio Great, thanks!
David you're a GOAT!
These guys are amazing!!!
amazing tutorial...really appreciate the videos. I wanted to know how to use a transparent BDSF or an alternate way to create a transparent silicone material with controllable specular.
This series of tutorials is great! !! I can't wait to debug a cartoon material based on this, but there are still many things I don't understand after I get started. Can you provide a series of materials for the basic character model for reference? Thank you very much!
Thanks so much! You'll find the most up-to-date shader in the video description. We do have more features that we are still working on and will be showing in the next tutorials, but they are still not final so that's why we want to wait a bit before we post the full thing.
Thank You so much
9:40 "Why I'm not using Y. It moves diagnal. Not sure Y."
Very very cool !
if i wanted to have normal/subsurface scattering data in a toon shader, how would i add those ?
that stylized face is soooo intriguing! will you make a tutorial about how you made Cuppers 2d face? Im really curious about it
Sure, that might be something we do! It's pretty simple though, just used some shapes made with the Grease Pencil. We don't have any kind of rig at the moment.
@@LightningBoyStudio ohh yeah a grease pencil rig is what interests me personally XD mainly because most of the blender 2d face tutorials on TH-cam just use texture mapping XD
Thanks for sharing this!
Amazing tutorials! Please keep going :)
still would like a way to make custom Specular Reflection models to readd things like phong shading or even just custom ones that don't exist currently, since This is still quite limiting being stuck to PBR
Thanks for your sharing!
Awesome!! Can you please do glass and transparent liquids with toon shader next?
Thanks 3d Nago! We have planned the next few tutorials already and sadly won't have time to cover glassy materials, but we'll keep your request in mind for future episodes!
Amazing.
MERCI for you joy to share.
how to reuse this material from scene to scene on different assets?
Thanks a lot for your tutorials.
We'll be releasing a new version of our shader in a few weeks, and we'll show all you need to know about setting it up on a character, apply it to different assets, etc. Stay tuned!
I don't understand why specular it works only key light. At my place specular is also on Fill light. I don't look seperate RGB in Specular frame :(
9:35 This is probably due to Blender being set to Z-up, not Y-up.
Why the Y vector channel does what it does has something to do with the object depth relative to the camera, since it doesn't have a way of coming off the 2D surface. But this is only how I imagine it works.
Great tutorials series. Enjoy very much your spirit.... also and regardless. I had an issue with the image attached. When I put the -1 and 2 in the XY location/scale it gave fish eye effect. Then I downloaded your blend file and noted that for the metallic you entered actually +0.5 for location and scale and the mapping is set to Point rather than Texture... which is confusing. Can you kindly explain? Also, when I entered in my blend file your metallic values, I still didn't receive a clean image.
Right, so the quick explanation is that using 0.5 in Location/Scale in Point mode will give the exact same result as entering -1 and 2 in Texture mode. I can't really explain why, other than that's how the underlying math works. That being said, it's hard to tell why you're not getting the same results as we do-maybe some other values are not connected the same?
That scaling is actually kinda weird. Normally with blender scale, numbers above 1 makes it smaller. But i this case it makes it bigger. Scaling up is going below 1. Guess it due to the transform added to it. 2 adds to the -1 in the location
Absolutely fantastic series. This is the best toon shader I've ever seen.
Just a question, but is it possible to limit the specular highlights to the most well-lit areas of the mesh? At the moment they appear even in shadows and it looks kind of strange.
You probably figured it out by now, but you could multiply the specular highlight with the result of the original color ramp (before adding color) that defines which areas are lit and unlit.
@@DonWippo1 That might actually be more elegant than my solution, which was to add the difference between specular and the rest instead of adding the specular intensity. I'll go check, thanks.
Love this, great tutorial. It helps out a lot. Just a question about your char. Are the eyes sticky eyes or just texture driven?
They are done with the Grease Pencil!
Awesome tutorial! One question: How come youre getting only one specular with this setup? With the 3 lights, i get 3 speculars and have to use a Separate Color between the Shader to RGB and the Color ramps to limit it to the key light.
I had the same problem, but after rewatching a couple of times, I noticed that at the beginning of the video he mentions that he turned off Specular for the Fill and Back Lights. If you click on the light in your Outliner, you should be able to go to the Object Data Properties for the light (it looks like a little lightbulb) and just change the Specular slider to 0.
I hope that helps!
Amazing tutorial. I somehow am only getting specular from my fill light even though the paramter input I am using is definitely from my Keylight. Anyone else run into something like this? Not sure what's causing it.
Figured it out. For some reason the red channel of the key light just wasnt as strong as the fill light and I couldnt the specular of it because of how dim it was even at 1.0 strength. Turned the strength of the key light up to 5.0, brightened the specular value in the BSDF Specular, and turned the specular of the fill light off.
i love this series soooooo much, its exactly what i was looking for!!! but one quick question, is there a reason he doesnt use the constant color ramp mode instead of putting the pins close together?
No particular reason. I think we might have done it this way because we wanted to demonstrate the change happening over the softness while moving the pins? Anyway, constant mode works great too, and is the perfect choice mathematically speaking. :)
These look absolutely beautiful. Sorry if you cover this as I'm just going back to watch the first video in the series. How did you do that mouth? A sort of drawn, 2D looking mouth smoothly animating on a 3D model. Everything about the characters is just great.
Thanks Keith, really happy you like our style.
The mouth and eyes are done using the grease pencil in Blender. We might make a video about this down the line. We look forward to share more!
@@LightningBoyStudio great tut , can i just draw my eyes and such on the face with grease pencil ?
@@dimitrishow_D Yes, that's what we did! :)
@@LightningBoyStudio cool i tried it for my character, works perfect thank God and you for not having to rig a mouth :))
very nice Tutorials, thank you.. And can you explan Rimlight 2D section please :)
i couldnt find that in this series.
Thanks! We'll explain the 2d rim light in a later tutorial, but if you want to take a jab at it, you need to use a Fresnel effect as a mask for your Kick light.
Hello sir, I would like to ask why I have 3 reflection points in the beginning of specular reflection, I hope sir can help me to answer, thank you! !
loved the whole series and made a perfect toon shader. I just have one problem. So when I use the mat cap metallic effect on a cubical shape object suppose locker it acts really weird. Like when I go below it , the color becomes white which is a problem as i want to get low shots
Yes, unfortunately this kind of effect doesn't work fantastically with square objects. What you could try maybe is make an alternate matcap texture for these lockers where you raise the horizon line in the reflection?
Thank you
So, when you animate face and eyes, you draw every single frame of animation with Grease Pencil? That's challenging!!
Also, when you assigned different materials to different vertex groups, how did you manage to smoothen the partition lines of 2 vertex groups with different shaders?
Where is the overall scene lighting coming from if you are only using RGB channels?
Please make a tutorial series for animating the characters
I don't understand it, your specular shader creates a single light dot from 3 light sources, while mine creates 3, even though i did all the same stuff that you did in the tutorial
Anyways thank you for the tutorial
The specular feature doesn't work when screen space refraction is turn on in blender 2.93.1 which is the version i am using . is there a way to fix it? BTW your tutorial is very helpful. thank you very much.
This is a Blender specific bug. Seems to be fixed in blender 3.0 so it should work now.
This is SUCH an incredible tutorial! Thank you so much for providing this! I'm just having one issue, I've plugged everything together for the specular light, which seems to be working except for the color? I've tried troubleshooting this and double-checking all of my nodes as well as lighting settings and can't find the source of the issue? Additionally, I have enabled the movement for the X and Z axis but it gives me that diagonal movement that you found with enabling Y... this I can totally live with, I'm more wanting to figure out the color issue so that I can understand what's going on in the future! Thanks!
Solved it! I actually just managed to fix the issue with the color by unplugging and replugging a few of the color connections in the specular light frame. I'm not sure which one was directly related to the issue but if anyone else has this problem give this a go!
@@rabbitrabbit9878 Hey Rabbitrabbit! Thanks for the kind words, and glad you could find a fix. Yeah, it's kinda rare but we do sometimes encounter some weird bugs that seem to be mostly about refreshing the display or reconnecting nodes again.
As for the diagonal movement of the specular, have you tried playing with the Y axis? It might have something to do with what direction your model is facing in your 3d scene.
Hi, how do you do to make the sprite face?
, in my project it get influenced by the lighs, so it looks red and green, i hope get you answer
Nice tutorial! But, if possible, tell me something: For the metal texture to work in other objects (not being a sphere) i'd have to make another matcap wich corresponds to the shape of the mesh, right?
Matcaps definitely work better on round-ish shapes in general. But if you look at our character here, we use the same matcap for the helmet, shoulder and the armor. So it's not like to you need to make a custom one for each shape.
@@LightningBoyStudio Got it! thanks
Hey David! I followed all two parts now im halfway through the 3rd tutorial and somehow my nodes werent the same as yours. at 10:20 when you plugged in the specular you didn't have the group input that control the outline color plugged anymore. I downloaded the file and saw that you dont have the outline color in the node group anymore... am I missing something? Insane tutorial. thanks alot ! :D
Hey goosebumps! You're right, sorry about that. If you download the shader in the video link from the 4th video (anisotropic) you should see all the features.
Great Tutorials and greatr shader! but I have a question... how can you make those scratches or charp edges as in the armor of the character at the beginning of the video? is it explained here?? (perhaps i just skipped that part xD) or is it explained in othe tutorial of the serie?
Thank for the help :)
If you continue with the tutorial series, we explain how to do it in one of the videos. (the triceratops one I think?)
However, you should definitely check out the new version of our shader, which is much more powerful and makes setting up layers of scratches and sharp edges like this much easier.
th-cam.com/video/8fHZcnTFYEI/w-d-xo.html
@@LightningBoyStudio Thank you so much!!
Hi, first of all, thanks for the informative tutorial. I have one question? How can I add normal map in toon shader?
If you stick to the end of the tutorial series, we show how to add a Normal map input. Basically, you just need to create an input that connects to the Normal socket of the Diffuse BSDF inside the nodegroup.
@@LightningBoyStudio Thank you
www.artstation.com/artwork/Aqgb4z
Do you think it's possible to make the white part on the helmet, the scratched area, somehow, to reflect less light? Maybe adding in a mask layer and making that area get more node roughness?
Yes, it's absolutely possible. You can add custom nodes to this shader like you would to any Principled BSDF, so for instance you could have a texture mask plugged into Specular Color. Everywhere that's painted white you'd get a white specular, and anywhere you paint a darker color you'd get a specular with reduced opacity.
@@LightningBoyStudio a'iight!
Tho, it would look fantastic on your shaders too! Would give a final touch of attention to details!
I want to get into making some simplest possible stories, reduce to the lessest expression yet keep it entertaining and eyecandy. Cartoon is excellent for this! Your work is very inspiring too!
Been trying that method with solidify in the past but it gave some glitchy corners so i wonder if i would get amazing results mixing both methods you presented right here!
One thing i wonder about is if there's a way to get the model to have its own lighting and a feable impact from environemental lighting so the movement of the shade lines becomes less wobbly. I mean, besides post-process compositing.
Cartoons had that very consistent light and shadow division with a very stable contrast line while every 3D attempts at 2D gets some kind of a more wobbly shade... Maybe rendering at lower FPS might be part of the illusion IDK?
@@LightningBoyStudio Tho using the solidify shader, i had some very sharp corners around nose and other sharp corners. How to get some smoother corners?
@@LightningBoyStudio So many questions sorry ha ha... But is there also a way to stylize the outlines through post-process, besides Freestyle?