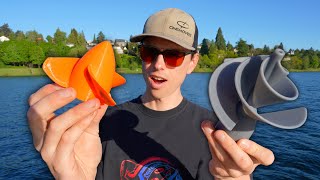
How to finish off your 3D Print

ฝัง
- เผยแพร่เมื่อ 17 พ.ค. 2024
- Mike Mead, one of the judges of cartridgesave.co.uk's 3D Print Cup, gives a demonstation of how to finish off a 3D Print.
The tutorial includes tips on removing the layering effect, repairing breakages and painting.


I find you get the best results with the acetone vapor bath finish is to lower the part into the jar with a platform (I made mine from a bent coat hanger) after it has already started boiling and there is already some vapor built up. That way you avoid the lower half of your object from getting too much exposure to the vapor. Lower it in slowly so you avoid loosing some vapor out of the top. Also multiple trips in and out of the jar seem to produce a better finish instead of just one longer exposure to the vapor. let the part dry and cure for a few minutes before putting it back in.
I wish the support came off of my prints that easily. WOW.
+Dark Alchemist Mine do.
John Ian O'Neill
With PLA no way no how for me and ABS is easier but not that easy. With S3D it has some other issues which negate me using it (bridging has a known bug that is also in Cura btw).
With S3D I am printing curved bridges with no sag. My supports almost fall off. Took a while to dial it in but I am very happy with the results. I have found different colors need different extruder temps though.
Well, I can prove S3D does it wrong (so does Cura) but on the official forums it has already been documented just no word when, or if, it will be fixed.
For larger surfaces, I've used an old iron and some oil to get rid of lines, works pretty well but can easily go wrong too.
This was not a live experiment. Neil underwood created the acetone vapor method months before you posted this. I dislike when people take credit for others work.
Isn't it preferable to use a cheap coffee warmer for the acetone method than placing a potential bomb on a 1000$ printer ?
What is the resolution on the first print? It looks great.
Is the acetone smoothing applicable in PLA or any kind of filament?
What type of pollyfiller do you used ? Automotive , gypsum based ?
How about a comparison of current finishing tools like Solderdoodle Pro 2.0, Retouch3d , Ritocco or Modifi3d ?
Hi Cartridge Save!!
I want to disapear the lines and have a very glossy finish (this is because I wand use my printings as molds), sorry my native languajes is not English, but I heard "household polyfiler" which brand do you recommend? have you find a better solution for this?
Kind Regards
Leonel
So what are the results of your acetone experiment?
I wonder if the acetone "Safety Cage" is a bad idea since you are trying to vaporize the acetone. If you get the right stoichiometry and a spark then the whole cage explodes! I don't know enough about acetone to know how plausible that scenario is, but it seems worse than just having the jar and perfboard. The jar has much less volume and no ignition source. If you have proper ventilation to capture or move the fumes outside, then you don't have to worry about the air catching on fire.
Nice to see Lancashire at the forefront of 3D printing!!! Can I do a degree in SpongeBob, I am sure it will help my career prospects.
You should use Multi-Surface Paint. It is made by several companies and it works well on plastic. Regular Acrylic Paint is not good on plastic. It becomes sticky after a while and you have to then seal it with clear nail polish, which kind of sucks and nail polish is expensive so if you have to paint many objects it is prohibitively pricey to use nail polish and/or regular acrylic. I would suggest this stuff: www.michaels.com/msc-satin-acrylic-craft-paint/M10198119.html?dwvar_M10198119_color=Scallion#q=multi-surface+acrylic&start=1 Micheals also sells an Americana brand of paint which comes in a Multi-Surface variety and comes in many colors. The downside is if you want a shiny surface I have yet to find anything other than nail polish which works and does not become sticky.
Oh.. Now I got it... If you run out of yellow filament and you have only black, and at the same time you accidentally printed a despicable me minion but your intention was to print a mutated willy, then a quick way to change colour and shape is to place the model in acetone... Cool!
ironsienna hilarious 😂. It definitely looked 🥀
do you print 100% infills?
+Hany Soliman in most applications, 100% infill is a waste of material. Can you think of a model that requires 100% infill?
Try this part finisher... Solidoodle- 3D Part Finisher
Ermmmmm ..... so where is the end result for the little minion you used as an experiment? That's a bit unfair.
10:33 sponge bob dies