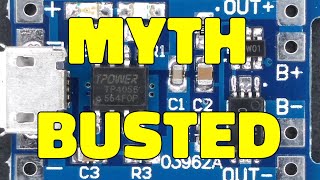
Your explanation about Over-Charge(OC) and Over-Discharge(OD) protection seems wrong. The 8205A is a pair of N-Channel Enhancement type MOSFET. The Drain of both MOSFETs are connected together. You forgot about "Intrinsic Body Diode" aka Reverse Current Path of MOSFET. The Cathod of two body diode of MOSFET pair are connected together. During OC protection, the MOSFET(OC pin of DW01A connected with the Gate of this one) is turned off so the charging stops immediately and the vice versa for OD protection. The same thing you can turn for positive line with a pair of P-Channel Enhancement Type MOSFET. By the way, thanks for the great effort.
Great review! I bought several stuff based on your reviews! Keep up the good work. PS: you only missed the overdischarge protection. I would have like to see it. Best regards
Great to see a review of J5019 and its lack of undervolt/discharge protection (lack of DW01) and if there is alternative board with tp4056, adjustable boost to 6v to 12v+ like j5019 but with dw01 prior to booster for discharge protection.
Awesome Video. One of best video to understand datasheet and deep learning. I have four questions. 1. Is there more advance chip available as compared to TL4056 ? Is TL5100 is better ? 2. During charging of battery , we can connect load ? 3. I want to use TL4056 for charging 18650 battery and simultaneously use it for AVR microcontroller, which work on 5V. please suggest , it can be used this way ? 4. which DC to DC buck converter is suitable for 18650 LI-ion Battery? Input : ( 3V to 4.2V) and Output 5V/2A current .
Well explained 👍🏼 thanks for the informative video. I think the (-) of battery should be connected to 1,8 pin of FS8205A chip instead of pin 2,3..and actually the load should be connected to pin 2,3 ... that would allow it to be isolated from either part(charging or, discharging) of the circuit... Currently both charging and discharging path is common so when it disconnects it because of OD(over discharge) it also disconnects the charging path.. same while disconnecting because of OC(over charge/current) it disconnects the load also... Please correct me if my understanding is wrong.
I think I agree but pin 6 of the protection circuit needs to be connected to ground, which it wouldn't be if the overdischarge circuit protection turns on as it would disconnect the path from 1,8 to 6. Also, connecting the B- to 1,8 and OUT- to 2,3 would disconnect the load from the charging port either of the MOSFETs closed, probably not intended.
how to increase current output? it's posible for change of the mosfet for increase current output? maybe use AO3400 or 70N03. help me please for my question 🙏🙏
Hi, Did you find an answer to your question? I'm trying to use this module with my 3.6v screwdriver, but right with I turn it on the current protection start and cut the output voltage because of the rush current at the beginning when the motor strat spinning. Is there any solution for this case?
The maximum current of TP4056 is 1A, which is too slow. I need 3A to fast charge the 18650 battery pack, so I modified the circuit and saw on the Internet that using three 4056s in parallel or using P-channel MOS are not good methods. Is there an optimal solution? I used a 0.22 ohm 5-watt cement resistor across the 5V positive power supply and the positive electrode of the battery. The battery started charging at 3.3V, with an initial current of 3.2A. When it was charged to 4.18V, there was still 1.5A. At 4.25V, the DW01 protection action was locked. The current is zero, and the discharge current is 3.1A. It automatically cuts off in 10 seconds. I don’t use protection and directly supplies 15A battery. Very easy to use
Excellent video. Really helpful What happens if the battery is connected reverse by mistake ? I think it fries the board. also what happens if 12v input is given by mistake
Isn't this person speaking is Ahmad Shamshiri? He did similar thing to this one at Robojax, in year 2020. But this one is way more detailed than the old one.
Nice and proper explanation. have a question, can we replace the R6 with 2K to reduce the overcurrent protection to 1~2 amp? becauase some battery can not output 3amp. can you demonstrate it is a video maybe. thanks
@@Vinod-xw2bx hi mate, if you connect 300ohms of resistance between ground and the DW01 chip side of R5 you'll get a discharge cut off of 3.2V or close to👍 the only problem is I think it also raises the voltage that it cuts back in from 2.9 to 3.7V🤔
Hi, if you want to make a setup with more batteries doesn't need the first chip (next to the usb) isnt't it? It can be one for all or/and a microcontroller
8:35 In THEORY, you can connect the input to 8.0V, but if you do, the 4056 charger chip will dissipate a peak of about 5 watts with a 1A charging current, causing the chip to throttle back charging current. Most people will just use 5V, not 8V, which causes the 4056 to dissipate 2 watts for a while. Many users complain about the heat the tiny board produces, and this is why. If heat bothers you, reduce the charging current.
Hello, If you live in Canada or USA, I am giving away this DL24P 180W load and energy meter. Make sure to sign up for it th-cam.com/video/-UblSfUEY-0/w-d-xo.html
Hi, I don’t remember what I said in the video, but it seems you have skipped the video. We have 3 things connected to this board. Battery, load and charger. Watch the video again.
Hi! I have one such module. The blue (standby) LED does not light up when charging is complete. The red LED, on the other hand, is constantly lit. On the other hand, it charges the battery because I measure 4.2V on it. What can cause this? Thanks for your response!
I think the red LED keeps on even when the battery is fully charged is because you have connected load to the board. If the load is connected to the board, the board will always keep red LED on unless you remove the input supply to the board. But I think when the battery is fully charge the current to the battery will stop which the TP4056 will keep flowing current through it to power the load but not the battery.
I have explained it fully. this is based on a charger and protection chip ou can't change it. You get step down converter which I have so many videos on that.
DS463_main rev:00 94V-1.6mm 94V0-1.6mm E123995 is a board used to charge a VDL 583040 lithium polymer battery. This board used5353A and 57b8 (4057).is it possible to explain this board. Thank you
In connected 3pcs of tp4056 in parallel, but to my surprise only one is showing red light for charging while the remaining 2 only show blue light, can you tell me if not all tp4056 can be connected in parallel or i need to change any on the board ?
lets say you have 7 or more cells in series, can you use one power supply to 7 or more tp4056 modules to charge up all these cells in series without having to disconnect each cell from each other? if yes then easy to make a balancing charger for many cell pack.
Very good explanation. Thank you for sharing. Is it possible to increase the output current bay changing R6. I tried to put a ½k to get 6A output current, but it didn't work.
Hi, greetings and salutations from Mexico. This video was very interesting for me and the question I want to ask is as follow: I need to replace the batteries of an Emergency lamp which it's always connected to the electricity and the batteries start working when the electricity is cut off. Could the circuit 4056 showing here be good to protect any damage ?, I mean that the battery may explode due to continous connection to the electricy. I appreciate your comments, and thank you very much in advance.
Hello, If you live in Canada or USA, I am giving away this DL24P 180W load and energy meter. Make sure to sign up for it th-cam.com/video/-UblSfUEY-0/w-d-xo.html
TP4056 when does charging come on? At what voltage? We don't want, nor need, it to "top it off". What I am getting at is that below a certain voltage then kick in the charging but not before. You only get so many charging cycles, With solar powered equipment it will charge each day unless a circuit prevents that until a minimum voltage is hit.
At 10:43, you indicate that both the OC and OD are not connected in the schematic. But they are connected in the schematic - check it. It made me believe that there are some versions of the module that don't have both connected - which isn't true - and would be ridiculous. If the DW01 is present, then both overcharge and over discharge protection is there. It wouldn't make any sense otherwise.
Excellent and detailed description.... Thank you. What if i want to connect 2 batterys whit 2 charging moduls in serial!?.....to get arround 8v from the batterys. Can i do it on the LOAD connectors? (+ load on the first module to be connected to the - load on the second module) Is it possible?... How can i do it!?. Thank you.
you are welcome. no it is not possible because the modules have either + or GND commend. even you connect them each separately, once you try to get the output, you would connect positive one to the negative of the other. and they are command and will not work.
You can add a 330ohm resistor between ground and the chip side of R5 to increase it to around 3.1v. Lower the resistor to increase the overdischarge voltage 👍
Hello, If you live in Canada or USA, I am giving away this DL24P 180W load and energy meter. Make sure to sign up for it th-cam.com/video/-UblSfUEY-0/w-d-xo.html
Hi, Tnx for your great video. But I have a question. How can I remove dw01 and its mosfets but still protect the battery. Can I monitor the battery percentage?
Over discharge protection is basically a lie then? If you discharge down to 2.5v for any significant period of time the battery is effectively destroyed. To which I suspect you will say its to deal with voltage sag... This just means its going to ocilate and still likely kill the battery.
my friend you have responed without watching the video. That portion was to exaplin the module, then I have shown schematic, then all features on the schamatic and finally I have shown multiple test where I explained and shown the wiring. You should have never seen such comperhinsive complete video.
I am not impressed with the TP4056 module. It takes a long time for unit to charge one battery and even longer to charge two batteries in parallel. I can honestly say this is a mediocre, NOT VERY GOOD, charging board and no one reviewing it or testing have the expertise or guts to say it. Except for one, this engineer warns people not to use it as well as other charge modules. I agree with his conclusion. It is better to just use a real charger like XTAR. I am glad I found at least one honest person that says it like it is.


This is far more info than I actually needed, but I'm grateful for it all. Thank you.
Awesome video, I was looking for an explanation of how the TP4056 module works for a long time! Thanks a lot!
Glad it was helpful!
Your explanation about Over-Charge(OC) and Over-Discharge(OD) protection seems wrong. The 8205A is a pair of N-Channel Enhancement type MOSFET. The Drain of both MOSFETs are connected together. You forgot about "Intrinsic Body Diode" aka Reverse Current Path of MOSFET. The Cathod of two body diode of MOSFET pair are connected together. During OC protection, the MOSFET(OC pin of DW01A connected with the Gate of this one) is turned off so the charging stops immediately and the vice versa for OD protection. The same thing you can turn for positive line with a pair of P-Channel Enhancement Type MOSFET. By the way, thanks for the great effort.
Man you put alot of work into this. Awesome video .
I appreciate it!
Great review! I bought several stuff based on your reviews! Keep up the good work.
PS: you only missed the overdischarge protection. I would have like to see it. Best regards
Clearly explained with great schematics. Nice job!
Glad you liked it!
very well made video, I learned a lot, thank you for posting!
The highest standard product review , thanks
Wow, thanks!
Great to see a review of J5019 and its lack of undervolt/discharge protection (lack of DW01) and if there is alternative board with tp4056, adjustable boost to 6v to 12v+ like j5019 but with dw01 prior to booster for discharge protection.
Awesome Video. One of best video to understand datasheet and deep learning.
I have four questions.
1. Is there more advance chip available as compared to TL4056 ? Is TL5100 is better ?
2. During charging of battery , we can connect load ?
3. I want to use TL4056 for charging 18650 battery and simultaneously use it for AVR microcontroller, which work on 5V.
please suggest , it can be used this way ?
4. which DC to DC buck converter is suitable for 18650 LI-ion Battery? Input : ( 3V to 4.2V) and Output 5V/2A current .
This is an absolutely perfect video. Thank you!
You're so welcome!
Well explained 👍🏼 thanks for the informative video.
I think the (-) of battery should be connected to 1,8 pin of FS8205A chip instead of pin 2,3..and actually the load should be connected to pin 2,3
... that would allow it to be isolated from either part(charging or, discharging) of the circuit...
Currently both charging and discharging path is common so when it disconnects it because of OD(over discharge) it also disconnects the charging path.. same while disconnecting because of OC(over charge/current) it disconnects the load also...
Please correct me if my understanding is wrong.
I think I agree but pin 6 of the protection circuit needs to be connected to ground, which it wouldn't be if the overdischarge circuit protection turns on as it would disconnect the path from 1,8 to 6.
Also, connecting the B- to 1,8 and OUT- to 2,3 would disconnect the load from the charging port either of the MOSFETs closed, probably not intended.
thats great explanation. thanks for this..
may i just ask what is the B+ and B- voltage when battery is not connected?
Very detailed video, just what I needed! Thanks :)
Thank you for your work. It helped me a lot.
how to increase current output?
it's posible for change of the mosfet for increase current output?
maybe use AO3400 or 70N03.
help me please for my question 🙏🙏
Hi,
Did you find an answer to your question?
I'm trying to use this module with my 3.6v screwdriver, but right with I turn it on the current protection start and cut the output voltage because of the rush current at the beginning when the motor strat spinning.
Is there any solution for this case?
Thanks for an excellent video. You have a new subscriber!
Welcome aboard!
Thank you. Very concise, informative video.
Glad you enjoyed it!
best explaination ever seen.
thanks pal
Thanks. I am glad you found it useful. Please share and subscribe. Stay safe.
Most excellent explanation. Thank you
Thank you for your very well explained circuit
Why its give 0.4 to 0.8 voltage at output terminals. Somthing goes wrong but I am not able to find please help me
The maximum current of TP4056 is 1A, which is too slow. I need 3A to fast charge the 18650 battery pack, so I modified the circuit and saw on the Internet that using three 4056s in parallel or using P-channel MOS are not good methods. Is there an optimal solution? I used a 0.22 ohm 5-watt cement resistor across the 5V positive power supply and the positive electrode of the battery. The battery started charging at 3.3V, with an initial current of 3.2A. When it was charged to 4.18V, there was still 1.5A. At 4.25V, the DW01 protection action was locked. The current is zero, and the discharge current is 3.1A. It automatically cuts off in 10 seconds. I don’t use protection and directly supplies 15A battery. Very easy to use
Great effort,full explanation
Excellent video. Really helpful
What happens if the battery is connected reverse by mistake ? I think it fries the board.
also what happens if 12v input is given by mistake
No protection for reverse nor for 12V. It will die.
I can confirm applying 12v in will blow the tp4056 apart. I did it myself by accident!
Isn't this person speaking is Ahmad Shamshiri? He did similar thing to this one at Robojax, in year 2020.
But this one is way more detailed than the old one.
cooperating with Robojax.
Sir thank you so much 🙏 for this great useful info 🙏
All the best
thanks so much helped me alot..
but I have a question ..can we charge tp4056 with 5v 2.1 amp phone chager? or this will cause damage?
Just connect a USB connector. does not matter where it comes from. Yes it will work.
Nice and proper explanation. have a question, can we replace the R6 with 2K to reduce the overcurrent protection to 1~2 amp? becauase some battery can not output 3amp. can you demonstrate it is a video maybe. thanks
@@ingulari3977 i never tried.
Great vid!👍 Would it be possible to increase the overdischarge voltage by increasing R5? 2.4v is way to low for my project😖
I added 400ohms resistance between ground and the chip side of R5 and it raises the overdischarge voltage to 3v!😍
I also have same 😊 question I need cuttoff at 3.2V any solution please
@@Vinod-xw2bx hi mate, if you connect 300ohms of resistance between ground and the DW01 chip side of R5 you'll get a discharge cut off of 3.2V or close to👍 the only problem is I think it also raises the voltage that it cuts back in from 2.9 to 3.7V🤔
Another problem with the idea presented in the comments is that you also increase the overvoltage protection essentially disabling it.
Hi, if you want to make a setup with more batteries doesn't need the first chip (next to the usb) isnt't it? It can be one for all or/and a microcontroller
8:35 In THEORY, you can connect the input to 8.0V, but if you do, the 4056 charger chip will dissipate a peak of about 5 watts with a 1A charging current, causing the chip to throttle back charging current. Most people will just use 5V, not 8V, which causes the 4056 to dissipate 2 watts for a while. Many users complain about the heat the tiny board produces, and this is why. If heat bothers you, reduce the charging current.
You saved me alot of time, Thank you.
.very nice and useful video .discharge under voltage protection is not shown
Whatever protection this chip has , has been explained.
that temperature pin looks interesting any info on that?
schematic shown. nothing is left out.
I guess if you connect a thermistor to it, it'll cut energy when it reaches a certain temperature
TC4056 very usefull for DIY
thank you i learn a lot about this solar battery 🔋 chargers but does lt have anti backflow
Hello, If you live in Canada or USA, I am giving away this DL24P 180W load and energy meter. Make sure to sign up for it th-cam.com/video/-UblSfUEY-0/w-d-xo.html
Great video.
Hi.. Thanks for the nice video. I need battery over discharge cutt off at 3.2V any solution please...
Hi sir...good tutorial...a what is the use of in pos neg...thank you so much
Hi, I don’t remember what I said in the video, but it seems you have skipped the video. We have 3 things connected to this board. Battery, load and charger. Watch the video again.
@@WattHour ok thank you so much...a near the micro usb...its only use for volt meter
Fantastic! Liked and subscribed!
how can I increase 2.5V over-discharge to 3.4V? with save the 4.2V over-charge limit
you can't. it is set by the chip.
Hi!
I have one such module. The blue (standby) LED does not light up when charging is complete. The red LED, on the other hand, is constantly lit. On the other hand, it charges the battery because I measure 4.2V on it. What can cause this? Thanks for your response!
I think the red LED keeps on even when the battery is fully charged is because you have connected load to the board. If the load is connected to the board, the board will always keep red LED on unless you remove the input supply to the board. But I think when the battery is fully charge the current to the battery will stop which the TP4056 will keep flowing current through it to power the load but not the battery.
Can you please tell me how to convert output 4.2 v to 1.4 V in this module ? Ampere must be 600+ ma
I have explained it fully. this is based on a charger and protection chip ou can't change it. You get step down converter which I have so many videos on that.
can i use this on led lights? gona connect like bewtween 4 to 6 leds. trying to make it when i can charge use and recharge like a phone in a waty
DS463_main rev:00 94V-1.6mm 94V0-1.6mm E123995 is a board used to charge a VDL 583040 lithium polymer battery. This board used5353A and 57b8 (4057).is it possible to explain this board. Thank you
In connected 3pcs of tp4056 in parallel, but to my surprise only one is showing red light for charging while the remaining 2 only show blue light, can you tell me if not all tp4056 can be connected in parallel or i need to change any on the board ?
lets say you have 7 or more cells in series, can you use one power supply to 7 or more tp4056 modules to charge up all these cells in series without having to disconnect each cell from each other?
if yes then easy to make a balancing charger for many cell pack.
this is made for one cell. If you connect cells in series the voltage is added and it won't work.
Great video and explanation, Thank you
Very good explanation.
Thank you for sharing.
Is it possible to increase the output current bay changing R6.
I tried to put a ½k to get 6A output current, but it didn't work.
it is already set to maximum. you can decrease it. I forgot what was my test result. but I belive it is set to maximum.
Разве нагрев до 80 градусов это нормальнт для такого чипа? Он ведь постоянно будет иметь потери в виде тепла
Да, это так. Вы можете ознакомиться с техническим описанием здесь dlnmh9ip6v2uc.cloudfront.net/datasheets/Prototyping/TP4056.pdf
Hi, greetings and salutations from Mexico. This video was very interesting for me and the question I want to ask is as follow: I need to replace the batteries of an Emergency lamp which it's always connected to the electricity and the batteries start working when the electricity is cut off. Could the circuit 4056 showing here be good to protect any damage ?, I mean that the battery may explode due to continous connection to the electricy. I appreciate your comments, and thank you very much in advance.
Hello, If you live in Canada or USA, I am giving away this DL24P 180W load and energy meter. Make sure to sign up for it th-cam.com/video/-UblSfUEY-0/w-d-xo.html
TP4056 when does charging come on? At what voltage? We don't want, nor need, it to "top it off". What I am getting at is that below a certain voltage then kick in the charging but not before. You only get so many charging cycles, With solar powered equipment it will charge each day unless a circuit prevents that until a minimum voltage is hit.
both has been explained. start of charge and stop. I have shown data sheet and spoken about it I remember. you may have skipped the video.
@@WattHour I watched it but I did not see you say the charging voltage will always start at XX volts. I saw where you said the OV will stop it.
DW01 Overdischarge protection starts at 2.4V which is way too low for a LiPo. Do you know why?
This is based on the manufacturer data
@WattHour yes, but why is it so low?
@@WattHouryes, but why is it so low?
Thanks for the informative video.
Can you send the easy EDA schematic.
do a "google" or "bing" search.
Ty, sir. Wonderful (Türkiye)
where can I get the same schematic ,Actually I'm using TP module in my PCB @WattHour
get a magnifinre and farw it. I have shown the schamatic.
Great explanation. Thank you.
You are welcome. Please subscribe. I appreciate it and helps my channel grow. Thank you
it can charge multiple battery in pararel?
yes you can. But divide the time it takes to charge. so for one battery if it takes 1 hour, then for 2 batteries it will take 2 hours.
At 10:43, you indicate that both the OC and OD are not connected in the schematic. But they are connected in the schematic - check it. It made me believe that there are some versions of the module that don't have both connected - which isn't true - and would be ridiculous. If the DW01 is present, then both overcharge and over discharge protection is there. It wouldn't make any sense otherwise.
Excellent and detailed description.... Thank you.
What if i want to connect 2 batterys whit 2 charging moduls in serial!?.....to get arround 8v from the batterys.
Can i do it on the LOAD connectors? (+ load on the first module to be connected to the - load on the second module)
Is it possible?... How can i do it!?.
Thank you.
you are welcome. no it is not possible because the modules have either + or GND commend. even you connect them each separately, once you try to get the output, you would connect positive one to the negative of the other. and they are command and will not work.
Hi sir, ic dw01a has over discharge limit upto 2.5v but 18650 li ion cell has safe discharge limit upto 3 or 3.2v , is it good to use it. Plz clarify
Hi, I remember that I mention upper and lower voltage by showing the datasheet. I don't remember the value. So please watch the video.
You can add a 330ohm resistor between ground and the chip side of R5 to increase it to around 3.1v.
Lower the resistor to increase the overdischarge voltage 👍
Great video..Thank you!...
Great video thanks
Need a test of 4 paralel lipo to 4 paralel tp4056
Only out on paralel (not bat)
Current In, per bat and out (all bat) and Efficient
otlichno !!!!
Great Insight 👌
Hello, If you live in Canada or USA, I am giving away this DL24P 180W load and energy meter. Make sure to sign up for it th-cam.com/video/-UblSfUEY-0/w-d-xo.html
@@WattHour 😕☹️😢
Asia 🤤
Hi, Tnx for your great video. But I have a question. How can I remove dw01 and its mosfets but still protect the battery. Can I monitor the battery percentage?
Hi, if you remove it , then it won’t be this module . There is not current reading feature with this module
Show de video🇧🇷👍
Great
Need Kevin Costner here for manage too many ,,Wolves"
Over discharge protection is basically a lie then? If you discharge down to 2.5v for any significant period of time the battery is effectively destroyed.
To which I suspect you will say its to deal with voltage sag... This just means its going to ocilate and still likely kill the battery.
It gets so hot you can't touch it
Video broken after 24:20
Thank you for letting me know. After the mentioned time, there was just black video which I trimmed. The video will be shorter in a few hours.
short-circuited
You need to show us how to connect the chips together instead of talking and using a pen. Just for the visual learners.
my friend you have responed without watching the video. That portion was to exaplin the module, then I have shown schematic, then all features on the schamatic and finally I have shown multiple test where I explained and shown the wiring. You should have never seen such comperhinsive complete video.
ask ONLY once for thumbs up and subscribe
asking more then this gets a down vote ever time
I don't evern remember if I asked.
more tehn 5 times @@WattHour
I am not impressed with the TP4056 module. It takes a long time for unit to charge one battery and even longer to charge two batteries in parallel. I can honestly say this is a mediocre, NOT VERY GOOD, charging board and no one reviewing it or testing have the expertise or guts to say it. Except for one, this engineer warns people not to use it as well as other charge modules. I agree with his conclusion. It is better to just use a real charger like XTAR. I am glad I found at least one honest person that says it like it is.