I did a 100 sqr foot area with that pathmaker, along with the side of my home...I made a patio area with a fire fit in the center....I excavated the area down about 4.5" laid down about 3.5" of 3/4 crush gravel, leveled it and compacted with a hand tamper...then laid the walkmaker down alternating the orientation for a random appearing pattern... I laid a level on each "section" both ways to make sure it was perfectly level, and level with the sections next to each other...don't forget to trowel the edges of the stones for a more smooth look...instead of foil, what I did was bend cardboard and use it between the edges of the stones and the perimeter cement. The cost of pre-mixed concrete is constantly increasing, if you have a large area to do, it will be more cost effective to get some navy jack gravel, sand and portland cement and mix it together in the proper ratio... more work, but definitely way cheaper then paying...well shoot, a 60lb bag is getting up to around close to 4 dollars a bag here in Canada, I know the price varies depending on where you live geographically. I put coarse construction sand (this hardens and compacts unlike "river" sand, dont use that) between the gaps only to fill up about 1" depth (total depth was close to 2")... watered it and let the sand compact..I then laid Polymeric sand which is sand that hardens and doesn't let ants/weeds etc come through the gaps...this sand is EXPENSIVE so you don't want to be filling the gaps with a lot of this since it is way larger gaps then traditional paving stones and will cost a small fortune.
Before my days with TH-cam, my son and I built a walkway using the same form you have.We knew nothing so we did not remove the form immediately and our pavers ended up a mess.We also embedded colored flat beads in some of them., did not know to add sand afterwards.Still, we felt we accomplished something on our own and enjoyed our funny looking stones till the tornado removed them for us 2 years ago.Now we are in a new home and I may try this again.Your video was very helpful.Thanks for sharing
I installed this 13 yrs ago -I Used about 1/3 the color to save $. Our path is in shade/sun,most of the color faded after about a year. Faded color is still better than gray concrete color. If you are "Barefooters", you might want to smooth out the tops after you remove the form or it can be sharp for a few months until they wear down. For a natural look, you want to turn the mold each time or it will look too uniform. We also did not use any border cement. This is a very easy project!
Finally a video of a cobblestone walkway under the deck. I have a deck and want to do this. Thank You So Much 😊 ❤️👌🏽 Also thank you for explaining how many bags you used.
It came out looking good 👍 best cement to use is the max strength that has fibers mixed into the mix.. although i feel like you are missing a substrate for the walkway.. hopefully it doesn't rain much or as people walk on top of it could cause it to sink and eventually crack.. especially the outer cement border.. im not a cement guy but I've laid a few slabs in my lifetime and you always have to add a few inches.. Here maybe even an inch of gravel would have been better.. also when cement gets wet and there is no substrate it takes way longer for that water to dry up and could cause it to fail.. anyways I think you did a great job designing it and a great video 👍
great job on the video showing the process. I think I will go for it and do my driveway. It would be great if you make another video showing how it looks now after few years, lessons learned, and any fixes or repairs you had to do to it.
Looks great! Great video. Informative enough from beginning to end project. l love the 'wing it' idea, worked out perfect. This inspires me to do the same to my backyard. Great looking place.
Really looks much nicer than some of the other project how-to’s with this method! Your color choices are calming and subtle with all the shadows, too. Thank you. Regards...
Thank you! I think the cost of buying ready made brick may be a little less, however it would require more work to get the foundation in place. Depends on the look you're after...
Thanks. I'm a NYR fan. Was rooting for the BB. Wish they had extended the series to 7. Patrice Bergeron--what a player--heart and soul of the BB IMHO. Long term contract needs tobe done and his number will eventually be raised to the rafters.
If you use two molded just do one then a gap the the second. So you can go back and fill in the middle. Take so long doing one at a time. Nice video. Thanks
Use galvanized lawn edging for your outside perimeter molds. That way you can create natural radius's that are more pleasing to the eye. Choose a complementary sand color for the filler. Float the top of your molds more to create a more uniform smooth surface. Wait till a few people catch their foot on something you think is minor. Make the gravel company pickup up the wrong product unless you know with certainty you can use all the material without charge. If they want to charge you even a nominal fee to keep the incorrect material tell them to come pick up ever last rock and not damage the surface it is on (only worried about if it were dumped on black top or cement). You did a decent job but you really need to float your molds more. All it take is one person tripping or cutting themselves to get a lawsuit these days, and since you did the work you are on the hook... well youre on the hook even if somebody else did it. But at least if somebody else did it and you were sued you can turn around and sue the installation company. Screw it that's what home owners and umbrella policies are fore. Love this country. Somebody can't pick up their feet and you get sued for it .
Nice job man. I liked the way you shaped the path and then used gravel for the surroundings. Also was helpful to know what the materials cost and how many man hours the project required. Great post!
Great Video , Thanks for putting it up. This will be my next project. The only problem I had was the language you were speaking. I am a New York Ranger fan and I had to turn the volume down. Just Kidding. Thanks again.
The molds can be purchased from Home Depot or Lowes. They make four different styles. If your local store doesn't have it they can special order them (Home Depot can at least).
Put some sand and morter mixed together and fill all the cracks. Broom it in and when done sprinkle some water on it to make it hard. I would have put some gravel down first to drain water under the stone. I'm pretty sure it will crack for you.
If you use straight portland cement you have to add sand. If you use Quikrete or it's equivalent it's already mixed, don't add anything to it or it breaks apart. I learned that the hard way. Portland is just straight concrete.
You dont need to use a funel to lay down the polmeric sand. just pour it over the top then sweep into place. clear the extra off the top of the concrete then wet the surface to harden the sand. this looks rad though thanks for the video.
This came out fantastic! I am thinking of doing something similar here in the Boston area, so how has this held up to 5 New England winters included the most snow ever last year...Thanks,-Shawn
Great job on the video. I feel a lot more confident in starting my project. Helpful to know how much concrete you used and how long it took. Thanks for sharing!
Hello👋🙋♂️ there... Amazing and very interesting video🎥... Super like👌👌👌 project Do keep posting Warm regards and best👍💯 wishes The UnknownManCub 👍😎👨🏭
If you read the reviews on the color he chose, you don't actually get black out of it. Every review I read states that it ends up a dark grey. But, if you don't use it as intended (like in my video for my pathmate concrete mold test), it actually looks black. Now, I don't know how well it will hold up the way I used it.
awesome video! I just have two questions: 1. can grass grow up from the gap? 2. you did this project years ago, so now does your walkway have any crack? thanks
Looks great, good job! How do you feel about placing the molds next to each other? Am I just over analyzing it, or are there visible thickness differences when you use the molds next to each other? The reason I ask, is I bought a similar product and if you do put the two molds together, the gap between them is larger than the gap between stones. Just curious if this product is the same way.
This is really very nice. I never saw this before. I want that too. I have to do it alone, I think this is much more lighter to do for me than putting stones. Could you please tell me how many kilo's concrete I need per aquare meter?
It looks good, thanks for the video, and good luck to Boston in Conference final this year vs Penguins, who beat my Senators, so now I'm going for Bruins to win the cup! :)
That turned out pretty nice. I have ordered one of the pathmates myself and was wondering if yours was square by dimension or rectangle? I notice you were able to rotate the pattern and I'm hoping to do the same to keep a natural look.
I like how the walkway is not at 90 degree angles like most walkways people do not and never walk that way with this walkway you can go a normal route and easily stay on the walkway.
pour the concrete in your ear mate, tip your head sideways and you will find it will pour out your other ear, if it doesn't hay presto you filled an empty cavity
Your walkway looks beautiful! Planning on doing a 400sq. Ft. Patio I live in Canada. Noticed from your other video u get snow there too. Anyway wondering about base I was going to put in a weed barrier and 3” of 3/4 stone for a base would u think that is overkill? Also how’s the color and walkway itself holding up would u recommend? Thank you 😀
l would recommend watching the official Quikrette Video...he is not talking about an important step...curing the Concrete Stones with misting water for 3 days! You also have to use Non Cracking Concrete!


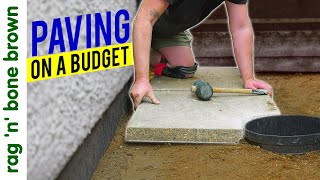


I did a 100 sqr foot area with that pathmaker, along with the side of my home...I made a patio area with a fire fit in the center....I excavated the area down about 4.5" laid down about 3.5" of 3/4 crush gravel, leveled it and compacted with a hand tamper...then laid the walkmaker down alternating the orientation for a random appearing pattern... I laid a level on each "section" both ways to make sure it was perfectly level, and level with the sections next to each other...don't forget to trowel the edges of the stones for a more smooth look...instead of foil, what I did was bend cardboard and use it between the edges of the stones and the perimeter cement.
The cost of pre-mixed concrete is constantly increasing, if you have a large area to do, it will be more cost effective to get some navy jack gravel, sand and portland cement and mix it together in the proper ratio... more work, but definitely way cheaper then paying...well shoot, a 60lb bag is getting up to around close to 4 dollars a bag here in Canada, I know the price varies depending on where you live geographically.
I put coarse construction sand (this hardens and compacts unlike "river" sand, dont use that) between the gaps only to fill up about 1" depth (total depth was close to 2")... watered it and let the sand compact..I then laid Polymeric sand which is sand that hardens and doesn't let ants/weeds etc come through the gaps...this sand is EXPENSIVE so you don't want to be filling the gaps with a lot of this since it is way larger gaps then traditional paving stones and will cost a small fortune.
Before my days with TH-cam, my son and I built a walkway using the same form you have.We knew nothing so we did not remove the form immediately and our pavers ended up a mess.We also embedded colored flat beads in some of them., did not know to add sand afterwards.Still, we felt we accomplished something on our own and enjoyed our funny looking stones till the tornado removed them for us 2 years ago.Now we are in a new home and I may try this again.Your video was very helpful.Thanks for sharing
I installed this 13 yrs ago -I Used about 1/3 the color to save $. Our path is in shade/sun,most of the color faded after about a year. Faded color is still better than gray concrete color. If you are "Barefooters", you might want to smooth out the tops after you remove the form or it can be sharp for a few months until they wear down. For a natural look, you want to turn the mold each time or it will look too uniform. We also did not use any border cement. This is a very easy project!
After 9 years of searching for a video on the Stanley cup victory on the Bruins vs the Canucks I am so glad I found this video
Finally a video of a cobblestone walkway under the deck. I have a deck and want to do this. Thank You So Much 😊 ❤️👌🏽 Also thank you for explaining how many bags you used.
it all really came together and looks great. and finally someone who includes length of time and costs sent.
This is by far the nicest result I have seen using this mold. Good job! Will def be copying you!!
It came out looking good 👍 best cement to use is the max strength that has fibers mixed into the mix.. although i feel like you are missing a substrate for the walkway.. hopefully it doesn't rain much or as people walk on top of it could cause it to sink and eventually crack.. especially the outer cement border.. im not a cement guy but I've laid a few slabs in my lifetime and you always have to add a few inches.. Here maybe even an inch of gravel would have been better.. also when cement gets wet and there is no substrate it takes way longer for that water to dry up and could cause it to fail.. anyways I think you did a great job designing it and a great video 👍
great job on the video showing the process. I think I will go for it and do my driveway. It would be great if you make another video showing how it looks now after few years, lessons learned, and any fixes or repairs you had to do to it.
Hesham Elsaghir no...more lessons to Learn!!
Looks fantastic! A really helpful video for someone who wants to try DIY paving but hasn't done it before. Thank you.
Enjoyed spending 12 + minutes with you. Nice job. Go Blackhawks!
Very nice! Great job! Thank you for posting this project from beginning to end. :)
Looks great! Great video. Informative enough from beginning to end project. l love the 'wing it' idea, worked out perfect. This inspires me to do the same to my backyard. Great looking place.
I wish I had a garden that size . Nice job with the cobbles , hope mine turn out that good
Really looks much nicer than some of the other project how-to’s with this method!
Your color choices are calming and subtle with all the shadows, too.
Thank you.
Regards...
Absolutely love the garden! So fortunate
And nice job on the DIY paving job too
That's looks great. I was on the fence about doing this kind of a project but after watching this video I'm going to do it!! Thanks for the video!!
Thank you! I think the cost of buying ready made brick may be a little less, however it would require more work to get the foundation in place. Depends on the look you're after...
lmao! " I gotta late start because I Had to build a zip line"hahahahaha
Nice job! Really enjoyed the video, certainly helped me feel confident enough to take on my pathway this summer. Thanks for sharing.
Pics or it didn't happen
thanks man for taking the time to explain all procedure , well done my friend looks very neat.
What a beautiful yard!!!
Great video with great details. Loved the funnel for the sand. Def smart.
Lovely garden! Thanks for this video, the project came out great!
Thanks.
I'm a NYR fan. Was rooting for the BB. Wish they had extended the series to 7. Patrice Bergeron--what a player--heart and soul of the BB IMHO. Long term contract needs tobe done and his number will eventually be raised to the rafters.
If you use two molded just do one then a gap the the second. So you can go back and fill in the middle. Take so long doing one at a time. Nice video. Thanks
Use galvanized lawn edging for your outside perimeter molds. That way you can create natural radius's that are more pleasing to the eye. Choose a complementary sand color for the filler. Float the top of your molds more to create a more uniform smooth surface. Wait till a few people catch their foot on something you think is minor. Make the gravel company pickup up the wrong product unless you know with certainty you can use all the material without charge. If they want to charge you even a nominal fee to keep the incorrect material tell them to come pick up ever last rock and not damage the surface it is on (only worried about if it were dumped on black top or cement). You did a decent job but you really need to float your molds more. All it take is one person tripping or cutting themselves to get a lawsuit these days, and since you did the work you are on the hook... well youre on the hook even if somebody else did it. But at least if somebody else did it and you were sued you can turn around and sue the installation company. Screw it that's what home owners and umbrella policies are fore. Love this country. Somebody can't pick up their feet and you get sued for it .
I was in Vegas for game two... what a series!
Nice job man. I liked the way you shaped the path and then used gravel for the surroundings. Also was helpful to know what the materials cost and how many man hours the project required. Great post!
Thank you! I have a better understanding of working with the molds. Great job. Please post an update.
Great Video , Thanks for putting it up. This will be my next project. The only problem I had was the language you were speaking. I am a New York Ranger fan and I had to turn the volume down. Just Kidding. Thanks again.
It's held up just fine; no problems. The sand hardens, so it does not sweep away.
Coming from a 30+ yr concrete guy. Nice job!!
The molds can be purchased from Home Depot or Lowes. They make four different styles. If your local store doesn't have it they can special order them (Home Depot can at least).
Put some sand and morter mixed together and fill all the cracks. Broom it in and when done sprinkle some water on it to make it hard. I would have put some gravel down first to drain water under the stone. I'm pretty sure it will crack for you.
The way you get it to keep its form is by not getting the cement too wet to the point where it starts to run
Nice tidy job mate. Well done 👍🇬🇧
I love this video !!! I love your yard!!!!!!
If you use straight portland cement you have to add sand. If you use Quikrete or it's equivalent it's already mixed, don't add anything to it or it breaks apart. I learned that the hard way. Portland is just straight concrete.
bb
You have a beautiful garden, I wound have replaced the sand with some green grass,
Great Job !
thanks for sharing this is the best video ive seen so far on the subject! love the border idea!
You have done a fantastic job on this.
You dont need to use a funel to lay down the polmeric sand. just pour it over the top then sweep into place. clear the extra off the top of the concrete then wet the surface to harden the sand. this looks rad though thanks for the video.
This came out fantastic! I am thinking of doing something similar here in the Boston area, so how has this held up to 5 New England winters included the most snow ever last year...Thanks,-Shawn
Great job on the video. I feel a lot more confident in starting my project. Helpful to know how much concrete you used and how long it took. Thanks for sharing!
Thats a nice walkway, that border made the difference thanks
yard cleaned up nicely.... looks good...
Hello👋🙋♂️ there...
Amazing and very interesting video🎥... Super like👌👌👌 project
Do keep posting
Warm regards and best👍💯 wishes
The UnknownManCub 👍😎👨🏭
So far, so good (it's been 2 years in New England)
If you read the reviews on the color he chose, you don't actually get black out of it. Every review I read states that it ends up a dark grey. But, if you don't use it as intended (like in my video for my pathmate concrete mold test), it actually looks black. Now, I don't know how well it will hold up the way I used it.
I just love this kind of project. Good Job.
doesnt look like you did much ground prep. Is that the norm with the stone look as opposed to pouring concrete?
I see this was installed in June 2011 - how has it held up since then?
I too I'm curious as to how it looks now?
Like dust...
May the best team win!!
Should have done the whole area it looks fantastic
great job! I learn a lot from you today! Thanks for the video.
Nice job, I am working in a project like yours. Looking at yours, give me the motivation to finish mine, I know that it will end nice!!
awesome video! I just have two questions:
1. can grass grow up from the gap?
2. you did this project years ago, so now does your walkway have any crack?
thanks
Good job buddy , thank you for the aluminum foil trick 👍🙏
Awesome job, feeling motivated on a project of my own, thanks!
Great job. Thanks for the tips. I'll be doing this soon enough
That seems like a great value for $300. Good work!
You're welcome! I like the flat beads idea! Do It Yourself!!
Good Job man. Love a fellow Bostonian...
nice job....you have a video on how it looks now?
Very nice..! I love the stone wall is very cool..!
Looks fantastic, great job!!!
Great video, very helpful. you did a nice job. Thanks for sharing.
you properly want to use a few hours on the foundation , so you dont get the concrete directly on soil.
This was quite detailed and helpful.
Looks great, good job! How do you feel about placing the molds next to each other? Am I just over analyzing it, or are there visible thickness differences when you use the molds next to each other? The reason I ask, is I bought a similar product and if you do put the two molds together, the gap between them is larger than the gap between stones. Just curious if this product is the same way.
Thanks! Chicago got the B's this year, but it was a great series!
When applying the joint paver sand, you first used a funnel to add in-between the stone forms. Did you add water following the application?
Very very nice dude and nice work.
Need to go see Vinny the Twister!
You used straight cement? Or did you use concrete or mortar?
This is really very nice. I never saw this before. I want that too. I have to do it alone, I think this is much more lighter to do for me than putting stones. Could you please tell me how many kilo's concrete I need per aquare meter?
Man outstanding job! I just got one of these, hope mine turns out this good. Thanks for the vid.
It looks good, thanks for the video, and good luck to Boston in Conference final this year vs Penguins, who beat my Senators, so now I'm going for Bruins to win the cup! :)
Great job, congratulations 👏🏻👏🏻👏🏻
honestly. really nice job. looks really good .
Looks good, not bad at all for a DIY job!
Very nice. I'm about to do the same thing with a walk way. How did you prep the ground to make it level for the concrete?
Thanks. The area where I put the walkway is under a deck, though. No sun.....
That looks great ! Now its my turn
🍝🍝🐎🦄🐒🐵🐅🐩🐵🐖🐅🐗🐽
i would like to know how much dye you used and how you mixed it in.
I wanna see a Bruins/BH final!! Bring it on!!
You filled the cobblestone with concrete and then wet it?
That turned out pretty nice. I have ordered one of the pathmates myself and was wondering if yours was square by dimension or rectangle? I notice you were able to rotate the pattern and I'm hoping to do the same to keep a natural look.
You need Landscape Edging to keep the gravel in place.
Thanks for sharing... A very helpful video...
I like how the walkway is not at 90 degree angles like most walkways people do not and never walk that way with this walkway you can go a normal route and easily stay on the walkway.
pour the concrete in your ear mate, tip your head sideways and you will find it will pour out your other ear, if it doesn't hay presto you filled an empty cavity
That is awesome. great job. Total cost?
Nice. But what was the bottle of color for? The concrete looks natural grey.
Those sides will never hold, they will break right off.
Your walkway looks beautiful! Planning on doing a 400sq. Ft. Patio I live in Canada. Noticed from your other video u get snow there too. Anyway wondering about base I was going to put in a weed barrier and 3” of 3/4 stone for a base would u think that is overkill? Also how’s the color and walkway itself holding up would u recommend? Thank you 😀
Great job...thanks for sharing....
l would recommend watching the official Quikrette Video...he is not talking about an important step...curing the Concrete Stones with misting water for 3 days! You also have to use Non Cracking Concrete!
how has it held up?
Curious to know how things have held up.