Best Window Mount to Stop Glare - WYZE Cam V3 Settings + Comparison

ฝัง
- เผยแพร่เมื่อ 4 ส.ค. 2024
- ⚡⚡⚡⚡Amazon Products:⚡⚡⚡⚡
Angled Window Mount: amzn.to/4bT52Y6
WYZE Flat Window Mount: amzn.to/3TcuGA1
Acetone Nail Polish Remover: amzn.to/3TdVOi1
WYZE Cam V3: amzn.to/3ArIQlI
MicroSD Card - Class 10 32gig: amzn.to/3gy8Pxs
USB SD Card Reader: amzn.to/34aR6uJ
WYZE Extension Cable: amzn.to/3G2hgg2
Transcript and more info on mounts: More info on my blog: www.hometechdiy.com/wyze-wind...
Download RSTP V3 Firmware here: www.hometechdiy.com/wyze_cam_v...
💻💻💻💻 Blue Iris 💻💻💻💻
😀😀😀 Download, Demo and Buy Blue Iris: www.hometechdiy.com/buy-blue-i...
Today, we are talking WYZE cam v3 window mounts. I will show you how to get rid of those nasty window reflections when pointing your camera through a window. We’ll also checkout the camera footage from 3 different windows.
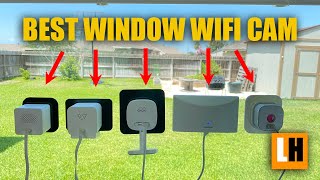
Here are 2 silicone window mounts we’ll examine today. One is an angle mount and places the camera at a 20-degree angle and the other flat against the glass. Without a mount, placing a camera near or against the window will reveal some reflections. At night we have much more especially when the camera’s IR night vision lights turn on. They are reflected back, right into the camera’s lens and the footage is useless.
Today’s video will show you how we can fix this and make the image better. We’ll test out these 2 mounts and discuss the camera setting in the app to make these mounts even more effective. Then, we’ll do some side-by-side testing, followed by a pro tip at the end, so make sure to stick around for that. As always, links for everything seen here today are in the description below.
The angle mount costs about 15US.
The flat mount costs about $10US.
Go into the app to fix the camera's setting to prevent IR light and status light glare:
1. First; the IR night vision lights. These are used so the camera can see at night, but through glass, they destroy the image. We’ll need to prevent them from turning on. To do this, open up the camera in the WYZE app, click settings in the upper right corner. Go to Advanced Settings. Here we have the Night Vision IR Lights option. Turn that to off. Much better
2. Next, we will turn off that status light on the camera because we don’t want to see that in the reflection either. Back on the Advanced Setting page. Where it says, camera status light, turn that off.
I next install the cameras in 3 locations. There are a total of 3 cameras. One in each mount and one control.
Location 1:
During the day the images were perfect. The control did allow a slight reflection of the camera's face. At night all the cameras had a little glare but the control allowed in the most light.
Location 2:
I point the angle mount upwards to see the sky and we capture the northern lights. The glare was pretty bad until I turned off my outdoor house lights. These lights reflect off the dual panes of glass in the window and cause glares.
Location 3:
I pointed the angle mount towards garage doors. The house lights again created a lot of glare.
In summary, we updated the settings to turn off the IR and camera status lights. We then compared the footage taken from each mount. I found the mounts definitely made a difference in controlling reflections. These glares can originate from light both inside and out. This doesn’t mean however I’ll be keeping my property lights off at night. The flat mount controlled the glares the best, but I found the angled mount more versatile.
Thanks for sticking around to the end, and for that, I have a final pro tip if using the angle mount. Color the face of the camera black, like this. Then you’ll have even less of a reflection of the camera in the window. Check out the difference of these before and after images. Pretty cool right? Thanks for watching. Please like and subscribe so you don’t miss my home tech DIY projects that you can do yourself.
Chapters:
00:00 Introduction
01:18 Mount Specs
01:41 Cam Config
02:32 Location 1
05:02 Location 2
06:41 Location 3
08:33 Final Thoughts - วิทยาศาสตร์และเทคโนโลยี


![บุษบา - วงชานเมือง [LiveCoverVertion] Original : เมนทอล](http://i.ytimg.com/vi/Dm81sKcd9rs/mqdefault.jpg)


Thank you. Quite comprehensive!
Thanks for making the video.Looks like you spent a lot of time and effort making the vid. Much appreciated.Very informative and helpful . Thanks
Glad you enjoyed it!
Extremely helpful video. Am considering indoor cameras exactly like you're showing. Already have outdoor cameras, but they don't always get a good view of a face. just now starting to explore options for inside window mounts so perfect timing. Thank you
Glad it was helpful!
I want to get outside windows but I feel like somebody would just break them. I don’t know if footage will save if cameras are broken
Cardboard Cutout , About 12" to go around the cameras will help a LOT
I just use Two Way Tape on the Front of the Camera So the Body itself Seals Close.
White Cameras.. I cover with Black Tape.
Great idea!! I will try to find some other DIY solutions and make a future comparison video. Thanks!
Is this camera recording 24/7?
Yes