Awesome video. No lengthy channel intro, no "sponsor" to please, no unrelated chit-chat, or telling us about your feelings lol. Straight facts condensed into a quick how-to, leaving superfluous details out. All how it should be. Thank you!
I don’t know why it should be so but I love seeing anodised bits in a race car. It makes the car (if a race car) all the more finely worked on / engineered. Your video is definitely being saved to my fav. films . Thank you!!
dude, I love your videos. I used to own a supra (actually bought it cash, brand new in 97). It was amazing seeing inside the manifold and seeing how EFFECTIVE a FMIC actually is. I mean, amazing dude. Please keep on making projects. You really are more valuable than you realize.
Been anodising aluminum parts like this for years. Very satisfying once you get it right and use genuine dyes. Just a quick point on the turbine flames at the end; 'hot' starts are definitely to be avoided! Lift the front of the kart to drain excess fuel from the gas turbine.
@@slushedpuppy8044 Sorry if this sounds like a stupid response, but Google Anodising Dyes and buy whichever colours you want. I found that bright red works extremely well. Some people attempt it with clothing dyes but that gave an awful result when I tried it.
Can't wait for your next video! Thank you for sharing Matt. I still hope to learn more about your magical clear material and custom built LED some day.
Oh man, I need to get on my slow motion videos now, after I finished that light I didn't put out a video using it yet... Just this pandemic and all these crazy things but, I got one more Mr Beast project and then I'm going to start pumping my videos out
@@WarpedLab Yeah I understand, life has been a bit hectic here also. Hopefully the pair with Mr. Beast is bringing in some extra cash for you to have fun with though!
Hello. Props on your set-up. Thank you for the information. I am considering going into business for myself anodizing parts for local companies in my area. I'm going to have to watch this video a few times to get the process you have down pat. thanks again.
Wow, that was refreshing and satisfying all at the same time! Great video. I don’t have enough work to justify the investment, but knowledge is power!!!
Great video. Great job! I'm thinking; *While it's in any bath, give it a few taps, swirls or shakes to remove bubbles and possible voids in the coatings.*
@@abishopish Actually it was done with very fine aeration. These plastic tubes were run through the tank and low pressure air was pumped in. The plastic tube walls were porous, not drilled holes. The bubbles were small, like beer bubbles. It just slowly moved the fluid up one side of the tank so that it circulated in the tank. Once you have established current you don't want to interrupt it until the step is completed.
This video is so awesome I decided to buy my own setup off amazon so I can anodize my AR15 parts. I spent about $200 and all my parts came in yesterday. I am a littler confused tho because research online instructed me to use something called a 720 calculator which tells me to anodize my part at less than an amp. My part is about double the size of the part you anodize in the video. I tried it and it didnt turn out well. I made a mistake somewhere. Ill try again today after work. I may need to anodize for an hour at 3-5 amps. My part is about 8inch by 2.5inch. (AR15 upper receiver) Thx for posting!!
I found personally that if I followed those calculators online for some reason it wouldn't come out good, I don't know if it has to do with location or specific part or the type of water or what, but I always ended up using more voltage and amperage than was stated, once I started just going with my gut then I've had very successful parts. When I was following the online instructions to the t I had many failures.
@@WarpedLab interesting. I guess it’s just trial and error. I anodized my part recently at 30 volts 3 amps for an hour and turned out great! Took the dye perfectly. Posted my piece on Reddit and other guys liked it too. Thx to your vid!
I want to try this. Make some custom RC car suspension. A nice goldish bronze shock body, DLC coated shock tubes, metalic red spings, cutom valving and voila!
Hehe 66.6 k subs 🤪 I thought that voice sounded familiar! I weld for a living - and we use a veryy deep saturated red dye /I’m for ndt , and I’m now curious as to if I can lightly sandblast and/or ( either) use draino as an etchant ? 🤔 On my breaks I’m making an assortment of components i was too cheap to buy lolol For an auto rotation mount system for a telescope as a side job for myself, -Under test loads It’s pivot points already have started to pill and get scratched up. I was curious if you happened to know if this/ your method and it’s ultimate results give a really good finish! I’ve already ran into some alum on alum friction And scrapes - requiring some fitting But you mayyy have just solved my conundrum! So Thanks brother! 🤪
That seems like really high amperage for that size from what I've read so far? I only JUST started experimenting--does this work better. The reason I ask is almost everywhere I read, for that acid concentration they recommend 6A/Ft², which would be more like 0.5A for a part that small? (And probably for an hour so at that rate based on the "720 rule") Any advice?
Yeah well I can tell you I looked at every chart online as well as the very reputable ones and even if you follow the instructions to a t for some reason or another The amperage and voltage for me never matches, so I do it this way and it always works. So just like you I was a little confused because nothing I did matched what I read but it works.
The voltage should generally be increasing during the anodizing, not decreasing. I believe the small decrease shown is due to a short-term upset to the bath. If it's consistently dropping you probably connected the wires backwards and are removing any existing anodized layer.
Hmmm... You might be thinking of the fact that you have to increase voltage as anodizing layer gets thicker to keep the amperage the same, The anodizing layer is an electrical insulator, have you ever tried the weld a rusty piece of metal, think about it as you have a conductive wire that you add insulation to, as time goes on the insulation gets thicker and thicker and the resistance goes up, amperage goes down And you need more voltage (push) to get the electrons through that insulator.
Looks great, I think some extremely fine bead blasting pre anodizing would have looked amazing. Hard to believe Victorians invented these processes so long ago.
No, if you look when I pulled the part out before putting it in the dye and had like a grayish Smoky Hue, it was already anodized, there are a lot of parts that are just clear anodized and they look really nice
@WarpedYT Have you ever machined aluminum after anodization? I'm wondering how deep the color goes. I'd like to do this on some aluminum pieces I'm making and then run an etching program over the surface to reveal the untreated aluminium underneath. I'm wondering how deep I would have to cut (genterally).
Hi, I'm a new subscriber. I've been anodizing and coloring for years. I'd like to know where you buy the colorant, if you can get it at a good price, and what you use to shake the container where you color the aluminum piece.
Why does the voltage drop? If anything it should rise based on ohms law. As the anodized layer increases the resistance should increase and cause a voltage increase. Thanks for the video detailing your process
Hey. Need some help. I have a motorcycle rim which I need to take the paint off from. However, lye bath did not work, hence, not anodized. Paint remover also did not work which usually works on other stuff... The paint is Matt gold, kinda rough to touch. Any idea what kind of paint or color is it and how would I remove it???
For better anodizing, the prepared composition (water and acid) can be placed in the refrigerator. The ideal temperature is +1C. Anodizing will be rougher than when using a warm solution.
Lower temperatures allow you to pump more current and / voltage in and let it go for longer amounts of time ala Hard Coat Type III anodize. Theres a bit more to it than that (and colder temperatures), but the main advantage is that the oxide layer can be much thicker and hence tougher. If memory serves ne correct, I thinik I usually get a couple tenths (of an inch - .0002) or so per side of growth doing tyoe 2 and my half ass attempt at hard coat saw closer to a thou (although I was a bit shy). I ended up doing a big ice bath around my tank.
Decorative anodising as shown in the video should be carried out at between 19 and 24 degrees Celsius. Hard anodising is done at between 5 and 0 degrees Celsius. Hard anodising will produce a thicker anodic layer, typically 50% thicker than that of decorative anodising. Decorative produces a much more aesthetically please finished whereas hard produces a more flat finish which is exaggerated after dying the part.
@@WarpedLab Ok, does it have a particular name designed specifically for chroming? Can you tell me what the liquid was that you put the dye into? Thanks.


Awesome video. No lengthy channel intro, no "sponsor" to please, no unrelated chit-chat, or telling us about your feelings lol. Straight facts condensed into a quick how-to, leaving superfluous details out. All how it should be. Thank you!
Bro you getta be a bit patient! People are giving a useful information for free. Don't they deserve for your patience
tbh no@@geeljireoomaar6140
@@geeljireoomaar6140 no, and no.
A how to video shouldn't be a biography.
Perfectly stated!
Never begged for likes, subs or comments...
Perfectly concise, this is great and more stuff like this would be rad. No filler.
Thank you for getting straight to the point! This was very helpful
Two thumbs up. Short and precise. No useless yapping. Great video indeed.
and no brain numbing music 10 thumbs
I don’t know why it should be so but I love seeing anodised bits in a race car. It makes the car (if a race car) all the more finely worked on / engineered. Your video is definitely being saved to my fav. films . Thank you!!
I’ve been anodising titanium exhaust piping with dc power in a baking soda bath. Been wondering how to do aluminium and this popped up. Neat
Yeah titanium is pretty simple anodizing aluminum is more complicated but very rewarding.
In other words I won't be able to do this in my kitchen...
Who says 🤔
No way could I do this in my kitchen , I have a wife.😂
exactly
🤣🤣🤣
@@Doug791I can do this. I have no wife lol
@@romeo_alpha0176 Can you do some for me then?😂😂😂
Thanks for getting straight to the point. I've always wondered how this is done.
Great video for ppl that are mechanically inclined. Straight to the point. Well done.
No expensive Multi Etch needed.
I like it! 👍 😃
Exactly
I would think you can use oven cleaner for etching.
@@dickjohnson5025 any product containing sodium hydroxide should work for etching
I heard soaking in muriatic acid for 20 min is a great etching solution prior to painting / dying.
dude, I love your videos. I used to own a supra (actually bought it cash, brand new in 97). It was amazing seeing inside the manifold and seeing how EFFECTIVE a FMIC actually is. I mean, amazing dude. Please keep on making projects. You really are more valuable than you realize.
Now that was a thing of beauty! Very nice job.
I'm a little late to this party, just stumbled on to it. I wish all how-to posts were like this one. Well done, and thanks!!
Been anodising aluminum parts like this for years. Very satisfying once you get it right and use genuine dyes. Just a quick point on the turbine flames at the end; 'hot' starts are definitely to be avoided! Lift the front of the kart to drain excess fuel from the gas turbine.
Agreed, as for the hot starts I like them sometimes it gives a good light show haha.
What are the correct dyes for this?
@@slushedpuppy8044 Sorry if this sounds like a stupid response, but Google Anodising Dyes and buy whichever colours you want. I found that bright red works extremely well. Some people attempt it with clothing dyes but that gave an awful result when I tried it.
@@slushedpuppy8044 RIT
@@justotalkalottashit8392 - Just their regular fabric dyes?
Can't wait for your next video! Thank you for sharing Matt. I still hope to learn more about your magical clear material and custom built LED some day.
Oh man, I need to get on my slow motion videos now, after I finished that light I didn't put out a video using it yet... Just this pandemic and all these crazy things but, I got one more Mr Beast project and then I'm going to start pumping my videos out
@@WarpedLab Yeah I understand, life has been a bit hectic here also. Hopefully the pair with Mr. Beast is bringing in some extra cash for you to have fun with though!
Wow thats cool..always wondered how that was done and now i know....thank you.
Hello. Props on your set-up. Thank you for the information. I am considering going into business for myself anodizing parts for local companies in my area. I'm going to have to watch this video a few times to get the process you have down pat. thanks again.
hell yeah, straight to the point
Wow, that was refreshing and satisfying all at the same time! Great video. I don’t have enough work to justify the investment, but knowledge is power!!!
What dye do you recommend for various colors?
That turned out fantastic. Very well done.
This is going to save me money, thank you.
Nice thing is, you can do any color and any shade of color that you want exactly the way you want it.
Great video straight to the point.
What a great project to work on. 👍👍
Great video. Great job! I'm thinking; *While it's in any bath, give it a few taps, swirls or shakes to remove bubbles and possible voids in the coatings.*
we used a slow circulating fluid to do this. Because shaking may disrupt the current which messes up the anodize.
@@phild8095would you mind explaining the slow circulating fluid step? Informative video thank you
@@abishopish Actually it was done with very fine aeration. These plastic tubes were run through the tank and low pressure air was pumped in. The plastic tube walls were porous, not drilled holes. The bubbles were small, like beer bubbles. It just slowly moved the fluid up one side of the tank so that it circulated in the tank.
Once you have established current you don't want to interrupt it until the step is completed.
Thank you brother. Very clear explanation. Thank you for the effort youbtook to write this article. It is easy to follow
Thanks
This video is so awesome I decided to buy my own setup off amazon so I can anodize my AR15 parts. I spent about $200 and all my parts came in yesterday. I am a littler confused tho because research online instructed me to use something called a 720 calculator which tells me to anodize my part at less than an amp. My part is about double the size of the part you anodize in the video. I tried it and it didnt turn out well. I made a mistake somewhere. Ill try again today after work. I may need to anodize for an hour at 3-5 amps. My part is about 8inch by 2.5inch. (AR15 upper receiver) Thx for posting!!
I found personally that if I followed those calculators online for some reason it wouldn't come out good, I don't know if it has to do with location or specific part or the type of water or what, but I always ended up using more voltage and amperage than was stated, once I started just going with my gut then I've had very successful parts. When I was following the online instructions to the t I had many failures.
@@WarpedLab interesting. I guess it’s just trial and error. I anodized my part recently at 30 volts 3 amps for an hour and turned out great! Took the dye perfectly. Posted my piece on Reddit and other guys liked it too. Thx to your vid!
love it, right to the point.
No, it doesn't look pretty good, it looks FANTASTIC!!! Thank you for this video.
Haha... Thanks
Спасибо
What do you use to dye the part?
Really nice video , thank you very much for share your knowledge.
Hi i like what you doing so keep up greet work. A friend from North Africa Libya alkhoms..i well 😊try make like you
Thanks !!! Good luck
@@WarpedYT thanks
Sorry . May i ask about the dye? How to make the dye?
Also mate thats bloody good quality work 🤜🤛👍
What a great video! Well done!
What kind of power supply are you using?
Does it regulate or limit current or voltage?
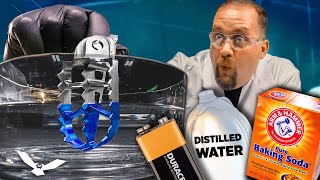
Great video! Do all baths have to be distilled? I really don’t want to get a whole grocery cart of water
That Looks Great....Thanks! : )
Polish that ish before ano at it comes out way cooler 👌
Thank You man!
What dye are you using?
Yep! Amazing.
So good
That is really cool. Could use that for some guitar parts.
Now that’s a COOL video!!!
Nice concise video, I'm concerned how the bearing falls in place though.
The bearing dropped into place coz the hub had grown a bit with the heat,it will tighten up when it cools.
really rich color, very nice. How do you UV protect it? This would last a years in LA sunlight before is fades to 1/2 its shade.
Awesome, can we do silver colour?
I want to try this. Make some custom RC car suspension. A nice goldish bronze shock body, DLC coated shock tubes, metalic red spings, cutom valving and voila!
sweet video, have you tested it in sun to see how long it takes to fade? or does it fade? Thanks
What would you est the cost for this setup to be, looks like something fun to try!
Hehe 66.6 k subs 🤪
I thought that voice sounded familiar!
I weld for a living - and we use a veryy deep saturated red dye /I’m for ndt ,
and I’m now curious as to if I can lightly sandblast and/or ( either) use draino as an etchant ? 🤔
On my breaks I’m making an assortment of components i was too cheap to buy lolol
For an auto rotation mount system for a telescope as a side job for myself,
-Under test loads It’s pivot points already have started to pill and get scratched up.
I was curious if you happened to know if this/ your method and it’s ultimate results give a really good finish!
I’ve already ran into some alum on alum friction And scrapes
- requiring some fitting
But you mayyy have just solved my conundrum!
So
Thanks brother! 🤪
Neat video! Do you have any on custom building gas tanks?
That seems like really high amperage for that size from what I've read so far? I only JUST started experimenting--does this work better. The reason I ask is almost everywhere I read, for that acid concentration they recommend 6A/Ft², which would be more like 0.5A for a part that small?
(And probably for an hour so at that rate based on the "720 rule") Any advice?
Yeah well I can tell you I looked at every chart online as well as the very reputable ones and even if you follow the instructions to a t for some reason or another The amperage and voltage for me never matches, so I do it this way and it always works. So just like you I was a little confused because nothing I did matched what I read but it works.
The voltage should generally be increasing during the anodizing, not decreasing. I believe the small decrease shown is due to a short-term upset to the bath. If it's consistently dropping you probably connected the wires backwards and are removing any existing anodized layer.
Hmmm... You might be thinking of the fact that you have to increase voltage as anodizing layer gets thicker to keep the amperage the same, The anodizing layer is an electrical insulator, have you ever tried the weld a rusty piece of metal, think about it as you have a conductive wire that you add insulation to, as time goes on the insulation gets thicker and thicker and the resistance goes up, amperage goes down And you need more voltage (push) to get the electrons through that insulator.
Awesome
Blue dye is beautiful. What brand / type did you use.
I agree! I'll check, but I got it off of Amazon. I just looked at the reviews.
Amejzing!!!
Looks great, I think some extremely fine bead blasting pre anodizing would have looked amazing. Hard to believe Victorians invented these processes so long ago.
I wish I could meet you in person you are amazing
When you do the final rinse after the color do you also use distilled water?
Where the heck do you get battery acid lol is that something you can actually buy?... Looks really good btwv
Is all anodized aluminum dyed? I never realized this i thought the anodization process resulted in the color change, not a dye. Thanks for the Video!
No, if you look when I pulled the part out before putting it in the dye and had like a grayish Smoky Hue, it was already anodized, there are a lot of parts that are just clear anodized and they look really nice
Hey man can u tell me the equipment used? Bc i like ur set up
Notification SQuad Have a nice weekend!🔥🔥🔥
I wish I could do dat!👍🏼☮️
What is the material of your kathode?
@WarpedYT Have you ever machined aluminum after anodization? I'm wondering how deep the color goes. I'd like to do this on some aluminum pieces I'm making and then run an etching program over the surface to reveal the untreated aluminium underneath. I'm wondering how deep I would have to cut (genterally).
Hi, I'm a new subscriber. I've been anodizing and coloring for years. I'd like to know where you buy the colorant, if you can get it at a good price, and what you use to shake the container where you color the aluminum piece.
this is super cool! But how do you hard anodize?
Lower the temp to 45deg and anodize at 24 volts for 60 to 90 minutes
Can also follow up with hot nickel acetate sealing bath (200 F) for a better seal on dyed parts.
Sweet.
Why does the voltage drop? If anything it should rise based on ohms law. As the anodized layer increases the resistance should increase and cause a voltage increase. Thanks for the video detailing your process
I believe I had fixed voltage The amperage is what was dropping. As the resistance increases the voltage would go up to keep the same amperage.
What metals can you use to make it work
A question master, what composition do they have, or what name can I get them under?
Just found your channel and subscribed very interesting. Where do you buy you products?
Hey. Need some help. I have a motorcycle rim which I need to take the paint off from. However, lye bath did not work, hence, not anodized. Paint remover also did not work which usually works on other stuff... The paint is Matt gold, kinda rough to touch. Any idea what kind of paint or color is it and how would I remove it???
Can do with white dye?
Hi,i did see how you make the coor bath,and you show only one color (bleu),is it possible to get other colors (like golg) ?
Thank you.
Bye.
Lucien
hi, what kind of paint you ar using for anodize aluminum?
Salt water & DC voltages can change your parts colors no dyeing only titanium
What colour is this for this jod where we can Found it?
Hi, Can i use diluted car battery acid
Sir also make a video how to Chrome .. steel or aluminium..
IN YOUR OPINION WICH IS THE BEST SEALER'? DO YOU CAN SUGGEST SOMETHING?
Is it possible to re-anodize aluminium? I have some Aliexpress phone holder that turned from black to orange, it looks crappy.
I came here to learn about aluminum anodizing, but did he say JET GOCART?? HOLY SH*T
ikr 🤣🤣🤣
more curious with the go cart than the anodizing
🤣🤣
I have an item that is already anodized in a color but I want to change the color. (purple to black) what steps would be necessary?
Can an iron also be anodized?
Used to do this for a living. How does your part not melt without a chiller or liquid flow 🤔
Came to see if i can learn how to anodize a little part for my car, stayed for the rocket scooter
Hello, where I can buy paint to anodize ?
For better anodizing, the prepared composition (water and acid) can be placed in the refrigerator. The ideal temperature is +1C. Anodizing will be rougher than when using a warm solution.
I'm going to try that next time, I thought 22c was the ideal temp for the acid solution
Lower temperatures allow you to pump more current and / voltage in and let it go for longer amounts of time ala Hard Coat Type III anodize.
Theres a bit more to it than that (and colder temperatures), but the main advantage is that the oxide layer can be much thicker and hence tougher.
If memory serves ne correct, I thinik I usually get a couple tenths (of an inch - .0002) or so per side of growth doing tyoe 2 and my half ass attempt at hard coat saw closer to a thou (although I was a bit shy).
I ended up doing a big ice bath around my tank.
Decorative anodising as shown in the video should be carried out at between 19 and 24 degrees Celsius. Hard anodising is done at between 5 and 0 degrees Celsius. Hard anodising will produce a thicker anodic layer, typically 50% thicker than that of decorative anodising. Decorative produces a much more aesthetically please finished whereas hard produces a more flat finish which is exaggerated after dying the part.
Are the wires you used to attach your power leads to also aluminum?
Watching the vid they obviously are aluminum.
But what do you use for coloring, what kind of dye?!
Hi, Can you tell us what make and manufacturer of dye your using, thanks.
I'll have to check If I still have it, I got it off of Amazon I just looked at the reviews and pick the one with the best reviews.
@@WarpedLab Ok, does it have a particular name designed specifically for chroming? Can you tell me what the liquid was that you put the dye into? Thanks.
What's in that soak giving it color just dye? The stuff we use on clothes?
What is the neutralizing solution you use right after the anodizing bath?
Baking soda in distilled water works.
what is the neutralizer please and where can I buy the colorant?
The neutralizer is baking soda (sodium bicarbonate).