3D Printed Form for Slip Casting - Clay Shrinkage and a Slip Well

ฝัง
- เผยแพร่เมื่อ 30 มิ.ย. 2023
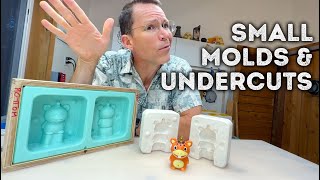
- We have been iteration on our plaster mold making in our deep dive series. So far we've only been copying existing forms. However they aren't really copies. The final pot is smaller than the original (clay shrinks!) and we've added a slip well to get a better rim. Here we use a 3D printed form to address these issues. We test out the form with a draft 3d print of the final size. Once happy, we print out a version to account for clay shrinkage and also integrate an integrated slip well.
This is a step towards our end goal of creating some software that can do most of the hard work of mold design for us! If you're interested in trying out the software, sign up here shapecastmolds.com/ - แนวปฏิบัติและการใช้ชีวิต


![[Full Episode] Hell's Kitchen Thailand EP.14 | 12 พ.ค. 67](http://i.ytimg.com/vi/MNspIlqlJcc/mqdefault.jpg)


You have the most relaxing voice ☺️ great video
Thank you so much 🙂
Brilliant 👏
Loving your videos more & more! Great work 👌 thanks ☺ 😊
Thank you so much!
your videos are soo helpful 🤗 thanks for the work
Glad you like them!
Interesting process, thanks for sharing.
Thanks for watching!
I’ve randomly watched your videos over the past 4 months and appreciate how you are evolving your skills and techniques. I have a 3D printer on order specifically to help my productivity in the my pottery studio so thank you for sharing Ken.
Thanks so much. And that is great - I hope you find it to be a useful tool like I have!
Very impressive!
Thanks!!
Great tutorial
Glad you think so!
🤩 Very useful! I actually like the vertical artifacts. As to layer lines, by switching to an 0.6mm nozzle I can print at a relatively high resolution (0.2mm) and still have reasonable print times. I upgraded to a ruby nozzle and have been very happy with the results. And... 0.4mm draft prints are surprisingly usable and very short print times.
I've actually drinking out of that piece right now and the shadow lines created by the vertical lines are actually really fun. I'll need to play more with them to see what I like the most!
Hi Kent, one of the best ways I've found to clean up a 3d print surface is to apply UV resin (mixed with some cornstarch) and then cure in the sun or with a UV light. It would let you get the original extremely smooth and eliminate the need to post process the pots themselves.
Thanks. I've seen a similar suggestion before. Can you say more about why it would only fill in the valleys of the 3D print between the layer lines and not also the parts protruding (the layers themselves)?
(I have follow up videos using filler primer, and its the combo of primer to build up low spots, and sanding to take down the high ones that makes things smooth)
@@PotterybyKenthi Kent, so what joe said was sort of true, it's the same principle to a clear coat of varnish on wood, surface tension keeps everything smooth, but another way of doing it would be to use abs instead, the only other requirement would be to use an enclosure to avoid warping, but once you have it you could vapor smooth the 3d print with acetone and it will leave it glass smooth
Thanks for the explination @ericsaul9306. My model of how this works is missing something for sure. So based on this, the outer surface, where the resin is, wants to be held smooth because of the surface tension, as opposed to it building up a surface with a more or less a fixed offset from the 3d print (like a paint would). I guess in this case getting the viscosity and thickness just right would be important.
@@PotterybyKent that's exactly right, too thick and it won't flow, too lean and it will just fall like water, also the best way to apply a coat is through a spray gun, as it will leave even coats, the best example I can think of are car paint jobs which leave the finish glass smooth
Thanks for shedding light on that!
Thanks for this video series, very helpful.
One, question, what sort of wall thickness are you printing your forms at? I'm guessing they should be a bit flexible for release, but rigid enough so there isn't any deformation when pouring the plaster. Is it possible to find the right balance?
That is exactly correct. Those two requirements point in exactly opposite directions unfortunately! And that is why things like silicone and a rigid backer are often used. The other issue is you need the wall to also not be porous to plaster. I've settled on 2.4mm right now (0.4 nozzle size * 6) and it seems to be working well. The real trick was finding a way to slightly shrink the PLA part while inside the mold to release it. I have another video showing how to use a mixture of frozen alcohol and water to do that.
Hey - nice. The seam you're seeing along the side of the pot can be gotten rid of. It's there because each layer starts and stops at the same point. However, getting rid of it (by telling the slicer to randomize the starting position) makes it harder to sand out. I probably would have created the plastic mold in one piece with the bucket, but your way worked great. Also, I would - and have - experimented with patterns along the outside of the pot but most of my patterns have made demolding slightly harder and sometimes impossible. :/
cheers,
m
Thanks for the feedback. I havent played with PrusaSlicer much but did see the option for altering the print seam lines. I like the idea of adding in patterns to the surface, but that might require going to multipart molds.
@@PotterybyKent Yes, print seam lines is exactly the option - but I think you'd be better served slightly sanding the part before casting - the seam errors will still be there but they'll be spread around the model at random points. Also, you printed the first demonstration the wrong way up, visible because the lines were coming of the model in the bottom indent. For the actual mold, it seems you flipped it over which solved the issue. However, the empty inside with the supports was probably slower to print than a solid model with moderate infill would have been, because the outlines take a lot of time to print. However, as you noted, the support tree turned out to be a handy handle to extract the mold. Something to consider would be to deliberately design a handle for that at the last couple of centimeters to speed up the print.
As for multi parts - yep, I made a two part mold of a vase with a semi circular indent scooped out repeated like 32 times around the outside. Looked very involved, but I couldn't demold it without waiting for about a day when it had shrunk enough to let go of the molds, which wasn't what I had intended. Since then, I've been doing four part molds instead, but that comes with a lot of seams. I wanted to make thin throated vases, and that was never going to be easy with a one part mold. I'll be transparent any note that I don't actually have a pottery oven so all I do is experiment - but with actual plaster and actual slip.
One more observation I'd make is that your molds are very thick - and I've seen people suggest that that's the thickness you should aim for. However, for me, plaster is fairly expensive and the molds take a lot of space. I suspect that the thickness is important if you want to make many pieces over a single day - the capacity for absorbing water is greater with greater thickness. If you're developing a shape, 3 or 4 cm plaster molds seems to be enough, though they're wet for the rest of the day after a single casting. Again, not suggesting you're doing anything wrong.
Btw, I'm also a software developer - often involving coding in my more physical projects. Most such projects are an attempt to get away from the keyboard...
How do you make the little texts on the bottom of your pieces? That must come in handy!
cheers,
m
The two scale prints I showed at the beginning were printed right side up with only a couple shells wide - so very fast since no support is needed (but yes with artifacts). For the actual print used for the mold it is printed upside down as noted so that there were no supports in contact with the outside surface. I've also found solid (or infilled) 3d prints can be extremely difficult to remove from plaster - so wanted it to be mostly air so it could flex (or be destructively removed easier) if needed. And yes, designing in a handle is probably a good idea!
Yes, these plaster molds are all too thick for my liking. They are functional, but not ideal. What I am working towards is 3d printing an outer mold as well. I'm in the process of getting software to auto generate that mold. It'll probably take a few iterations to get it where I want - but step by step!
My makers mark on the bottom is a stamp I created from silicone (cast into a 3d printed mold). I then use a stamp pad that has underglaze (instead of ink). th-cam.com/video/di2p1phIHlU/w-d-xo.html
Loving the vids, have another sub.. Hey, you mentioned plaster likes to stick to itself.. With that in mind, could one not patch up air bubbles with a little plaster on a finger tip?
Thanks! Yes you can (although I havent tried much myself). The hard part is getting to where the bubble is inside the mold and then getting a good surface finish (as opposed to just cleaning the slip cast pot afterwards).
@@PotterybyKent Yes fair enough, things could get messy quickly, poking around with putty in the bottom of a pot. I see your molds have come a long way since this vid, I'm almost caught up. :)
Thanks for watching!!
You might be able to increase the angular resolution when exporting the model from your 3D modelling software to get a smoother surface and avoid those vertical ridges. Would be nice to see you make some pots in distinctly 3D printed shapes. These videos are very satisfying to watch. :)
Thanks for watching and sharing! Indeed I was able to bump it up and the mesh was much smoother as a result (and that's the default in shape cast right now). I do want to get to more unique designs - I just need to find the time/motivation to wrangle the code!
I took a screenshot of you holding the master and the molded part you fired and compared them in GIMP. I paused the video and worked out the scale factor to be about 1.144 (14.4%) and then when I started it up again, you came out and said 15%.
"I enjoy understanding" -George Costanza
Wow, very nice!
Hi! Can you share what product the "silicone" is that you use to secure the print to the bottom of the bucket? Thank you!
Sure. Something like this: amzn.to/3UwdnLo
If you made your model as a solid object. You would need the supports and and use infill to help with the structure support. Also should allow this to print much faster with less plastic waste.
I'm pretty sure that is incorrect. Adding the organic supports doesn't require that much more material. Also, it is rather important for it to be hollow so that it can be removed from the plaster (as my followup videos show).
Love your videos!! Are you going to post your 3D file to Thingiverse? Thank you for posting the test tile.
Thanks! I'm actually working towards some software that can generate the 3D files in a more automated way (so potentially you could make your own). Once I get that working, I might also provide some of my designs along with it. There's a link in the description to sign up for the waitlist.
That would be great! I signed up on your list.
Great!
say you want the cup to be 3.5 mm thick, how do you know when to pour away the excess slip?
You test with your slip and molds until you get the desired thickness. Luckily these attempts can be recycled indefinitely until you figure out the dwell time.
Do you need mould release? Or dos air gun suffice?
For the 3D printed form, at this point I've switched over to an alcohol and water mix that I keep in my freezer. I put that into the mold which gets it cold and shrinks it just a bit and it pulls right out. Check out this video: th-cam.com/video/5Y1fQsqht_4/w-d-xo.html
@@PotterybyKent awesome! Thank you!
You're welcome!
is there a reason why so many pots do not have proper plant drainage? Can the holes be placed while it's green?
As for why - you'd need to ask the creator! But yes, they are trivial to add. I usually put them in at the leather hard stage as it's easiest to cut the clay and not deform it. When it's bone dry there's a risk of breaking the pot. I've done a few after they've been bisque but you need something like a diamond bit to cut through then.
Does the shrinkage rate change within the same clay body depending on the batch? For example, I bought a clay body from Laguna clay and it has a shrinkate rate of 10% +/- 2%. After using the clay, I discovered it has a shrinkage rate of 12%. If I buy a new bag of this same clay body from Laguna, will it always have a 12% shrinkage rate or could the next bag have a 8% shrinkage rate?
The answer to your final question is yes that means it could be different between batches. So 10% +/- 2% means a given bag could have a shrinkage rate anywhere between 8% and 12% (which seems like a very high range!) I'd guess that means they have a lot of variation on their input ingredients they aren't controlling for. I had assumed (maybe incorrectly) that the range is much narrower, but that is likely highly dependent on manufacturer, or even the specific product line for the manufacturer.
One other thought is maybe the clay has a high range in temperatures. Like cone 5-10. It's possible some of the shrinkage variation they're accounting for is from that. If that is the case maybe the shrinkage would be more consistent given a specific firing target.
Hi Mate, what is the purple material you are using at 0:08?
What’s his name? Thanks a lot
It's expanded polystyrene foam. It's made as a sheet for insulation and is easy to cut.
Wonder how we could upscale something without 3d printing? I have a mug I want to copy but it will come out tiny 😢
I don't think there is a very good way which is one reason I use 3D printing. I think the other common way is to sculpt or throw it in clay.
What model of 3D printer do you use?
It's an original Ender 3
Please tell me about pouring material nd mixture
Check out my other videos
Do you have link where can I buy plaster powder to make plaster mold?
I could provide the one to my local pottery supply store, but it's not useful for 2 reasons. Plaster is big and heavy and would be crazy expensive to ship! And they don't have any right now since there are supply chain issues. Having said that, I buy USG #1 Pottery Plaster and it's distributed throughout north america. Not sure about the plasters used in other places.
Can u make sublimation coating mug
Say more?
@@PotterybyKent love ur work
Please show firing technique
I have some old videos on my channel with more info on my kiln and using it
@@PotterybyKent okay sir thanks