Set Ignition Points Timing Part 2 - GS550 Build (Part 98)

ฝัง
- เผยแพร่เมื่อ 22 ส.ค. 2024
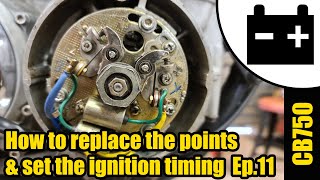
- After ordering and receiving a new set of Chinese made K&S ignition contact points, I show how I needed to modify them to work in the GS550, even though the Ebay seller claimed they would fit the GS550 with the Kokusan ignition set. After modifying them, they do fit and function and I set the point gap and complete the ignition timing process. Another adventure in DIY motorcycle mechanics! Good fun really.
Set Ignition Points Timing Part 1: • Set Ignition Points Ti...
Book - Creating Mr. Kortan: Building a Custom Vintage Cafe Racer: www.amazon.com...
Urban Monk Website: www.urbanmonktv...
Follow in Instagram: / urbanmonktv - ยานยนต์และพาหนะ


Great Vid! I have a 79 GS850 given to me. Has not been running right for over 15 years, that’s how it ended up in my garage a few months ago! I’ve been tinkering as a weekend project and this video helped tremendously for the spark issue I was having! I’m not much of a pro by any means, just a TH-cam certified kinda guy. My bike has the “other style” of condenser plate and components, but the concept is still the same for the gap adjustment! What a huge difference, thank you! It’s bone stock and all original plastics and body parts. I’m going to turn it into a back road runner for the part of Michigan I live in! Definitely will be checking out more of your videos from the detail you put in!
Thanks for watching! Enjoy your project. These bikes have great character.
Thanks for the very clear video. I thought if the points surface looked even and not pitted, they were fine. My 1978 GS 1000 has very week spark and runs poorly (was great a couple years ago). My headlight is very dim and sometimes I have to mess with the ignition switch to get the starter to engage, I bought a connector cleaner set and will clean all the 45 year old connections, hoping to get full current to the coils and headlight.
Thanks for watching! Perhaps check the ground also where the coils are mounted to the frame and the ground wire between engine and frame. Could be a source of trouble.
Tremendously helpful. Thank you.
Thank you for saying so and thank you for watching!
Top job 👍
Thanks for contributing good information for others!
Hey monk! I am struggling to understand how to set my ignition advance on 78 gs550e using the advance tool could you helped by explaining what marks I use
F T or II to set my advance THANK YOU! your videos have helped alot!
I'm currently traveling. I'll have to circle back here to answer your question at a later date. Early next week sorry.
Following up here. Sorry for delay in reply. Been busy traveling and at work. So, mechanical advance has 2 sets (cyls 1-4 and cyl 2-3) with 3 marks on it. T, F, & 1-4 (or 2-3). At 1500 rpm F mark should align with the stationary mark. With engine running at 2500 rpm or more, the 1-4 mark should align with stationary. (or 2-3, depending on which breaker your light is connected to.) Hope that helps!
For description with pictures, go to members.dslextreme.com/users/bikecliff/, download GS550 manual and reference pages 58 and 69-72.
@@UrbanMonkTV thanks monk! My bike has a bad habit of high idle that just started out of nowhere after I removed the new airfilyer it went away
,sir how are you, greetings!
Can you tell me how to connect the logic lamp?
Thank you
Thanks for watching. I did this video almost 3 years ago. Honestly, I would have to watch it myself to remember exactly, but in general you can use any 12 volt light and wire between contact point wire connection and ground.
when I have done this on my '77 KZ1000, I set the cam to just a hair from F and then adjusted to make the light barely go out. I think it works better because of the progression of the timing as you turn the cam.
BTW I can get $1000 more for a 40 year old motorcycle if it is completely stock. In your case, you are making a custom cafe, so unless you are selling to the OEM motor and drivetrain crowd, I'd have upgraded to electronic. But, the OEM motor and drivetrain crowd have very deep pockets and they will pay out the yingyang for a Steampunk Cafe with OEM motor and drivetrain, so I assume you are keeping your options open and don't need to unload the racer fast.
I like your video. Unfortunately, my kids say you sound like me, diving too deep, and boring. How is thoroughly explaining things diving too deep? You made a mistake with the light, why keep it in? Because 50% of the viewers using this as an instructional will do it too. But not now that they saw you do it.
Thanks for watching! The key driver for me here has been personal artistic expression, the romance of analog, and a tribute to my childhood teacher. My kids agree with yours...changes nothing for me. :)
Just curious why you didnt upgrade to electronic ignition.
Romantic love affair with the past. To me, putting an electronic ignition on this bike would be like going to the Eiffel Tower at the Paris casino in Las Vegas instead of going to the real Eiffel Tower in Paris.
@@UrbanMonkTV I agree. I'm torn between keeping the old or upgrading to electronic. Thanks for all the videos. Been a huge wealth of knowledged helpoing me work on mine..
Heres a question, why does my light stay on while I open and close the gap?
Is you gap set wide enough? Did you double check the test light is connected to the contact point that is indicated on the rotor? I've made that mistake myself. Also, is the gap closing completely?
I will buy a suzuki gs550. but it does not have the platinum plate or the platinums. where could i buy both parts
I'm terribly sorry but I don't understand your question. Could you try asking a different way? Seems like you mean to use a different word than platinums.
Regarding Daiichi points, Motorcycle Spares Warehouse part # DK-39 R/L seems to fit my 1978 with Kiko... They are in Australia, shipping is expensive and slow, $43 or so total. I can get static timing dialed in, but the primary breaker plate (#1/4) must be twisted almost fully CW, secondary plate (#2/3) fully CCW. I’m a bit worried that I have no adjustment when it comes time (months away) to check with a timing light. Advance mechanism removed/dismantled/cleaned/lubed/reinstalled, shows little wear and seems to work smoothly. I watched your surgery on the K&N points, can you recommend a course of action (hopefully short of breaker plate modification) to give me adjustment room? Is this situation indicative of something enough know of?
Thanks for watching! I think this situation is indicative of contact point ignition systems being nearly extinct and retailers attempting to sell a shrinking number of point sets into any and all applications. Just an off-the-cuff observation. When you twist or plate fully CW and CCW, what is result in points? Closed all the way except at the limit of plate rotations in either direction?
@@UrbanMonkTV Thanks for replying. I never thought that the #1/4 set closed all the way, even when the rub arm was not touching. I watched the video again, fiddled with the points for a few hours, then ordered a Dynatech DYNA S DS3-2 off Amazon. I feel better already!
Oops, just discovered that those of us with Kokusan points need the DS 3-1 kit.
UM I have basically the same bike cept mine is a 77, I switched to the electronic ignition and it's like a brand new bike.
I don't doubt it! I will probably go there eventually but I wanted to do a video on how to set the points. Plus, there's a romance to points.
@@UrbanMonkTV no doubt! Great videos and info, I basically built my entire bike from watching your videos!
@@bhunter8476 Thanks so much for saying so! I wanted to be of help with these videos, happy to hear you like them.
@@bhunter8476 I know it’s been two years but I have 78 gs750 was buying the electric ignition worth it? And was the instillation difficult??