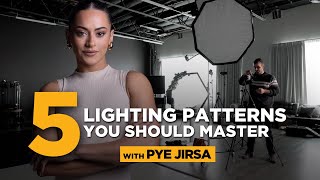
Mastering the Art of Colored Gel Portraiture with Jake Hicks: A Step-by-Step Tutorial

ฝัง
- เผยแพร่เมื่อ 12 พ.ค. 2024
- Join us as we explore the captivating technique of colored gel photography with renowned photographer Jake Hicks. Known for his exceptional skill in using colored gels, Jake guides us through the intricacies of this unique photographic style. From setting up your studio to mastering the final touches in post-production, this video covers everything you need to know to create breathtaking gelled portraits.
Times
00:00 - Intro To Gelled Lighting
14:02 - Intro To Gelled Flare
17:29 - What Is Gelled Flare - Key Light
23:40 - Camera Settings For Gelled Flare
27:21 - Gelled Flare Fill Light
32:57 - Adding Hair Lights With Gelled Flare
40:23 - Introducing Color in Gelled Flare
51:16 - Camera Lenses For Colored Gel
59:21 - Skin Retouching
01:13:17 - Black And White Toning
01:20:53 - Skin Smoothing
01:29:20 - Dodge and Burning In Photoshop
01:42:33 - Skin Sharpening
01:50:56 - Global Highlights
01:53:56 - Colour Toning
02:03:00 - Wrapup
📸 What You'll Learn:
- Fundamentals of Colored Gel Photography: Understand the basics of using colored gels and how they can enhance your photography.
-Equipment Essentials: Discover the must-have equipment for gel photography, including the best gels, lights, and modifiers for your studio.
-Camera Settings and Exposure: Learn how to master manual mode for perfect exposure in colored gel photography.
-Lighting Setups and Techniques: Explore various lighting setups, from single light simplicity to complex multi-light configurations.
-Creating the Gelled Look: Step-by-step guidance on achieving different gelled looks, from subtle hues to bold, dramatic effects.
-Post-Production and Retouching: Tips and tricks for refining your images in post-production, using tools like Lightroom and Photoshop.
🌟 Key Takeaways:
Create unique and vibrant portraits using colored gels.
Understand color theory and its application in gel photography.
Develop skills in lighting setup and camera settings for optimal results.
Enhance your post-production workflow for polished, professional images.
📚 Resources and Extras:
Lighting Diagrams: Download the full course at PROEDU.com
Photoshop Actions: Included in Jakes Course
Exclusive Behind-the-Scenes Content: In the Course
👥 Who Should Watch:
Portrait Photographers looking to add a creative edge to their portfolio.
Fashion Photographers seeking to incorporate vibrant colors into their shoots.
Photography Enthusiasts eager to learn new techniques and expand their skill set.
Digital Artists interested in exploring the intersection of photography and art.
🔗 Useful Links:
Jake Hicks' Portfolio: jakehicksphotography.com/
Purchase Colored Gels: proedu.com/products/how-to-ph...
Long Exposure: proedu.com/products/long-expo...
💬 Join the Community:
Share your thoughts and your own colored gel photography in the comments below! Don't forget to tag us on Instagram @PROEDUEducation with your creations using this technique. We love seeing your work and sharing in your photography journey.
👍 Like and Subscribe:
If you found this tutorial helpful, please give it a thumbs up and subscribe to our channel for more in-depth photography tutorials. Your support helps us create more content like this!
🔔 Stay Updated:
Hit the bell icon to get notified about our latest videos and never miss out on new techniques and exclusive content.
Thank you for watching "Mastering the Art of Colored Gel Portraiture with Jake Hicks." We hope this tutorial inspires you to experiment with colored gels and bring a new dimension to your photography. Happy shooting!
MORE INFO ON PRO EDU Courses & Software:
🚀 Pro Edu: proedu.com/unlimited
🖥 Portrait Tutorials: proedu.com/collections/portra...
Composite Courses: proedu.com/collections/compos...
🧑🏽💻 Facebook: / proedututorials
🤟 Join Our Photo Community: / rggedu
🦅 Twitter: / proedututorials
🤳🏼 Instagram: / proedututorials
🎥 Pocket Portfolio: www.pocketportfolio.co/
📰 Blog: proedu.com/blogs/news
🎙 Photography Podcast: podcasts.apple.com/us/podcast...


![[LIVE] : ONE ลุมพินี 62 | คู่เอก "มงคลแก้ว vs อีที"](http://i.ytimg.com/vi/q7QuSUtUN94/mqdefault.jpg)

Who Needs 'Mastering the Art' When You've Got Pure Bluffing Skills?!
No way! Y'all really gave this one away for free! I'm a member and this is one of my favorite courses along with Chris Knight's lighting class.
It’s just the first chapter, we didn’t give away the full course 😊
I’m a boudoir photographer and Jake your work with color gels has been one of my biggest inspiration to my style thank you for this wonderful course and tutorial
Its so good! Love it
Am an amateur and you explained everything very well from set up to the end perfect result I learned a lot thanks keep up the good work and your model is amazing
Excellent step-by-step from capture to post. Time well spent whether you are a beginner or intermediate level. Thank you for the educational content and contribution to the creative community!
Glad it was helpful! Check out the rest of the course at PROEDU.com
Awesome!! Great instructor.
I absolutely love this tutorial. Great detailed information. Answered all my studio questions. Need more tutorials like this
Great presentation thank you for sharing your expertise, nicely done!
Thanks!
Yes it's in nature and beautiful. The main reason it's popular is Teal and orange compliment skin tones. 💯
This sample course is really good. Good for personal work or campaign.
Thanks!
Appreciate all the info 🙏🙌
Great Job 👍
Great video. Thank you. Did I miss you telling what strength your diffusion filter was? Thanks
What battery pack is that? the blue pack on the stand! Thats awesome
any chance to know what is the exact brand of the diffusion filter you used? thanks any suggestions in the comments as I'm a newbie. thanks
Thanks for sharing this, lots of useful information. I have a question though, when you talked about the gelled lights you said that the most saturation is when the lights are turned down low. Is the reason that when you increase the power of the light then you start saturating one of the RGB channels, and thus you loose the difference in value between the channels?
Colored gel filters exhibit more saturation at lower power and less at higher power due to the principles of light intensity and color absorption. At lower power, the light source emits less intense light, allowing the gel to absorb and transmit its specific color more effectively. This results in a richer, more saturated color. Conversely, at higher power, the increased light intensity can overwhelm the color characteristics of the gel, leading to less effective absorption and thus, a less saturated appearance. This phenomenon aligns with the Beer-Lambert Law, where the concentration of a colored solution dictates the amount of light absorbed; in the context of gels, lower light intensity parallels a higher 'concentration,' enhancing color saturation.
@@proedututorialsThank you, that was a very comprehensive reply. Appreciate it.
Their explanation isn't wrong, but it's not the complete picture. A lot of that depends on what gels you're using, how they are situated, and how far away from the subject they are. When balancing lights, for example, 3 gel lights, the more power the more color saturation you will get from that respective color. There is a point where the light can be so overpowered it basically washes out the color as they mention, but the power of your light has to be fairly high to reach this point.
All looks great and your technique plus PS skills are great but i can't get through the fact image is miss-focused. Your focus is on her hair but not on her eye :(.
Great instructor. Out-of-focus shots. Mad PS skillz lol.
Andrew Tate
Here is my critique- great info. WHEN you finally get to it. The video could have easily been an hour without a single bit of Iose of quality info.
I agree... the constant talking was very annoying and made me lose interest fast and skip on and on.
that music in between sections was horrible. I almost left the video due to it. Unnecessary, annoying, time wasting.
Did you try listening to it with gels over your ears? Makes a difference 😅
@@proedututorials sure, nice response to feedback, too.
Thanks