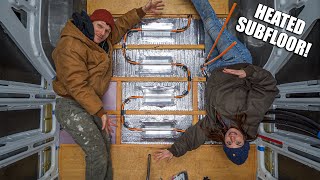
Heat Your Feet! How To Install A Hydronic System In Your Van

แชร์
ฝัง
  • เผยแพร่เมื่อ 14 ต.ค. 2024

ความคิดเห็น • 335

  • @octane_ape
    @octane_ape 12 วันที่ผ่านมา +1

    This DIY approach is significantly less expensive than the other floor heating options. Thanks for the vid!!

  • @nils2698
    @nils2698 2 ปีที่แล้ว +32

    I love the idea of a hydronic system in a van! My 2 cents though: Please consider re-routing the exhaust pipe to the side of the van so the fumes won't get trapped below and start to rise up into the inside where you are sleeping. This can be very dangerous!

    • @dogcatmanvan
      @dogcatmanvan  2 ปีที่แล้ว +12

      We can relocate it no problem!

    • @V4NLIFE_CANADA
      @V4NLIFE_CANADA 2 ปีที่แล้ว +2

      they way he mounted it is perfectly fine. enough air circulating there

    • @vikingvan7864
      @vikingvan7864 2 ปีที่แล้ว +3

      @@V4NLIFE_CANADA where does the air circulation come from? The van isn't moving most of the time when you are running your house heating. Exhaust should be to the outside of the footprint of the van. Those are deadly gases.

    • @V4NLIFE_CANADA
      @V4NLIFE_CANADA 2 ปีที่แล้ว

      @@vikingvan7864 nope

    • @b.s.adventures9421
      @b.s.adventures9421 2 ปีที่แล้ว +1

      Maybe you did, and I didn’t see it.
      But, Jack stands sir.
      Use jack stands.
      Never trust your life to a tiny Oring inside a jack holding up the thousands of pounds of your van.

  • @ErikSjaastad
    @ErikSjaastad 2 ปีที่แล้ว +16

    By far one of the craziest build videos I've ever seen. You two are so hardcore!! I love the sound effects so much, they always make me smile :)

    • @dogcatmanvan
      @dogcatmanvan  2 ปีที่แล้ว +4

      I'm glad you appreciate the sfx haha they take me some time!

  • @jeffsteinmetz7188
    @jeffsteinmetz7188 2 ปีที่แล้ว +10

    Great video! I think it is highly recommended you exhaust vent out the from under the van. It appeared in the video you are venting the exhaust under the van. You don’t want the fumes creeping in every nook and weeping hole under your van.
    I went with Rixen's Hydronic heater and after seeing your video I am glad I did, so what you talked about at the end is not an issue with Rixen's. Hooking up all the wire was dramaticly simplified and you don't need to do near as much work to integrate all the wireing end points. The support you get from Rixen’s is superb! Really more than half the time you get Jim Rixen on the phone and he is happy to help the DIY folk. I actually think he likes being on the front lines so he can hear the issues first hand. I wish I had decided on the Rixen's system before I completed my flooring. No in floor heat for me.

    • @dogcatmanvan
      @dogcatmanvan  2 ปีที่แล้ว

      Thanks for the heads up!

  • @muvybuf1
    @muvybuf1 2 ปีที่แล้ว +24

    Consider putting some sort of bug and debris filter on the end of the intake and exhaust of the furnace. I used stainless steel washing machine lint filter for the intake and the exhaust came with one. It would probably be "bad" to get something crawling or sucked into the furnace. I really enjoyed watching your installation. You do a great job.

    • @dogcatmanvan
      @dogcatmanvan  2 ปีที่แล้ว +4

      I was a bit concerned that the intake didn't come with anything. Steel lint filter sounds like a good idea

    • @bambambundy6
      @bambambundy6 2 ปีที่แล้ว +1

      I crammed some steel wool into it.

  • @mariehuff5763
    @mariehuff5763 2 ปีที่แล้ว +4

    Julie voice is so smoothing. Swear she need her own channel just telling stories. I bet she be really good at it.

    • @phoenixgirl70
      @phoenixgirl70 2 ปีที่แล้ว +2

      I noticed that too! This episode really made it stand out.

  • @TheEthanification
    @TheEthanification 2 ปีที่แล้ว +15

    Great video, guys! The drawn visuals are amazing and must have taken forever so hats off to you for that! Looking forward to more!

  • @phoenixgirl70
    @phoenixgirl70 2 ปีที่แล้ว +10

    So much detail, I can’t imagine the time drilling, drinking diesel, setting up shots, editing…you two are killing it and without killing each other (different views/styles of working on projects. I gotta say I’m more a Julie type of worker haha.) And happy 31K! But in fear of permanently discolouring Bens teeth you’ll celebrate in 5 or 10 k intervals haha. Well Ben, you’re a lucky man to have extra heat sources, an intelligent beautiful partner and her sweet pupper and not just Rocky. Rocky may take some time adjusting (lots of changes) so extra pets and kisses to him. It is V Day after all ❤️. So excited for what’s to come on DCMV!

  • @guidolyons4912
    @guidolyons4912 หลายเดือนก่อน

    Thanks for the wiring diagram translation! I am retrofitting an Espar D5WS into a Camperlance conversion and that was super helpful!

  • @harleyrobertson6746
    @harleyrobertson6746 2 ปีที่แล้ว +5

    Dude, I think these videos of a second van build are way better because we can learn from what you've learnt and so we can make better van builds 👌👍

    • @dogcatmanvan
      @dogcatmanvan  2 ปีที่แล้ว +4

      Yeah I was a bit concerned with how long the videos are getting, but we wanted to provide everyone with a comprehensive guide on how it went for us since we couldn't really find a single video with everything in it while we were doing our install. Hopefully it helps out!

    • @harleyrobertson6746
      @harleyrobertson6746 2 ปีที่แล้ว +2

      @@dogcatmanvan Dude, I'll admit when I saw the length of the vid I said to myself that I won't have time to watch it, busy day and all, but man the longer the better. I see it all the time with these short videos and you're kinda left hanging, so longer videos 👍👌

  • @guidolyons4912
    @guidolyons4912 ปีที่แล้ว +2

    I just added a floor heat loop to my Espar D5WS. Bypass with just three standard ball ball valves. One ball valve on each leg going to the floor heat loop. One ball valve in the center of the bypass. To add the floor heat to the glycol loop, open both ball valves and close the third ball valve in the center. This will allow glycol to flow through the floor loop. To bypass the floor loop, close both vlaves going to the floor loop and open the third valve in the center of the bypass. Easy peasy, commonly available valves from any hardware store.

  • @JonasMarcinko
    @JonasMarcinko 2 ปีที่แล้ว +3

    I did a hydronic floor in a cargo camper build and found the same thing. It just didnt heat up that much. I've come to the idea that the wood is too much of an insulator and ill probably take the wood out and put a thin layer of cement.
    nice video guys!

  • @ryanchristie5349
    @ryanchristie5349 2 ปีที่แล้ว +5

    I would always feed the coolant into a heater from the bottom and exit on top. That will push any air bubbles up out of the internal cooling channels.

  • @richardvalitalo3670
    @richardvalitalo3670 2 ปีที่แล้ว +2

    Holy moly! You talked me out of this idea, wow! Hotel rooms sound ok now haha.Just to make the video is crazy, respect to you both.

    • @dogcatmanvan
      @dogcatmanvan  2 ปีที่แล้ว

      Thanks for checking it out. It was a lot of work!

  • @ZiLg0
    @ZiLg0 10 หลายเดือนก่อน +1

    Great information, thanks! Love the production value in this video!!

  • @onemanandhisdog9
    @onemanandhisdog9 2 ปีที่แล้ว +2

    There are so many van channels out there, but you bring interesting content in a very amusing and helpful way, fantastic work, keep it up!!

  • @glenjohnson9660
    @glenjohnson9660 2 ปีที่แล้ว +4

    This job was grueling, great job! When your extruded aluminum comes in and you rework any piping you might want to purchase a copper manifold. It will mount on a sidewall and eliminate a lot of tubing. Just makes for a nice looking easy to follow flow.

  • @findingpoints
    @findingpoints 2 ปีที่แล้ว +8

    I did the same basic system with the gasoline version. It’s been 3 winter months and I absolutely love the system. I developed a thermostat to keep the van temperature at a specific temperature, which is control through my phone. If you’re interested let me know.

    • @dogcatmanvan
      @dogcatmanvan  2 ปีที่แล้ว +4

      Yeah let us know how you've got it running from your phone!

    • @richardprice5978
      @richardprice5978 2 ปีที่แล้ว

      i wished cars heated and cooled the floor as well with radiant but no i have a fan pointed at me 😑 or nothing at all plus it's uneven aka cold spots the the fan missed

    • @findingpoints
      @findingpoints 2 ปีที่แล้ว +6

      There’s a bit to it, but the premise is that a tiny microprocessor called a Wemos d1 mini turns on and off a relay that turns on and off the heater. That microprocessor talks to another small computer called a raspberry pi. That runs home automation software that talks to the iPhone through HomeKit. So when you turn on the heater through the iPhone, it talks to the small computer. Then the small computer talks through the vans WiFi to the microprocessor. It’s way easier than I’m making it sound. Then when the van gets to the temperature set by the iPhone, the relay turns off and the heater shuts down. When temperature cools down the reverse happens, and the heater turns back on.

    • @MiracleMadkins
      @MiracleMadkins 2 ปีที่แล้ว

      Do you have a link to the one you used?

  • @theonlywoody2shoes
    @theonlywoody2shoes 2 ปีที่แล้ว +8

    As you have a twin line water feed, why did you need the three way valves for the floor bypass? I agree if you have a single line system you would need this, but with a twin line system all you need is a single on/off valve to shut the floor loop off in summer, especially since your bypass leaves liquid in the floor loop so really no benefit with the complex bypass setup. It may even cause issues as this will allow hot water to flow via the least resistance path through the bypass valves back to the heater causing this to regulate (reduce output) or even maybe shutdown.
    Sorry if I’ve missed something here, but I’ve fitted a few of these Webasto style heaters on several vans.

    • @dogcatmanvan
      @dogcatmanvan  2 ปีที่แล้ว +1

      You’re probably write. We’ve received a few comments suggesting the same thing. This was our first go at a hydronic system so I figured a bypass is what we needed, but I can see how a simple shut off valve would do the same trick. Wouldn’t the fluid still sit within the heated floor loop though? Or would the pump pull it out once the heated floor section is cut off?

    • @theonlywoody2shoes
      @theonlywoody2shoes 2 ปีที่แล้ว +4

      The glycol fluid will “sit” in the floor loop, but this really isn’t any different to the fluid sat in the header tank; it doesn’t “go off” or anything just sat there. Think of it like an electrical circuit with a switch disconnecting either the positive or negative connection to the battery - nothing flows until you turn the switch/valve on (I guess you could say that in an electrical circuit the power is just sat there, waiting to flow once the switch is turned on too).
      The pump won’t suck the fluid out of the floor loop, as there is no pressure created, the fluid will just circulate via the plate heater for your hot water and the air heater matrix instead - that’s the great benefit of using a twin feed/return design as you have.
      Those circulating water pumps don’t make a lot of pressure either, as they are a different design to the pump you have for a faucet on a sink. They were originally designed for use as engine pre-heaters in cars/vans/trucks, so the electric pump circulates the engine coolant fluid when the heater is running, but allows the coolant to flow through it when the heater is off but the engine (and its coolant pump) is running.
      I hope this helps you understand things a little better.

  • @JockeSelin
    @JockeSelin 2 ปีที่แล้ว +2

    Thanks! Very helpful. Hydronic heating seems a bit less like voodoo now! 😁👍🏻

  • @jiexilaoshi
    @jiexilaoshi 2 ปีที่แล้ว +3

    Great job explaining the hydronic system, long term I think you will be glad you did it. Congrats on 30k subscribers, I wish the best for you guys!

  • @scottM-v3u
    @scottM-v3u 2 ปีที่แล้ว +3

    Well done. Thank you for all the video/production and van work you are sharing. Way to provide a way for people to install diesel heaters. One of the most satisfying van mods that can be accomplished.

    • @dogcatmanvan
      @dogcatmanvan  2 ปีที่แล้ว +1

      Of course! Thanks for watching. Hopefully it helps some folks out on their future builds!

  • @forrestbro
    @forrestbro 2 ปีที่แล้ว +7

    Great tutorial. I'm in the daydreaming/planning phase of a future van build and would like to do something similar for my heating so definitely saving this for future reference.

    • @richardprice5978
      @richardprice5978 2 ปีที่แล้ว

      i wished average sub-120k usd luxurious passenger car's did it to

    • @vikingvan7864
      @vikingvan7864 2 ปีที่แล้ว +2

      I put one of these in my van and thought I might regret putting in the heated floors. The Kalori blower that comes with this system is SOOO loud I scrapped it and put a Chinese diesel heater under the passenger seat floor which has worked incredibly well and from the back of the van I can barely hear the heater even on high. I went skiing yesterday and camped there the night before. Temperature was 8 degrees F. We actually didn't have the heat on all night and woke up to a pretty cold van. I turned on the diesel heater and it just could not seem to warm up the van comfortably. When I turned on the floor heat the van heated up quickly. So long story short I would definitely recommend the floor heat because the floors get really cold and just having an air heater might not be enough. The chinese diesel heaters are cheap so would recommend going that way instead of the Kalori blower.

    • @richardprice5978
      @richardprice5978 2 ปีที่แล้ว

      @@vikingvan7864 on JC-6 2005 model year the floors in the winter time can be miserable despite the tail pipes getting way hot and in the summertime leaking a lot of heat in to the cabin that and the fire wall but in the winter ❄it does help as the wall keeps the windchill at bay and a lot of the air box heating leaks out from the cold bottom of the jeep and with the engine heat and a extra pump or thermo-sifin i wish it did floor heating and air conditioning from the dealership from day 1

    • @richardprice5978
      @richardprice5978 2 ปีที่แล้ว

      @@vikingvan7864 some luxury cars are more insulated for sound and temperature controlles but still the floor is a weak spot as the pavement or wind that goes under it soaks up the temperature delta more than say the roof or F-windscreen glass so instead of a 1 or 2 hours of the car staying the same comfy ish temperature as the engine block/exhaust ect. does store some heat in the winter and can be extended for another 6 ish hours with little parts or complexity or weight added 😉 aka come out of work/shopping and the car is already warm ish with no extra fuel used or a very little extra energy as it's possible to used a extra part to extend it indefinitely as long as there power to do so in side of the cabin ie a C-class or lincon or caddy devill or 300-C or model S or X Tesla's ect.

  • @travellingDAS
    @travellingDAS 2 ปีที่แล้ว +1

    Manufacturers could learn a LOT from this video. If this is the standard someone working stuff out for themselves comes up with first time out shame on them and their marketing budgets! As someone who’s played around with electrickery (and teaching) in all sorts of places for over 30 years I wish I knew as much when I first started learning. Bravo!

  • @pangeyi
    @pangeyi 2 ปีที่แล้ว +3

    This is such an amazing video. Both of you did a good job on explaining the details. Can’t wait to see more build video from DCMV!!!

  • @randalbloomquist7812
    @randalbloomquist7812 ปีที่แล้ว +1

    I've been thinking about doing this for a while now. Thanks for the heads up!

  • @justdoinglife412
    @justdoinglife412 2 ปีที่แล้ว +2

    I don’t know if anybody’s answered your question about the expansion tank but it does just what the name says it gives the water in the system a place to expand and contract when it heats and cools, great video by the way

  • @chrisdaniel1339
    @chrisdaniel1339 ปีที่แล้ว +3

    I agree you should have spaced the PEX in the floor closer, I also would have heated the entire floor even under cabinets, benches, that way the entire floor becomes a radiator. Just remember space heating is not just heating the air inside the van everything inside the insulated envelop is being heated, counters, cabinets, the sink, the bathroom, everything so having the underfloor PEX running under everything helps heat the entire space. There should also be heated floor under your freshwater tank and batteries/electronic for obvious reasons. draw the exact path the PEX in the floor takes on the top of your subfloor so when you are mounting cabinets or 80/20 modules you will not pierce the hydronic lines.

  • @jfxl1977
    @jfxl1977 2 ปีที่แล้ว +2

    Great video! I've been enjoying the new van build. Thanks for the detailed explanations. Congrats on hitting 30k subscribers. I look forward to seeing that number continue to climb!

  • @tomaustin4526
    @tomaustin4526 2 ปีที่แล้ว +1

    Another awesome fun video Ben n Julie. Really enjoyed the details of your installation n testing n especially all y’all’s funny comments. Thanks for sharing and safe travels in your cool van home 🏡👍😊wishing y’all much happiness n success.

  • @jarretrhyner5922
    @jarretrhyner5922 2 ปีที่แล้ว +1

    Fantastic Video. This video is super helpful, as I'm currently working through the same project. Kudos!

  • @Swimdeep
    @Swimdeep 2 ปีที่แล้ว +2

    Amazing. Truly. So much work. Really enjoying the info despite having an SUV. Good going.🌀🌿

  • @rmontena4583
    @rmontena4583 2 ปีที่แล้ว +2

    You are so smart! :) Really well done. Especially the diagrams! Best regards. Rich

  • @maidelie
    @maidelie 2 ปีที่แล้ว +1

    These are seriously excellent instructional videos, also delightful.

  • @marklambert2712
    @marklambert2712 9 หลายเดือนก่อน

    This is the video I have been waiting and searching for! Awesome detail, hilarious video and great job explaining everything.

    • @dogcatmanvan
      @dogcatmanvan  9 หลายเดือนก่อน

      Glad it was helpful! Thanks for watching:)

  • @johnjarvinen2783
    @johnjarvinen2783 11 หลายเดือนก่อน +1

    Love this video. Well done and well explained. As for the lack of difference in the temperature of the test floor, it is about the material used above the heating plates. I will not use wood because of the air traps. We have radiant floor heating in our home and we love it but would use concrete instead of tongue and groove floor. Be sure to place the plates upward to help spread the heat on your floor material. Again, love your ambition and common sense.

    • @dancarter482
      @dancarter482 10 หลายเดือนก่อน

      _GUTTED_ that it is so old - doubt they'll read new comments.

  • @docbreezy4900
    @docbreezy4900 9 วันที่ผ่านมา

    As time has passed how have you both liked the heating system? I purchased a Rixen system about 5 months ago... I still feel overwhelmed at beginning to install it 😅. Ive watched this video at least 2 or 3 times in these past few months and every time I do I pick up on something I find useful/helpful so thank you for making such a thorough video!!
    I've mainly been nervous about cutting a hole through the floor and appropriately sealing it, with tubes and wires running through. I've heard or rubber grommets and its likely I may have to use some kind of caulk, as you have. I pride myself on not having used any kind of glue/caulk to the body to allow for things to be 100% modular (if/when I need to get at things to fix/replace). ...the only similar aubstance I've used is on the roof for AC and fan to prevent water ingress from rain. Are you satisfied with the caulking? Has anyone advised differently or do you know, with different life conversations or experiences, of reliable alternatives to caulk?
    Lastly, is there anything that you've learned that you would definitely change if re-done, add, or eliminate from this process?
    *You're videos continue to inspire ❤

  • @dinahreyes4947
    @dinahreyes4947 2 ปีที่แล้ว +1

    Omg you guys have A LOT of patience! That's a lot of work! Congrats on 30K!

  • @waynec2962
    @waynec2962 2 ปีที่แล้ว +2

    Cute video 📹! Cute dog🐕! Cute Couple 💑 Great work guys!

  • @gregvittore5004
    @gregvittore5004 2 ปีที่แล้ว +2

    Nice! I don’t have the same stuff, but my air heater does have a valve on it to make it hot or ”cold”. On my heater in outputs do matter. I didn”t see any valves on yours so you should nit care about direction.
    My floor lines runs roughly 20 cm apart from each other. Even after a whole night running you still feel colder areas in between. Lack of concrete😅
    I insulated all my pipes as they do heat up quite a bit. And try not tu build to much stuff around as you always want to check your system!!!had 2 month great than started leaking...you never know on this diy systems.
    Btw, i only use the fan to warm up quickly,than it only maintain heat via the floor, really nice. Had this weekend -3C out and staedy 15C inside.
    Wish you both all the best. Cheers

    • @dogcatmanvan
      @dogcatmanvan  2 ปีที่แล้ว +2

      Thanks for sharing the real world experience you've had with your system. I'm curious to see how ours pans out once we're up and running!

    • @gregvittore5004
      @gregvittore5004 2 ปีที่แล้ว +1

      @@dogcatmanvan thanks for the entertainment! ❤️👌👍

  • @johnplyler7054
    @johnplyler7054 2 ปีที่แล้ว +1

    Great video! All I can say is OMG, what I am in for since I am doing a similar system.

  • @jhonnygringo1514
    @jhonnygringo1514 2 ปีที่แล้ว +2

    Awesome job! best install video and super entertaining as well.

  • @jonathanneethling
    @jonathanneethling 2 ปีที่แล้ว

    Think I just found my new favorite channel- legend status 10 achieved 🏆 ✌🏻🇿🇦

  • @NomaddUK
    @NomaddUK 2 ปีที่แล้ว +1

    I have been considering this type of system as I have just a basic chinese diesel heater and not hot water system as yet. Thanks for uploading this. It will help me decide.
    Where is our feline friend? Unfortunately this is the first video I have had recommended to me by TH-cam for a while so may have missed a few which I will go back a watch.
    All the best. Still love the squeaks and farts of the animules!

  • @doughurst5787
    @doughurst5787 2 ปีที่แล้ว +2

    My first heated floor I figured out very fast that heat does not pass through wood very easily. The closer the tubing is the better , but the surface cools faster than the heat passes through.

    • @dogcatmanvan
      @dogcatmanvan  2 ปีที่แล้ว +1

      Do you ever figure out an alternative flooring that is a better heat transfer?

    • @brutusmaximus5380
      @brutusmaximus5380 9 หลายเดือนก่อน

      @@dogcatmanvan If you are going for heat conduction through solids, I suggest copper foil adhered to the underside of your wooden top floor. However, you would have better results with ceramic tile with a copper foil underside. Copper is expensive. Aluminum may be cheaper and it doesn't corrode in a humid cabin but since it's near the top most layer, condensate from the cold metal floor would be negligible.
      Most of your heat loss is coming from your air matrix and the heat exchanger since they are the 1st in line and that's why the rear of your van is much colder. I'm going by Bernoulli's' principles of fluid dynamics here and looking at your diagram, the pass through connection from the heater to the heat exchanger looks like it's going to suck in the colder fluid from your reservoir, through the heat exchanger and mix it in with the heated fluid coming out of your heater but that's depends on the pressure difference between the heater and the outlet of your heat exchanger as well as the amount of flow resistance created by the heat exchanger. What I'm saying is that the fluid flow through the heat exchanger looks like it would be opposite of it's intended direction in the diagram. I would have connected the heat exchanger, air matrix and floor line in parallel. But it looks like that single pump has enough negative pressure to keep the flow in the proper direction.

  • @HueNarcisWorld
    @HueNarcisWorld 9 หลายเดือนก่อน +1

    this is a great video, very detailed, thanks !

  •  2 ปีที่แล้ว +3

    I've heard you need to use submersible fuel lines in the tank. Usual fuel lines would dereriorate with a time. Maybe not an issue with diesel or you used correct hose but worth to check. Great video! 🙂

  • @RapidGW
    @RapidGW 2 ปีที่แล้ว +1

    31:38 - LOL. These are great - thanks for sharing

  • @christoffer1973
    @christoffer1973 2 ปีที่แล้ว +2

    So interesting video. I never seen that product. Great video! But I would have a bigger distance from exhaust and fuel line.

  • @natashalion8028
    @natashalion8028 ปีที่แล้ว

    That Rivet Nut tool is genius

  • @tommurray2653
    @tommurray2653 7 หลายเดือนก่อน

    From your neibor to the north. I did not see any isolation valves on either side of the circulation pump. They are very good to have when you have to replace the "water" pump. No need to drain the system . Have a nice day. Tom up in Canada in the Maritimes at the NB-NS border.

  • @geekazoid
    @geekazoid 2 ปีที่แล้ว +2

    Terrific presentation! Awesome work.

  • @denisecafferky2248
    @denisecafferky2248 2 ปีที่แล้ว +1

    Alot of work. Well done guys 👍

  • @jamesbrooks985
    @jamesbrooks985 2 ปีที่แล้ว +1

    Good build video! Real extensive addition!

  • @robertjosephmurphyii4947
    @robertjosephmurphyii4947 2 ปีที่แล้ว +1

    Good job you guys! Keep up the great work can't wait to see what ya show us next.

  • @moes920
    @moes920 9 หลายเดือนก่อน

    I bought this kit 2020 and it’s sitting in my garage haha. I’m going to use it for my new truck camper!!

  • @ryanjones7681
    @ryanjones7681 2 ปีที่แล้ว +6

    ALWAYS do intake at the bottom.
    That way it fills up evenly and there's no air pockets.
    If you go from the top, the water can "fall" (aided by gravity) and create dead zones where no water touches (which is HORRIBLE for your machine and will cause it to burn out much much faster)
    Hope you read this!
    Good luck

    • @dogcatmanvan
      @dogcatmanvan  2 ปีที่แล้ว +1

      It has been read and we appreciate the info!

    • @ryanjones7681
      @ryanjones7681 2 ปีที่แล้ว +3

      (Push in water from the bottom) if that was confusing wording.

  • @WoodRanger138
    @WoodRanger138 ปีที่แล้ว

    Outstanding! Thank You Both.

  • @timbirkenbach5092
    @timbirkenbach5092 ปีที่แล้ว

    Hey guys, first up big compliment!
    Your videos are so refreshing to watch! Always something to smile about without losing focus on the matter!
    Thanks for the great effort.
    Now after running the heater for a while...
    Have you had many troubles with it and would you go for the same setup again?
    Regards from Oz

  • @sandraadams4940
    @sandraadams4940 2 ปีที่แล้ว +2

    Rocky is such a Sweetie. He loves you so much Ben.

    • @dogcatmanvan
      @dogcatmanvan  2 ปีที่แล้ว +1

      He does and he's a massive jelly bean. He doesn't like having to share me with Julie and Reli

  • @cdshobak
    @cdshobak 2 ปีที่แล้ว +3

    Very nice to see you have made the hydronic system working. I did the hydronic system in my sprinter 4x4 with single loop system. Floor does not get hot but it is warm enough to walk on it with bare foot when out side Temp is below 20 degrees.
    Do you have any issues with not controlling the fan speed. I can not control fan speed on my setup. other than that heater works great.

    • @dogcatmanvan
      @dogcatmanvan  2 ปีที่แล้ว +1

      We've been able to control the fan speed thus far. It's a bit delayed when switching between speeds, but it works fine.

  • @granitfog
    @granitfog 2 ปีที่แล้ว +1

    I have to wonder, how many joints got you through the process. (or was it beer, schnapps, wine...)? Great video.

  • @jessesmithchannel
    @jessesmithchannel 6 หลายเดือนก่อน

    Thank you for putting all of this info together! I know this isn't a recent video, but hopefully you see this comment.
    Was there a specific way you purged the air from the system? That seems important with the 2-pipe layout and only one port leaving the expansion tank.
    I've basically replicated your system, and im ready to fill with Cryotek-100, but I want to avoid getting airlocked.

    • @dogcatmanvan
      @dogcatmanvan  6 หลายเดือนก่อน

      Hey there, your expansion tank should have a breather line towards the very top of it to allow for the air to expel as it cycles through the system. The only way we were able to successfully purge the air was to run the system and take the van for a drive. Hitting a few bumps and vibrating the system while the pump was running worked the air out of the lines. I drove while Julie kept an eye on the expansion tank and she was able to visually see the air bubbles coming up. The air wasnt really purging itself before we drove the van. Hope that answers your question!

  • @NoOne-xp1pe
    @NoOne-xp1pe 2 ปีที่แล้ว +8

    RE the floor, although I don't know the best way, the problem is that you don't have enough tubing in the floor. I would lean towards trying 1/2" tubing, to slow the fluid and enhance heat transfer, and lots of it. The pump might be too light for smaller tubing and you would just increase the length. The spacing is way too far apart.

    • @dogcatmanvan
      @dogcatmanvan  2 ปีที่แล้ว +2

      Yeah we came to that conclusion at the end of the video. We are using 1/2in tubing for the underfloor heating. They definitely need to be closer together, but I also think the flooring needs to be different. I wonder if I could've gotten away with 1/4in subfloor, but who knows if that would make much of a difference.

    • @NoOne-xp1pe
      @NoOne-xp1pe 2 ปีที่แล้ว +3

      @@dogcatmanvan As nice as a warm floor is, I'm thinking all solutions lead to a lot of work, added weight (bad mileage), and slower heating. Perhaps adding more radiator type with or without fans would be more practical. A long radiator without fan could hold a good volume of heated solution, radiating heat while the pump is off. You're kind of asking the same of the floor, but you have reduced radiation, and only a hard surface will keep the heat, giving up more space and increasing the weight even more. Interesting build, good luck.

    • @kaymarpee
      @kaymarpee 2 ปีที่แล้ว +1

      Not sure how far along this van is but a possible adjustment could be made at this point. You can router out grooves on top of the subfloor and place flooring directly on top of the tubing. That’s my plan- I’ve got these layers 1) furring strips with insulation on top of the van metal floor, 2) 3/4 inch ply resting on the furring strips 3) pex tubing inlaid into the top of the plywood via routered channels (the pattern of the furring strips should support the ply, I’m using 3/8s pex), 3) cali cork plank click lock flooring floating on top of that....click lock floating should reduce any problems from floor expansion changing temps

    • @jacklorchdesigns
      @jacklorchdesigns ปีที่แล้ว

      I think the best option for floor heating is to have a separate pump loop with a temperature control valve and check valve back to the main. That way it recirculates until there’s enough heat transfer

    • @joeyallcock1011
      @joeyallcock1011 ปีที่แล้ว

      @@dogcatmanvan if any use i would get 2 heater core/matrix & the blower & its blendor from junkyard to save money& add extra lines to spread a lower heat in more places for blown air. Floor heatin reinforced pvc hose long length/roll to do this looks like garden hose with the string in it & fittings are easy to source also isolation valves to choose where flow goes cheap for a diy enthusiast all from new + used car parts shop + plumbing/building diy shops cud even do part wall by bed/bench in ur van *smaller diameter hose heat easily in small space plus = less fluid weight.

  • @euphioquestion420
    @euphioquestion420 ปีที่แล้ว

    great video!
    a thought on your hydronic hookups to the blower matrix, I would hook the coolant input into whichever port feeds closer to the fan side of the heat exchanger first. Same idea as hooking up your plate heat exchanger.

  • @matt82228
    @matt82228 2 ปีที่แล้ว +2

    One of the best video showing how the hydronic works!! Compare to the airtronic heaters, how effective and efficient is the hydronics in heating up the cabin through the Kalori?

    • @dogcatmanvan
      @dogcatmanvan  2 ปีที่แล้ว +2

      I'm not sure yet. Once we get to take the van out and stay in it during a few cold days and nights we will make a full review of the system and how it heats.

  • @thegarageetc
    @thegarageetc ปีที่แล้ว +1

    thanks for the info, the only thin I want to point out is that you always pump away from the expansion tank

  • @krisg3984
    @krisg3984 2 ปีที่แล้ว

    Very brave and I have to say : the LINGO has been a wild ride ! You guys sound like geniuses to me ! ! Thumbs up for your Can Do push-through, even in frigid weather !! You have a good work ethic and as a team, worked it all out. It seemed very complicated. Probably could do installs fast after this learning curb

  • @NDpendentconnection
    @NDpendentconnection 8 หลายเดือนก่อน

    Great team work and details for installation. Thank you both..:>)

  • @kaymarpee
    @kaymarpee 2 ปีที่แล้ว +1

    I knew I would have to “drop my fuel tank” eventually but I didn’t know what I was in for! Eyyyyyy. You guys rock and ty for this video it will be helpful when that day comes -_-

    • @dogcatmanvan
      @dogcatmanvan  2 ปีที่แล้ว +1

      Maybe you'll get to drink as much diesel as me!

  • @Ksarle06
    @Ksarle06 7 หลายเดือนก่อน

    I know this is really old. But I’m thinking a 3-loop manifold would really clean up all that plumbing. One loop serves the heat exchanger, next loop serves the air matrix, third loop serves the floor heat. Easily isolate the floor heat at the manifold for the summer months.

  • @cloneboy18
    @cloneboy18 2 ปีที่แล้ว +3

    I'm not building my van right now, or planning on putting a glycol system in it, I just like the format of your videos so I watch them all. lol (algorithm comment)

    • @suedefringe
      @suedefringe 2 ปีที่แล้ว +2

      Same , same !

    • @dogcatmanvan
      @dogcatmanvan  2 ปีที่แล้ว +2

      Thanks Olin!

    • @phoenixgirl70
      @phoenixgirl70 2 ปีที่แล้ว +1

      Same Olin and so excited for their fun adventures when they’re finished.

  • @DaveGme
    @DaveGme ปีที่แล้ว +1

    Great content. New sub. Seams like pumping the fluid back into the tank would be a place where it would lose heat unnecessarily. I blow stuff up for a living, so that’s probably not right. Just a guess.

  • @Wrenchmonkey1
    @Wrenchmonkey1 ปีที่แล้ว

    The reason it's more efficient to only have the one line connected in the expansion tank is that you are not circulating the water THROUGH the tank, which would have all of the hot water going into the tank, and leading to heat loss. If the only water that enters the expansion tank is the water that 'expands' out of the system due to heat/thermal expansion (hence the term), then it doesn't expose all of that heated water to a poorly-insulated tank that will just radiate and conduct the heat away.
    In times when you're trying to heat the space (ie; winter) the losses probably won't matter too much since most of the heat will be lost inside the living space anyway, and just contribute to the overall effort. However, in the summer months, losing heat to the interior of the van not only hurts the efficiency of your water heating system, but also creates more work for your cooling system, causing both systems to work less efficiently.
    I'm surprised nobody was willing to provide an explanation.

  • @bennyhaa
    @bennyhaa 2 ปีที่แล้ว +2

    I transitioned out of van life about a year ago. Eventually wanna do a new weekend warrior build. I don't think I'd ever get this deep in the sauce of designing but wow this is very interesting so thanks for the amazing content!

    • @dogcatmanvan
      @dogcatmanvan  2 ปีที่แล้ว +1

      Yeah this was a lot haha. Thanks for watching!

  • @jacklorchdesigns
    @jacklorchdesigns ปีที่แล้ว +2

    Very helpful! Did you find that the 5kW heater is enough? You would need the water tank at room temperature or higher to be able to heat to 100F unless it’s really low flow. Does the shower work ok when it’s freezing temp outside?

    • @dogcatmanvan
      @dogcatmanvan  ปีที่แล้ว +2

      So far it has done the trick. We aren't roasting in crazy heat, but it makes the space comfortable. The shower is also working fine as far as hot water goes since we really only take bird baths in order to conserve water.

  • @timort2260
    @timort2260 2 ปีที่แล้ว +3

    A quick tip when taking a fuel pump please use a brass rod to remove the circular bracket or whatever the bit is called that tightens down to hold the fuel pump. Sparks and fuel tanks can be sketchy but as ya can tell ya can get by is just a little risky

    • @dogcatmanvan
      @dogcatmanvan  2 ปีที่แล้ว +1

      Good point!

    • @timort2260
      @timort2260 2 ปีที่แล้ว

      @@dogcatmanvan awesome video though makes me pump to do my own build. Take it easy!

    • @NoOne-xp1pe
      @NoOne-xp1pe 2 ปีที่แล้ว +2

      Please show me how to ignite DIESEL with a spark. It CAN NOT be ignited with a blowtorch unless you have a wick, heated to a high temperature, or extremely compressed. Gasoline is a different matter. TV & movies are FAKE!

    • @timort2260
      @timort2260 2 ปีที่แล้ว

      @@NoOne-xp1pe awh well that's good to know I generally don't use diesel so figured it was fairly flammable as well.

    • @NoOne-xp1pe
      @NoOne-xp1pe 2 ปีที่แล้ว +1

      @@timort2260 In the movies and TV it blows up all the time, creative license, but also why they tell down right lies constantly. Like the science parts on Bones, anything having to do with guns, or how great government is at doing anything other than lying. Bit much, but true.

  • @peterlamere1982
    @peterlamere1982 4 หลายเดือนก่อน

    Florida in the winter is a nice way to stay warm in the winter.🤔🤓

  • @TheJustneon
    @TheJustneon ปีที่แล้ว +2

    Thank you for such a detailed video! I wonder how is the hydronic system running right now? Also, I know that you can use a water/water heat exchanger to heat up shower water. The questions is, how do you store the hot water for shower? If you store hot water in a separate tank, does it mean that you have to always heat the floor to heat up shower water? Even in summer time? Thx!

    • @dogcatmanvan
      @dogcatmanvan  ปีที่แล้ว

      The hot water is instant. Once the heat exchanger is warmed up you can pump water through it and it heats up instantly for you to use. We placed a shut off valve for the heated floor system so that it doesn't run during the hotter months when we need hot water.

    • @TheJustneon
      @TheJustneon ปีที่แล้ว

      @@dogcatmanvan Thank you so much for answering. It is quite helpful.

  • @CampervanMan
    @CampervanMan 2 ปีที่แล้ว +2

    Great video. All the detail anyone needs. Can I ask if you were tempted to plumb into the van coolant system and add a hot water storage tank (calorifier)?

    • @dogcatmanvan
      @dogcatmanvan  2 ปีที่แล้ว +1

      No, we didn't plan on doing that for this build. Maybe on a future build we will integrate the vans coolant system.

  • @patrickmooney4895
    @patrickmooney4895 2 ปีที่แล้ว +1

    Well done - Thank you - :) I am now a subscriber and I did give you a thumbs up - :)

  • @bjbhehir
    @bjbhehir 2 ปีที่แล้ว +1

    Glad my Espar B4L M2 was really easy to install and works great at high altitude!! It's heats my van up in any temp in less than 10 minutes. That seams like way to much work for a floor that's about 15 sq.ft. but good luck!!

    • @dogcatmanvan
      @dogcatmanvan  2 ปีที่แล้ว +1

      We liked the challenge. Thanks!

  • @Canadian_Ry
    @Canadian_Ry 2 ปีที่แล้ว +1

    Congrats on 30k!

  • @Mike2trys
    @Mike2trys 2 ปีที่แล้ว +2

    have no intention of ever doing anything like this... still watched entire video, lol

  • @darkexpose5153
    @darkexpose5153 2 ปีที่แล้ว +1

    I Love this Useful Video, Much Thanks Man 👍🏻

  • @boatelectricaldiy
    @boatelectricaldiy 10 หลายเดือนก่อน

    You guys are funny. I learned a bit and had fun. Subbed.

  • @tomhartridge1
    @tomhartridge1 2 ปีที่แล้ว +3

    Thought about the underfloor bypass. I'm not sure it's needed as you've gone for the two pipe method... the risk is that the hot water will take the "easy" route through the bypass and completely ignore the heater and blower. Normally for UK central heating anyway. you have to balance the system so no one thing gets too much water. and you just close the valve when it's no longer needed.

    • @dogcatmanvan
      @dogcatmanvan  2 ปีที่แล้ว +2

      We will be reworking the system to eliminate the bypass for a shut off.

    • @careykuhn9174
      @careykuhn9174 2 ปีที่แล้ว

      The underfloor water has no where to go. They way they did it the first time will be fine.

  • @TimHayward
    @TimHayward 2 ปีที่แล้ว +1

    I would warn against tying into the existing high pressure fuel line.
    I would also run the wires, then build the harness so you can get wires through smaller holes.
    Looks cool.

  • @philltwose4088
    @philltwose4088 2 ปีที่แล้ว +2

    Funny you mention those plates, I thought when you fitted them they were upside down 🙃, I would also consider the thermal conductivity of plywood is not optimal for heated floors so is probably not helping

    • @dogcatmanvan
      @dogcatmanvan  2 ปีที่แล้ว

      Any suggestion on an alternative conductive flooring for a van?

  • @landyboy7
    @landyboy7 2 ปีที่แล้ว +1

    Hi, greetings from Cornwall, England.
    Great videos, you guys crack me up!
    Re the hot water, not sure if I missed it but obviously the glycol sealed system runs through the plate heat exchanger which is connected to your cold domestic water fee. My question is, does this produce instant hot water from the tap (faucet!)? Or do you have the heat exchanger in another water tank purely for hot water? What tempeature do you get? Many thanks.

    • @dogcatmanvan
      @dogcatmanvan  2 ปีที่แล้ว

      It should produce instant hot water, but we haven't finished our plumbing yet to test how hot it gets. We'll be doing a full review in a few months.

  • @ashleypynn5428
    @ashleypynn5428 ปีที่แล้ว +1

    This video has been my guiding light, thank you guys. My only question is what does the line from the center of the purge valve connect to underneath the floor?

    • @dogcatmanvan
      @dogcatmanvan  ปีที่แล้ว

      Our purge line just runs underneath the van and when we want to empty the lines we just place a bucket underneath it. Other than that, it's not attached or running to anything.

  • @bambambundy6
    @bambambundy6 2 ปีที่แล้ว +1

    Nice job in my opinion.

  • @michaelrees5190
    @michaelrees5190 2 ปีที่แล้ว +5

    By not returning liquid back into the expansion tank your liquid is not cooled in the reservoir, so it stays it retains its heat as it circulates. Maybe.

  • @maidelie
    @maidelie 2 ปีที่แล้ว +1

    The melting ice pellet! 🤣😭🤣

  • @red6743
    @red6743 2 ปีที่แล้ว +1

    You noted that you used hot water to make the hoses more pliable in order to fit over the fittings. Seeing as the point of the system is to...pump hot water, have you developed any leaks? Did you use hosing that was rated for higher temps? Awesome video btw

    • @dogcatmanvan
      @dogcatmanvan  2 ปีที่แล้ว +1

      We've only really developed leaks on the expansion tank as well as our three way bypass configuration which we will be changing both. The hoses can take the heat and the fittings are barbed so once they are on, they are hard to get off or leak when tightened down with hose clamps.

  • @robertlindberg815
    @robertlindberg815 2 ปีที่แล้ว +1

    Hi. Cool video. I have been looking at the Van Life Tech’s floor heating. But it is pricey and i live in sweden and the VAT, shipping and customs fee busts my budget. So i found the one you installed. Does it differ much from Van Life Tech’s floor heating? There’s a huge price difference, why? I will not be building it, I have van builders for that. They have never installed floor heating so i dont know if VLT’s is easier? What are your thoughts? I am also interested in VLT’s upcoming recirculating shower, so maybe it would be a good idea to have the floor heating be the same brand.

    • @dogcatmanvan
      @dogcatmanvan  2 ปีที่แล้ว

      It looks like all of the components are the same as our system, but your also purchasing an entire pre-built heated subfloor. We had to put ours together with pex. Theirs come pre-built to heat the entire floor of your vehicle. Not just the areas you choose.

  • @philltwose4088
    @philltwose4088 2 ปีที่แล้ว +2

    Sip, Sip, Sip, ☕️

  • @dr.holymoly8260
    @dr.holymoly8260 2 ปีที่แล้ว +1

    Good job guys! Keep it up :)

  • @claudiomartin2204
    @claudiomartin2204 2 ปีที่แล้ว +2

    The point of the heating floor, is that is working when loosing the temperature, so you never should put insolation, between the tubes and your floor, you always have to put it under, to avoid lost this temperature from the bottom. The floor should lose the temperature from the top, and the temperature that the floor lose, is the way it works to warm the air.
    For that you need a surface with a high thermal inertia, so it take a lot of time to warm the floor, but after that it will be really efficient, because you will need a small amount of energy to heat the area.
    This type of heating is not the best for vans, because you are switching on and off all the time the heating. the heating floor in a house, normally have a first period that it need a lot of energy to warm the floor, but after that just a small amount and also it takes 1 or 2 days to have the proper temperature at home

  • @brookestephen
    @brookestephen 7 หลายเดือนก่อน

    O M G you guys have definitely earned honorary mechanical engineering degrees!