
ฝัง
- เผยแพร่เมื่อ 8 ก.พ. 2025
- **warning this video is not a complete guide and for demonstration only**
There's been a lot of hubbub on the internet about making PCBs using these new PCB printers. They sound all cool. They're only thousands of dollars, they take less than an hour, have okay precision and seem to produce tolerably durable boards.
WHY?
Making PCBs isn't rocket science. People've been doing it for decades at home. Heck, my first PCBs were made using some mid-90's radioshack kit.
In fact, they can be made cheaper, more durably, and faster using traditional methods!
Materials:
(1) FR4 (or CEM) 0.060 1 Oz Copper Single Sided boards, available from ebay.
(2) DuPont Riston. Available from tech-place or ebay.
(3) UV Mercury Vapor Light, usually used in terrariums.
(4) ~42% Ferric Chloride, available from ebay and other shops.


It's amazing, I have worked in PCB production and sales for many years, I never imagined to be able to make at home。
I'm glad you turned the water off, I was getting seasick, :-)
When I used to make PCB photo negatives like this I would make one of the images flipped, so when I sanwhiched them together, with stickey tape arround the edges, I would have double the black print sanwhiched in the centre of the plastic film, which prevents the print from being scratched during use. Still have them today, 30 years later in perfect condition !
"They're... 20 years too late." HAAAHAHAHA!!!. Love it. Comedy gold for a nerd like me.
I was 9 when I made my first PCB in the mid 80's. I look at all these modern DIY PCB etching and prototyping things involving 3D printers, CNC, lasers, etc and laugh. By the time they get their machine set up and calibrated, my board's done. Print, iron, etch and rinse. Done! The method I usually used was not as accurate as the Riston method you're using though. But the Riston step adds on, what, a minute?
I remember using a pen with etch resistant ink to hand draw some of the simpler projects involving 555's and 556's by hand. I remember playing with the settings on the iron to see which ones transferred the toner best without spread. Then, there were the ink-jet and transfer paper experiments. Those were hit or miss as the FeCl would seep through the ink, or eat it right off, if you didn't do things juuuuust right, and hold your tongue at the perfect angle.
And the whole thing can get even faster if you have a t-shirt silk-screen press. But it's only faster if you have a ton of identical PCBs to make, as the set up time - and process for that matter - takes about twice as long.
Yeah. I love keeping up with the latest stuff, but there's no flippin way I'm laying down $5,000 to $10,000 for one of those things.
Quite an interesting process. I am not at this stage yet however it will be soon. Nicely lit video and very informative.... helps prevents accidents when you see the actual process in motion.
Helpful and informative, thank you. In the future, you could use an awl to punch up (up, as to keep the bottom side from lying flat as well, only one correct side down) through the two transparency layers in two opposite corners to keep them aligned with each other.
i use a local digital printing shop, which has machine for printing on plastics, very good resolution on copper, super cheap too. like 1$ per 10x10cm copper plate.
I made PCBs with ferric chloride 40 years age but had to make photo negatives from art work. The software and printer are a real enhancement. Nice video.
Being able to "print" them makes ALL the difference. It's amazing to be able to design on computer and the printer can print things with such incredible detail.
Very nice demonstration of the process. And while I mostly agree with your points, this was a simple single-layer board without any through-hole parts or vias. I've been making home-made boards for my projects with many different methods, and while it's not that hard to make double-sided boards and align them properly, and you can also have soldermask, and silkscreen can be done with the laserprinting/ironing method rather nicely too, but at the end of the day having to drill hundreds of holes kills my enthusiasm. And too top that off, not having plated-through holes means I have to solder components on both sides, and I have to layout my board in such as way as to connect traces to some components which can't be top-soldered on the bottom side only (which means more vias). And vias become a pain in the ass because you have to fit a little bit of wire and solder it on both sides to make the connection (I usually snake a long wire through multiple vias, solder it and then cut the excess off).
I'm not sure where I was going with this :) It sure is fun making your own PCBs (except for all the drilling), but lately I've been leaning more and more to cheap chinese PCB manufacturers when I don't care that much about when I'll get it done.
Btw I prefer hydrochloric acid + hydrogen peroxide for etching. Have you tried it?
My solution was to give up on holes altogether. It's just too easy to do single-layer designs. Select parts that have the pins where you need, reassign pins. It's rather easy to keep most simple designs one layer. I have tried HCl. But, it smells just awful. Ferric Chloride is basically odorless.
"White text" needs their own TH-cam channel.
I was doing this as far as 1998 using overhead transparency film intended for overhead projectors. I'd copy the image from a magazine onto standard paper and touch it up where needed from the photocopier. I'd then use the same photocopier to transfer that image onto the transparency film. The copiers used 'laser' ink toner which are mixtures of iron and a plastic that could be manipulated on the page while it was hot.
Once on the clear transparency sheet the toner could again be transferred onto a clean sheet of copper by simply and directly ironing the transparency sheet (covered by a sheet of paper to stop sticking) onto the copper blank. Just get the up/down side of the sheet correct -lol.
I used a large plastic dish myself with a reclosable airtight lid. just drop the blank into the solution and come back about every 2 hours to check on it and to move it about. The Ferric Chloride solution can etch many boards. It just gets slower each time before it finally needs to be regenerated or disposed of as heavy metal waste. Of course the metal can be recovered but that's another story.
Really uncomfortable seeing the water being wasted like this.
+Prem Kurian Philip Water comes from the rain and is free dumbass.
Not very educated, are you?
I was thinking the same
+Prem Kurian Philip you need to flush the drain with water while rinsing sticky materials off and down the drain. not very edumucated are you?
Really uncomfortable seeing you waste you time being butthurt like this
Why do not you close te water instead letting run for so long. This irritates me.
Watched this to learn how to make my own boards for Arduino projects while high af. When you finally turned the faucet off and it was complete quiet, i look down to take a hit, look up, and you're just staring back. Laughed my ass off!!! Very good video, I'm very happy you didn't post-production cut to make shorter, was good :)
What program do you use to design your circuit board printouts?
I ever used the dry film before, but now I usually print the circuit on the HP premium presentation paper, then do toner transfer to PCB, much faster and easier than the way of dry film.
I started with toner transfer, but, I eventually moved away for it in favor of this method. I sometimes pine for those days, but not frequently.
If you use cold ferric chloride you can leave the PCB floating upside-down on top of it: you won't need to agitate it, scrub it, or anything.
if you will boil FeCl3 to 70 Celcius in a jar you can etch a pcb in a closed jar for about 5-10 min (max) doing anything waiting. It will be perfectly etched.
To peel away the protective plastic from the photo sensitive film, just use a piece of tape, stick it to a corner of the protective film and peel the film away. Much easier than tweezers, teeth or finger nails.
I am sure I used caustic soda, not bicarb, to develop the riston and it only took like 30 seconds. Also best to use a mixture of hydrogen peroxide and hydrocloric acid, can't remember the ratio but it will be on the web, is more environmentally friendly. And make a bubble etching bath (vertical tank) with a tube full of holes at bottom fed with a fish tank air pump, and suspend the PCB vertically with with a piece of plastic ' gutter gaurd' suspended from the lid. Makes it easier.
Everyone's got their own technique
When you have the baking soda at hand, you can use it to neutralize the ferric chloride.
I too would like to see a show in the spirit of Breaking Bad, but instead of making meth they made counterfeit pcbs
Cool. Thanks for the tips. I'm going to try one of those laminators next time.
wonderful, thanks for sharing your experience with us, I've learned a lot, I'm gonna give it a try.
can you leave the links for online shopping of the stuff. I appreciate it.
great video,
I do my PCB basically the same, but I'm a bit more impatient
so I do not coat my PCB on my own I buy pre coated photo positive
and I also just use regular paper because UV light can go trough it so no need to use transparent
and of course a cheap UVA sunlamp is used for 3min instead of getting tan :-)
development and etching is done the same way, but I do not waste them, the chemicals can be used for years
and I wash with alcohol...
I achieve a resolution of 8mil on the PCB which is enough for most SMD
I've just never had good quality with any of the REALLY cheap pre-sensitized boards, and I can't warrant spending more than ~$12/sqft for PCBs. But, I keep hearing others love it, so go make videos! I'd love to see the results.
I like it, more basic, more diy than using pre-sensitized boards. Keep the etchant stored however, people have ferric chloride stored in ceramic pots and keep using it for years. The etched copper solution settles down, leaving fresh solution above for repeated use. The other difference is sponge scrubbing that makes the whole process a lot faster than leaving the board dipped in ferric chloride for an hour or two.
Awesome video. BTW, you can get the protective coating off easier if you sandwich the film between two pieces of scotch tape with the sticky sides facing in. When you pull apart the tape, the protective film will peel off one side or the other with the tape. I fold over the outer ends of the tape to make little "handles" that aren't sticky. That way, it's easy to grab the tape and pull them apart. You can also use another piece of tape to peel the final protective film off the board. Once again, you did an awesome job with the video and I really enjoyed watching you.
+DogByte2012 Neat, I may stick with my current method as it's bascially come off every time first time the last several times now as I'm getting pretty good at it.
Hey, just a thought; have you considered milling the boards out? I'm not sure if your mill there has the needed accuracy, but I know even cheap 3d printers can be fitted with a spindle, and have enough accuracy to mill out boards. It's more consistent, quicker, easier, drills all the vias for you, and it's less messy (except for fiberglass dust) than etching. It's also super easy to do double sided boards on. Then you can just use uv sensitive soldermask paint or sheets, and hit it with some liquid tin. Makes for a really professional looking board.
+DJ027X Less accurate, takes longer, gnarls the surface. Requires a very planar surface. Needs registration for two sides. I have done milling before, and I am never going back.
For those not willing to buy the lamination thing, I heard you can do that step using an iron for clothes
When I do DIY I use presensitized PCBs + developer powder+ muriatic+hydrogen peroxide- ebay and ali has this stuff for low cost- microwaving the liquid for a minute greatly speeds develop and etch- then I used a CNC to drill the holes - now I mostly use iTead
is it safe to put the sollution in a microwave ?
yes- as long as there is no metal in it- it only heats up the muraitic+H2O2 and greatly speeds up and improves the etching.
Your use and advocacy of gloves and goggles has assuaged my tender sensibilities.
it is not allowed to waste chemicals, especially if not neutral. You should also neutralise the soda with lemon juice. Also skip the acetone... expose the board to the lamp again at few centimeters distance and then reuse the soda (if you kept it)
Trying to maintain all of those things precisely is a waste of human time. It is safe, and well within tolerable limits. Have you ever used drain cleaner? /that/ is a SUPER base.
I'm really loving your "washing equipment". Brrrrhahahaaa, thumb up for the art of presentation.
Thank you for this video AND for the one demonstrating the use of Bismuth Tin solderpaste. They are excellent videos which demo cutting edge techniques in a down-to-earth, workmanlike manner. I've subscribed.
Do you experience much bridging while soldering narrow gauge TQFP leads on homebrew PCBs without solder-mask ? What soldering technique do you use for such high density components?
I used to, I need to show how I get around that, but even when, with the new technique, I fail, it's easy to get the bridges out using a soldering iron and some flux. Sometimes, but only sometimes do I need solder wick.
Way back in the 80's (yes, I'm that old), I learned to do prototypes using 30awg wire wrap. I've been doing my projects that way ever since. The packaged logic nowadays lends itself to this method. I never get up from my desk and I can knock out a proto rather quickly. I've done Arduino projects, esp8266 and various other logic boards. Have you ever explored wire wrapping? (Hint: use a nice spring loaded wire stripper tool. It will save your sanity.)
+m t I had my nice wire strippers and everything. I used to do direct-wire and solder... but... PCBs are SO MUCH FASTER AND EASIER.
wire traces just take too much time and attention to create, especially the short ones
Absolutly the most funny PCB Tutorial on TH-cam :-D
funny /annnndddd/ informative???
Would argue that if you have through hole needs, drilling 200 0.4mm holes takes an hour. I've done it too many times. But yes, you can make them at home pretty quick
Not worth it. Placing the parts, hand soldering, all of this is much longer than 4 minutes on the hotplate.
The photo resist we used in the 80's would have came off during all that rubbing. It looks like riston is much tougher.
Very interesting. Totally interested in making my prototypes this way, but being a human with OCD I would spend to much time on trimming and all the other stuff. I'd make a system for rinsing, washing, the whole bit. So I'll probably keep doing what I do that and that is many projects in tandem very slowly. Very slowly, and then print of 200 or 300 boards at a time. I use Myropcb. They haven't let me down yet. Thanks for the vid though. I'll probably play this over in my mind for the next 2 years.
without white text I would get bored, thank you .
Good ,very good but no need to rush things it can be etched also by itself. Sponge its not a good idea since rubbing the pcb, line tracks can be removed.....a few minutes more wouldn't be harm.
Thanks for closing the tap at 6:15.
WOW!!! I have been working with and building circuits on perforated boards (no copper on the boards) and connecting the parts together using wire and solder since I was about ten years old I am now 54 so I need to more about the printer and software I need to do this so again WOW!!!!!!. I will check amazon.com but feed back from you on this would be great.
there's a ton out there for it. I use KiCad for my design program... I have a number of videos of me showing how I do it. Recently with my livestream, I designed a PCB in real time, printed it and tested it.
the way you did this video makes it look very easy process. i really like your video. right to the point. just one more thing, it would be awesome if you can list all chemicals, devices and stuff like that which is needed in simple 123 text or with a picture. hope you can do that.
thanks again, really like it. :)
thumps up & subbed
+Applied Electronics I think I will try to do that more in the future... The biggest problem is making sure that the sources for materials are still available. So much of what I buy is off ebay.
+CNLohr that's why it's important to know what we need in total before we start doing. it would be very appreciated if you can provide that all in one.
thanka again for the afford. ;)
If you don't mind compiling the list based on the video, I will edit the description and add it. I'm sorry that my life is so crazy right now.
+CNLohr thanks bro.
take care 👍
Applied Electronics in
Is it mandatory to waste tremendous amounts of water by letting the tap open for nothing ?
Ecology is a geographically sensitive thing. There's an unlimited quantity of fresh water in Maryland. We take extra long showers, leave it running on our lawns, have extra water usage toilets. You should do whatever you can to live somewhere where water is not a precious resource, instead of using what little the area has left.
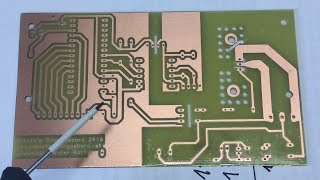
24:09 Take the top pad (by the "1") for example -- why do many circuit boards have such a thin boarder between the solder area and conductive "background"? Why not take off another mm of Cu and have more isolated pads across the board?
If it's insulated, that's good enough. Having more copper makes it easier to solder.
That'll teach you using a proper workbench :-)
Thanks for the video. Contains a couple of aspects to the art of producing homemade PCB's.
I didn't know that you can remove the second layer from the resist before applying the oil. Nice mess!
Laundry in the machine.... love it... looks like my garage...
fishing out the tweezers from the washing machine lid is part of the pcb making process, lol
Nice one. Now i can just point people at this vid and save my breath :)
"omg I'm gonna buy/make/kickstart an amazing pcb blah blah blah it's only $42*10x¹² including shipping"
meanwhile, in a dark room, an old man is snoozing off sound of the ticking of the timer on a small used sunlamp picked for a dollar, strange smells brewing in the background....
there have to be 3 or 4 processes I've used over the years, I don't find any of them much faster or better than the others when you get used to them but *none* of them unbearably long or require that much skill after a couple of runs. Like you, I have no idea what the fuss is about, other than an excuse to spend crazy money on a CNC-like robogadget :/
Fair enough - if you have several different people making unique boards like in a hackspace, but even then duplicate boards will take a linearly long time to produce.
Since SMD became mainstream the drilling step is long gone for most boards. I can't even remember where my bench PCB drill is these days.
i really love what u do
this is the longest process i have seen so far
Have you used the POSITIV 20 fotoresist spray by german KONTAKT CHEMIE ?
I used that already in the 80s and found it is still in shops.
Instead of laminating that riston on you spray a coat of POSITIV 20 and let it dry.
About the same process after that.
+gunnarMyTube I actually tried getting it but was unable to source it. Can you help me find it?
+CNLohr I picked up two cans recently at a sale at ELFA, a swedish electronics giant. www.elfa.se/sv/fotoresist-positiv-spray-200-ml-kontakt-chemie-positiv-20-nordic/p/18021933
I see them on EBay also, this seems a good source, ships international www.ebay.com/itm/POSITIV-20-Kontakt-Chemie-200-ml-Fotolack-Foto-Positiv-Lack-Fotoresist-/281637015675
+gunnarMyTube Just like every source I've ever seen, the POSITIVely will not ship to the united states.
I am surprised you didn't make your own laminator from a junk laser printer. I have old uv film and it seems too old, it comes out like poop with bubbles and inconsistency.
I have been working on doing a direct laser to pcb print, was using brother printer, but then I got a free copy machine, seems it might be easier. Have you thought of doing this?
At this point, my 3 weeks was up and my boards showed up from China, so less interested, but I need other boards. thanks
It's all a tumultuous mess. So ethereal. If you blink you'll miss some real gems.
Interesting everyone else say baking soda won't work. The oil was new to me as well.
Strongly disagree with them when using riston. I still like it better than their developer.
3 basic questions:
Is the riston resist film positive or negative (I'm guessing positive)?
Does baking soda do the same job as "riston dry film developer"?
What is the wattage of the grow light?
and WTF is 3-in-1 oil ... is it just an ordinary light machine oil?
Riston is negative. Anywhere there is black, no light gets through and does not cure the riston. All uncured riston is washed away in the baking soda bath and will be etched away leaving no copper.
Yes! It does. So, the dry film developer does not eat away the exposed traces as bad as baking soda, but, you can get more control over the process if you use baking soda, so when you're starting, I recommend their dry film developer.
120 W or 160 W can't remember.
Yes. 3-in-1 is just light machine oil.
thanks. making artwork negatives is such a PITA though when I can print positives with a laser from the pcb software.
If you want to print many designs on a single sheet and have multiple copies, you have to put it together externally. It literally takes an extra 3-4 minutes to do that.
the glas dish can go back to the kitchen before someone notes it. no need to shrub wit the sponge just agitate the liquid.
I used to just agitate. Then, I got impatient and found out I could do it faster this way.
You still have to drill it though. Thanks for the Riston tip, I've heard of UV sensitive spray but not of sticky film. I'll give it a try
papalevies Where do you get the spray, I have been unable to procure it. I've always wanted to try it!
And, I don't drill. Everything I use is surface mount.
@@CNLohr Greetings from Germany. That was a more European thing, back in the time.
The company "Kontakt Chemie" (bought by CRC) sold their POSITIV 20 (and is available on Amazon today) spray. There are other brand names and companies of course (search for "Fotokopierlack").
But are you sure? With a foil you always have known layer thickness. You know yourself that the exposure time (in your video 4 minutes 30) is very important for sharp details of the PCB! Without special techniques (rotary application devices, like in waver production or precision droppers) you can not guarantee the same layer thickness. In a quick hobby setting, tolerances of 50-100% thickness will just make repeatability and precision work impossible. Maybe back in the time with 20mil thick detail and through-hole PCBs that wasn't a big problem, but with SMT? I don't think you should waste your time with that:)
Also a 200ml can is 25€ ... Even back in the day we (and hobbyists) got really cheap access to already photopositive coated base material (meaning, your step with applying the foil wasn't even needed in our region), so that photo-laquer was something that really "gross motor skilled people" used (meaning biiiiig copper contraptions, maybe not even for electronics), for example to make front panels.
Anyways, there is nothing wrong with trying such techniques out yourself. Learning is always wonderful. I tried that spray too back in the day and this was my somewhat not so good experience, that I shared here. The mileage of other may vary. Thank you very much for your videos from years ago and today. Keep up etching that copper away and what not all strange things and have fun making. Big thanks for sharing your experience and ideas, CNLohr!:)
P.S.: NaOH will dramatically speed up your development time. But mix the developer FIRST ... or you have a half overdeveloped PCB:)
P.S.S.: I am even more impatient than you. I've done and do etching in seconds with HCL and H2O2 :P (Very dangerous and ... Chlorine gas ...). Who cares. Nosebleeds caused by chlorine gas are nothing special for us women in everyday life (just joking:P).
That's a very nice speed suit you are wearing. Did you get that at Enzo's Tailoring?
A quick glance at the comments in this video made me double-check we're not living on Arrakis.
Correct. Maryland. I waste water like this daily and my bill is only $15/mo. The county I live in practically begs us to use more.
What happened to Crow and Servo after the cancellation? I guess we now know.
What?
can use water tatto also very easy to apply on pcb...
heat can demage resist. you should add some alignment crosses in your drawings.
It can, at least this resist! Not the chinese goop method, though.
White text: would you like to meet up for coffee? I have sponges.
Hey +CNLohr to get the photosensitive film off you are mentioning that you use Baking soda, isn't this washing soda you are using? I recently gave it a try with normal baking soda and it didn't do anything to the dry film.
+lyzux Baking soda. But, I always use hot water from the tap and a sponge. Water being hot is key!
Did you really need to let the water running all that time? I couldn´t focus in what you said thinking in all that wasting while there are people and animals dying of thirst
+Johnny Sanchez this is what I was thinking
+Johnny Sanchez Me too. I think everybody agree with you buddy :)
+Johnny Sanchez I'd be more worried about his gas/electric bill for that hot water - if I was worried at all.
Turning a tap on and leaving it for a few seconds longer doesn't mean there's less water to use, it's all recycled and reused. Little thing called the Water Cycle.
I came just to write about all this waste and found you comment. That's it! That lot of waste (paper, water, energy) to make a single little pcb made me nervous.
You think this is bad? You should see what it actually takes industrially!
so why did you waste so much water
+Baba Oyuncular Mekanı Quit bitching about wasting water. He was doing a demonstration and trying to not get confused while doing so. You can easily loose track of whats going on when doing so.
Seriously you're defending all the waste based on losing track while being focused on a shitty pcb creation, which has been told thousands of times? How would you feel when your super focused pilot loses track of whats going on? Stop justifying idiots.
Actually, no water is being wasted here at all. The water comes out of the river, is treated with a bit of UV light and ozone, possibly chlorine, and then pumped into the industries and homes. The drain then goes into the treatment where it's filtered, separated, skimmed, microbially and chemically treated, and goes down into the same river again, or maybe back into fresh water supply. But the more clean water you pour down, the less energy and chemicals the wastewater treatment takes, they actually perform measurements of the amount needed at every step.
It's all in your water bill, and if the price is low, you know the amount of energy and material it all takes is absolutely benign. And it's not like by using water just downstream of a mountain in the States or Europe somehow reduces the amount of water available in a random distant desert.
im more worried about 3rd world countries mass burning electronics to salvage metals, releasing toxic stuff than the waste of chemicals being used to treat water.
WHY IS IT ANY OF YOUR GODDAM BUSINESS?!!
Aparrently (I know nothing, I'm just putting this here for comment) Washing Soda (Sodium Carbonate) is better than Baking Soda (Sodium Bicarbontate)
You leaving on the tap bothers me soooooo much
IF YOU'RE SO DAM CONCERNED ABOUT WATER- GO PISS UP A ROPE!!!
Strawberry paper jam on top of the washer? And noone's mentioned this? I'd never live it down.
does that film cure with uv leds? I already have something like a 20w uvled for curing phone sscreen glass to display bonds. reason I ask is, LEDs are more narrow band than more traditional sources and not everything designed pre common access to cheap leds cures with UV LEDs
7:57 Peel OFF the film? It looks like you're just removing the surrounding film, and leaving the area that's adhered to there board. No?
10:55 Why are you waiting until the 10 minute mark? Just for convenient start-time?
You should create a channel just for White Text. At least he doesn't waste water!!!!
I suppose one can use one of those boards that are already coated with copper and photosensitive material?
George Tsiros You can get cheap copper PCB material off ebay 70x100mm for
I live in Greece, I can't order nothing from ebay anymore (capital controls), plus, I have easier access to these protoboards... how do you call them anyway? Those that are plexi with copper and photoresist on them? Anyway, I wanted to reach out to you. Greetings from an electronics hobbyist physicist from Greece. Rock on.
Why you are using ferric chloride instead of B327 (sodium persulfate)? As far as I know ferric chloride is more unpredictable, I mean your signal traces can be etched more than you need (I don't know how to describe it in english, more "bitten").
Radosław Karasiński I've never tried sodium persulfate, but every other etchant I've tried so far just wasn't as speedy and even as Ferric chloride. After googling sodium persulfate, people are saying "15 minutes" or times like that. Is that accurate? Or is it faster? If I have to wait 15 minutes for the etch process, there's no way that's happening.
CNLohr Yeah, it's pretty accurate if you are using heater and mix it all time. I was using ferric chloride in the beginning of my PCB production, but I don't have any space in home where I can do so messy stuff. B327 don't left any dirt (almost) and don't eat my traces (ferric chloride was doing that in my case).
I may give this a shot some time, but probably not until I get near the end of this fecl.
Grow light? Is that just an incandescent light, or you have PSU/ballast for it hidden somewhere we can't see it?
Don't you need ammounts of UV light that would kill "vegetables"?
I use a UV LED now, but normally, it's used for reptiles I think.
Yeah the old school way we did it back in 80's but it still works… Laquer Thiner is the most toxic deadly flamable chemical used in this video. At least Acetone is just one chemical.
Did anyone try to 3d print a single layer of plastic as mask on those boards and then etch it?
can a clothes iron be used in place of the laminator?
Yes! But it takes more practice to get right.
CNLohr thanks! I’ll keep that in mind if I ever try this
Yeah.... i guess i wouldn't want any PCB made from this guy... but did show how easy and careless PCB can be made...
If it worked, that means I could have been more careless and have it still work. Gotta be speedy!
just let it float on ferric chloride solution copper side downwards. copper ions will go down by themselves
I did notice that in one of my early videos. I did a time lapse of it pointing down.
one question :
Why do you need a laundry machine ?
What else am I going to do with the copious amounts of water that come from the ground and sky?
you DO have a point, there ... :)
I mean this is great and all but have fun trying to use multiple layers and vias
Why would you?
Does the lack of solder mask make a big difference when surface mounting components?
Server Stud It "should" but I really haven't noticed any when it comes to relatively fresh paste.
I have not done much surface mount but I have seen a method where the solder is just run in a line and the individual pins suck up the paste and seperate the connections (slight clean up is often required). Is this a method you have worked with and if so did you run into issues with it?
Server Stud
That sounds like the method I use. And yes, I frequently need to take an iron to clean up pins, especially on 0.5mm bsc parts.
Pardon me but I think that toner trasfer method would be much faster. I made more than few with IC and SMD components. As I can see You already have laser printer, only additional things you need are inkjet photo paper and iron (for ironing clothes).
I used to do toner transfer for a long time, but, I did eventually have to abandon it for this. Just can't keep consistency and quality with complicated designs.
nope, never heard of it. any good videos on it?
Watched video. Looks amazing. I will NEED to try this.
The bigger problem I have for me is glass PCBs, it's really hard to get the coplanarity good enough with them to do the hot method, which is what got me to jump ship initially for the riston method. That and all the pitting.
there seems to be a solution for the pitting as well. It's called TRF paper. You need to run this trough the laminator to put a waxy layer on top of the toner. The wax doesn't stick to the bare copper at all but it seems to close up the small cracks and pits in the toner nicely.
The printer might be attractive to a prospective owner of a PCB printing business, because it could be operated by less-skilled / lower-paid employees who wouldn't have to understand or control the details of the process.
Hey just curious on the wattage UV lamp you are using? Also what is the dpi capability of your printer? I have been using printer toner method but that combined with my printer doesn't have the accuracy I need for a QFN32 package.
I believe it is a 120Wer.
I know this is an old video so you may not be monitoring the comments on it, but I'm wondering which Riston you are are using? There is FX and MX and various sub products within those lines. I'm guessing FX, but if so, FX250, FX950, or FX2000?
Oh my! I actually have no idea. I believe it is whichever one has the worst feature size because it's the easiest to use. But, I don't know for sure. I got it from a shady eastern european provider.
Does an inkjet really work without smearing on the board? My understanding is that you need a laser printer. I hope I'm wrong.
I've never tried but other people did get that working.
That water sink drives me crazy.
Does this save much for production runs? I found a place I can get them in bulk for 67 cents each. (2"x3", 2 layer, 100 boards) But if this can produce the same for much less cost...
Absolutely not. This is geared for "I need some boards now." Not "I'm going to do a production run and have two weeks."
I've made over 100 "I need some boards now" version PCB's, but now there are various online services that supply a PCB board the next day with a minor extra fee, which is quite convenient considering the time and mess you can avoid.
Thanks for the video... Just curious if what is a limit how thin the traces can be ?
I usually do 12 mil... but I have gotten functional boards as low as 8 mil
OK , cool Thanks for the answer . All MY Best
What about getting some Sodium-Hydroxide and less water as a developer, then you can lean back and dont need to rub and mix like crazy.
I have not tried sodium hydroxide, but I
I dont mean the etchant, I mean the developer.
Oh I was thing sodium persulfate. NaOH is a resist remover.
Yeah, just keep the water running. There's more where that came from...
Kenneth Tan I live in Baltimore County, Maryland. We have basically unlimited fresh water.
I like your work, but with a good concience I think that's not funny.
No, I mean really. It's basically like well water. I use a large amount to water my plants outside every day. By continually running water down the drain it helps make sure the remainder of the chemicals are fully flushed.
CNLohr Ok, that one was funny.
But now I'm going on with studying some of your video's.
Why don't you make the bassment your oun work shop, it is better than working next to the washing matchine. Good job👍👍👍.
Because I already have the utility sink next to the washing machine.
@@CNLohr hahahaha, you are doing a great job good luck mate.
I love your videos my friend. Please, keep 'em coming.
hi what the name of the ploy A4 you printed on to called me use gloss paper i am a bit out of date
You just have to try to do a couple til you find the right one... There's no one brand I am using that is still available.
NO. You can't use an inkjet. The ink on a laser printer is a polymer. The ink on an inkjet is water-based. If you're informing people, inform them correctly.
Meu DEUS, que desperdício de água, poderia ao menos fechar a torneira quando não estiver usando.
Que aflição, toda essa água desperdiçada.
Quero lembrar que não estou aqui degradando a imagem do amigo, que está a nos ensinar a desenvolver uma PCI, mas sim, conscientizando para conservação do nosso planeta.
Camarada, ai na sua área a agua deve ser abundante em, esqueceu a torneira aberta, ho desperdício de agua!!! fora isso, agradeço pelo video!!!
Wasting water, working with a laminator connected to AC next to the running water. Damn
If it's to code, that outlet will be gfci protected so shouldn't be an issue.