Thanks for watching guys, Don’t forget to Subscribe! Please check description for links to all the parts! These are affiliate links so I do get a small commission if you purchase anything thru my link. AT NO EXTRA COST TO YOU! It’s a great way to support the channel. I have also done a rear storage system build for a 5th Gen 4runner! Video 👇🏻👇🏻 th-cam.com/video/aIin2rq508A/w-d-xo.html Patches and Stickers 👇🏻👇🏻 Adv4x4.us Follow me on Instagram 👇🏻👇🏻 instagram.com/adv.4x4?r=nametag
Thank you! That was the original plan. But finding a screw exactly the right length that would counter sink flush without bottoming out on the 80/20 extrusion first proved to be almost impossible. I did experiment with a few sizes. Looking back now I should have just drilled a small recess in the 80/20 to allow me to use a longer screw without it bottoming out before becoming flush. Sometimes you gotta experiment and make mistakes to learn!
This was a nice DIY project. Really nice. The 8020 and Rhino finish give a commercial look. I know this was done a few years ago. I hope your drawers have held up. Butting boards and nails make for pretty weak corner joint. At least use some glue. Pocket hole screws are easy and would really strengthen the drawer boxes. It would be nice to see a follow up where you upped your box joinery.
I would pay good money for this lol I’ve been wanting to do a 60% rear seat delete to build a platform in the back seat, and like the idea of using extruded aluminum. Nice work, man.
Thanks for the great build and ideas, you forgot to give an estimate of how much, I have to assume that the aluminum frame with all the dedicated hardware is not cheap but it probably is very strong, I don't know what you did for the back portion but I would have done a similar flap like the one in the front that is easy to open and close, that also makes a very nice space for a quick nap is you are travelling and don't want to set up a tent or something like that , that back space is also perfect to set up a battery with a bms and inverter, all nicely tucked in and out of sight, a couple of solar panels and you are a rolling power station. If you could post a PDF with the plans and materials would be of great help. Shout out to your sensei he taught you well, cheers from Canada.
Great job!!! Extremely impressive and looks awesome. I’m curious why you didn’t want to make those finishing Allen heads flush or countersunk so you have a smooth surface to stir stuff on. ✌🏽
When using 80/20 extrusion, it may be an idea to look into ABS haircell, or HDPE plastic sheeting. It is strong, lighter than wood, waterproof and usually cheaper than ply. Just a thought!!!
Really well done. I am glad I stumbled across your video. I did a sprinter build for a production van awhile back and now I am planning on building an overland storage system for the bed of my truck. This is going to help tremendously.
Amazing. Any chance you could get a quick measurement between the back of the drawer system and the back of your cab? I'm thinking about dropping batteries or a water tank in there.
Watching the video, the one idea I have is to hinge the top so it folds back could also do it 50/50 so you dont have to raise the whole top, make for easier access to the factory storage area so that the drawers dont have to be completely removed to get access
Yeah that would work great! I just almost never need the things under there, but same time I wouldn’t leave home without them. So removing the drawer to gain access works well for me!
This is such a great build. Lots of inspiration for me here. I want to make the same style of setup, for my access cab long bed 2nd gen. Thanks for the video!
I have watched tons of videos on DIY options and this looks amazing!! Do you have a rough idea of total cost by chance? I know it's been awhile but trying to figure out if it's in budget. Thank you 🙂
Great build and so detailed. I am going to do this in my Tacoma. Question; did you simply send your drawings to TNutz so they could work the material list etc or did you have to do your own cut list etc?
Excellent build! I want to work with 80/20 in the bed buildout of my camper, so this was really helpful. Did you do a video of the sound deadening application? I need to do that too, and I'm not sure how that's going to go. Thanks!
I experimented with that idea on a scrap piece of wood but the particular plywood I was using would just chip on the edges of the hole and not provide a clean countersink. If you can get your hands on Baltic birch it will countersink without issues. I could not find any local
Exact build i kind of want to do for my 4runner just double drawer pull out. Still trying to figure out how to order through Tnutz like you did. But love this build.
Nice job...Really cool build...My son wants to do this to his Ford F150 in a few months...I've been elected to do the design with my CAD software...been reaching for all the hardware and can't figure out where you purchased those square end blocks that attaches the rails together with screws...Can you help me out on this?
I experimented with that idea. Unfortunately the wood couldn’t hold up to the counter sink. It would splinter at the edges. Need Baltic birch to pull that off which isn’t available near me easily.
Funny you mention that! I bought a new thing of wood glue and everything for this project with that in mind. In the midst of building/filming it was a step I completely forgot about haha.
Awesome build. I think I’ll do the same for my Hilux….poor mother in law 😂. I think the top plate I will just fix with a few alignment pins as I don’t think it needs to be actually screwed down. Then I’ll have access to all the goodies below
On the latches section. Can you give the exact or rough estimate how far down from the top you started the router? Looks like half an inch to me but I’m just guessing🤷🏼♂️ About to undergo this for my own truck but I have the electric powered sliding back window so we’ll see how that works out. Awesome video man the finished product looks even better than goose gear
Thank you man! I’m not near the truck to get an exact measurement just yet but I believe you are correct it’s about 1/2”. I did a test cut on scrap wood to see how far down I needed to mount it. I’d suggest doing the same!
This is awesome!!! Thanks.. I want to build a drawer system for my Land Cruiser.. did TNutz help in any way on the design or this was all through CAD? Or just good old paper??
Hey man was thinking of do a one seat delete in my Tacoma and putting in a maybe a fridge and stack 3-5 drawers on top of it would you think it’s a good idea to use this material for that my not for the fridge but for the drawers on top of the fridge
Space is rather limited height wise back there this single drawer plus a 12v fridge above it while still being able to gain access to it is about all that will fit unfortunately
What psi do you shoot the Raptor? It seems you hold the gun fairly close to the work piece so I’m guessing 30-40psi? Also your liner looked “wet” still after it cured (not a bad thing). How many coats do you use? Do you find the craftsman compressor has a hard time keeping up?
I don’t recall exactly but yes I think around that PSI. I usually do 2 coats minimum! Compressor seems to work I’m sure the coating would be more consistent with a larger compressor but I’ve raptor lined a ton of stuff with that little compressor. No complaints from me!
I didn't know a seat delete excited until someone on a forum said something about goose, well, compared to that, your build is absolutely top tier. Would width dimensions you have there fit an access cab? I know depth and height are different, but most things should be similarish right?
Hey man! Not too sure about that. I think the limiting factor on an access cab would be how far you keep your seats back as well as how much that rear door sticks out once it’s open. When the drawer is extended it will have to clear the door panel which is pretty thick on the opened “rear” door
The drawers when fully extended have release tabs that let you completely remove them from the module to gain access below. I keep spare parts in my cubby storage so things I in theory won’t need but wouldn’t leave home without lol
I did the m6x1.0x 25mm tap and ordered their screws separately. They actually include all the screws you need automatically and I didn’t know. So I should have got them tapped to 1/4 20 x 1”
Adv4x4 okay awesome. Yeah I looked at the angle brackets and they had the screws included. Thanks for this video. There’s a lot out there that are just poorly made. Love how you got so in depth with it and also making it look so clean
No way for me to measure that unfortunately but never worried about putting things on top of it. It can handle far more weight then I can fit in the back seat 👌🏼
I haven’t figured exact numbers yet. Especially since I bought more then I needed when figuring out what wood I wanted to use. But I estimate about $500 or less.
Amazing job, looks as good as Goose Gear offerings. How much do you think it cost you to put this together? You inspired me to buy a welder and start working on making my own trailer. Thank you for all your hard work!
Thank you! I would say it cost less than 500. So in comparison to a premade unit, lots Of money saved. Also that’s awesome about the trailer build! It’s a great skill to learn anyways and a ton of fun.
He has had one made out of wood for years, hes also talked about an 80/20 system for years considering thats what goose gear ect uses. Nothing wrong with wanting to make something nice for yourself.
Thanks Russell! @j coats My wood version served its purpose for a long time. Wanted to make a nicer version of it and 80/20 was a lot of fun to build with!


Thanks for watching guys, Don’t forget to Subscribe!
Please check description for links to all the parts!
These are affiliate links so I do get a small commission if you purchase anything thru my link. AT NO EXTRA COST TO YOU! It’s a great way to support the channel.
I have also done a rear storage system build for a 5th Gen 4runner!
Video 👇🏻👇🏻
th-cam.com/video/aIin2rq508A/w-d-xo.html
Patches and Stickers 👇🏻👇🏻
Adv4x4.us
Follow me on Instagram 👇🏻👇🏻
instagram.com/adv.4x4?r=nametag
Are you kidding me, what a professional job you did, great work
Thank you James!
This was probably one of the best 80/20 cabinet assembly videos I have seen, nice job!👍
Excellent build! Only change would be those top screws- I'd have used countersunk screws... That way they're flush
Thank you! That was the original plan. But finding a screw exactly the right length that would counter sink flush without bottoming out on the 80/20 extrusion first proved to be almost impossible. I did experiment with a few sizes. Looking back now I should have just drilled a small recess in the 80/20 to allow me to use a longer screw without it bottoming out before becoming flush.
Sometimes you gotta experiment and make mistakes to learn!
Such a detailed video. Absolutely amazing work. It drives me nuts that you didn’t countersink the allen head bolts up top. Hahah
Best rear seat delete Ive seen. Love it!
Appreciate it man!
Very nice DIY build! For me i would add the seat on top in case for 3rd passenger with the drawer underneath.
Another great build video! Awesome job bud! Damn i learn a bunch from your step by step instructions. You explain everything you do so well. Thanks!
Thanks man I appreciate it! Glad you enjoy the videos so much 👍🏼
This was a nice DIY project. Really nice. The 8020 and Rhino finish give a commercial look.
I know this was done a few years ago. I hope your drawers have held up. Butting boards and nails make for pretty weak corner joint. At least use some glue. Pocket hole screws are easy and would really strengthen the drawer boxes. It would be nice to see a follow up where you upped your box joinery.
This project is amazing! Well done sir. Thank you so very much for making this video.
So glad I found this. DIY goose-gear absolutely love it. 👌🏻
I would pay good money for this lol I’ve been wanting to do a 60% rear seat delete to build a platform in the back seat, and like the idea of using extruded aluminum. Nice work, man.
Appreciate it man!! Hope it gives you some good ideas for your build
I'm in the same boat wanna do the 60 but no way I'm paying $600 for it 😂😂 Time to build ha
Thanks for the great build and ideas, you forgot to give an estimate of how much, I have to assume that the aluminum frame with all the dedicated hardware is not cheap but it probably is very strong, I don't know what you did for the back portion but I would have done a similar flap like the one in the front that is easy to open and close, that also makes a very nice space for a quick nap is you are travelling and don't want to set up a tent or something like that , that back space is also perfect to set up a battery with a bms and inverter, all nicely tucked in and out of sight, a couple of solar panels and you are a rolling power station.
If you could post a PDF with the plans and materials would be of great help.
Shout out to your sensei he taught you well, cheers from Canada.
I'm a little late to the party, but I just ordered all the material to make this for my tacoma.
Awesome man! Goodluck on your build!
Love it! Still torn if i want to do a rear seat delete on my 4Runner, this makes me want to😂 great build and great video.
Thanks man! I haven’t regretted running my old seat delete at all. Was happy to finally upgrade it!
Great job!!! Extremely impressive and looks awesome.
I’m curious why you didn’t want to make those finishing Allen heads flush or countersunk so you have a smooth surface to stir stuff on.
✌🏽
When using 80/20 extrusion, it may be an idea to look into ABS haircell, or HDPE plastic sheeting. It is strong, lighter than wood, waterproof and usually cheaper than ply. Just a thought!!!
Which is stronger? Or what’s the difference in the two?
Really well done. I am glad I stumbled across your video. I did a sprinter build for a production van awhile back and now I am planning on building an overland storage system for the bed of my truck. This is going to help tremendously.
Glad it helped man! I also did a build on the rear of a 4Runner. Video is on the channel!
Amazing. Any chance you could get a quick measurement between the back of the drawer system and the back of your cab? I'm thinking about dropping batteries or a water tank in there.
Watching the video, the one idea I have is to hinge the top so it folds back could also do it 50/50 so you dont have to raise the whole top, make for easier access to the factory storage area so that the drawers dont have to be completely removed to get access
Yeah that would work great! I just almost never need the things under there, but same time I wouldn’t leave home without them. So removing the drawer to gain access works well for me!
Awesome work Buddy. Super clean work and professional finish. Enjoyed this project very much.
Thanks Mike! I’m glad I took my time with the build. Seemed to pay off 👍🏼
This is such a great build. Lots of inspiration for me here. I want to make the same style of setup, for my access cab long bed 2nd gen. Thanks for the video!
Appreciate you watching man! Have fun with the build 80/20 extrusion is awesome stuff.
I have watched tons of videos on DIY options and this looks amazing!! Do you have a rough idea of total cost by chance? I know it's been awhile but trying to figure out if it's in budget. Thank you 🙂
That turned out very nice. I like those drawer slides.
Thank you! I’m very happy with the outcome as well.
Great build! Your step by step vid is very helpful!
Glad it was helpful!
Great build and so detailed. I am going to do this in my Tacoma. Question; did you simply send your drawings to TNutz so they could work the material list etc or did you have to do your own cut list etc?
On a larger scale, this could be a good design for a solo bed platform build for an suv
I like the build. Very nice and well done. Gives me ideas for my rear seat area.
Thanks Chris! It’s very handy to have the storage space back there
Excellent build! I want to work with 80/20 in the bed buildout of my camper, so this was really helpful. Did you do a video of the sound deadening application? I need to do that too, and I'm not sure how that's going to go. Thanks!
Yes I did!
th-cam.com/video/EBFRtALdhy4/w-d-xo.htmlsi=O-FfXbNDhQtz5DIV
Nice I'm going to countersink the bolts on the top piece.
I experimented with that idea on a scrap piece of wood but the particular plywood I was using would just chip on the edges of the hole and not provide a clean countersink. If you can get your hands on Baltic birch it will countersink without issues. I could not find any local
Exact build i kind of want to do for my 4runner just double drawer pull out. Still trying to figure out how to order through Tnutz like you did. But love this build.
Nice!! I also did a build for the rear of my wife’s t4r in the cargo area. There’s a video on the channel for it!
@@Adv4x4 just watched it hah.
Nice build! Had you considered counter sinking the bolts on the top surfaces?
Nice job...Really cool build...My son wants to do this to his Ford F150 in a few months...I've been elected to do the design with my CAD software...been reaching for all the hardware and can't figure out where you purchased those square end blocks that attaches the rails together with screws...Can you help me out on this?
Great build! Really clean DIY! It would interesting to know the final cost of the project!
Thanks! I believe it was around $600
Sick. Need something like this for a maverick
It’s like playing with legos! Possibilities are endless.
Nice. I would’ve countersunk those hex screws.
I experimented with that idea. Unfortunately the wood couldn’t hold up to the counter sink. It would splinter at the edges. Need Baltic birch to pull that off which isn’t available near me easily.
Nice work !
Nice Build! My only concern is the drawer life, the nails will work loose after a bit. Glue them first then nail them. But it came out great.
Funny you mention that! I bought a new thing of wood glue and everything for this project with that in mind. In the midst of building/filming it was a step I completely forgot about haha.
Those 1x1 are 3-4 dollars a foot, that seems insanely expensive to me but I could be wrong since this material is new to me
Dude your on this was legit!!!!
Thanks man!
Dude!!! Killer job!
Thanks man!
Nice work. Getting ready to do a build. Gave me great ideas.
Awesome glad to hear! Goodluck!
Awesome build. I think I’ll do the same for my Hilux….poor mother in law 😂. I think the top plate I will just fix with a few alignment pins as I don’t think it needs to be actually screwed down. Then I’ll have access to all the goodies below
Thanks man! Alignment pins should work well as long as the wood isn’t warped. Also may vibrate and make noise on bumpy roads 👍🏼
@@Adv4x4 definitely. 3/4 inch - heavy and flat. And something rubberized to kill the vibes 😂. Saludos from Venezuela
On the latches section. Can you give the exact or rough estimate how far down from the top you started the router? Looks like half an inch to me but I’m just guessing🤷🏼♂️
About to undergo this for my own truck but I have the electric powered sliding back window so we’ll see how that works out. Awesome video man the finished product looks even better than goose gear
Thank you man! I’m not near the truck to get an exact measurement just yet but I believe you are correct it’s about 1/2”. I did a test cut on scrap wood to see how far down I needed to mount it. I’d suggest doing the same!
This is awesome!!! Thanks.. I want to build a drawer system for my Land Cruiser.. did TNutz help in any way on the design or this was all through CAD? Or just good old paper??
I just sketched it on paper! 100% my design from scratch. I actually may be making a drawer system for the back of my 80 series here in the future!
Very impressive. Thank you!
Thanks for watching!
You did a great job.
Thank you Sir!
Hey man was thinking of do a one seat delete in my Tacoma and putting in a maybe a fridge and stack 3-5 drawers on top of it would you think it’s a good idea to use this material for that my not for the fridge but for the drawers on top of the fridge
Space is rather limited height wise back there this single drawer plus a 12v fridge above it while still being able to gain access to it is about all that will fit unfortunately
Love the build and currently working on a version for my truck. Question, what sealer did you use to seal the wood drawers?
I generally use a wipe on sealer from Watco!
Beautiful job.
Appreciate it!
very nice build.
What psi do you shoot the Raptor? It seems you hold the gun fairly close to the work piece so I’m guessing 30-40psi? Also your liner looked “wet” still after it cured (not a bad thing). How many coats do you use? Do you find the craftsman compressor has a hard time keeping up?
I don’t recall exactly but yes I think around that PSI. I usually do 2 coats minimum! Compressor seems to work I’m sure the coating would be more consistent with a larger compressor but I’ve raptor lined a ton of stuff with that little compressor. No complaints from me!
Smart build!! 😍
Thank you!
Wow 😯! Great job👏🏼👏🏼👏🏼👏🏼
Thank you!
Great build, thanks for sharing
Thanks for watching!
I didn't know a seat delete excited until someone on a forum said something about goose, well, compared to that, your build is absolutely top tier. Would width dimensions you have there fit an access cab? I know depth and height are different, but most things should be similarish right?
Hey man! Not too sure about that. I think the limiting factor on an access cab would be how far you keep your seats back as well as how much that rear door sticks out once it’s open.
When the drawer is extended it will have to clear the door panel which is pretty thick on the opened “rear” door
@@Adv4x4 gotcha, thanks for the heads up! Hope much did the build cost with the aluminum sans wood and drawers and pulls, just the aluminum and bits?
I don’t remember exactly but total cost was about $600 so I’d say roughly $400 for the aluminum stuff?
@@Adv4x4 oh heck yea!! It looks worth 1500 easy
I’ve also built a rear storage for t4r videos on my channel for that as well
What diameter and length of screws sir ?
Was this for a 3rd gen?
Clean and clever
Thank you!
Great video
Thanks!
Note really considering this option verses Goose great for my Bronco set up. Seems far more logical than 5500$ 🤷🏼♂️
How do you access the factory cubby storage?
The drawers when fully extended have release tabs that let you completely remove them from the module to gain access below. I keep spare parts in my cubby storage so things I in theory won’t need but wouldn’t leave home without lol
So you reach through the draw to access?
The drawer is completely out of the frame at this point so you reach into the remaining opening to grab things out of the cubby
what size bolts did you use and what was the tap size?
I did the m6x1.0x 25mm tap and ordered their screws separately.
They actually include all the screws you need automatically and I didn’t know. So I should have got them tapped to 1/4 20 x 1”
Adv4x4 okay awesome. Yeah I looked at the angle brackets and they had the screws included. Thanks for this video. There’s a lot out there that are just poorly made. Love how you got so in depth with it and also making it look so clean
Thanks for watching Man! Glad it was helpful.
nice work
Thank you!
When you order it from Tnutz? did you use 10 or 15 series extrusion?
10 series 👍🏼
@Adv4x4. Do these dimensions work for a 3rd gen?
Yes!
Wish you could build me one !
Possibly could depending on your location! I’m located in Virginia
What did you do for sound deadening?
Have not gotten that far just yet due to other projects unfortunately!
What was the total cost if you don’t mind
I believe around $600!
What’s the weight capacity on top?
No way for me to measure that unfortunately but never worried about putting things on top of it. It can handle far more weight then I can fit in the back seat 👌🏼
I may have missed it but what was the total cost of the project?
I haven’t figured exact numbers yet. Especially since I bought more then I needed when figuring out what wood I wanted to use. But I estimate about $500 or less.
Clean
How much did this all cost you?
Around $600!
Amazing job, looks as good as Goose Gear offerings. How much do you think it cost you to put this together? You inspired me to buy a welder and start working on making my own trailer. Thank you for all your hard work!
Thank you! I would say it cost less than 500. So in comparison to a premade unit, lots Of money saved.
Also that’s awesome about the trailer build! It’s a great skill to learn anyways and a ton of fun.
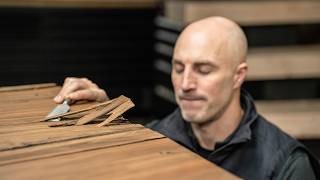
That moment when one cuts the tag. Special…..
Shit Mate that looks great!
Thanks Gavin!
Hey- are you interested in building one for me.. Absolutely will pay you generously for your time..
Serious question…
Thanks👍
Unfortunately I do not have the time to produce these currently. Maybe in the future 🤞🏼
8020? Pretty overkill.
He has had one made out of wood for years, hes also talked about an 80/20 system for years considering thats what goose gear ect uses. Nothing wrong with wanting to make something nice for yourself.
Thanks Russell!
@j coats My wood version served its purpose for a long time. Wanted to make a nicer version of it and 80/20 was a lot of fun to build with!