TH-cam
US
How to Build A Beautiful Sheet Metal Ductwork Transition. | DIY HVAC GUY
23:45
How to make an HVAC sheet metal transition
8:11
Exaggerated Plenum Transition- Sheet Metal Hack
12:28
OHANA บ้าพลัง EP.134 : เกมการ์ดโอฮาน่า X วัยหนุ่ม 2544
53:39
ถ้าม้าโดนแกล้งที่โรงเรียน ม้าจะฟ้องครูว่าอะไร #แต้มเซน #การ์ตูน #tamzen #ตลก #shortvideo #การ์ตูน
00:29
Oren helps Durple escape Pinki in a way you wouldn't expect
00:48
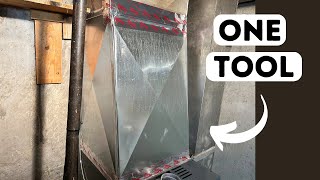
How to make a sheet metal transition HVAC
Mechanical Environments
ติดตาม
787
ดาวน์โหลด
โหลดลิงค์.....
มุมมอง 19 880
0
0
เพิ่มลงใน
เพลย์ลิสต์ของฉัน
ดูภายหลัง
แชร์
แชร์
ฝัง
ขนาดวิดีโอ:
1280 X 720
853 X 480
640 X 360
แสดงแผงควบคุมโปรแกรมเล่น
เล่นอัตโนมัติ
เล่นใหม่
เผยแพร่เมื่อ 18 ม.ค. 2025
ความคิดเห็น • 16
ต่อไป
เล่นอัตโนมัติ
23:45
How to Build A Beautiful Sheet Metal Ductwork Transition. | DIY HVAC GUY
The DIY HVAC Guy
มุมมอง 136K
8:11
How to make an HVAC sheet metal transition
Mechanical Environments
มุมมอง 7K
12:28
Exaggerated Plenum Transition- Sheet Metal Hack
Tractorman44
มุมมอง 21K
53:39
OHANA บ้าพลัง EP.134 : เกมการ์ดโอฮาน่า X วัยหนุ่ม 2544
ohana clip
มุมมอง 662K
00:29
ถ้าม้าโดนแกล้งที่โรงเรียน ม้าจะฟ้องครูว่าอะไร #แต้มเซน #การ์ตูน #tamzen #ตลก #shortvideo #การ์ตูน
TAMZEN
มุมมอง 19K
00:48
Oren helps Durple escape Pinki in a way you wouldn't expect
Slime Cat
มุมมอง 774K
00:55
ไม่มีใครรักหนูเลย #shorts #แม่สุน้องซูกัส
HeHaa TV
มุมมอง 2.6M
34:38
Onsite metal fabrication - four-piece duct transition (Mechanical / sheet metal training #106)
AGL Mechanical Tips
มุมมอง 108K
13:08
How to Make a Metal Duct Transition in the Field
HVAC School
มุมมอง 115K
12:52
2pc Transition
Sheet metal layout school
มุมมอง 3K
7:02
How to Make a Field Offset on any Duct
Winston Buzon
มุมมอง 6K
15:51
Triangulation - Square to Round, fabrication
Duane Maillet
มุมมอง 87K
16:01
Triangulation - Transition with 3 sides slanted, fabrication
Duane Maillet
มุมมอง 24K
19:29
How to Build a Sheet Metal Duct Transition
Joe Tollari
มุมมอง 77K
19:55
Air Handler, Centerline Plenum Transition and Return Air Installation
Tractorman44
มุมมอง 105K
17:39
45 degree ductwork layout part 1
Gary Ricks
มุมมอง 11K
00:31
How to treat Acne💉
ISSEI / いっせい
มุมมอง 101M
1:32:40
ซินเดอเรลล่ากลายเป็นภรรยาของลุงสุดหล่อหลังจากคืนโรแมนติกนั้น ไม่รู้ว่าเธอได้พบกับมหาเศรษฐี
Shop ละคร
มุมมอง 1.4M
00:35
กินขนมมั้ยจ้ะน้อง หนมน้า😝
Eoirndaime
มุมมอง 307K
2:33:50
🔴LIVE กัมพูชา vs ติมอร์-เลสเต | ฟุตบอล ASEAN Mitsubishi Electric Cup™ 2024 | รอบแรก กลุ่ม A
Thairath Sport
มุมมอง 488K
1:07:14
【พากย์ไทย】ฮ่องเต้เมาและหลับไปกับนางใน แต่นางในตั้งท้องมังกรทันที จึงได้รับการแต่งตั้งเป็นพระมเหสี
Fresh Thailand
มุมมอง 769K
00:58
มายคราฟ แต่ ผมห้ามตาย..!!! #minecraft #พี่เก้า #มายคราฟ #minecraftmtr
MTR Mysterios
มุมมอง 100K
00:11
Cat mode activated 🤣
Kotiki_Z
มุมมอง 2.1M
10:01
Nec Red Rockets Kawasaki vs. LP Bank Ninh Binh - Pool B | Highlights | Club World Champs 2024
Volleyball World
มุมมอง 184K