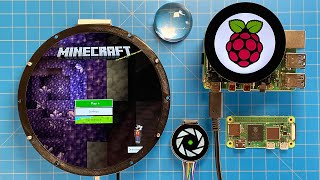
Using Images and Sprites to Make a Gauge | Beginner How To Converting Images to CPP to Sprite

ฝัง
- เผยแพร่เมื่อ 30 เม.ย. 2024
- In this video we are going to carry on with our Speedo series and learn the next logical step. Creating a gauge from an Image. For this example we will take a PNG image of a Gauge as well as a Needle, turn them into Sprites and then into a working gauge. This series will continue to expand on this topic allowing the user to select multiple backgrounds but understanding the foundation is key.
Here are the image to CPP converters used in the video.
javl.github.io/image2cpp/
sourceforge.net/projects/lcd-...
I am using an M5Stack but you can use whatever setup you have as long as you know how to display basics on the screen. If you are not using an M5Stack you need to have the eSPI library from Bodmer. github.com/Bodmer/TFT_eSPI
To follow along you should make your own 240x240px (or any size that fits your needs) image as a bitmap or png. We will walk through how to convert it to a byte array, how to deal with issues and how to force transparency so the sweeping needle doesn't wash out anything under it.
00:00 Introduction
03:00 Image Conversion to CPP
25:30 Creating a .h tab in an Arduino Sketch for an image
36:00 Code to Push an Image byte to an LCD Display
46:02 What to do when the color is wrong - Byte Swap
51:02 Creating the needle for the gauge
1:00:50 How to handle swapping pixels to transparent ones
1:04:40 Creating the Sprites with the byte arrays
1:28:38 Making a For Loop to Test the Gauge
1:35:32 Testing the Animation and Review
1:46:11 Conclusion - แนวปฏิบัติและการใช้ชีวิต


Very detailed description including what to expect when things go wrong. Thank you
Glad it was helpful! When things go wrong that is the big time sink :)
I can't believe that I just watched an hour and 46 mins of someone talking about how to create sprites! Excellent video. Thanks.
I'll look back at your other vids as well as I've recently bought a RoundyPi and am looking at using more than just basic graphics for the first time.
It's especially useful as you mention early how your example can be used with other screens, very few others do that. It's very well explained and as such is very easy to follow and not get bored.
Glad you enjoyed it! Thanks for the kind words! I don't cover a ton on Arduino type projects as so much is out there on the topic, but when i have to spend a good bit of time figuring something out I imagine others do as well :)
I've just started working with some displays and looking to create a compass on an ESP32. These are some amazing tools and your video will go a long way toward accomplishing that goal. Thank you for this.
Glad it was helpful! You will want to look at the pushImage command in the tftEspi library. that isn't available in the M5 Stack library version but you can use it to push multiple images to the same sprite(similar to pushRotated).
Wow!!! What an outstanding Tutorial!! Thankyou so much for this!.
Glad it helped!
Fantastic video. Love the in-depth video so glade I just found this channel. Keep up the great work
Awesome, thank you!
Thank you so much for putting this video together! I am VERY new to the M5Stack Core2 device and I have been trying to find information on to create very nice looking graphs and graphics on the M5Stack display. Which I am having a hard time finding videos on how to create HIGH quality graphs and animations for the M5Stack Core. Thanks for taking the time and explaining things in detail! Especially when you give things to watch out for and how to correct them! Not sure how large the M5Stack Core is but hopefully they will appreciate this video!
Thank you! Have you checked out some of the examples that are preloaded in the m5 library? in the M5gfx there is an analog meter and a bar graph sample sketch. Because there are variations of the M5 you might find that some code wont work. my grey unit isn't touch screen for example so some of the GFX samples won't run.
They are great dev units and i love that they have built in sd, battery, speaker etc. all that would be hard to have in such a nice package.
thanks for watching and commenting!
We are building a model railroad controller that attempts to emulate the correct controls as seen in real steam locomotives based on an esp32. What you have presented is exactly the sort of gauge displays we need to provide feedback to our train engineers. Great info thanks heaps.
Mark
Glad to hear it Mark! Its actually funny the number of comments/emails from people using these videos for model trains! I'd say you are the 4th person using it for that. Very cool to see! If you want to share any pics please email me support@caducator.com. I'd love to see it!
Thanks for sharing your techniques.
My pleasure!
Excellent Lesson ! i was looking for this for a long time !
Glad it was helpful!
@@LearnEverythingAboutDesign Thank you for the step by step , it is extremely helpful to Me.
Excellent video. Now my gui (s) not going to be bland. Thank you for your time and work!
My pleasure!
Yeah I just want to say I am finding this a very useful video . . excellent work sir!! . . I know it's never going on Netflix, but it is appreciated
Glad it was helpful!
Fantastic tutorial.....cheers.
Glad you liked it!
that is amazing explanation might have been a long video but was very interesting Thanks.
Glad you liked it!
Hi there, can´t wait for your next video about sprite gauges 🤩👀🤪
Thanks Jacek! I have hit the limit of the TFTeSPI library that is ported into the M5 stack so I am currently looking at other sprite libraries. Specifically this one github.com/lovyan03/LovyanGFX I hope to get back to this project soon but ask any questions and i'll do my best to answer.
Thanks! Great tutorial.
Glad you enjoyed it!
This is the BEST tutorial on sprites and images, by a country mile. Thank you. You asked what projects your viewers are working on. I have just finished programming an ESP32 with a GC9Aa01A round display. It displays the clock face of Big Ben with Big Ben hands. The code uses 4 sprites (I like a seconds hand even though Big Ben doesn't have it). It is flicker free and the images are sharp except where the 3 hands cross over each other around the pivot point. When displayed separately, each hand displays perfectly but the images become a little tardy around the pivot time point when all hands are shown together.
Thanks Brian! Your project sounds cool! Which library did you end up using? I found on the M5 stack that not all the tftespi library was ported over and specifically in compositing images. I have been looking at github.com/lovyan03/LovyanGFX as it is supposed to be faster as well as more flexible with compositing multiple sprites.
On your sprites at the pivot, they are using transparent pixels correct? One possible solution would be to add yet another image of a black dot that would act as a "pin" over all the pivots. This could be on the second hand or as its own image that never rotates.
@@LearnEverythingAboutDesign I tried to respond with a video of the clock working but I guess that is a 'no-no'. I tried to use the Lovyan library after changing the GCA9A01A configuration file and running an example script, but it initialized the screen with a white image but nothing else. With respect to my issue, I am using the TST eSPI library. The video would have shown that the order of the sprites (i.e. the hands) being pushed impacted the final look. The last sprite displays the hand perfectly, but the previous sprite's image is impacted where the ends of the hands start to overlap. Swapping the order swaps which hand display correctly. I think I am using transparency correctly (i.e. I replaced white hex bytes with 0x0120 bytes) but maybe I'm not.
@@bpeacock2 Ok if you are using the TFT eSPI library directly then you have the pushImage where you can overlay multiple sprites on top of each other without the rotated. you can email me support@caducator.com a video link since TH-cam doesn't like that :)
@@NikolaTyson I am happy to email the code but we shouldn't continue this thread on this TH-cam channel. Please go to: th-cam.com/video/BEeBBSVdTbQ/w-d-xo.html and if it still seems to be relevant to your project then post a request on my TH-cam channel.
Excelente! 😃👍
A brilliant series so far. Incredibly detailed and very useful. I'm building a series of gauges for my Land Rover and this will (hopefully) help me to up my game significantly
Great to hear! There are some options in the library i am using on the m5stack that are disabled or not included that you could use with the full library. Things like pushing multiple sprites together not just the pushRotated. This would be helpful if you are planning to display warning lights(not that a Rover needs them ;)). You can also check out this other library github.com/lovyan03/LovyanGFX that is supposed to be a little faster.
@Learn Everything About Design much appreciated, thank you! My gauges were all set to be very basic on oled. Now with your tutorials and tfts....well, I have a chance at making something pretty cool. Thanks again
@@greglogan4443 Great! I would also suggest taking a look at Nexion displays. They make large displays that are good for dash setups and their UI makes it much easier than hard coding and converting images like this. I think the tftespi method is great for a single use gauge but for a full dash definitely check them out.
Thank you for this great video! I'm trying to learn more about the TFT eSPI library. There's very little tutorials online about using sprites.
It would be very helpful if you made a tutorial or maybe a few about programming sprites. I want to learn more about how to make multiple sprites, when It's best to push multiple images to the same sprite, and moving/controlling sprites in various ways.
Thanks Lilly! The library is very nice and there are tons of examples, but yes figuring it out can be maddening at times! I do have a few more sprite videos planned but mainly with more gauge configurations. Did you see the 2nd video in the series manually drawing into sprites? th-cam.com/video/SUAqVUN9AuQ/w-d-xo.html
Can you let me know more about your project/intent with sprites? You can email me if you like Support@caducator.com
Thanks so much for introducing me to Sprites!!
Don't know yet if Sprite concepts are applicable, but I've been thinking about a one-dimensional application using neopixels. Want to take a linear string of neopixels ... perhaps 50 to 75 of them ... that are all programmed to a shade (or shades) of orange. Then on top of this orange string, I'd like to superimpose a "bump" of slightly more intense orange neopixels pixels that travels down the string of neopixels. My guess the bump would consist of 5-8 neopixels. Alternatively, it could be a "divet" of slightly less intense neopixels that travels down the string. Ideally, maybe some combination of bumps and divets, all traveling in one direction down the string. Kind of a higher (or lower) intensity wave traveling down the sting.
Here's my application. As a steel mill model railroader, I'd like to simulate a linear flow of hot, liquid metal flowing through a trough.
You comments would be appreciated. Please realize I just saw your video about Sprites, so I need to do some experiments!!
All the best ...
Hey Donald! I would say that want you want will likely have nothing to do with Sprites. So on my house in the winter I have 1500 neopixels with some hard coded light displays including a traveling candy cane and "chase" sequence of lights. I was using the WS2811 protocol but whatever you have(2812 or other) will be the same except for how you initialize them. likely what you will have is going to be a couple of loops to accomplish this and maybe a Switch Case type of code set. As a general thing what I would do is turn all of them on whatever your base color is(lets say orange), which will be a RGB value where 0 - 255 will represent the color. So an orange is 255,175,74 (just a random orange i grabbed). then what I would do is have a loop from 1 to whatever your highest pixel is(50 or 75) where you increment each pixel. something like (for i = 1; i < 76; i++) and inside that loop as you iterate through you set your pixel i to your intense color and the ones before it a slightly less intense color until you get to that 5-8 pixels behind and it would be (255, 175, 74). This is a bit hard to do in a comment so feel free to send me an email support@caducator.com and ill do my best to try and explain. Do you have a set of neopixels now? are you using arduino or python code to control them?
A way to expand this project might be to add a light / lux sensor so that the brightness can be adjusted as conditions dictate. I would not want the screen in my face at night with this graphic on it! So either switch for a dark theme and/or dim the brightness and it should be much better, at least in my opinion. I think this project is awesome and thoroughly enjoyed watching your video. I am just about to get my feet wet with a microcontroller and C++ and will likely employ the use of sprites in parts of my projects.
For sure. The user who asked the questions was building the gauge for his boat and had several different sprite backgrounds to swap between including a black one with white segments.
If i was building a gauge for a car or something I would likely go with a Nextion display. It offloads a lot of the heavy lifting that smaller microcontrollers have issues with and lets your microcontroller just focus on bringing in the inputs and reading outputs. Loading a bunch of images into a controller will eat up the ram and the refresh rate will eventually diminish.
Great video and really helpful in my project in creating an aircraft battery gauge. I have a challenge however in that the display has two needles and I can't get both to display at the same time. An update or further video would be great.
Great suggestion! A few people have asked about this. You would use the same process to push rotated with a single needle as you would with 2. You simply need to push them in the order to a base(gauge face) sprite before pushing that sprite to the display.
Are you working on an M5 or some other display?
I'm using a Lilygo T-display S3, same TFT_eSPI library. Your videos are long, because you cover a lot of ground. Keep them coming!! Maybe do one on a touch display with ESP32?
The only touch display I have currently is on an arduino but ill keep that in mind. I have a few more project ideas just no time :) thanks for watching!
Hella useful!
Glad to hear!
This is a very nice and value video. I'm currently creating an application to monitor the cooling of a watercooled CNC motor. I had a rectangle TFT screen and 5 zones, one round gauge with needle, one vertical meter with small rectangle indicator, a water level detector, one empty zone for future (detect running of spindle) and a general zone indicating OK (green), warning (yellow) or red (dritical). I did draw the needle and small rectangle....and its a drag with many limits. Currently working to try to use sprites... and your video will help me! Thanks!
I did have other issues, the meters are jumping and not fluently moving, so I had to make the funtions to move in steps so it stays visible fluently moving.
And secondly, having different sensors and funtions to do things on the screen I had to make my 'main()' more of a time management routine that will only go to a funtion (read sensor of move some indicator) every so many milliseconds. This makes everything look like its all moving at te same time and without stutter. Now every zone has its own timer that will be handled from within the main() and this works great.
Now I will get rid of the moving indicators and use sprites...you convinced me that that is far better.
Very cool project Ruud! from my research I think the Nextion display seems like one of the best options for what you are doing. nextion.tech/ The display has its own processor and they also have their own software to help build the GUI. And they are touch screen. The benefit here is the graphics heavy lifting happens on the monitor hardware rather than on a microcontroller. You would use an Arduino or similar to send it commands but everything in the graphics doesn't eat into your memory allocation.
For what you are doing now as you transition to sprites you might have good luck pushing everything to a single background and then displaying it. Even if the background was just a single color. So if you had a 320x240 display you could make a sprite that size and push all the other gauge elements onto it. The main downside to sprites(as far as I am aware) is that you can't resize things. If you are manually drawing your gauges you can use variables to control things like text size, gauge position etc. So to me that is the only downside to image sprites. But this video and the previous one in this playlist were both sprite videos. The last one used sprites but we used drawing commands to draw the gauge and display a number and needle position.
I am learning as much as I can so feel free to ask questions and I will try to answer as you progress with your project.
@@LearnEverythingAboutDesign Yes I know the Nextion displays and they are on my whishlist, I really want to try them. The graphic designer and the usage in the program look extremely easy. But I have still a few of the TFT's laying around and wanted to use them. My brother burned his CNC spindle recently so this project was pushing itself in priority. And doing the complete hard and software is fun to do...and it is a practical thing so you get much satisfaction.
For now I'm working with zones for which I have a funtion that get arguments for left upper coner, width and heigth. This allows me to make sure inside the funtion everything is drawn according these base coordinates in case I want to move things.
It is mainly the 'moving' parts that are the difficult factor. And I see you do things for which I had to do a lot of effort...so your video helped me to understand the sprites better.
The current project measures the cooling temperature, the flow through the spindle motor and the level in the container. Using the ESP32 and the TFT touch makes it a very versatile project from one learns a lot.
If I have questions I know now where to ask ;-)
Have you seen this project? www.instructables.com/Arduino-analogue-ring-meter-on-colour-TFT-display/
It was done by Bodmer, who also wrote the eSPI library that is used for sprites.
@@LearnEverythingAboutDesign Wow, very nice stuff. Maybe I need to look into this one also. It might help me because my meter scales has color bands to indicate normal, warning an critical range. This looks good. Thanks for the link!
No problem. It is very clever and gives you the ability to build multiple gauges off the example. I found it a bit harder to configure the way I wanted but was able to get something working. Maybe it will get you a quick working Prototype! If you do I would love to see the project! support@caducator.com
Great videos, very helpful. Do you have a target [ round ] display in mind for the actual instruments? I'm looking for a round display to replace an aircraft instrument.
Thanks! For this I don't. So this was answering a user question who was using a round display. In the future when I make the gauge I am planning it will be with a Nexion display. There are limitations to the implementation of TFTeSPI in the m5stack for example I can't push multiple sprites to the same display because they didn't include that. There are other implementation that could do it but you have to consider things like the speed/responsiveness of it. This is where the Nexion displays really shine.
so shorter answer no I don't have immediate plans to do more with this specific one because it was for a user that was having issues implementing the basic movement smoothly.
Thanks very much for this, I'm building a gauge to display air-mass movement in sailplanes using RTK GPS. I'm currently using your first sprite demo as my starting point and have a very pretty gauge that displays in about 70 msec (after I've added my various numbers (airspeed, heading, Yaw, and derived windspeed) to the basic design. My question is if using this approach will give any speed advantage over 70 msec? Maybe a link to a demo that I can try on my M5Stack.
Glad it was helpful! While i don't consider myself a programmer I do know there are certain limitations you will run into. I am going to guess your GPS is pulling in data 10x a second or slower. If you are sticking with the tftespi library that the M5 stack is using(parts of) I would take a look at this thread on Github from the creator (Bodmer) of the TFTeSPI library.
github.com/Bodmer/TFT_eSPI/issues/650
I think your 70ms speed seems pretty good. The difference between this example and the first one where we were drawing the gauge as a subroutine and this where its calling it up bit by bit will likely be different speeds. There are two things at work here.
1. You are drawing this to the buffer before pushing it to the screen.
2. When you push to the screen with an image like in this example you are redrawing the whole screen.
The time to draw it to the buffer is quicker than the time to push it to the screen I do believe. So in the first example if you are only drawing a part of the screen and you can clear that before drawing the new position I would imagine that to be faster. Using the images as sprites again will likely be slower but you would need to test it to be sure.
Hello, this is a very interesting video. I would be interested to know if I could also use such a transparent sprite for a website? So store it in flat storage. Could you make a video about this?
Best regards
Lutz
Lutz, I am the furthers thing from a web designer so sadly I can't make a video on that. The way sprites are used for something like this gauge are really there to either save memory or speed up the display. Loading a sprite into memory then flashing it to the screen rather than drawing it each time.
For websites, to the best of my knowledge, sprites are used but they will normally use a sprite sheet. Sprite sheets are similar to what I did in this video except that you call a location of a larger image rather than an individual image. I did a quick search and found this site that seems to explain it pretty well. Hope it helps. www.dbswebsite.com/blog/how-to-use-sprites-in-web-design/
Excellent. Loved the details explanations . Can I get the sample code ?
Thanks! I don't have the code posted anywhere but happy to share it if you want to email me. support@caducator.com it will only work if using an M5Stack, otherwise you have to declare/include the tftespi library and call to its functions.
wow man !!!! This is right what I was looking for. I am trying to do multi gauge using different screens for various parameters.
the only thing I am mising is a analog watch. Any suggestions wellcome. Tanks in advance.
Glad I could help! What equipment are you using? Since I am on the M5Stack I have hit the limitations of the partially ported TFT eSPI library. I can't composite multiple sprites past the pushRotated so you can't overlay multiple sprites on each other(other than the rotated). If you are using the TFT eSPI library directly there is a pushImage function you can use to overlay. Anyways the point of that is I was directed to this other library. github.com/lovyan03/LovyanGFX
I haven't had a chance to really dive into it yet but they do have a clock as one of the examples. github.com/lovyan03/LovyanGFX/tree/master/examples/Sprite/ClockSample
They are just counting up using milis I believe, so you would need to sort where you are getting your time from. If you are using GPS that is pretty straight forward as it can pull in time/date info.
Are you building this for a vehicle? Are you using something with actual clock/time?
@@LearnEverythingAboutDesign Hi there, I´m using ESP32 DEV1 board and 1,28in 240x240pxl round display with GC9A01 controller
@@LearnEverythingAboutDesign I´ve tried with arduino nano and pixi 28 from 4D Systems but its limited memory. I´m building it for my motorcycle.
Thats great! I run a trail tech gps speedo on one of my bikes which has everything I need, but I am planning on building a dash for a project car.
I have a PCB I designed that has an micro SD slot, a spot for a QTPY(Samd21 chip) and the ability to be used to send info to an LCD if you are interested. I can share the design. It isn't 100% complete as its main function was an LED headlight dimmer which ended up overheating and saturating the FETs for some reason. I will be out of town for a bit but if you would like the fusion pcb file let me know.
are you using the TFTeSPI library for your sprites? if so there is a clock example github.com/Bodmer/TFT_eSPI/tree/master/examples/320%20x%20240/TFT_Clock
is there a Mac based app that lets you convert to c array with similar functionality you'd reccommend?
Steve I am not sure since I don't use Macs, but the first one image2cpp was a web based app javl.github.io/image2cpp/ I imagine that would work for you.
Can u upload all code to pastebin or something similar ? Or mayby u can make similar video with GC9A01 240x240 and TFT-eSPI ?
Hi Lukasz, in some of the video descriptions I posted the code. For this one the images came from a user which is why I didn't post the code directly. The user that requested help also had Volos do the same thing using the round display and you can check out his work. th-cam.com/video/y_H7HM0oyoo/w-d-xo.html
As for TFT-eSPI vs the M5stack I used the main difference is just in the declaration of the objects. I declare M5.stack but using tft-eSPI means you would declare your sprites like this TFT_eSPI tft = TFT_eSPI(); with tft being the name.
The user I helped with this hasn't replied in awhile but the code aside from the images themselves is straight forward. if you email me support@caducator.com I am happy to share the code minus the CPP images
good evening .. does it works with arduino one?. Memory is enough?
I have used sprites on everything down to a microview(little watch arduino uno based device). You can use sprites on anything, but yes you have to watch the memory. Instead of doing full screen images you may find you need to reduce the quality or size of your images. for example a black/white image vs a 16bit color image.
I am making an artifical horizon for an aircraft. I have 3 sprites on top of each other. Airplane symbol - ground/sky box - Outer casing. How would I go about layering those items and making it smooth
are you using the M5Stack like in the video or something else? Basically what we did was we pushRotated for the needle on top of the gauge background. You just need to push multiple needles. There are limitations with the M5stack library version of the tfteSPI library. the real library has a pushImage also that didn't make it into the M5 library.
@@LearnEverythingAboutDesign thank you for the quick, reply, I have a few sprites neatly layered, however when it comes to animation, everything is flickering. I am trying my best to figure things out with pushToSprite
@@greenlightzone are you doing this on an esp32 controller? Which display are you using? I plan to do some more arduino/display projects in 2024 as I have had a lot of requests for exactly what you are asking for so it will be on my short list. My plan was to do more with the M5 stack but I think most users have something else.
@@LearnEverythingAboutDesign Sorry for not answering your main question. I am using an Esp32s3, a lot of ram, psram availability and fast cpu. I have a Spi LCD screen 240 by 320. ILI9341
@@greenlightzone no problem. With the flickering this "usually" happens to me when pushing/clearing the screen and trying to redraw multiple sprites. Doing the composite sprite in memory and pushing it all at once doesn't usually trigger a flicker unless it somehow hits a limit with the displays refresh rate. I don't specifically know what your display is but likely a delay between "pushes" of 25ms should help. So composite all your sprites in memory with the background being the entire display size, push it to the display, read your sensors, delay 25ms, composite to memory, push etc etc.
Hope that makes sense. The datasheet for each display(if available) should list the refresh rate.
Any specific instructions on where to learn how to set up M5stack core3 on my Mac book air? I’ve followed most instructions on the internet, reloaded drivers, changed new cables, used M5core3 libraries; but no connection. Thank you.
Tough one as I don't have any Mac to try, but I would suggest maybe try the web based arduino IDE and see if that gets you around any problems with drivers and libraries.
Is the Mac just not seeing it when plugged in?
Correct, just doesn’t see M5stack. I will try web based IDE. I got your needle sweep gauge working well on my esp32 development module with 0.96 OLED with a variable potentiometer input. But I wanted to do it with SPRITEs and got the newest M5 Stack, thinking that had the best access to a SPRITE library.
@@thomasshearer9200 The library in the M5Stack system is a modified version of the TFTeSPI library by Bodmer. There are some bits of it missing, so unless they updated it I don't think there is a library benefit to using the M5. Just the benefit of all the electronics, button, battery etc built into a single unit. I used it because my Grey has an IMU in and I was able to add a GPS antenna to it. In the past when i had use an Arduino board like an Uno it was tricky powering the project and the memory was very limited. Jumping to an ESP32 based board, or Samd21 opened up the memory capabilities but I found that some libraries cause issues with say i2c access on stemma connectors for small displays. The m5 simplifies a lot of those challenges and comes in a nice package.
The main thing I found missing from the m5 version of the TFTeSPI library was the ability to push Image. We can push rotated which is fine, but if you wanted to have say a warning icon pop up on the gauge under the rotated needle it wasn't possible with the M5 version of the library.
So any ESP based setup you have should work fine with the TFTeSPI library or other sprite libraries if you can't sort out the connection to your Mac.
Thank you very much, I’ll try the TFT library on my esp32 dev mod.
@@thomasshearer9200 github.com/lovyan03/LovyanGFX/tree/master/examples/Sprite This is another library that was pointed out to me.
How can I do that using arduino gfx library by moononournation?
to the best of my knowledge the gfx library doesn't specifically handle sprites. There are a few things you can do like using the GFX canvas which is a group of pixels in memory. this was really made for things like text scrolling or image scrolling and not really for a gauge like this. If you use the GFX library redrawing the needle with a line is likely the best way that I know of.
learn.adafruit.com/adafruit-gfx-graphics-library?view=all
I did a 3.5hr part one of this playlist where we used a sort of draw/redraw approach that should work with the GFX library. I used the M5Stack, but they just adopt other libraries so the LCD functions in the m5 should be similar because we are just drawing lines and circles.
th-cam.com/video/xlb7FGKBp3Q/w-d-xo.html
Please share your code and progmems + jpegs with us :-) So we can try to first adapt code to our config an test out if everything works with our config :-) Thx
if you email me support@caducator.com ill send you the code, but the images were of a subscribers project and i can't share those.
Nice and thanks, but I do have to chuckle that you remark you’re not a coder…
Have to put it out there lol. People can be brutal :)