How To Change Background with Photoshop AI Beta
ฝัง
- เผยแพร่เมื่อ 20 ก.ย. 2024
- How To Change Background with Photoshop AI Beta
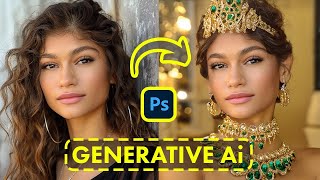
In this video, we’re going to take a look at how to change the background of an image, super quick and easy, using the new generative fill AI inside of Adobe Photoshop Beta.
The first thing you’ll need to do, is grab the new Photoshop Beta. Just to quickly go over that, you can download this by opening your Creative Cloud app on your computer, choosing apps on the top here, and then beta apps on the left side menu.
At the top, you’ll see the new Photoshop Beta. Go ahead and download that.
Once you have that installed, we’ll go ahead and look at changing the background of an image.
I have an image of a lady here with shopping bags. But she’s in a subway station in looks like, and we want to place her in a location that makes more sense. Let’s say a shopping mall.
Now this works best when the subject is easily identified in the image. This one here works, but if there were a bunch of people standing around, and focus was all over, it would take a little bit more work.
The first thing we want to do, is on this new tool bar here, choose select subject. If you don’t see this bar, then it may be turned off. Choose Window at the top, and then choose Contextual Task Bar here on the bottom. That’ll turn it on.
Once you choose select subject, Photoshop will do a pretty good job of automatically select the main subject in the image. You can take your wand tool and add things if you need to, like this spot here. You can get as precise as you need, but let’s just keep it where Adobe selected.
When you have your selection, choose invert selection here.
Now to the cool part. Choose generative fill, and on the next bar, type in your description. For this example, we’ll type, busy shopping mall. After that, hit generate.
Photoshop will then generate a new background automatically, with the text prompt you gave it. If the first option it returns isn’t what you were looking for, you can check out two other options that it created, using the arrows here.
You’ll also see the new layer here in the layer window. This part is nice, because you can easily switch back and forth to see before and after. Also, you can color correct or adjust the two layers to fit together better if you need to. A really cool feature, and I can’t wait to see what Adobe does next.
And that’s how you use generative fill AI inside Photoshop Beta to change image backgrounds.
Thanks for watching! Give it a thumbs up if you found this helpful!
www.youtube.com...
We are creating the Netflix for Ai Education, including a complete Midjourney course.
Check it out and join the waiting list: www.sajadibs.c...


![[TH] RNT vs SPG - VCT Ascension Pacific - Day 1](http://i.ytimg.com/vi/RUTkf8Detj8/mqdefault.jpg)

We are creating the Netflix for Ai Education, including a complete Midjourney course. Check it out and join the waiting list: www.sajadibs.com/skill-leap-ai-coming-soon
thanks m an
No problem!
Bro i have $40 starbuck card can you plz exchange it😢
terrible