Litter Robot 3 Pinch Detect (permanent) Error (rapid blink yellow light) Bypass/Fix. See note first!

แชร์
ฝัง
  • เผยแพร่เมื่อ 26 เม.ย. 2022
  • BEFORE DOING THIS BYPASS HACK:
    Be sure to do the usual fixes first.. Clean plastic pinch detector part that flexes first (the cracks), then clean both sides of clear screen covers over drawer full lasers, and the laser part too. Look at the metal pieces for the detector that touch and make sure they are clean, not corroded and actually touching. If doing these fixes fixes your problem and yellow rapid light stops. Then you know this was the issue, and this bypass will work for you if you want a permanent solution that you don’t have to repeatedly check and clean to fix this ever present reoccurring error. If these fixes don’t work for you, then you may need a new DFI (drawer full indicator) or chip board replacement.
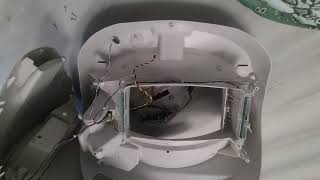
    Helpful video to get you to the pinch detector terminal spot inside the robot where I apply my fix if you don’t know how to get there already:
    • Replacing the Pinch De...
    (Left this out of video):
    You take the bottom off by removing I believe a total of 9 screws, some you will need a long screwdriver to reach. I didn’t put this in my video as it was too hard to hold camera and remove screws, but I wish I’d pointed them out at least. Sorry for that. When you flip the base over, remove screws at the feet pads (spots robot sits on- quarter sized circles), you will see a long tunnel at the sides of these pads (3 of them, the 4th is shorter screw closer to surface) the long tunnels have a screw at the bottom to remove. A long magnetic screw driver is helpful as putting them back in without one can be a challenge, but you can also attach a magnet to the metal of your long screwdriver and this will help. There are 2 screws under each handle and one at the back side of the robot in the center. I believe these are all you need to take out to remove base, just keep track of what you’ve removed and from where. If you look up videos for pinch detector replacement that should walk you through the base removal too. Truly you should not try this bypass unless you have previously checked your metal detectors to see that they are touching (not even smallest gap), they are clean, & they don’t have corrosion, also make sure the moveable trip sensor plastic piece inside robot litter emptying square shoot doesn’t have debri on it or stuck in crack. When you fix all these issues, and robot functions as it should without error, Then you know there is no problem with your circuit board or a wire connection or wire problem. These may need replacing to fix. If everything functions and you are just sick of having to check all these things and clean everything again and again to return stop yellow light error, then do the bypass and you’ll never have to mess with any of the above again. But it’s important to know that cleaning, and fixing the contacts of your trip sensors fixes your issue before you do this permanent fix. Hope this helps :)
    Maybe one day I’ll take my robots apart again and shoot a better video, but I’ve had no issues since my fix and just had no desire to do another video detailing it again in even more depth. Maybe some day :)

ความคิดเห็น • 867

  • @MarkSmolinski-no9fu
    @MarkSmolinski-no9fu ปีที่แล้ว +87

    THANK YOU. THANK YOU. THANK YOU. I have had the Litter Robot for over three years. The pinch detector has been a constant nuisance. On the day I was leaving for overseas for three weeks, the blinking yellow light happened and my usual cleaning did not work. I had to get a back up regular litter box for my cat sitter...and the house was a mess with litter when I returned. I searched for a solution and found your video which I followed and solved the problem permanently. I am so happy...and so are my cats (and future cat sitters). This is the first time I ever commented on a video, but just had to thank you for this incredibly useful guidance. Much appreciated!

    • @shallahk8403
      @shallahk8403  ปีที่แล้ว +8

      Wow, thank you so much for your comment! I was frustrated with my repeated issue too, and only put this out there after it worked in my first robot, cause I thought for sure it might help someone with the same issue.
      You forget what a problem old school litter boxes were until you get stuck using them again, lol, then you’d pay for a litter robot all over again. This fix just makes them better. I’m so so happy when I get to read a comment from someone my video helped. THANK YOU SO MUCH ❤️

    • @dudemanaric
      @dudemanaric 9 หลายเดือนก่อน +2

      I had nightmares all week until mine was fixed. I know the feeling

    • @juliehendrickson8493
      @juliehendrickson8493 8 หลายเดือนก่อน +1

      Same issues. Was soooo frustrated when my robot was down. Until I kept working on it until I got it up and running again. Thank you for this video because if it keeps happening with mine I will do this.

    • @shallahk8403
      @shallahk8403  8 หลายเดือนก่อน +2

      Lol. Litter nightmares, sounds wild.
      Hope you got it fixed up for good!

    • @chuckfangirl
      @chuckfangirl 7 หลายเดือนก่อน +1

      You are a legend for sharing this. I have literally just ripped out the plastic thingamagig and will now clean up the heads and tape them together (I could have been more delicate and try to preserve them but I don’t have the patience.
      Btw my hack for the draw overfill thing was to add some light to the drawer and for some (insert science) reason, this has improved the signal between/across the panels.
      Also, I have covered the area where extras tend to accumulate with some clear plastic which diverts the clump crumble away from the edges.
      Thanks again

  • @davidcalton4097
    @davidcalton4097 ปีที่แล้ว +10

    This is the first video I have felt the need to comment on. Just to say thank you we have 3 litter robots and despite constant pinch sensor changing and cleaning I could not solve the dreaded fast yellow blinking light. I was even thinking of buying new bases!! Problem now solved 😊

    • @shallahk8403
      @shallahk8403  ปีที่แล้ว +1

      That’s great! Wow, two frustrated me with the sensors. Can’t imagine 3. Mine have worked gray for going on 6 months now, so seems to be a great long term fix overall. Thank you for your comment!!! Glad it helped

  • @cjrothwell8788
    @cjrothwell8788 ปีที่แล้ว +45

    Omg you’re a life saver!!! I was getting so angry and ready to toss this thing out the window! I followed your suggestions and it worked like a charm! Thank you so so much!! ❤️❤️❤️❤️

    • @shallahk8403
      @shallahk8403  ปีที่แล้ว +1

      :) so happy it helped! These are great machines. I could never go back to scooping litter boxes :) Really Really appreciated your feedback!! 😻

  • @Lostinamomentillnevergetback
    @Lostinamomentillnevergetback ปีที่แล้ว +11

    Omg I could cry finding this. I’m getting divorced and have cancer. Super sick and the robot saves me from having to deal with it too much. Since it’s been broken I’ve had them refuse to use a traditional litter box even so far as to knock all the litter out to pee on the floor. I just got all the supplies to try this. Fingers crossed

    • @shallahk8403
      @shallahk8403  ปีที่แล้ว +1

      It works as a permanent solution if the normal cleaning of the metal pieces, and making sure they are aligned and actually touch, and no debri on the plastic pinch pieces, and metal pieces cleaned of corrosion works to fix issue for it. The same issue keeps occurring every few days or weeks, then you can do my permanent fix to remedy having to go through all the steps above. I would not try this permanent fix unless the above fixes work. If they do, then you can do this fix to not have to do the above again. But if fixing all these things doesn’t make robot work, you could have a bad sensor, or microchip board that needs replacing.

    • @shallahk8403
      @shallahk8403  4 หลายเดือนก่อน

      Did it work??

    • @dynodin81
      @dynodin81 4 หลายเดือนก่อน

      I really hope that you have found your health and peace. Sending positive energies. 🙏

  • @andrewrouth249
    @andrewrouth249 2 ปีที่แล้ว +58

    I’m glad to see someone bypassing these fancy sensors! I’ve had a lot of issues with my robots and I’ve always thought if I could just bypass the dfi and pinch sensors I’d have a lot less headaches

    • @shallahk8403
      @shallahk8403  2 ปีที่แล้ว +5

      I agree, I’m glad they are there and I understand the purpose, but have decided that the constant issues are worth bypassing as I truly feel my cats aren’t at risk at climbing into it when it’s turned upside down and moving. Thanks for the comment!

  • @GBeto3
    @GBeto3 ปีที่แล้ว +12

    Thank you! I cut the connections off the two metal tabs and used a Wire Twist Cap to connect the two wires permanently. Worked great and theres enough slack in the wire that i can redo the connections to the metal tabs if ever needed.

    • @shallahk8403
      @shallahk8403  ปีที่แล้ว +2

      I thought about doing it that way, but wanted to be able to reverse it quickly if it didn’t work once I put it back together. Glad the idea helped you. So glad I did mine, not a single pinch detector alert since or need to clean metal pieces, yay!

    • @tammyroberts8488
      @tammyroberts8488 ปีที่แล้ว

      What are the two wires coming out of the bottom of the litter robot

    • @cisko707
      @cisko707 4 หลายเดือนก่อน

      @@tammyroberts8488It is for a remote control. I asked when I was trying to troubleshoot the fast blinking yellow light and had them on the phone. 😂

  • @sallymurray4583
    @sallymurray4583 ปีที่แล้ว +12

    THANK YOU!!!! You saved me $$$$$ my pinch sensor plates were corroded, a good clean and bypass as you detail here worked wonders. The base disassembly wasn’t shown but once I checked where all the screws were it wasn’t too hard. I’ve had my litter robot 4 years now and other than replacing the liner and periodic cleaning its worked great and still looks like new. Penny my cat says Thank you that was purrrrfect! 😊😺💕👍

    • @shallahk8403
      @shallahk8403  ปีที่แล้ว +3

      You’re welcome, thanks for the comment. I didn’t show base removal, that’s true, couldn’t figure how to film it and not add drastically to time, thought anyone attempting this would’ve replaced or adjusted their pinch detectors before to fix the error. But I’ve had a lot of comments about not showing it, so my bad I guess. Glad Penny and Penny’s Mom have a better working box now! =^•^=

    • @sallymurray4583
      @sallymurray4583 ปีที่แล้ว

      😊😺💕

    • @scazzasofija
      @scazzasofija หลายเดือนก่อน

      Oh whoops I didn’t clean mine. There was some corrosion for sure but it’s still working

  • @JoyFlyer
    @JoyFlyer ปีที่แล้ว +5

    Thank you so much, after 4.5yrs of use that pinch sensor finally started acting up consistently about a month ago. I’m so happy to find a permanent solution!

    • @shallahk8403
      @shallahk8403  ปีที่แล้ว

      You’re so welcome! Took me about the same time of frustration, lol. So glad to help!

  • @Klvn369
    @Klvn369 ปีที่แล้ว +8

    Literally took me about 3 seconds thanks to you. So many videos but not the solution I needed except for this one🙏 thank you!

    • @shallahk8403
      @shallahk8403  ปีที่แล้ว +1

      So welcome! Glad it helped. Cheers to you and yours

  • @jessicacobb4846
    @jessicacobb4846 ปีที่แล้ว +5

    THANK YOU!! For this video! This error has been driving me nuts for months now. I was able to fix it right before I go out of town for a few days and I don’t have to worry about the cats not having a potty!!

    • @shallahk8403
      @shallahk8403  ปีที่แล้ว

      You are SO WELCOME! So glad this fix helped you! It’s a game changer for sure, I hated the deeded blinking light, take apart the robot and check connectors issue sooo much. All going strong for over a year now, so seems it’s a great long term fix. Best wishes to you and your kitties!!

  • @SaraLilyRose
    @SaraLilyRose ปีที่แล้ว +7

    Thank you so much ! I've been having so many problems with the pinch detector sensor, I was really getting annoyed. I bought my litter robot in 2019 and it was starting to have the problem for a while. Your solution was exactly what I needed. My cats are seniors so I know they will not climb in it while it moves. So, many, many thanks !

    • @shallahk8403
      @shallahk8403  ปีที่แล้ว +1

      So happy to hear it worked for you. Appreciate the feedback :) thank you!

  • @dadajessi
    @dadajessi 2 ปีที่แล้ว +3

    Thank you so much for this! That pinch detector was driving me crazy! Just finished getting them bypassed and the box seems to be working just fine!

    • @shallahk8403
      @shallahk8403  2 ปีที่แล้ว

      You are so welcome!! Hope it works really well for you! Mine has been bypassed for 2 months? Now I think.. not a single pinch detect alert since. Oh what a relief!! :)

  • @callyearl8265
    @callyearl8265 2 ปีที่แล้ว +9

    Man I wish I would have seen this a couple of years ago! Thank you so much!!

    • @shallahk8403
      @shallahk8403  2 ปีที่แล้ว

      So glad I could help! Wish I’d thought of it sooner too, posted another video about a year ago that showed how to help keep the pinch detector clean and prevent debri build up, but it wasn’t 100% fix like this fix I figured out is.I can’t tell you how many times I took that dang robot apart to look at, clean or replace those metal pieces, such a pain. And I have two! Never again!! Muh ha ha!

  • @donmayne
    @donmayne ปีที่แล้ว +5

    This is a great video. It is so helpful to understand the machine. My pinch detectors were corroded and it took very little scraping with a knife at the right spot to fix the contacts. It would not have happened if this video had not explained the pinch detectors so effectively. Thank you!

    • @shallahk8403
      @shallahk8403  ปีที่แล้ว +1

      Glad it helped you! Mine tended to bend a bit also, and would loose contact by as little as 1mm and would cause problems. Another reason I decided to attach them and overuse the detector. Cleaning your clear covers front and back that protect the laser lenses in the litter shoot square also can help fix issues that occur. I really appreciate your comment. Makes me happy I took the time to post :) thank you

  • @bigtuna8535
    @bigtuna8535 2 ปีที่แล้ว

    Hello! I just came across your video and just wanted to say THANK YOU SO MUCH for posting it! I just did this to my litter robot 3 and it seems to have been the cure of many headaches for the past few months! Again thank you so much!

    • @shallahk8403
      @shallahk8403  2 ปีที่แล้ว

      So welcome! Glad it’s working as well for you as it did for me! Thank you for your comment =^.^=

  • @nixalot9065
    @nixalot9065 2 ปีที่แล้ว +2

    How did I never think of this?! I'm not sure how but without fail I've had to replace the pins every year and have just dealt with it moving/stopping/moving/stopping until the parts come in. Tried this when it was already freaking out, it's been a week and 0 issues. Thank you so much!

    • @shallahk8403
      @shallahk8403  2 ปีที่แล้ว

      So glad! Thank you for your comment

  • @rupi6165
    @rupi6165 ปีที่แล้ว +5

    Thanks. This is the second time I followed your instruction with success. This year I had several pinch detector alarms and I have removed them as you suggested. My cats don’t jump in when it’s moving. Thanks for doing all the research.

    • @shallahk8403
      @shallahk8403  ปีที่แล้ว

      Rupi, appreciate you comment and so glad my posting helped you out. Love it when people let me know it was helpful, gives me a bit of cheer and a smile. Thanks for making my day!

    • @rupi6165
      @rupi6165 ปีที่แล้ว

      Hi there so I did what you said and since my last post I keep getting a flashing yellow light. It says “safety bar detector” and I just can’t figure out how to fix it. Please let me know if you have a recommendation. Btw do the pinch detectors have to be attached with electric tape. I used some regular clear tape. It worked for a while but now I keep getting this Above notification. Also do they have to remain clean I don’t know what’s wrong. I have email iRobot. Help! Rupi

    • @dotsona07
      @dotsona07 ปีที่แล้ว

      @@rupi6165 I am having the same issue, were you able to fix this?

  • @susansiljee4038
    @susansiljee4038 ปีที่แล้ว +8

    I have to say, this is the most calming instructive video I have ever watched!! Thank you for your detailed process and calming influence. I don't have a problem with my LR3 yet but I have saved this video for future reference.

    • @shallahk8403
      @shallahk8403  ปีที่แล้ว +1

      So sweet of you to say. Thanks!

    • @bijulakoyyeri2172
      @bijulakoyyeri2172 10 หลายเดือนก่อน

      This was how I felt too! Yours was the most calming LR video I've watched. The other videos and the music/ narration were making me want to throw the whole thing out. Thank you, thank you, thank you!!

  • @asiansrock10
    @asiansrock10 ปีที่แล้ว

    We’ve had so much trouble with that error and I’m so glad that is a thing of the past with your hack!

    • @shallahk8403
      @shallahk8403  ปีที่แล้ว

      That’s great! It was a huge burden lifted for me too not having to go and clean everything that could be causing it or having to check the sensor contacts. So glad it worked for you too!

  • @monikasarac2249
    @monikasarac2249 ปีที่แล้ว +1

    Omg this worked!!! I was so nervous about breaking the whole thing but watched your video three times before finally trying it. It was so easy! Thank you!

    • @shallahk8403
      @shallahk8403  ปีที่แล้ว

      So glad it helped you! Yes, I was nervous too to give it a try as it was just an idea I had, but by making it reversible, I figured o couldn’t hurt anything. It is such a relief to be months down the road and everything still working great!! No cat sensor/debri errors anymore.
      Thank you for your comment!

  • @darleenperezade8340
    @darleenperezade8340 ปีที่แล้ว +1

    Thank you so much! My litter robot constantly had this issue! Ir had been out of commission for 2 months because I got so frustrated with it! This worked !! You made my cats happy!

    • @shallahk8403
      @shallahk8403  ปีที่แล้ว +1

      So glad to hear!! I’d battled with mine for about a year too, had come up with another solution that lasted longer but still needed fixing every couple months. Then thought to do this. Just wish I’d had someone to hold the camera so the shots were better on the video. I havent had a single pinch detect error since, so hope you have the same luck!! Thank you for your comment!♥️

  • @uberassault6021
    @uberassault6021 ปีที่แล้ว

    THANK YOU SO MUCH! My litter robot was out of commission for months and I had to rotate the globe by hand. I was about to spend $600 to buy a new litter robot.
    After watching your video and taking my machine apart, I discovered that the pinch sensors were corroded. I ordered new sensors and taped them like you did in the video. Now my litter robot is working like normal after months of being broken.

    • @shallahk8403
      @shallahk8403  ปีที่แล้ว

      That’s great! I’d buy another too if I had to, love them so much. But sooooo much better if you can fix them first. I REALLY APPRECIATIVE
      your feedback! Thanks so much :)❤️

  • @smflyboy
    @smflyboy ปีที่แล้ว +23

    Thank you so much for this. I’ve been pulling my hair out. I’ve done various surgeries on my LitterRobot over the years, but I’ve taken this thing apart three times today and cleaned the contacts and everything else and bent them to make sure they are touching but the flashing yellow light won’t stop flashing. Took it apart a fourth time and followed your technique and it worked. Thank you!!

    • @shallahk8403
      @shallahk8403  ปีที่แล้ว +2

      So happy for you!! I’m glad it worked for you. I was frustrated with the similar issue as well, but none since. Wish I’d come up with it years ago, lol. Loved 💕 your comment, makes me happy to hear the video helped someone.

    • @crystalluv545
      @crystalluv545 6 หลายเดือนก่อน

      I guess I'll be spending the day tomorrow taking it apart again and seeing it this will work.. its 4:30a.m and I am too tired now to try . I'll do it in a few hours. I hope it works as I'm scooping and mad !!!😅😅

    • @shallahk8403
      @shallahk8403  6 หลายเดือนก่อน

      @crystalluv545 . If cleaning the Contacts, realigning them and cleaning the spot where the litter piles up by the trip sensor works, and the robot works for a few days then starts acting up again, this solution will fix those issues permanently from having to clean and realign the contacts again and again. If you are just tired of doing those cleanings then do this. If that cleaning doesn’t fix your issue then this override won’t. You may have a bad circuit board for DFI sensor or maybe even a spot of debri on the lenses or lense cover instead, this fix doesn’t solve that issue.
      Hope this explanation helps

    • @smflyboy
      @smflyboy 6 หลายเดือนก่อน

      @@shallahk8403 It’s been a year since I posted my comment above and I still have not had that problem reoccur since I used your fix. Thanks again!

    • @shallahk8403
      @shallahk8403  6 หลายเดือนก่อน

      @smflyboy that’s so great!! Thanks for the feedback and your comments :) I’m really glad it helped you.

  • @alyssarudden6954
    @alyssarudden6954 ปีที่แล้ว +11

    Oh my god. You are the first person to not only explain what this error means, but how to fix it! THANK YOU SO MUCH!!!!! If I could LOVE this video instead of just “like” it, I would!!! You’re truly the best!

    • @shallahk8403
      @shallahk8403  ปีที่แล้ว

      I’m so glad this helped you! It was a true pain for me.
      This is the rapid blinking yellow light error. There is also one for a slower blinking yellow light, just in case that’s what you have.
      A slowly flashing yellow light may mean that the bonnet is removed or disconnected. Check that the bonnet tabs at the side and rear are secured to the base. The unit will resume cycling 5 seconds after the bonnet is replaced. Last but not least, check for excess weight, such as too much litter or waste.
      Thank you for your note! This is the best machine in the world to have when you have cats, but it likes to misbehave every now and then. LOL =^.^=

  • @TheGuySharon
    @TheGuySharon 7 หลายเดือนก่อน

    I cannot stress this enough: THANK YOU!
    After three years with the Litter robot3, i finally gave with this constant, fast blinking yellow light.
    I used to be able to shake it or smash it around and it would solve it, but for two months now, it's been broken.
    I started checking reviews for other litter boxes, frustrated with the price of the LR4...
    But now, thanks to you, it's alive again!!
    I sand-papered the touching bits of these metal parts, cleaned the s*** out of them, and it's back in working condition!
    THANK YOU! THANK YOU!
    If it ever fails completely, I now know how to bypass this security.

    • @shallahk8403
      @shallahk8403  7 หลายเดือนก่อน

      That’s great!! So happy to hear it’s up and running well again!

  • @artemosity
    @artemosity 11 หลายเดือนก่อน +1

    We just replaced our inner rubber lining and started having this issue constantly. I'm not sure I'm going to bypass mine just yet, but your video (and the other one where you cleaned around the plastic detector part and put the ziplock plastic over the grooves) showed me where to look for issues which was tremendously helpful. If cleaning it out hasn't fixed it, I'll probably be back for a rewatch later so I can bypass. Our cats are far too skittish to go anywhere near the thing when it's moving, much less get inside, so I think it would be safe enough. Thanks so much for this very helpful video ❤

    • @shallahk8403
      @shallahk8403  10 หลายเดือนก่อน

      :) you may also have an issue with the DFI sensor needing replacement. If you clean the metal pieces, make sure everything is aligned, clean the debri off the plastic piece in the poop shoot spot and it works again for a few days but then the issue starts again, this bypass is the solution. I found that one of my metal pieces that are supposed to touch had about a 1mm hairline gap I could barely see so I kept having the issue off and on, plus the debri messing up the trip detector. So this solution of taping the metal contacts together worked for me, :) best wishes to you and your robot!

  • @hosunchoe9831
    @hosunchoe9831 ปีที่แล้ว +1

    That pinch sensor is a good idea only in theory. It's SUCH a pain in the ass. Thank you so much for this permanent fix!

    • @shallahk8403
      @shallahk8403  ปีที่แล้ว +1

      You’re welcome!! Yes it is and now WAS a pain in the ass, I agree, I appreciated what they were trying to do, but just a goofy design. I think the newer ones corrected it, but who wants to spend that kind of money again to find out? :)

  • @joannebutzerin6448
    @joannebutzerin6448 ปีที่แล้ว +1

    Thank you so much, and thanks for the additional comment explaining how to access the sensors. I am not going to spend a fortune getting my litter robot serviced, so I'm relieved to know there may be a way that I can manage these issues myself.

  • @jenniferanderson4805
    @jenniferanderson4805 ปีที่แล้ว +1

    Been struggling with this for a couple hours and found your video and as soon as I disconnected (and I didn't need to remove the bottom to do it) and taped the connectors together it worked like magic!

    • @shallahk8403
      @shallahk8403  ปีที่แล้ว +1

      That’s great! I didn’t even try doing it without removing the bottom, so hard to get to these, I’m amazed you did it without taking it apart :)!! Cheers, glad it fixed your problem

    • @kaylascinta6526
      @kaylascinta6526 ปีที่แล้ว

      How do you take the bottom apart?

    • @elizabethharrison3481
      @elizabethharrison3481 ปีที่แล้ว

      That's what I was trying to figure out-how do get the bottom off?

    • @shallahk8403
      @shallahk8403  ปีที่แล้ว +2

      There are deep screws in the base. It is too hard to video removing screws and time consuming, so I left it out. But it’s easy to find a video for litter robot base removal on TH-cam or the company’s website if you need the instruction. Also you will need a long screw driver to reach the screws.

  • @GQdaddy07
    @GQdaddy07 2 ปีที่แล้ว +10

    I've watched sooo many videos to help me remedy this problem and i have to say this was by far the most helpful. Thank you!

    • @shallahk8403
      @shallahk8403  2 ปีที่แล้ว +1

      Thank you so much! Kind of you to comment :)

    • @shallahk8403
      @shallahk8403  2 ปีที่แล้ว

      Thank you!

  • @LittleLisa092
    @LittleLisa092 ปีที่แล้ว +3

    I was almost in tears with my litter robot's flashing yellow light. I was debating on just eating the money and buying the new version. I ended up trying this fix and so far it works! I hopefully don't have to worry when I'm away at work if my robot is stuck!

    • @shallahk8403
      @shallahk8403  ปีที่แล้ว

      That’s great! Hope it’s the fix for you. I bought a second used one awhile back just so as to not have that worry. I do wish if they errored that they would error right side up with the litter in the bottom for the cats to use. If this didn’t fix your problem it could be a bad circuit board or sensor, those can be replaced. Don’t give up :)

    • @shallahk8403
      @shallahk8403  ปีที่แล้ว

      Also you can try a hard reset too, might fix a programming issue.

  • @doctorbuzzkill2658
    @doctorbuzzkill2658 7 หลายเดือนก่อน +2

    Thank you for this vid!
    I'd like to add one more thing. If after doing everything shown on this vid your pinch detection light still blinks, then last thing to try is cleaning the board. There is a black chip on the pinch sensor board that I had to clean to finally stop the curse of the blinking yellow light of death!
    Hope this helps and again thank you to the OP for this vid

    • @shallahk8403
      @shallahk8403  7 หลายเดือนก่อน +1

      Interesting! Good to know. I will pass it on to those who can’t get this fix to work. Surprised this happened to your.. isn’t the board completely covered by a silicone topper? I guess anything can happen with litter and dust though. Also the plastic lens covers in the poop shoot can get gunk on them causing this issue. I really need to update this video with added info.. but it’s kind of a real pain to disassemble everything, especially now that they’ve been functioning so well for about 2 years, to show it again and add info I’ve found out from people.thanks for your comment!!

    • @akrefambam8376
      @akrefambam8376 7 หลายเดือนก่อน

      I’m still getting the fast blinking yellow after all of this. 😩

    • @shallahk8403
      @shallahk8403  7 หลายเดือนก่อน

      You may have a bad DFI sensor needing replacement. Not hard to do. Also be sure to clean the clear covers both sides that cover your lenses in the square shoot. If a wire in your connections is loose, it can cause this too.

  • @mbraden66
    @mbraden66 ปีที่แล้ว +3

    I haven't used the one I have for a couple of years due to this issue. The cat of mine that is most likely to crawl into it, and has tried, weighs 22lbs. I tried sand paper to clean them, but couldn't get as close as you did, without taking it apart more than I had. Thanks for this.

    • @shallahk8403
      @shallahk8403  ปีที่แล้ว +1

      So you got it fixed then? :)

    • @mbraden66
      @mbraden66 ปีที่แล้ว +1

      @@shallahk8403 Not yet, I only watched your video an hour ago. I am just finishing up work and will be getting on it as it nice to have it working. You have yours up on a table yes? That might help my back a bit. The link to that non-Litter Robot one I thought was great as it seals the back and essentially makes a new bag for you. Making cleaning it a bit better. Just need to see some actual reviews on it.

  • @Sumpvesen
    @Sumpvesen 2 ปีที่แล้ว +2

    Thank you for your an excellent video. Needless to say, I just started having the same problem. With the knowledge from your video I choose to use a small pair of wire cutters, then while pulling the plastic pinch detector part forward until I was able to cut of the plastic part at the back that engages the switch. This can be done without disassembling the bottom unit. Hopefully the switch will not in the future loose contact due to corosion etc. If they do then I'll just proceed with the same procedure you suggested in your video with one exception; using a tin snips or other suitable cutter cut one of the switches off a suitable distance from the wired end and replug the second wire onto it so what you then have is wire - wire. Done right the two wire plugs will but up against each other leaving no or little exposed metal.
    Like you I've had great success using cheap tall kitchen garbage bags with no fancy tie off. I just leave the end tucked up to the front of the drawer without any issues though.
    The best litter I've found to be is Arm & Hammer, clumping SLIDE. It keeps cleaning to a minimum (I'm lazy and belong to 10 cats)

    • @shallahk8403
      @shallahk8403  ปีที่แล้ว +2

      Thanks! Do try the 8 gallon bags though, they fit better and cost oh so much less then tall kitchen bags, and less environmental waste by far. Great fix idea, I don’t quite understand it though, make a video :)

  • @11mccubbin
    @11mccubbin ปีที่แล้ว +7

    THIS!!! For over 2 years the stupid pinch detector has been the bane of my ownership of my litter robot (I’ve had for about 5 or so years now-love it) and I can’t believe it took me this long to find your video. A million thanks! This hack worked beautifully. Recommend to anyone who’s been struggling with the “fast flashing yellow light” troubleshooting :) thanks again!!!

    • @shallahk8403
      @shallahk8403  ปีที่แล้ว

      You are so welcome!! You made me laugh cause I struggled with it to for over a year or two as well, had another fix that kept the pinch detector working for cat safety but it wasn’t fool proof and the metal strips still got dirty or moved, so had to fix it much less but still it was an issue. I truly appreciate the positive feedback. That’s to you!!

  • @user-zu7fo9fg1t
    @user-zu7fo9fg1t 7 หลายเดือนก่อน +1

    THANK YOU! It never dawned on me that it's just a simple circuit. Keep it connected all the time (tape the sensors together) and voila! No more frustration!!

    • @shallahk8403
      @shallahk8403  7 หลายเดือนก่อน +1

      Exactly!! That’s how I felt after years of fixing/cleaning the connections again and again! I was so happy to come up with it and it worked! Thanks for your comment!❤️ I just had to share the idea, and it warms my heart when I get feedback knowing it was worth filming and it’s helping others love their robot again.

  • @bloodonthesnow
    @bloodonthesnow ปีที่แล้ว +1

    Thank you so much for making this video. My pinch sensor has been acting up for about a year and this morning I couldn't get it to turn off. I've wasted several hours removing the dome and cleaning it in the past. Hopefully now it's fixed for good. The Litter Robot is generally a great product but the pinch sensor system is a serious design flaw they need to work out.

    • @shallahk8403
      @shallahk8403  ปีที่แล้ว +1

      I totally agree. Mine seemed to be every couple of days sometimes, I was so sick of messing with it. So I came up with this permanent idea and was so very happy when it worked, and I havent had a single need to fix it again or take the robot apart in I think almost over a year. Thanks so much for your comment! Best wishes to you and your robot :)

  • @criminalxxxlove
    @criminalxxxlove 2 ปีที่แล้ว

    YOU ARE THE GOAT! Thank you so much for making this video! This just happened to me and I was freaking out. You saved us!

    • @shallahk8403
      @shallahk8403  2 ปีที่แล้ว +1

      You made me smile, thank you for your comment! Glad I could help. Cheers

  • @zoltomar4759
    @zoltomar4759 2 ปีที่แล้ว +13

    Thank you, Shallah K! I had upgraded my litter robot 1 (an invincible tank) to the robot 3 and was hating life. After about a year of owning the unit I've come home to the dreaded half-turned unit + rapid blinking light. Your method is perfect for a non-destructive bypass. I think I'll go a step further and put both contacts on one strip of metal, one could even strip the terminals off of the wires and solder them together if there was no intention of resale, though the unit would inarguably be more reliable. In theory, I suppose I understand the pinch sensor idea, but in reality...I've never owned a cat that wanted to be around the unit when it was in rotation (that wasn't a kitten). Anywho, thanks again!

    • @shallahk8403
      @shallahk8403  2 ปีที่แล้ว +2

      You’re very welcome! I was frustrated with it too.. cleaning, taking it apart, checking connections, replacing the metal pieces. After a few years, I came up with the previous video tips to cover the debri spot which worked great. But after a long time I got the errors again and the terminals weren’t connected. Sick of taking the machine apart I did the bypass, and so glad I did! Glad it helped you too!! Loved the thanks!

    • @EmilyMancusoDesign
      @EmilyMancusoDesign ปีที่แล้ว

      Hey Zolto! Did you ever have any success with your hack? I have this issue also and wondered if just having a single piece of that same metal and the connectors on either end would be more reliable. I'm not savvy with this kind of stuff so not even sure what type of metal to look for? Is it just tin? steel? or something else?

    • @shallahk8403
      @shallahk8403  ปีที่แล้ว +2

      All you need to do is tape the metal pieces together (after cleaning them) and this will keep them clean and connected and signal transferring without interruption. No need to clip, add a metal piece or solder anything, the electrical tape method lasts and will outlive the product. No need to overcomplicate it, unless you just prefer it that way. Cheers

  • @marsrae7236
    @marsrae7236 5 หลายเดือนก่อน

    I didn't know what the pinch sensor was a thing until the light started flashing randomly. This video helped correct my litter robot, thank you!

    • @shallahk8403
      @shallahk8403  5 หลายเดือนก่อน

      Good to hear, thanks!

  • @vane46793129ssa
    @vane46793129ssa ปีที่แล้ว

    THANK YOU VERY MUCH! Our machine had been flashing the stupid yellow light for a long time, and we finally had our NORMAL litter robot BACK after following your solution 🎉 you save our lives 😍😍😍

    • @shallahk8403
      @shallahk8403  ปีที่แล้ว +1

      That’s great!! They are the absolute best to have when they are working!! But such a nuisance when they aren’t, lol! So glad this fox was a help to you. Mine have been going strong for about a year now, very rarely do I have any more issues with flashing lights. Keep your other contacts clean, be sure to reset your weight sensors if any show up. Clean your DFI sensors and clear screen covers occasionally and all should be well! Cheers

    • @shallahk8403
      @shallahk8403  ปีที่แล้ว

      Loved the “you saved our lives”, so funny… kitty litter is definitely a nightmare when you’re having robot issues!! Thanks for the comment!!❤️

  • @andreichirescu
    @andreichirescu ปีที่แล้ว

    Thanks alot for showing me the 2 metal pieces that need to touch. As soon as i made them touch, no more errors. Thanks alot!

    • @shallahk8403
      @shallahk8403  ปีที่แล้ว

      That’s great!! Keep them clean, and watch for corrosion you can sand off too!

  • @kathyperez2756
    @kathyperez2756 4 หลายเดือนก่อน

    Thank you so much for this video!!!! My husband and I were so frustrated we were ready to buy a new litter robot but this video saved us! That flashing yellow light has been going on for several days and I've been manually cleaning the litter box multiple times a day to avoid accidents while we tried to fix it. FINALLY found this video and BINGO!

    • @shallahk8403
      @shallahk8403  4 หลายเดือนก่อน

      Awesome!! Thanks so much for your comment! Love to hear it helped :)

  • @michaelklimek6393
    @michaelklimek6393 ปีที่แล้ว

    Thank you a million times over for this. That blankety-blank sensor was driving me nuts!! No longer!

    • @shallahk8403
      @shallahk8403  ปีที่แล้ว +1

      So happy to hear! Appreciate the comment. And I totally agree I hated it too, I haven’t had a single issue with it since. Cheers!

  • @matthewcintron-quinones9614
    @matthewcintron-quinones9614 7 หลายเดือนก่อน

    Oh my goodness! Thank you so much for this video. Silly me, I didn't read the description to know about the screws, but I figured it out. I followed these instructions exactly - black electric tape and a zip tie, and now the machine is working flawlessly. I bought the Litter Robot 3 in Nov 2020, so I hope my little monsters know by now to not enter when it is moving, and thus they won't get stuck with the pinch detectors tapped and locked in. THANK YOU ONCE MORE!

    • @shallahk8403
      @shallahk8403  6 หลายเดือนก่อน

      You’re so welcome!! Glad it worked for you. My 4 monsters are alive and well with no pinched legs going on 2 years now after this fix, so guess they are smarter then we think!! Lol
      Best of luck to you and yours, my robot is now not a worry anymore, this fix solved a lot of headache :)

  • @jerrybarry1679
    @jerrybarry1679 ปีที่แล้ว

    Wow! What a great fix to a frustrating problem. Company said to clean with tooth brush you can’t get to it easy. Problem not fixed. Your idea is a permanent fix to a troublesome problem. Thanks for the great tip. Litter Robot needs to redesign the machine so this isn’t a problem.

    • @shallahk8403
      @shallahk8403  ปีที่แล้ว +1

      I know right, I absolutely hated!! taking the machine apart to fix those metal pieces. Dirt, corrosion, bending out of place. I know they did it for cat safety, so it’s good, but not all cats need that bit, and it’s such a hassle fixing the small issues. So glad you found this helpful. And thank you for telling me, always makes me happy to know it helps somebody. :) check out my litter robot bag idea too, it’s really helpful and easier. Cheers😎

    • @jerrybarry1679
      @jerrybarry1679 ปีที่แล้ว

      @@shallahk8403 Shallah I haven’t used the bag procedure yet but it is a great idea. You provided excellent instructions for installing it. Thanks. Jerry

  • @net-config
    @net-config 8 หลายเดือนก่อน +2

    Hi Shallah, THANK YOU SO MUCH - I applied the fix you show here to my Litter Robot 3 about 10 months ago and it has worked FLAWLESSLY ever since. I use (sometimes) the app for iPhones where you can see what is happening, including error codes. My LR3 was starting to have problems with the pinch sensor and it was getting frustrating to deal with it all. It is a Litter ROBOT - I would just like it to work and do its basic job... I have had problems with the "bonnet connection" also in the past, but you can fix that in the app by not using the Night Light, IIRC. THose wires connect the base to the top part of the LR3, and with that setting OFF, there are no "connection issues" in that department.
    Life was not as simple with the "Pinch Sensor", but that is where your video gave me the courage to FIX it. I basically took it apart, removed the metal clips from their normal area, and connected them up by clamping on on the other, IIRC. Then I taped it up and glued it to the area where they are located on the outside of the "pinch area". Put the globe and LR 3 back together, and KNOCK on WOOD, that was the end of any problems. The LR3 just works now, just was I want to. As others have mentioned, an erratic LR3 is SUPER annoying when you are out of town and someone is taking care of your cats. You do not want them to feel like THEY are causing issues with the LR3, when in reality this Pinch Sensor is something that should be an OPTION you can turn off somehow.
    So THANK YOU so much, I believe we can now happily keep using the LR3 for many more years to come!!

    • @shallahk8403
      @shallahk8403  8 หลายเดือนก่อน

      What a great review!! Thanks so much for your comments. I myself have had bonnet connection issues.. so really appreciate the info you provided.
      My pinch detector fix has been going strong almost two years now on 2 robots. I never get that error anymore! Yay. Hope you have the same luck. The litter robot is one of my best purchases!! If I had to work a second job to buy another if needed, lol.. I’d start working tomorrow. I love them that much. With 4 cats, not having to deal with scooping litter box or litter mess is a big deal. People think you’re crazy to buy one of these because of the price. But I’ve never ever regretted it.
      Cheers to you and your furball or furballs!! Thanks again so much for your comment, makes me feel like people who take the time to write back were really helped by it.

  • @DeWorm
    @DeWorm ปีที่แล้ว

    Thank you so much, I really appreciate that you share your insights here on TH-cam! Greetings from Germany :)

    • @shallahk8403
      @shallahk8403  ปีที่แล้ว

      Thanks for your comments from Germany!

  • @christineseng-bo7147
    @christineseng-bo7147 หลายเดือนก่อน

    I was feeling so down that I’d have to spend $600 for a new litter robot, but your video saved me!!! Clear guidance & soothing voice I might add lol Thank you, thank you, your video is so much appreciated. I feel so much better now!😊

    • @shallahk8403
      @shallahk8403  หลายเดือนก่อน

      I’m so glad! These robots are gizmos you don’t want to live without, but oh my when they keep erroring it’s the most frustrating thing in the world. Glad my video helped! Made all the difference for me, both going strong 2 years later!

  • @leanakiddy622
    @leanakiddy622 ปีที่แล้ว

    I've had my Litter Robot 3 for 2 years and didn't have a single problem until about 3 weeks ago. I stupidly didn't pay for the extended warranty, so I was at my wits end trying to get it to work again. I took it apart, cleaned out every nook and cranny of the robot, tried the plastic hack I found on another video, and replaced the power supply because I found that it was partially broken and felt that it might have been the cause. Didn't help one bit! After trying everything on the internet, I resorted to just unplugging it and only plugging it in when I wanted it to cycle (for some reason it would complete the very first cycle but then error out on the next one). So I followed your fix and all I can say is you are a GENIUS! This solved my problem. After bypassing the sensor, my LR3 is working like a charm and I am loving the LR3 again. I went ahead and checked the weight sensor and it is just fine, will stop as soon as it feels the slightest weight - so this is a great fix! I also tried your rubber band hack for the trash bag and again you are a GENIUS!

    • @shallahk8403
      @shallahk8403  ปีที่แล้ว

      Awww! You are so kind! I myself was just so sick of fixing the error over and over. Bought two just to have one accessible if the other was frozen upside down or some such other nonsense. After a few tries, that helped, I thought up this override and thought to share it. I TRULY APPRECIATE you taking the time to comment. And so glad I could help! Love these machines! Wish I’d bought one years before I did. But 6 years now with these and still worth every penny! Once again, thank you for your kindness!! ❤️

  • @shawntaylor4519
    @shawntaylor4519 ปีที่แล้ว

    OMG!!! For 2 months I have been messing with the stupid bonnet because of the constant error stating that the bonnet was removed when it wasn't. I even ordered a new bonnet but that didn't fix it and nothing was resolving the issue. I was pulling my hair out over this! Saw your video and wasn't expecting it to work... but it did!!! Thank you sooooo much!!! Was about to throw this thing out the window!!

    • @shallahk8403
      @shallahk8403  ปีที่แล้ว

      Yay!! Glad it helped :) I know, the frequent error lights were making me nuts too. I’d take it apart, clean everything, that would last about 3-5 days then the error again. Finally narrowed it down and just decided to wrap the metal sensors together to bypass the constant pinch detect errors. Going strong for over a year! Every now and then I cheat the metal contacts on the bonnet and the base but that’s all it ever needs, or just a basic reset.

  • @roebuddy01
    @roebuddy01 ปีที่แล้ว

    Splendid video. Thank you.
    Your LR3OAs are so clean too!

    • @shallahk8403
      @shallahk8403  ปีที่แล้ว

      I did video after I washed them :) THANKS!
      Use empty button to empty all your clean litter into the bottom tray after you’ve emptied it and put in a new bag. Then take off hood and you can lift robot out of base take outside to shake out remaining litter then I use a wispy wet washcloth to scrub it out then rinse it with a hose or sink sprayer and towel it dry. Looks brand new after. :) I only do this every 4 or six months but it helps to remove residue build up on rubber that sticks to used wet litter and clump at bottom.

  • @divinemzl
    @divinemzl ปีที่แล้ว

    Thank you for sharing this.. it totally worked!!! You saved me from having to replace my litter robot!

    • @shallahk8403
      @shallahk8403  ปีที่แล้ว

      :) wow! That’s great, I wouldn’t hesitate to buy another if I had to. Love the ease of the auto cat box. But omg the cost, especially nowadays. Glad this worked for you! It takes a lot of digging and trial and error, but usually I’ve been able to come up with a fix or find one on line. That’s why I shared this one, to help others. Thanks for the feedback. Cheers

  • @BillyBA55
    @BillyBA55 ปีที่แล้ว

    Seriously, I just fixed my litter robot with this video, I was going to throw it out! 01/13/23 this works! Thank you so much!

    • @shallahk8403
      @shallahk8403  ปีที่แล้ว

      So glad to hear! Don’t give up on them, they are awesome machines. They just my take a little work around or part replacements. I’ve had mine going on 6-7 years now :) one of my best investments though omg the idea of such a cost for a litter box. But I’d do it again tomorrow knowing now how great they are, and the ease they bring to litter box scooping annoyance. Lol
      Cheers to you, glad I was able to help!!

  • @TheDiosparati05
    @TheDiosparati05 ปีที่แล้ว

    You are the best, always come to your channel to work on litter robot.

    • @shallahk8403
      @shallahk8403  ปีที่แล้ว

      Thank you! So nice of you to say :)

  • @keggmcmuffinn
    @keggmcmuffinn 3 หลายเดือนก่อน

    You just saved me having to buy a brand new litter robot. Thank you so much for this information it’s so valuable.

    • @shallahk8403
      @shallahk8403  3 หลายเดือนก่อน

      Awww, appreciate your comment! I’m so glad it helped. Nothing worse than that dang robot getting stuck upside down with blinking light error every other day. Mine going strong 2 years now, only ever get an error once every few months and easily reset and fixed it need to clear hood contacts. But never this one anymore. Cheers!!

  • @iceman4965
    @iceman4965 ปีที่แล้ว

    Thank you for this video. I searched few days with no luck on how fix my robot. One video did show what could had been the problem but it didn't fix the issue. The touching pins at the bottom inside I didn't know of; I cleaned those and it works now

  • @michaelbrockmann1741
    @michaelbrockmann1741 10 หลายเดือนก่อน

    Thanks for this video. I didn't do the by pass but after reading the notes and watching the video I was able to remove the bonnet, ball, and pan which gave me enough access to clean the anti pinch contacts with the end of a tooth pick. After cleaning one contact was tight and one was loose. I pushed the loose one back in place with my thumb. I didn't need to remove the screws for the bottom. I just turned the unit up side down.

    • @shallahk8403
      @shallahk8403  10 หลายเดือนก่อน +1

      That’s basically what I did for years, cleaning and realigning but then it got to the point I had to do it nearly every week and more with the litter buildup on the trip detector. So I figured this out and I’ve not had the issue again in over a year now. Glad it gave you some help though :) thanks for the comment!

  • @cldxoxo
    @cldxoxo 2 หลายเดือนก่อน

    Thank you!! I never would have thought of this myself. I just did it today and so far, so good. I was about to quit on the litter robot and this changed everything!

    • @shallahk8403
      @shallahk8403  2 หลายเดือนก่อน

      That’s great!! Don’t give up, there’s a fix just takes time :)
      Mine have been going strong over 8 years. This fix stopped the constant annoyance of the trip sensor issue. Very very rarely do I get another flashing light, but if I do
      It’s usually just a reset power on and off, or cleaning the lens covers or bonnet connections. Never again will litter debri, a bent, corroded or dirty metal connector cause you an issue :) makes them nearly forgettable! Cheers

  • @scalpelmd1
    @scalpelmd1 2 ปีที่แล้ว

    OMG thank you so much for this, I really didn't want to send it back for repair.

    • @shallahk8403
      @shallahk8403  ปีที่แล้ว

      You are so welcome! I agree, sending back for repair sucks. Some here have had to had their computer boards replaced though as that was their issue, but if it’s more a sporadic issue for you that can be fixed but just keeps reoccurring then the bypass works.

  • @spottedmoray2466
    @spottedmoray2466 ปีที่แล้ว

    This video saved my life lol. I was seriously considering getting a new robot. Mine is getting a little up there in years but it was just these silly sensors all along!

    • @shallahk8403
      @shallahk8403  ปีที่แล้ว

      So glad!!! One of mine is 7 years old so I understand, but still going strong. Hope to not have to replace for years to come as they are sooo expensive. Glad this fix worked so well for you.
      Thanks for your comment :)

  • @swillsh
    @swillsh ปีที่แล้ว +1

    Thank you so much!! You just saved us a ton of money replacing ours :)

    • @shallahk8403
      @shallahk8403  ปีที่แล้ว +1

      Yay!! This fix saved my sanity, I’m so glad it helped you too. I’ve thought of upgrading, as mine are over 6 years old now. But always worry there will be some sensor issue I can’t fix in the new one. And since my old ones work perfectly ever since this fix, over 6 months or more now, there is No more problem! And once soaped and cleaned, they look like I just pulled them brand new out of a box, so I’m keeping my money in my pocket. Best cat litter invention ever! Love my robots. Cheers to you and your robot :)

  • @adamriley7587
    @adamriley7587 ปีที่แล้ว

    I know this is an older post but I was having the flashing light cleaned it it ran once then started again read watched your video and it runs correctly again ❤️❤️

  • @jean-francoisbourgault2823
    @jean-francoisbourgault2823 2 ปีที่แล้ว

    YESSSS !!!! this is it. , I still had an on/off problem wven after replacing the damn pins. This did the trick!

    • @shallahk8403
      @shallahk8403  2 ปีที่แล้ว +1

      Glad this helped you! Mine are working great still! Months later no errors! Yay

  • @eggy8108
    @eggy8108 ปีที่แล้ว

    Thank you so much! I'm going to do this on the weekend. You're a life saver :)

    • @eggy8108
      @eggy8108 ปีที่แล้ว

      Thank you, it worked perfectly. Really good instructions, had no issues following them. I could see that a bunch of dirt had got stuck between the sensors, I could have cleaned it, but ended up bypassing it anyway since my cats are thankfully pretty wary of the machine when it's rotating and won't go near it. I would rather not have to go through this process again, so easier just to bypass now :)

    • @shallahk8403
      @shallahk8403  ปีที่แล้ว +1

      Exactly! And believe me the frequency of cleaning need for the sensors seems to increase with time. Thank you for your comment. So glad this worked for you!! :)
      Happy litter boxing, :)

  • @bobberdie5444
    @bobberdie5444 ปีที่แล้ว

    Getting one of these for free today because of the “pinch sensor”. Thanks for posting this. I think this will do the trick!

  • @sumfoxx
    @sumfoxx ปีที่แล้ว

    You. Are. A. Godsend!!! Thank you for this SO much! You’re SO appreciated! Thank you! Thank you!

    • @shallahk8403
      @shallahk8403  ปีที่แล้ว

      You are so welcome! Makes me happy to know the video I made is helpful to people. Really appreciate your comment. Thank you so much! Yay for litter robots!!

  • @meganharris5073
    @meganharris5073 ปีที่แล้ว +2

    Thank you for sharing this! It saved my litter robot from being thrown out the window!

    • @shallahk8403
      @shallahk8403  ปีที่แล้ว

      :) I totally understand, lol! Glad it helped you. Thanks for your comment

    • @lynncosta9346
      @lynncosta9346 8 หลายเดือนก่อน

      For real!!

  • @mks9469
    @mks9469 ปีที่แล้ว +8

    This was SOOOOOO HELPFUL!!!
    I have had my LR3 for 5 years now and just love it!!
    The pinch detect has been going off a ridiculous amount of time and at the worst time also. It would freeze when it was upside down and when I was at work. My little sensors had become corroded and were no longer touching apparently.
    I soaked them in vinegar to get that corrosion off and then wrapped them like you showed here. This has been the fix I needed. Now there are no issues at all.
    Thankyou so much!!!

    • @shallahk8403
      @shallahk8403  ปีที่แล้ว +1

      Wow! That’s great :)
      I really appreciate the feedback. Does my heart good to know the video helped someone. ❤️❤️❤️

    • @GlamGypsy
      @GlamGypsy 4 หลายเดือนก่อน

      Did you wrap your sensors & then leave them connected for pinch detection? Or did you completely remove pinch detection like she does in this video? I am having a HUGE issue with my litter robot 3 that I literally almost cried out of frustration with how many times I have had to fight with this thing at the absolute WORSE times! I've had it for about 2 1/2 years now. I have even missed a day of work over it trying to fix it. I have 3 cats so I do worry though about them getting stuck because I have seen them getting in the robot while it is cycling!!! Ughhhh Not sure what to do cause the sensor bar always gets full of litter stuck in it & I have to clean it all the time. The metal pinch detection bars also get corroded & dirty. I even coat them with vaseline like their official tutorial mentions. The company even sent me a new pinch detector in the mail to replace myself which we did... but then after a while, it started happening again. I was going to get the updated version (litter robot 4) cause we have 3 cats but now I second guessing even bothering if it's going to have the same issues... My husband & I are pretty frustrated at this point so I am desperate to find a solution.

  • @BrianLeeTrades
    @BrianLeeTrades 11 หลายเดือนก่อน

    Thank you so much you explained it perfectly and fixed the issue I had today. Appreciate it!

    • @shallahk8403
      @shallahk8403  11 หลายเดือนก่อน

      You’re so welcome!! I’m glad it helped, that was my goal :)

  • @emilykeener1569
    @emilykeener1569 ปีที่แล้ว +1

    DUDE THANK YOU. These sensors have been the BANE of my existence since buying two of these infernal devices. I just found this video after tearing apart and cleaning that sensor for the 4th time this week 🤡

    • @shallahk8403
      @shallahk8403  ปีที่แล้ว

      You are so welcome!! I hated them too, decided to take a chance and fix them. It worked great 👍 I haven’t had a single error light for this since, think it’s been 5 or 6 months since I did it.

  • @robertbuckley2108
    @robertbuckley2108 9 หลายเดือนก่อน

    Oh my god, you just saved us $700. We've been having the pinch error for so long now that we are about to buy a new one since litter robot support hadn't responded to our messages.
    My litter robot was a little different than yours but the sensors were in the right place and the fix was mostly the same. I ended up just cutting the wires and soldering them together though instead of taping the plates together.

    • @shallahk8403
      @shallahk8403  9 หลายเดือนก่อน

      That’s great!! Congrats
      Others have told me they soldered as well. I like the idea, just wanted the option to reverse it if I ever got a new cat/kitten in the future, just for safety sake til they got used to the robot. But most likely that isn’t necessary.
      I’m so happy it worked out for you. I used to get those darn errors every couple days, drove me nuts fixing it again and again. Coming up with this idea has saved me so much hassle and robot annoyance. I hope it dies the same for you! ❤️

  • @mfasolo6046
    @mfasolo6046 ปีที่แล้ว

    Thank you soooo much! I could not get the sensor pinching light to go off tonight no matter what I did. I followed your steps to bypass, and it went back to blue when I set everything back up. Thank you, thank you, thank you!

    • @shallahk8403
      @shallahk8403  ปีที่แล้ว

      You are so welcome! It’s a beast to do it, but oh so worth it, once done!! Cheers to you

    • @shallahk8403
      @shallahk8403  ปีที่แล้ว

      That’s great!!! Thanks 🎉 for your feedback

  • @sheilapaschal93
    @sheilapaschal93 ปีที่แล้ว

    Thank you sooo much! Mine is in the middle of the cycle and it will not reset for me to empty the litter. I will be checking the pinch detector right now. Your video was extremely helpful for my problem

  • @emersonwynn3856
    @emersonwynn3856 ปีที่แล้ว

    So glad you shared this. Life saver! Thank you!!

    • @shallahk8403
      @shallahk8403  ปีที่แล้ว

      You are so welcome! Thanks for your comment

  • @franclarke8995
    @franclarke8995 4 หลายเดือนก่อน

    Thank you so very much Shallah!!! I have watched all the TH-cam videos on this problem, and hands down yours is the best. The one put out by Litter Robot is awful. I watched yours 4 times because I am not mechanically knowledgeable but I was able to take the bottom off, sand down the leads and get the job done. I did have to go to Lowes and buy a screwdriver, electrical tape and sand paper but its all good because your instructions were so clear. Having my Litter Robot since 2018 has spoiled me when my cat had to use a basic litter box, yuck!!! The peeing on the floor around the litter box, the cat litter flying all over the place and the SMELL!! I was so happy to fix my Liiter Robot 3, its been great. Thank you again for a great video. 😅

    • @shallahk8403
      @shallahk8403  4 หลายเดือนก่อน +1

      Awwww! Such a nice comment :)
      I’m glad you fixed it, it’s a great life changing (truly, lol) machine I know I couldn’t and wouldn’t want to live without. Really appreciate your words, mine are still going strong 8 years now hope yours does too!

  • @ReverendPONT
    @ReverendPONT 11 หลายเดือนก่อน

    Thank you for sharing. Had my LR3 for about 5 years and got the pinch sensor fault today. I needed to redo the liner and felt strips anyway so I ordered the pinch sensors also. When I go to redo everything, I'll be doing the bypass that you did.

    • @shallahk8403
      @shallahk8403  11 หลายเดือนก่อน +1

      It works great!!! Mine going strong 1.5 years later after fix made

    • @ReverendPONT
      @ReverendPONT 11 หลายเดือนก่อน

      @@shallahk8403 I got it going again by taking the old ones out, cleaning with Isopropyl Alcohol and sanding the parts of the sensors that touch and bent one slightly to increase the tension. Working great but the new parts are on the way so I'll be doing the bypass when they come.

    • @shallahk8403
      @shallahk8403  11 หลายเดือนก่อน

      Yay!! Glad :)

  • @rhenal1008
    @rhenal1008 ปีที่แล้ว

    Thank you, gonna give this a try, my box constantly gets stuck upside down. Looking forward to having this issue solved :D

    • @shallahk8403
      @shallahk8403  ปีที่แล้ว

      Let me know how it goes! Had that issue too many times, frustrating to say the least.

  • @Felony7777
    @Felony7777 2 หลายเดือนก่อน

    I just watched the last video then came to your page and seen this one. Holy crap, you’re a genius. I’m definitely doing this. My cats aren’t that crazy to try and get in while it’s rotating either. So this will save me from getting aggravated over it messing up all the time. Thanks so much for sharing.

    • @shallahk8403
      @shallahk8403  2 หลายเดือนก่อน +1

      You’re very welcome. I’ve had mine for going on 8 years and that dirty trip sensor thing was the biggest pain in the rear. Figuring this out made me love my robots again. Lol
      No issues in 2 years after doing it!

    • @Felony7777
      @Felony7777 2 หลายเดือนก่อน

      @@shallahk8403 Yes….. I even considered buying the new Robot 4’s. I love them but they are expensive. I have 2 robot 3’s and only the oldest one has the sensor issue. That’s about to change thanks to your video.

  • @tamarabogart1284
    @tamarabogart1284 10 หลายเดือนก่อน

    Thank you so much! My litter robot was getting stuck in the upside down position every day now and I have vacation coming up. I can’t have this happen when I’m on vacation and using pet sitter who knows nothing about it. I had to shove some painters tape in there this morning to make the contacts touch but going to get electrical tape and do this fix. My cats never play in the box or go in when it’s upside down. No reason to have that error.
    My daughter’s cat will pee in the chair if the litter robot is not working so this fix is really going to save us that issue!! You’re the best!!! ❤

    • @shallahk8403
      @shallahk8403  10 หลายเดือนก่อน +1

      :) It worked for me for sure. Hated the little bit of litter that would cause this error. Other stuff can do it like a speck on the lens covers. But if you fix it and it keeps happening again after a few days it’s usually solved with this fix. Thanks so much for your comment. Have a great vaycay!!

    • @tamarabogart1284
      @tamarabogart1284 10 หลายเดือนก่อน

      @@shallahk8403Yeah good reminder to clean the lens! I have done that during routine cleaning of the entire unit and plan to do it all together later today. 😊

  • @Ang__Hou
    @Ang__Hou ปีที่แล้ว

    Thank you for this video. It totally worked. 😊I’m so happy right now!!

    • @shallahk8403
      @shallahk8403  ปีที่แล้ว

      Yay!! It’s a relief to not have to clean those sensors or the trip sector litter debri over and over and over. Mine have been running smooth for over a year!

  • @aliwu2498
    @aliwu2498 ปีที่แล้ว

    Thank you! I fixed my litterrobot following your video!

    • @shallahk8403
      @shallahk8403  ปีที่แล้ว

      That’s great!! Thanks for letting me know. The comments given do my heart good. Glad it helped you :)

  • @mobayguy
    @mobayguy ปีที่แล้ว

    Thank You VERY much Shallah. The pinch detector gas been driving me crazy. It's hard to clean and a pain to clear.
    Thanks!

    • @shallahk8403
      @shallahk8403  ปีที่แล้ว

      Exactly! That’s why I tried to come up with a way to prevent all that hassle. Working great so far for over a year now!

  • @m0mb0y
    @m0mb0y 5 หลายเดือนก่อน

    Thank you!! Finally there is light (not a yellow blinking one…) at the end of the pinch detector tunnel

    • @shallahk8403
      @shallahk8403  5 หลายเดือนก่อน

      Ha ha! Come towards the light :)
      A steady light is a happy one

  • @kanjilovetat87
    @kanjilovetat87 ปีที่แล้ว +1

    You're an angel! This has helped so much!

    • @shallahk8403
      @shallahk8403  ปีที่แล้ว

      Thanks for compliment! So glad it helped you :)

  • @AliHaider-fb9qx
    @AliHaider-fb9qx 10 หลายเดือนก่อน

    Your video saved me hours of diagnostic time 😂😂.
    Thanks for your video and great solution.

    • @shallahk8403
      @shallahk8403  10 หลายเดือนก่อน +1

      :) so happy to get your note. Glad it helped and made it easier to fix for you, that was my goal.

  • @CallUNexTuesday
    @CallUNexTuesday 7 หลายเดือนก่อน +1

    THANK YOU SO MUCH! You legit saved our family a grand. I'm forever in your debt! ❤❤

    • @shallahk8403
      @shallahk8403  7 หลายเดือนก่อน +1

      That’s awesome!! So glad it helped.
      Working robot is a happy home. =^.^=

  • @user-he5pf7sl3i
    @user-he5pf7sl3i 2 ปีที่แล้ว

    Omg, What an idea! Thank you for sharing with us.

    • @shallahk8403
      @shallahk8403  2 ปีที่แล้ว +1

      You’re welcome! Hope it helps :)
      I’ve not had a single pinch detect error since, but be sure to not forget to keep clear window sensor area cleaned as well.

  • @anne-mariebitman4999
    @anne-mariebitman4999 ปีที่แล้ว +1

    I think this may have been my issue. The first time i did the fix it didn’t take. So I cleaned and did again. It just cycled 10 times and no problem. That is a miracle. I’ve been battling this for almost 2 years. I even installed a camera in the litter box room in the garage so I could monitor the robot. We have a doggy door through the laundry room and built cabinetry to store the robot. Thank you so much for this fix!!!! We have the robot 3 since early 2018. I bought the 4 but says 8 weeks for delivery. I’m debating cancelling it.

    • @shallahk8403
      @shallahk8403  ปีที่แล้ว

      I love mine, both over 5 years old. I decided not to upgrade because I’ve figured out the fixes for this one but the newer one seems less accessible to fixes but could be better, or worse. I decided not to take the gamble as I’m so very happy with mine now and the ease of the litter bag I use with it.
      Thank you very much for for your comment! So glad this helped you!!
      Let me know if you upgrade and if you like the new design.
      These are so expensive I’m gonna hold onto my older models for awhile longer :) seems new stuff is made so much cheaper now a days. Cheers 🐈

    • @anne-mariebitman4999
      @anne-mariebitman4999 ปีที่แล้ว

      Worked like a charm. No issues since applying this fix!!

    • @shallahk8403
      @shallahk8403  ปีที่แล้ว

      Awesome! Congrats 🎈🎉

    • @anne-mariebitman4999
      @anne-mariebitman4999 ปีที่แล้ว

      Still going strong!! Thank you! Now I’m getting bonnet removed. Any hacks for that besides bending the tabs?

  • @tripletap007
    @tripletap007 ปีที่แล้ว +1

    Awesome work…horrible design that I’ve been getting so many errors on lately. I can’t wait to do this when I get home!!

    • @shallahk8403
      @shallahk8403  ปีที่แล้ว

      Did it work for you?! :)

    • @tripletap007
      @tripletap007 ปีที่แล้ว

      @@shallahk8403 So far! Fingers crossed!

  • @matneyu3178
    @matneyu3178 ปีที่แล้ว

    Amazing video. Literally saved me this morning.

    • @shallahk8403
      @shallahk8403  ปีที่แล้ว

      Thanks for your comment! Appreciate the feedback

  • @himboslice_
    @himboslice_ ปีที่แล้ว

    my pinch detector was rusted and one broke to the stump on removal. I just cut the wire, stripped the plastic and twisted the wire before wrapping with electrical tape. fix worked! thank you!

    • @shallahk8403
      @shallahk8403  ปีที่แล้ว

      You are so welcome!! Glad it worked for you. Best thing I ever did was fixing this issue, many months later and not a single flashing yellow light error.

    • @himboslice_
      @himboslice_ 9 หลายเดือนก่อน

      One year later and it’s broken again 😞. May just get the 4 at this point. I’ve got over 4 years of use out of my 3.

    • @shallahk8403
      @shallahk8403  9 หลายเดือนก่อน

      Broken how?
      Same error?
      It’s not the connection I’d guess if your wires are wound together and covered. Maybe the DFI sensor has gone bad? I had issues for a bit and it turned out I had a little speck on the backside of the clear lens cover in the square drip slot. I cleaned both sides back and front and everything was working again. Don’t give up, maybe there’s a simple something you might be overlooking. But I do get the appeal of buying new. I looked at the 4, but was worried if it had any issues like the 3 it might be harder to fix. Wanted to give it some time on the market and see what people think. So far so good on mine, both 6 and 7 years old. I’ve had to replace the liners as they weren’t falling anymore and dumping clumps, and I added the wifi but with that the new DFI sensors were crap and had to replace both in a month.

    • @shallahk8403
      @shallahk8403  9 หลายเดือนก่อน

      The microchip board the wire plug into I think could go bad to.. maybe that needs replacing. Is your robot in a humid spot like a bathroom or something?

  • @mosesfamily1041
    @mosesfamily1041 3 หลายเดือนก่อน

    Thank you!!!!!! Finally, a solution to this issue. I'm was so tired of taking my litter robot apart.👏👏👏👏👏👏👏👏👏👏👏👏👏👏👏

    • @shallahk8403
      @shallahk8403  3 หลายเดือนก่อน

      I was too! So glad it helped you :)

  • @andrewwilson7169
    @andrewwilson7169 ปีที่แล้ว

    THANK YOU. This was my first search on a google, and I now know what to clean/maintain. Much appreciated, from a Persian Cat owner :-) [I have kept my pinch feature enabled as my cats are feeble, but at least I now know what to fix!!].

    • @shallahk8403
      @shallahk8403  ปีที่แล้ว

      So glad it was helpful. Yes, I was worried about the pinching factor two and watched closely for a few days praying I wasnt wrong about disabling it. Prior to this fix I had another idea and it helped a lot too, not a permanent fix but it did reduce the errors to a large degree also. I will see if I can send the link to you, if not, maybe you can find it under my name or subscribing, not sure. :)

    • @shallahk8403
      @shallahk8403  ปีที่แล้ว

      th-cam.com/video/1O0aS1jTLOI/w-d-xo.html
      Here it is, the fix is closer to the end of the video, be sure to tape down the bottom part of the cut bag, I found that out later.

    • @shallahk8403
      @shallahk8403  ปีที่แล้ว

      More detailed version:
      th-cam.com/video/4ZVFST4iPuo/w-d-xo.html

  • @clarea5863
    @clarea5863 23 วันที่ผ่านมา

    Thank you!!! Without fail I left for the weekend and it I got the dreaded alert on my app! It was a bit of a pain getting the bottom of the unit off. **Note long magnetic Phillips needed. But it went back to the blue happy light. Thank you!

    • @shallahk8403
      @shallahk8403  23 วันที่ผ่านมา

      Yay! It’s a great fix. Glad it helped

  • @anthonypalazzi6255
    @anthonypalazzi6255 10 หลายเดือนก่อน

    I hope you have a great day thank you so much for your excellent help!

    • @shallahk8403
      @shallahk8403  10 หลายเดือนก่อน

      You are so kind! Thank you for your comment. ❤️

  • @myfebronia3570
    @myfebronia3570 ปีที่แล้ว +1

    Thank GOD. I was about to toss my off warranty LR3 out today and happened to find this video on a whim. Ordering some tape and hoping for the best today!

    • @shallahk8403
      @shallahk8403  ปีที่แล้ว

      Did it work for you?? :)

    • @myfebronia3570
      @myfebronia3570 ปีที่แล้ว

      @@shallahk8403 YES. GIRL. I LOVE YOU :D Having to go out of town a lot for work, needed it fixed, and had some idea it was the pinch metal again, but had no idea just taping them together would still make it work til I saw your video!

    • @shallahk8403
      @shallahk8403  ปีที่แล้ว

      Love it! Thanks for your feedback. I had to share as this idea I tried helped me so much.

    • @myfebronia3570
      @myfebronia3570 ปีที่แล้ว

      @@shallahk8403 I was surprised to see the weight detection still worked fine, I was worried this would end up bypassing that somehow, but it didnt thankfully. Wont have to worry about my cat with this fix.

    • @shallahk8403
      @shallahk8403  ปีที่แล้ว

      Yeap, it’s just separates by itself when something is pressed up against the little long rectangular panel at the left side of the emptying shoot. This, if a cat is standing there as it starts to close. But do many issues with it getting dirty or out of place or just bent a bit that over time it seems to just get worse and worse. But that’s the only function it stops is the sensor something is trapped in the shoot up against that little panel. I took that dang robot apart probably 30 times over the years to fix the issue, replaced or cleaned the corroded metal, just to have it happen again in a week or two. And his knows what a hassle taking it apart is. So I decided to try this and just really really hope my cats weren’t dumb enough to stand in the whole while the robot turned and get stuck though it seemed truly unlikely. And viola, the fix :) was born.

  • @Yourmyhero1
    @Yourmyhero1 3 หลายเดือนก่อน

    Saw this another video but couldn't comment. I used rebar tie wire and so far so good Definitely works!

    • @shallahk8403
      @shallahk8403  หลายเดือนก่อน

      That’s great! Thanks for your comment :)

  • @michellesolomon-sk8gk
    @michellesolomon-sk8gk 11 หลายเดือนก่อน

    Thank you!! You are a Godsend ❤ this will save me so much hassle 🥰🤗

    • @shallahk8403
      @shallahk8403  10 หลายเดือนก่อน

      Awww!! Thank you 😻

  • @HardBlues
    @HardBlues 8 หลายเดือนก่อน

    Thank you for this video. Been hitting on and off to force it to rotate driving me nuts. This is exactly what was wrong with it.

    • @shallahk8403
      @shallahk8403  8 หลายเดือนก่อน

      That’s great!! Glad it was fixed with this. Thanks for your comment ❤️🙏