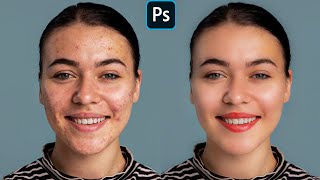
How to Color Correct Potraits in Photoshop
ฝัง
- เผยแพร่เมื่อ 8 เม.ย. 2024
- Learn how to fix color casts in portrait photos using Photoshop! This video will show you how to use Color Balance adjustment layers to achieve natural-looking skin tones in your portraits in a few easy steps.
Download the Sample Images and PSDs:
phlearn.com/tutorial/color-co...
Take your portraits to the next level with our in-depth PRO tutorial The Beginner’s Guide to Portrait Retouching Using AI & Traditional Tools:
phlearn.com/tutorial/beginner...
Join PHLEARN PRO (Save 10%):
phlearn.com/youtube
Join this channel to get access to perks:
/ @phlearn
―
What is PHLEARN PRO?
◦ 200+ In-Depth Courses on Photoshop, Lightroom & Photography
◦ 500+ Actions, Brushes, Presets & LUTs
◦ Master Retouching, Compositing, Special Effects & More
◦ Monthly & Annual Subscription Options
SAVE 10%: www.phlearn.com/youtube
―
Follow us on social!
Instagram: / phlearn
Facebook: / phlearn
Twitter: / phlearn


As always, excellent information, Aaron!!
Great tutorial as usual Aaron
Thank you for the great tutorial, Aaron. Phlearn will always be my go to channel when I’m stuck with a mistake I made in camera. Thanks again, Aaron!!
you're welcome @mackenzielarue2775! keep phlearning!
Very useful Aaron, thanks!
Thank you very much Aaron!
Thank you!
Thanks for watching!
Another great tutorial - would like to improve my skills in placing my subject in perspective ;-)
Hi Kristoff! We have a couple of tutorials you might find useful:
FREE
phlearn.com/tutorial/place-anything-into-perspective-photoshop/
PRO
phlearn.com/tutorial/perfect-composite/
Solid advise.
Thanks!
What is the difference between doing this and doing color temperature changes via Camera Raw Filter, and balancing there with temp/tone?
They are similar but you can't choose between high mid and lows. Which you don't always need. If you're opening a RAW file, Its best to adjust color in the RAW setting first. To use to most color data.
Great tutorial as usual, Aaron. If you are still in Vallarta, I hope you got to see the full solar eclipse! Cheers from Hoboken, NJ.
we definitely saw it!
@@phlearn ❤
Cool tut.. QUESTION: what is the best profile to work in when using Lightroom AND Photoshop???
Hey there! Are you referring to color profile or workspace?
great video, i still though have a hard time know what skint tone to aim for, what is great skin tone and what is not ? i know everyone's skin tone is different. If i edit a corp headshot session, what skin tone to aim for? unless there is a grey card in the picture i have no idea what the correct tone is ... right?
i know the adjustment layers etc, but what skin tone to aim for?
Hey there! Glad you enjoyed the video. Skin tone is all about keeping it natural, not about one specific color. Here are some tips for you:
A good starting point is to make sure the whites of the eyes are bright and clean, not yellow or muddy.
Look for areas of natural light on the skin (cheekbones, forehead) and use those as a guide for overall brightness.
Aim for even skin tone, reducing redness or excess yellowing. But remember, a little variation is natural!
There's no "perfect" skin tone, so trust your eye to create a healthy, balanced look that flatters the subject. And you're right, a grey card would be ideal, but these tips should help you get close!
Love the video, as usual. I've always used "Selective Color" which adjusts the colors in much the same way. Is there a difference? I'm assuming there is or there wouldn't be two different adjustments lol.
Both Color Balance and Selective Color are fantastic options, and the best choice depends on the image. For complex edits, Selective Color might be the way to go, while Color Balance offers a simpler approach if that's what you prefer.
@@phlearn Thank makes a lot of sense. Thank you for the response!
aron thanks
Excellent, thank you. As someone with 98% of his visual-arts neurons switched off at birth, this will be extremely helpful.
What about printing these images? How can you print the image to look like the image on the screen? I often see that my print images have more red. Could be a profile or screen issue?
Hey there! It might be a combination of screen calibration and paper profile. If you want to learn more about best practices for printing check out this video:
phlearn.com/tutorial/photo-printing-tips-printlab/
These days and w PS Ai there should be a one click auto detect apply adjustment w sliders
Great video again! How would you compare using the colour balance tool compared to using level and adjusting the RGB individually like you did in this other video th-cam.com/video/zTuCTYbvxac/w-d-xo.html ?
I guess some people might have a preference as a way to they work? Or There would be a detailed explanation for why one might be better than the other?
Thanks in advance off you have time to respond!
Hey Alex! Both are valuable tools when it comes to color correcting your images. For some situations, you might use just one or the other. But they can also work together! Levels can set a good foundation, and then Color Balance can add some finishing touches.
5:55 subject is just waaay too dark :D
Can't wait for a one button neural filter to correct images of people
There is lack of local adjustments, without them global ones will create fake effects. When you get skin right in global adjustments then hairs, eyes or background will look off. :)
Local adjustments are definitely a powerful tool for refining color correction! The learning path below includes several in-depth tutorials for portrait retouching. If you have time check them out!
phlearn.com/tutorial/learning-path-retouching/
4:26 Bruh she's still green. Too much green in the dark tones.
7:19 Thank God you noticed, it was obvious when put next to the other photos. I was like is he tripping or something