For various reasons my Adorama TV slots got juggled around a bit recently BUT from here on it's back to videos every other Thursday and I go live one Thursday in four 😁
Take away from this tutorial is Little! as in little flash fill :) Loved the photos, esp the use of depth of field. Thanks Gavin and of course Sam and Jade.
Thank you but I have conclusive proof that I can't do everything. Skip to about half way and watch me fall to pieces 😉 th-cam.com/video/Xr1sK3D3IQQ/w-d-xo.html
Another really insightful tutorial. Thanks for putting this together, Gavin. Would love to see some natural light photography tutorial as well, especially how the direction of light impacts the photo. Look forward to the next one from you. Cheers.
Hi Alan. Styling on this one was 100% Sam. Timing was everything as a week later and half the garden was flattened as the work to replace a fence got underway!
I learned daylight and flash lighting assisting top wedding photographer Monte Zucker back in 1972-1974 who introduced the use of off camera flash for shooting weddings and did all his formal portraits by north facing window light, both with careful attention to lighting pattern and precise facial angles. His flash approach was based on a strategy of always controlling lighting ratio by using one flash over the lens of the camera as centered fill, with the bracket raising it enough to hide the shadow it created down behind the subjects, and the second flash as Key light usually placed 45° to the side of nose of the subject because that models the 3D shape of the nose and facial features in a very flattering way and creates a “mask” pattern of highlights on the forehead, eyes, cheeks, mouth and chin which on a darker background creates eye catching and attention holding contrast on the eyes and mouth. Positioning the off camera flash so it was always one stop brighter than the fill on the bracket over the camera using relatives distances between lights per the inverse square law - e.g. fill @ 8ft / key @ 5.6ft or fill @ 11ft and key @ 8ft - created a 2:1 incident lighting ratio which allowed recording good detail in the shadow of the black suits of the men and the white dress of the bride. He taught that method to hundreds of other PPofA pros at conventions and private classes. Outdoors in sunlight to deal with the excessive contrast we’d always use the sun as back rim lighting, facing the subjects into the indirect skylight. Skylight while diffuse does have direction that will create a highlight pattern faces. So as with window lighting we’d first pose the face to that dominant direction at 45° to get the flattering 3D modeling and importantly have the subjects lift their faces into the light so the brow did not shade the eyes. Then instead of trying to overpower or cancel the natural light we’d place the key flash so it matched the modeling direction of the skylight at a distance where it was 2x brighter than the fill on the camera. It was really as simple logistically as using a single flash off camera with the added benefit of not having any dark distracting unfilled shadows on the face or clothing which will occur if a fill flash is not used.
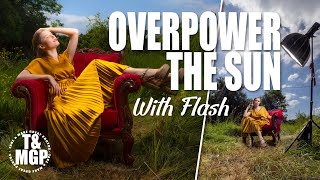
Beautiful pictures Gavin Hoey! About a decade ago using flash or strobes on location were the thing however the idea back then was to over power ambient light giving the image an artificial feel. The way you did it gave it a perfect natural look. Thanks for all the great content you make and thanks ADORAMA for having videos like this on their channel!
Thanks Alexander. Actually I do have an overpowering the ambient video coming up, some location same model VERY different styling. That's the beauty of photography you can choose to be subtle or dramatic or both in one day 😉
Another great tutorial Gavin in your " not so small " garden studio! 😊 I was actually surprised your small flash managed to put out any light at that very demanding 1/8000th sec HSS. 😋
Well done Gavin, I knew the theory but this very instructive video helped me to fine-tune the process. Because it's all about the details. Thanks so much!
Great video... very useful. I shot with Jade earlier in the year in the Highlands and used my speedlight and softbox, which worked really well. Best wishes Jono
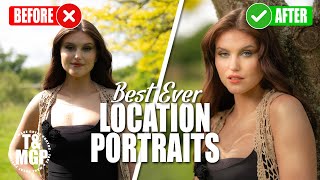
Great video Gavin. The background looks cluttered in the video but the images show what can be achieved with careful positioning of the model and photographer. Great light too! I also like the meandering fresh cut path.
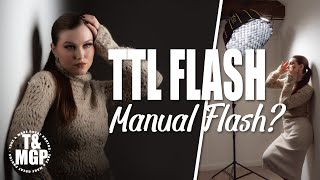
Hi Steven. Flash output and shutter speed usually are not usually connected UNLESS the flash is in HSS (high speed sync) mode. Then the shorter the shutter speed, the more the flash has to pulse and so each pulse is a lower light output. That's probably a massive oversimplification of HSS but it's as technical as I get 😉
Really useful as starting to get back outside again for shoots, been playing between the Aeos 2 LED light and AD200, and seeing which is easiest to work with and gives me the best results, still not as clear cut as I thought it woudl be ;)
Playing is the best way to learn. the Aeos is nice but limited in power and light mods compared to the EVOLV200 (AD200) but that has a fixed white balance... so many choices, no wonder photography is so hard to master 😉
I am curious. Instead of totally manual, could you go with aperture priority to maintain better consistency with the ambient light, if the ambient keeps changing?
Hi it’s great to know allot about photography from your channel . But can you plz tell me more about Godox flash with CD L 15 some light modifier . Can I use my flash with this modifier without use of externally .
I am curious. You have a flash meter. Do you look for any particular flash contribution, or just eyeball it? I know the Sekonic meters can easily provide the flash contribution measurement.
Gavin, i always watch your videos. I learnt a lot with them. Question: you said that if you adjust your shutter speed, you would have to adjust your flash power. But I thought that the shutter speed wouldn't affect the flash, only the ambient light? Thank you.
You're sort of correct. Usually shutter speed isn't a device to control flash BUT there's always an exception to every rule and this is it. High Speed Sync (HSS) flash output varies with shutter speed. Basically the shorter the shutter speed the less flash power you get at any given flash power setting. It bends my mind a bit, so I try not to get bogged down with the technical aspects. Test it for yourself and accept what you see 😉
Hi Gavin! Thank you for another anazing video! I need a little help trying master this technique, can you help me understand why I should use an ISO 200 for these amazing shots? I wanna learn from the best, thanks in advance!
Excellent tips, thank you! I just finished shooting 300 youth baseball players in natural light and the amount of tweaking in Lightroom was too much. I'm' looking for a way to make each photo more consistent out of the camera, and I'm going to try using this technique next time.
This is amazing. But I'm curious if a reflector would have accomplished the same effect or would it look too different? I understand you get less control but technically, a reflector can be used to bounce light and fill shadows.
It would look different with a reflector but who's to say if different is good or bad. Flash gave me fine control and consistency but in photography there are no rules 😉
When you are working with ambient light and using an artificial strobe to enhance do you follow the direction of the ambient light? What I mean is do you fill the shadows from the other side?
Good question. As a rough rule I try and keep my models face in as much shade as possible 1:36 A small amount of full summer sun (even for me in the UK) is enough to make a hot spot on the the face which isn't going away. After that, if there's an obvious direction of light in the background, it's logical to try and match that with the fill flash.
Thank you for the good tips and beautiful photoshoot. Do you need use gels to match the flash and ambient colour temperatures? Or is that only necessary when shooting in evening light? Thank you for your answer.
The short answer is you might want a warmer light as the sun sets and in those lower ambient light conditions I'd probably be reaching for something like my Nanlite FS-300B LED to visually match the light and colour.
Good question Sam. Partly because the results I was after are less measurable and more aesthetic but also because not every photography has access to a meter or wants to use a flash meter.
And also, there’s very few light meters that work with HSS. Only expensive ones like sekonic’s L858 I think it is. And not the L308 which I think is Gavin’s one.
As usual, a great informative video. One question though, when you went from the speed light to a full flash you mentioned it would be a Xplor400, but when the pictures came up with the information on screen, it listed the flash as a XPLOR 300. Which one was it?
Great Video! As always, your results are amazing!!! I do have on question: I appeared that Hi Speed Sync was not turned on, yet you took most of your pictures at speeds upwards of 2000. Did I miss something?
Find the shade (on their faces) the bigger the group the more central I place the light and place the largest softbox you own at distance that's roughly even for the whole group.


Hooray!! Gavin is back again - our MOST FAVOURITE Adorama instructor. Learning is so much fun just watching this guy!!
I'm a simple man. I see Gavin post new video, I smash "like" button right away 👍💪👏
Thank you and keep doing that... and commenting 😊
@@GavinHoey 👍of course I will
Yea Gavin is back. My favorite dude! ❤
For various reasons my Adorama TV slots got juggled around a bit recently BUT from here on it's back to videos every other Thursday and I go live one Thursday in four 😁
@@GavinHoey Glad to hear. keep up the great content.
All I can say is a big THANK YOU! Regards from a small town on the coast of Veracruz, Mexico.
Another great video Gavin - Jade's photos came out beautiful
Thanks Peter. Jade is always a pleasure to work with 👍
Amazing all around!
Gavin is the best 💪🏻
My favourite photographer of all time.
Good to see you again! The pictures look very natural, well done!
This is like a dream shoot. Love these videos.
Take away from this tutorial is Little! as in little flash fill :) Loved the photos, esp the use of depth of field. Thanks Gavin and of course Sam and Jade.
Gavin, you are so inspiring and versatile, is there anything you can't do ? Stop impressing me!!
Thank you but I have conclusive proof that I can't do everything. Skip to about half way and watch me fall to pieces 😉
th-cam.com/video/Xr1sK3D3IQQ/w-d-xo.html
Excellent! You make difficult things to look easy. Good job
Really pretty photos Gavin ⭐
Beautiful images and well composed.
challenging conditions Gavin, good results, Very informative photography content.
Thanks John. The video camera did a much better job then expected at disguising the contrast 🌤
Gavin is such a great instructor! Clear and concise information. I have learnt so much from his videos! Thank you Gavin!
Perfect explanation! Thanks 😊I like your videos!
Good to see you again! The pictures look very natural, well done!. challenging conditions Gavin, good results, Very informative photography content..
Great as always Gavin. Well done
Magic photos
Great Video!
So glad you are back. Your videos are so brilliant look forward to some fresh content feels like Christmas morning
Lovely results.
Another really insightful tutorial. Thanks for putting this together, Gavin. Would love to see some natural light photography tutorial as well, especially how the direction of light impacts the photo. Look forward to the next one from you. Cheers.
Truly awesome!!
Great as always Gavin! Thank you
Excellent., thank u !!!!
Always great videos !!!
Super video, thank you. Styling was great, as was Jade. I love your images shot through out of focus foregrounds.
Hi Alan. Styling on this one was 100% Sam. Timing was everything as a week later and half the garden was flattened as the work to replace a fence got underway!
I learned daylight and flash lighting assisting top wedding photographer Monte Zucker back in 1972-1974 who introduced the use of off camera flash for shooting weddings and did all his formal portraits by north facing window light, both with careful attention to lighting pattern and precise facial angles.
His flash approach was based on a strategy of always controlling lighting ratio by using one flash over the lens of the camera as centered fill, with the bracket raising it enough to hide the shadow it created down behind the subjects, and the second flash as Key light usually placed 45° to the side of nose of the subject because that models the 3D shape of the nose and facial features in a very flattering way and creates a “mask” pattern of highlights on the forehead, eyes, cheeks, mouth and chin which on a darker background creates eye catching and attention holding contrast on the eyes and mouth.
Positioning the off camera flash so it was always one stop brighter than the fill on the bracket over the camera using relatives distances between lights per the inverse square law - e.g. fill @ 8ft / key @ 5.6ft or fill @ 11ft and key @ 8ft - created a 2:1 incident lighting ratio which allowed recording good detail in the shadow of the black suits of the men and the white dress of the bride. He taught that method to hundreds of other PPofA pros at conventions and private classes.
Outdoors in sunlight to deal with the excessive contrast we’d always use the sun as back rim lighting, facing the subjects into the indirect skylight. Skylight while diffuse does have direction that will create a highlight pattern faces. So as with window lighting we’d first pose the face to that dominant direction at 45° to get the flattering 3D modeling and importantly have the subjects lift their faces into the light so the brow did not shade the eyes. Then instead of trying to overpower or cancel the natural light we’d place the key flash so it matched the modeling direction of the skylight at a distance where it was 2x brighter than the fill on the camera. It was really as simple logistically as using a single flash off camera with the added benefit of not having any dark distracting unfilled shadows on the face or clothing which will occur if a fill flash is not used.
You're Awesome! Thanks again for a great video.
I love your outdoor shots. I expect more outdoor photo shoots from you.
Excellent contribution, greetings from Mexico..
Beautiful work Gavin. Really enjoyed this 😊😊
Thanks Paul 👍
Brilliant as always from Gavin; best teacher there is!
beautiful set of images
❤ love the video
Gavin always has the BEST useful content and instruction. Thanks!
super dooper shoot
Just ran across your page and I love it . Really you're the best I've seem. And i love how you explain things
Nice, again. 🙂
Beautiful pictures Gavin Hoey! About a decade ago using flash or strobes on location were the thing however the idea back then was to over power ambient light giving the image an artificial feel. The way you did it gave it a perfect natural look. Thanks for all the great content you make and thanks ADORAMA for having videos like this on their channel!
Thanks Alexander. Actually I do have an overpowering the ambient video coming up, some location same model VERY different styling. That's the beauty of photography you can choose to be subtle or dramatic or both in one day 😉
@@GavinHoey Oh wow, can't wait to see that video Sir!
Using fill flash existed even during film photography times. I have read several books of the past that suggest fill flash.
Great video. 👍
Gavin, as always, gives all the necessary information
Another great tutorial Gavin in your " not so small " garden studio! 😊 I was actually surprised your small flash managed to put out any light at that very demanding 1/8000th sec HSS. 😋
Nice, Gavin and Jade!
Thanks Mike 👍
I adore Gavin's lectures❤❤❤❤
Wow, what a great lesson! Exactly what i am needing. Thanks so much Gavin and Sam!
Thanks for this terrific lesson! I've been practicing exactly this in my backyard last week. THEN I saw your video! Cheers!
Love your tutorials Gavin. Always full of positive energy.
Very informative video.. thank you Gavin..
Love these videos by Gavin! He keeps it real and fun.
Well done Gavin, I knew the theory but this very instructive video helped me to fine-tune the process. Because it's all about the details. Thanks so much!
Thank you so much sir 🙏🏻 for
This detailed episode.....🙂 So nice of you ☺️
Thank you for teaching us 🙏🏽
Excellent as always!
Great video... very useful. I shot with Jade earlier in the year in the Highlands and used my speedlight and softbox, which worked really well. Best wishes Jono
Great video and tips on
Thank you
Fantastic lesson! Beautiful photos!
You taught me from the beginning.
Good stuff, Gav!
Great photographer.
Nice photoshoot. Cg
He is da best❤
Thanks so much you make easier to understand!
Great video Gavin. The background looks cluttered in the video but the images show what can be achieved with careful positioning of the model and photographer. Great light too! I also like the meandering fresh cut path.
Thank you for calling out the freshly cut path 😎
Great summery feel to the pictures well done 📸
Thanks Mick, it's been the perfect year for it (so far) 🌞
the best
Muchas gracias.
Great, as always - many thanks. Could you explain why adjustments to the shutter speed would impact the flash component of the exposure? Thanks again
Hi Steven. Flash output and shutter speed usually are not usually connected UNLESS the flash is in HSS (high speed sync) mode. Then the shorter the shutter speed, the more the flash has to pulse and so each pulse is a lower light output. That's probably a massive oversimplification of HSS but it's as technical as I get 😉
Really useful as starting to get back outside again for shoots, been playing between the Aeos 2 LED light and AD200, and seeing which is easiest to work with and gives me the best results, still not as clear cut as I thought it woudl be ;)
Playing is the best way to learn. the Aeos is nice but limited in power and light mods compared to the EVOLV200 (AD200) but that has a fixed white balance... so many choices, no wonder photography is so hard to master 😉
Thank you!
thank you😃
Amazing
Gavin, your biggest fan here..can you please consider doing a Master Class in the UK for us? I could gladly come and join it :)
Good video Gavin, but remember....the tires are only flat on the bottom ;-)
Great stuff Gavin o/
I am curious. Instead of totally manual, could you go with aperture priority to maintain better consistency with the ambient light, if the ambient keeps changing?
Great video Gavin hope it wasn't too warm for you
The weather was a near to perfect as I get for a outside location session 🌤️
@@GavinHoey I agree with you
I hope you make a video about Graduation Photography outdoor and indoor with cap and gown with kids or Model like her
thanks man
Hi it’s great to know allot about photography from your channel . But can you plz tell me more about Godox flash with CD L 15 some light modifier . Can I use my flash with this modifier without use of externally .
I am curious. You have a flash meter. Do you look for any particular flash contribution, or just eyeball it? I know the Sekonic meters can easily provide the flash contribution measurement.
Gavin, i always watch your videos. I learnt a lot with them. Question: you said that if you adjust your shutter speed, you would have to adjust your flash power. But I thought that the shutter speed wouldn't affect the flash, only the ambient light? Thank you.
You're sort of correct. Usually shutter speed isn't a device to control flash BUT there's always an exception to every rule and this is it. High Speed Sync (HSS) flash output varies with shutter speed. Basically the shorter the shutter speed the less flash power you get at any given flash power setting. It bends my mind a bit, so I try not to get bogged down with the technical aspects. Test it for yourself and accept what you see 😉
Hi Gavin! Thank you for another anazing video! I need a little help trying master this technique, can you help me understand why I should use an ISO 200 for these amazing shots? I wanna learn from the best, thanks in advance!
Question 😁 why don't you use a grid on those boxes outdoor?
Excellent tips, thank you! I just finished shooting 300 youth baseball players in natural light and the amount of tweaking in Lightroom was too much. I'm' looking for a way to make each photo more consistent out of the camera, and I'm going to try using this technique next time.
300 to edit... I've been there too! Yep, find the shade and your own light and save yourself hours of editing 😁
Put them on negative box
Great as always one small issue your screen shots of images on bike has 300 when you had a 400
This is amazing. But I'm curious if a reflector would have accomplished the same effect or would it look too different? I understand you get less control but technically, a reflector can be used to bounce light and fill shadows.
It would look different with a reflector but who's to say if different is good or bad. Flash gave me fine control and consistency but in photography there are no rules 😉
Awesome and very informative as always, Gavin. Quick Q: why are you shooting at ISO 200?
200 ISO is the native ISO for Olympus / OM SYSTEM cameras. Other ISO's are available of course 😉
♥️
When you are working with ambient light and using an artificial strobe to enhance do you follow the direction of the ambient light? What I mean is do you fill the shadows from the other side?
Good question. As a rough rule I try and keep my models face in as much shade as possible 1:36 A small amount of full summer sun (even for me in the UK) is enough to make a hot spot on the the face which isn't going away. After that, if there's an obvious direction of light in the background, it's logical to try and match that with the fill flash.
Thank you for the good tips and beautiful photoshoot.
Do you need use gels to match the flash and ambient colour temperatures?
Or is that only necessary when shooting in evening light?
Thank you for your answer.
The short answer is you might want a warmer light as the sun sets and in those lower ambient light conditions I'd probably be reaching for something like my Nanlite FS-300B LED to visually match the light and colour.
Confused! Why would the shatter speed affect the strobe? Honestly I thought only aperture affects the flat..please help!
Excellent informative video. Why didn’t you use a light/flash meter?
Good question Sam. Partly because the results I was after are less measurable and more aesthetic but also because not every photography has access to a meter or wants to use a flash meter.
And also, there’s very few light meters that work with HSS. Only expensive ones like sekonic’s L858 I think it is. And not the L308 which I think is Gavin’s one.
It's nice
As usual, a great informative video. One question though, when you went from the speed light to a full flash you mentioned it would be a Xplor400, but when the pictures came up with the information on screen, it listed the flash as a XPLOR 300. Which one was it?
Check out 8:22 It's a Flashpoint XPLOR400 Pro. Links to the flashes and other gear are in the video description 👍
Thank you for the video. I think the only thing you failed to mention is that you're in HSS.
Great Video! As always, your results are amazing!!! I do have on question: I appeared that Hi Speed Sync was not turned on, yet you took most of your pictures at speeds upwards of 2000. Did I miss something?
If you look at time 5:29, on the flash transmitter, you will see an icon with an H and a flash bolt . That indicates HSS is active. I hope this helps.
Missed that. Thanks for clarifying.
Great video as usual. Question - any way to estimate the fill flash based on the ambient?
Hi Steve. Once you've dialled in YOUR look you could take a flash meter reading and work backwards from there.
Good explanations sir. How to fill flash at location for group, sir?
Find the shade (on their faces) the bigger the group the more central I place the light and place the largest softbox you own at distance that's roughly even for the whole group.