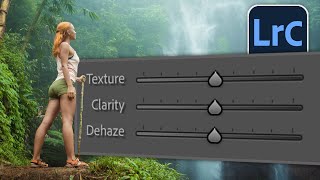
3 Things To Make Your Subject POP in Lightroom
ฝัง
- เผยแพร่เมื่อ 16 ก.ค. 2024
- Don't miss any of my videos! Subscribe now to my TH-cam Channel.
In this tutorial, I demonstrate three things you can do in Lightroom to make the subject of your photo POP.
Checkout Anthony Morganti's Lightroom Training - The ULTIMATE Lightroom Classic Course:
www.anthonymorganti.com/
Save $10 with Discount Code: TENOFF
Updated Lightroom Classic Keyboard Shortcuts PDF Download - It's FREE:
www.anthonymorganti.com/
To get more info about Lightroom, go here:
prf.hn/l/lGnjDBl
I am an Adobe affiliate and will earn a commission if you purchase anything using the link directly above. Please read my Code of Ethics Statement:
onlinephotographytraining.com...
Please subscribe to my newsletter!
anthonymorganti.substack.com/...
Contact Info:
Anthony Morganti
P.O. Box 805
Buffalo, New York 14220


Don't miss any of my videos! Subscribe now to my TH-cam Channel.
In this tutorial, I demonstrate three things you can do in Lightroom to make the subject of your photo POP.
Checkout Anthony Morganti's Lightroom Training - The ULTIMATE Lightroom Classic Course:
www.anthonymorganti.com/
Save $10 with Discount Code: TENOFF
Updated Lightroom Classic Keyboard Shortcuts PDF Download - It's FREE:
www.anthonymorganti.com/
To get more info about Lightroom, go here:
prf.hn/l/lGnjDBl
I am an Adobe affiliate and will earn a commission if you purchase anything using the link directly above. Please read my Code of Ethics Statement:
onlinephotographytraining.com/code-of-ethics/
Please subscribe to my newsletter!
anthonymorganti.substack.com/subscribe
Contact Info:
Anthony Morganti
P.O. Box 805
Buffalo, New York 14220
Let me give you a fifth thing, "The Eyes"! Now you know how to do this already (You probably taught me!?) but this what really makes a photo grab you! Beautiful eyes can make kingdoms crumble!!! Doesn't work on every photo but it worth trying.
Thanks
Rich
What you can do also is a radial mask around the subject, subtract the subject, and then slightly change the exposure of this mask. This is subtle, but this helps detach the subject
Thanks Anthony! A bit more work in LR6, but it can be done!
Your stuff is always so good, practical, and easy to understand, Anthony. Thanks for sharing.
Great demonstration. I wanted one more edit to image #2. Even blurred and darkened, the tree trunk in the upper center of the image pulls my eyes away from the model. I would Heal > Clone it out in LrC or use the Remove tool in PS. Fast edits that would improve the image a lot for me.
Excellent 👌🏾
Healthy happy 2024, Anthony. Great little reminders, excellent, thank you. In the masking section, when you say to slide exposure "just a little bit" to "lighter", I remind you of something I probably learnt from a video of yours, years ago.
We can click in the number next to the slider and change the number numerically, typing, BUT alternatively we can use the arrow keys to make minimal adjustment and the number goes up or down in its smallest steps. Easier than cramp causing precision with the mouse. And in that same old lesson, I learnt that double-clicking the name of the slider would reset it to its default.
Enjoyed the ideas.
And a good reminder for amateurs: you don't need to spend the extra money for a 2.8 lens when a 4.0 will do 95% of what you need. For the other 5%, use the LR and PS tools to get where you need to go. Use the saved $$ for education.
Excellent workflow for using Lightroom with subjects to highlight; thank you for your continuing support to those of us who use Lightroom and some Photoshop.
Mike in Oz
Great video. It’s good to be reminded of all the functions of LR. Thanks.
Excellent tutorial, as always Anthony! Wishing you and your family a happy, healthy, and prosperous new year!
Happy New Year! Thank you for all you do.
Thank you!! Thoughtful presentation! I enjoy your shows, very informative. Happy New Year!
Thanks, HAPPY YEAR!
Happy New Year Anthony. Keep up the good work!
Very helpful! I will give it a try!
Very nice, tnx - I think some photos I've seen push these 'sliders too far' making the subject look like a paper cut out, placed in front of a background. Which I find a bit disturbing for my taste. The natural rendering of a lens esp. an expensive one, has certain fall off properties and if these sliders are pushed too far it screams fake. I suppose there are horses for courses.
Starting new year with ur video.. it was nice . Wishing u a happy new year 🎊🎊
Thanks. Well taught. My 2014, Mac OS 11.7 imac doesn't get the Blur and Color Mixer LR updates, but the Mask and AI Noise Reduction do work and are fantastic. I feel that I can reproduce the blur and color control somewhat by tweaking other settings, so that it's just not worth getting a new machine while this imac is going strong.
Great tips. I don't use LR, but can do they same technique in other apps.
Good information.
Thank you.
On the second image I would also darken the white part of her dress that is a little overexposed. Just +0.5
good ALR content
Thanks for the great tips -
BTW - wouldn't lowering the exposure on the background would be equivalent to increasing ( by the same amount ) the exposure on the subject ?
Could you show how to edit a more high key image, like what's been popular for couples' photos for many years now? Where they look overexposed to me. I don't know if the photo is taken at correct exposure and edited to look overexposed. I should probably find a video on it, instead of asking this. :) thanks for the videos!
How do I control compression when exporting out of Lightroom? Couldn't figure out any other way to ask the question.