
ฝัง
- เผยแพร่เมื่อ 5 มี.ค. 2024
- This guide for Raspberry Pi 5 only and will show you how to have your Volumio boot up from NVMe SSD and store music on the NVMe as well. Additionally, I'll show you install the plugins, for example, Touch Screen, PeppyMeter ScreenSaver, Spotify, TH-cam and others from start to finish.
Links:
Prototype Volumio v3.636 image - (credit: nerd & Volumio dev team)
updates.volumio.org/pi-uuid/v...
PeppyMeter ScreenSaver v1.4.2 - (credit: 2aCD)
github.com/2aCD-creator/volum...
Prepare Raspberry Pi for boot from USB/NVMe - (credit: nerd)
Introduction:
With the Raspberry 4 version B released in 2019 SBC community gained capability of booting from USB attached storage in 2020. Raspberry Pi 5 released in 2023 with native implementation of PICe presented new possibility of making Volumio better.
The groundwork has been laid in the Community thread 64283 where a basic question, if the boot from MVME M.2 is even possible, is discussed. New question - can boot weld to MicroSD be liberated? Continue reading…
Preparations:
Make sure you are running the latest version of Raspberry Pi OS on your Raspberry Pi 4B or 5. You can download it from Raspberry Pi 2. You will also need to make sure the OS is all up to date.
sudo apt update
sudo apt full-upgrade
sudo reboot
1. Check current running version of bootloader EEPROM image.
vcgencmd bootloader_version
USB booting was supported starting with version 9-03-2020. You should see that version 16-02-2024 or later is installed. Now check to see if there is an update available.
sudo rpi-eeprom-update
You should see that the bootloader is up-to-date. By default you will only see updates from the “default” directory. Default updates are not released too often. Even if you see UPDATE AVAILABLE you can ignore it as we are going to check for an update in a more frequently released channel or directory called “latest”.
2. Upgrade to the newer “latest” EEPROM version.
You will need to change the firmware directory from critical or stable to latest to find the latest updates. To do this, you need to edit a file called /etc/default/rpi-eeprom-update.
sudo nano /etc/default/rpi-eeprom-update
Change the word “critical” or “stable” to “latest” and save the file.
Check once again for an eeprom update and you should notice a newer version.
sudo rpi-eeprom-update
3. Apply the update and reboot.
sudo rpi-eeprom-update -a
sudo reboot
You can check the running eeprom version again to ensure the correct version.
vcgencmd bootloader_version
ALL UP-TO-DATE!
4(a). Check BOOT ORDER configuration - Raspberry Pi 4B.
sudo rpi-eeprom-config
Take note of the BOOT_ORDER code. The defualt code is 0xf41 and is read right to left to determine the boot order.
1 = Check SD card
4 = Check USB drive
f = Start again
This boot order is exactly what we want. If the boot order code is anything other than 0xf41, you can change the boot configuration using this command.
sudo -E rpi-eeprom-config --edit
BOOT_ORDER=0xf41
Write your changes (Ctrl-O) and exit (Ctrl-x)
Reboot Raspberry Pi
sudo reboot
4(b). Check BOOT ORDER configuration - Raspberry Pi 5.
sudo rpi-eeprom-config
Take note of the BOOT_ORDER code. The defualt code is 0xf41 and is read right to left to determine the boot order.
1 = Check SD card
4 = Check USB drive
f = Start again
This boot order is not what we want. If the boot order code is anything other than 0xf461, you can change the boot configuration using this command.
sudo -E rpi-eeprom-config --edit
BOOT_ORDER=0xf461
1 = Check SD card
6 = Check PCIe NVME
4 = Check USB drive
f = Start again
In addition, you need to instruct your Raspberry Pi 5 to enumerate and use PCIe by adding after BOOT_ORDER: PCIE_PROBE=1. Please pay attention to the line orders.
sudo -E rpi-eeprom-config --edit
BOOT_ORDER=0xf461
PCIE_PROBE=1
Write your changes (Ctrl-O) and exit (Ctrl-X)
Reboot Raspberry Pi
sudo reboot
5. Use NVMe
If you want o test already attached NVMe you will need to update /boot/config.txt or /boot/firmware/config.txt with overlays:
dtparam=nvme
dtparam=pciex1_gen=2
Reboot Raspberry Pi
sudo reboot
Also you can experiment and force connection to Gen 3.0 (10 GT/sec)
dtparam=pciex1_gen=3
Shutdown your Raspberry Pi 5. It is ready to boot from USB/NVMe. - เพลง


Excelent video, thanks 👍
In the TH-cam video titled " Unleash the power of the Raspberry Pi 5 - 1TB NVME and Argon ONE NVME case. " on the MicroChipz channel he has verified that a One Terabyte Kioxia Exceria Plus G3 works in the Raspberry Pi 5.
In the TH-cam video titled " Raspberry pi 5 nvme drive working " on the Wolf Fur Programming channel he has verified that a One Terabyte Samsung Model 980 PRO PCIe® 4.0 NVMe® SSD 1TB works on the Raspberry PI 5 . This would work best if using headphones to negate fan noise.
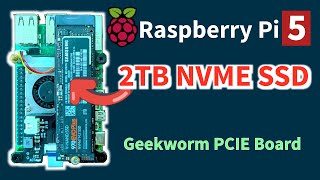
In the TH-cam video titled " Raspberry Pi 5 with 2TB NVME SSD Geekworm Shield " on the Code Fallacy channel he has verified that a 2 Terabyte Drive The Samsung 970 EVO Plus NVMe® M.2 SSD 2TB works in the Raspberry PI 5 using the Geekworm x1001 PCIE M.2 ssd board
Hi Andy, is there a noticeable difference playing music files from the NVME as compared to the NAS? Sonically speaking, I would imagine an improvement if the source of music is from the NVME rather than the NAS since there is no reliance on network cables/wi-fi. Really appreciate your good work on this video.
To my ear, I didn't notice any sonic difference between the NVMe and NAS. The advantages of having integrated NVMe is to have a collection of music with the RPi5 when I bring it to my friend's house and the speed over the NAS.
Hello, always a nice job, congratulations.
Two curiosities:
1) Is there a need to mount cooling fans on the Raspberry 5?
2) is there a difference in speed between systems installed on Raspberry 5 or Raspberry 4? (obviously with the same RAM and boot support)
Keep going, bye
1. RPi5 for Volumio, I don't think the heatsink with cooling fan is necessary. A passive heatsink is good enough. I can only hear a fan spin only when I boot up the RPi 5.
2. the RPi5 is definitely faster than RPi4. It also can boot up from a NVMe. RPi4 can boot only from USB 3.0. If I had only RPi4 and a fast USB 3.0, I would stick with this combination. The 5 and NVMe is not necessary in my opinion. Once everything is installed and music is added, you won't notice the different if not compare side by side. Enjoy the music! :)
I'm building a streamer based on volumio and an 11 inch touch monitor from waveshare (great, I tried it first with my old raspberry3+ and it works really well).
I then connected the raspberry 4 mime but it no longer turns on, just before editing the config.txt it worked, now the red LED turns on and the green one flashes quickly and does nothing else (even without the SD card it's like this).
This is why I'm undecided whether to get an r4 or r5....
Thanks for the reply and you are very active, well done@@Naimnatnod1
When you add all the time and cost together, it’s much better to buy a fanless PC / mini PC instead.
It's more fun with the Raspberry Pi for me. :)