TH-cam
US
Budget Cable Railing Materials
19:29
The GENIUS reason everyone's buying black PVC pipes for their porch
8:21
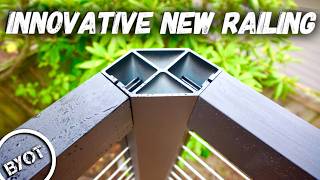
Fastest Deck Railing Ever Installed?!
16:44
HIGHLIGHTS : Singapore 2-4 Thailand | ASEAN Championship 2024 | 17.12.24
10:41
🔴𝐋𝐈𝐕𝐄 การแข่งขัน RoV นานาชาติ AIC 2024 รอบ Swiss Stage วันที่ 9
9:37:15
เจ้าของแทบทรุด บ้านสร้างได้ 3 เดือน พังทรุดตัว เพจดังชี้สาเหตุ ไม่ใช่เกิดจากเสาเข็ม
03:47
DIY Deck Cable Railing - hidden tensioners - we saved hundreds !
haigami
ติดตาม
351
ดาวน์โหลด
โหลดลิงค์.....
มุมมอง 167 797
0
0
เพิ่มลงใน
เพลย์ลิสต์ของฉัน
ดูภายหลัง
แชร์
แชร์
ฝัง
ขนาดวิดีโอ:
1280 X 720
853 X 480
640 X 360
แสดงแผงควบคุมโปรแกรมเล่น
เล่นอัตโนมัติ
เล่นใหม่
เผยแพร่เมื่อ 17 ม.ค. 2025
ความคิดเห็น • 131
ต่อไป
เล่นอัตโนมัติ
19:29
Budget Cable Railing Materials
Potter's Work
มุมมอง 229K
8:21
The GENIUS reason everyone's buying black PVC pipes for their porch
Hometalk
มุมมอง 4.6M
16:44
Fastest Deck Railing Ever Installed?!
BYOT
มุมมอง 259K
10:41
HIGHLIGHTS : Singapore 2-4 Thailand | ASEAN Championship 2024 | 17.12.24
BG SPORTS
มุมมอง 953K
9:37:15
🔴𝐋𝐈𝐕𝐄 การแข่งขัน RoV นานาชาติ AIC 2024 รอบ Swiss Stage วันที่ 9
Garena RoV Thailand
มุมมอง 891K
03:47
เจ้าของแทบทรุด บ้านสร้างได้ 3 เดือน พังทรุดตัว เพจดังชี้สาเหตุ ไม่ใช่เกิดจากเสาเข็ม
เรื่องเล่าเช้านี้
มุมมอง 577K
1:23:46
【หนังพากย์ไทย】ยอดฝีมือสังหารนักโทษ แต่นักโทษเป็นปรมาจารย์กังฟูที่ซ่อนอยู่ เขาจัดการทั้งหมดในทันที
Fresh Thailand
มุมมอง 468K
24:58
DIY Cable Railing with Metal Posts Built from Scratch!
DIY PETE
มุมมอง 499K
6:17
How to Choose and Maintain Cable Railing Systems | Ask This Old House
This Old House
มุมมอง 29K
16:56
Building The Nantahala Retreat #27 | Stainless Steel Cable Rails!
Perkins Builder Brothers
มุมมอง 199K
20:48
It's Been a Good Run, Drywall.
LRN2DIY
มุมมอง 4.5M
8:22
DIY Muzata Cable Railing Review | Tips, Tricks, and Fixing Mistakes
Little Mountain Life
มุมมอง 65K
14:06
Cable Rail Install | Stainless Muzata Brand from Amazon.com
Perkins Builder Brothers
มุมมอง 323K
41:19
Is This the BEST Deck Railing System? Zero Maintenance, Super Durable & DIY Friendly!!
Stud Pack
มุมมอง 531K
18:39
DIY Cable Railing - You Can Do It!
DIY with Andrew Bacon
มุมมอง 81K
5:27
The Best 1/8" T316 Invisible Swage Lag Screw Tensioner - Muzata Cable Railing CR73
Muzata_official
มุมมอง 3K
21:14
Highlight : นายใหญ่ฉุนใคร?
Thinkingradio
มุมมอง 124K
10:34
#WOWxดราม่าคอมเม้นแฟนบอลอาเซียน ตะลึง!! แห่ชื่นชมสปิริตทีมชาติไทย หลังเกมส์พลิกชนะสิงคโปร์ 4-2
# จัน ฑาล
มุมมอง 201K
00:18
#JasonDeruloTV // Funny #GotPermissionToPost From @SofiManassyan #SlowLow
Jason Derulo
มุมมอง 14M
2:55:14
🔴Live : สิงคโปร์ พบ ไทย #MATCHDAY รวมพลัง #เชียร์ไทยให้กึกก้อง
THAIRATH TV Originals
มุมมอง 1.3M
1:23:46
【หนังพากย์ไทย】ยอดฝีมือสังหารนักโทษ แต่นักโทษเป็นปรมาจารย์กังฟูที่ซ่อนอยู่ เขาจัดการทั้งหมดในทันที
Fresh Thailand
มุมมอง 468K
00:55
ไม่มีใครรักหนูเลย #shorts #แม่สุน้องซูกัส
HeHaa TV
มุมมอง 2.6M
14:51
Highlight | อัจฉริยะสาวไส้...เบื้องลึกเหตุยิง "สจ.โต้งปราจีนบุรี" | เปิดโต๊ะข่าว | 17 ธ.ค.67
PPTV HD 36
มุมมอง 390K
05:43
ส่องฟอร์ม อาหมัด ดิยัลโล่ เล่นโคตรดี | แมนซิตี้ 1-2 แมนยู
สปอร์ตเต็มเหนี่ยว
มุมมอง 96K