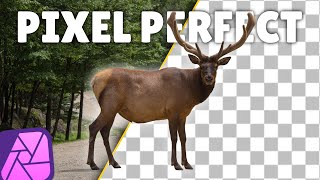
How To Quickly Remove A Background In Affinity Photo

ฝัง
- เผยแพร่เมื่อ 28 มิ.ย. 2021
- Of all the different ways you can edit an image, one of the most common edits you may be looking to make is removing its background. This is an essential function for any graphic designer, and today we'll be exploring exactly how to do so in Affinity Designer. Thanks to the Selection Brush -- a very handy tool that allows you to quickly remove a background in Affinity Photo -- this is a task that can be accomplished in minutes.
If you want to learn more about logo design, be sure to check out my Logo Design Academy - an interactive 18-part video course where you will learn my entire creative process for coming up with logo ideas and implementing them: logosbynick.com/learn/
Intro song: "In Da Mood" by Combustibles, used with written permission


Nick this is a great find. For years I enjoyed your Gimp and Inkscape tutorials. Few teachers are as fantastic as you are. The instruction quality is just unmatched; plain and simple! I discovered the Affinity suite in 2020 during the initial lockdowns. Imagine my surprise and excitement today when I realize you actually have Affinity tutorials too... You are the definition of "no fluff, no bs quality content"... now I am smiling all the way to the bank 😍😎👌👍🎉🎉😍
Probably the best video for removing background, and its short and straight to the point!! THANKS!
So helpful - thank you. Other tutorials make this so complicated, but you really stripped it back to the essential information to get started.
Short, simple, and super helpful as usual. You have no clue how much I've learned with your videos, thank you so so much!!
Thanks for your short and super helpful. You balance the right mix of getting the point while still commenting on essential things like the key commands to make life with affinity sooooo much better. This a great example of how a 'how to' clip should be. I rarely subscribe to channels, I subscribed to yours. Thanks again.
Thank you so much for this video! I have watched many beginner videos on the actual affinity program and yours are user friendly! Thank you
Thanks, as always your videos are easy to follow and help me out every time :)
Thank you for making this video. It was exactly what I needed and very helpful!
Awesome! Quick and simple! Thank you!
This was soooo helpful! Thank you!
Thank you for the in depth video ❤!
Very useful! Concise and clear. Thank you. :)
Precise and clear. Thank you!
Easy to follow, brilliant. Now to practice
Excellent tutorial, Thank you
your affinity videos are the best out there! please post more!
Great tutorial, thank you!
Fabulous teacher. Thank you.
thank you so much! this saved me a ton of time.
Thank you so much for this video!
great and easy to follow
I understood it all. You are awesome.
Perfect. Thank you! Subscribed.
Thank you, that really helped
You sir, are a life saver!
Thank you SO MUCH!
Great video!! What format do I export as so I can use it later with a different background?
Ya había visto otros canales y probado la selección con REFINE pero no me salía y de algún modo Logos by Nick siempre logra hacerlo mejor que los demás.
Thank you ,well done
This was very helpful 🔥
very well explained
A great pill of concrete knowledge :)
Great and I keep my fingers crossed for the rest of the materials.
I will ask you again on the topic of "how to paste in the place of the cut background, another background downloaded from the stock room, for example in the Affinity Photo program?
Regards
!Thank you so much! :)
yes! i just installed affinity photo and i spent 1 hour trying to delete the background of a photo, thing is , i was not selecting "rasterize and trim" . Why is that an option ?? is there any reason to not straight open a photo and start cropping before selecting that option in the layer?
Thanks so much for the video! How would you deal with something like the bike spokes on the back wheel where there’s so much space in between such narrow metal spokes? Thanks
That might need to be done manually with an eraser set to the right brush
@@DesignMadeSimple ok, thanks!
Oh my god !! lol I have been watching remove background videos and none of them helped me with too detailed background, most of the background of their pictures was blurred so it was easy for them. This video helped a thousand times better. Thank you.
Thanks so much for this tutorial. I could not hear well when you explained how to change the brush size; you mentioned something left and right and I heard you clicking but on what? I'm on Imac. Thanks!
The bracket keys, [ and ].
Love alwase❤️❤️
Great tutorial, when I unlock layers the whole canvas shows a transparent image i.e photo completely disappears? Is something set incorrectly?
what does rasterize and print do?
The Mac does have a Delete key, and I don't think that was a very good selection and mask.
What if you have an image, say of a pet, and you want to keep their whiskers that extend over into the background you are removing? And, in your image, if you wanted to keep the tall grasses that were deleted with the background?
Great move Nick! I subscribed here, although I do not use Affinity, but I really like your tutorials. Tried Affinity photo a while back but preferred using Gimp, as I am more familiar with it. I learned Gimp from watching your channel and Davies media designs. Btw, Michael Davies, credited you, when he received his TH-cam 100 subs award, for inspiring him to make better videos. Although, he mentioned you guys had a falling out some time in the past. I also watched your channel to learn Inkscape, I tried it but it was not appealing to me. I do these things for a hobby, not really any design client work. There are many new Affinity users, and surely many more to come, as more people will move away from Adobe's subscription model. I think you are making a very wise move, to teach these new users about affinity software. Best wishes to you in your future endeavors
Thanks for your comment, Vin! Glad you're finding these lessons useful.
hello my af photo doesnt have the refine button, so i can't move past 2:43.
when are you going to upload on main channel ?? Love your tutorials
I'm not sure. I feel like I've taught everything that I know about Inkscape and GIMP, and that channel has already peaked. I've been having a lot of fun taking on new challenges and making content about these other apps.
Hey Nick, great video. I'm really frustrated though. I get to the part where I need to delete but nothing happens. What am I missing?
Are you sure you rasterized the layer as I did at the beginning of the video? What you're describing sounds like what happens before it's rasterized.
Lol, Mac (at least MacBook Pro) HAS a Delete Key, on R below the Power button, the big one that says: "delete"! Speaking of Mac, in Affinity Photo I've found [W] for BOTH "Selection Brush Tool [W]" AND "Flood Select Tool [W]"?
Nick: I do everything you describe, but don't get the red overlay. How do I fix that?
I'm having issues with the program crashing
didn't work when I hit edit cut, it just deleted the whole thing, not the specific background
When i press delete the whole layer gets deleted not just the selection :)
You can't seem to convert a path to selection, one hell of lot faster. This is insane
Great instruction and it worked. However, for some reason it removed some of the hair inside the area even though it was painted red. So it looks really patchy and weird. Clearly I've done something wrong. But I really wish these software creators would make things much more easy to use.🤦🏼♀
This is really helpful but seems very rudimental compared with photoshop which I'm trying to leave.
isn't there some ai additive that can do this in a split second?
There is no selection brush! Why would they remove one of the most important tools of any graphic program?!!
This is still very primitive tool that requires lots time. Fun if you have lots of time. We should have AI built in background remover. The edges are jagged and not smooth straight
These much too quick demonstrations often represent a hasty murder on annoying details. All the fine plants in front of the sky in this image are wiped out, and not even mentioned, as it would be too difficult or to time consuming to explain how they could be preserved. The well known result without mentioning any specific editor is typical. What really could make a pleasant difference would be the engaging demonstration of how we are left with the fine details in the foreground when the sky - the whole sky - and nothing but the sky - has been removed. Then help me ...
I own all three Affinity tools, but lets be honest, the ability to do background removal in Affinity is poor and faffy. It struggles to acurately recognise an object against a pure white background in a well lit studio setting. Adobe photshop has free online tools that get the job done instantly.
This really drives me nuts! Such a complex progr.as affinity and have to spend hours when a simple app does it by one click and works better then this. This is rubbish.
not neat
This really drives me nuts! Such a complex progr.as affinity and have to spend hours when a simple app does it by one click and works better then this. This is rubbish.
Simple apps are for noobs and don't allow for the same amount of flexibility. Pro apps rarely are easy to use. There's always a learning curve involved.