Get Next-Level Colors With Gradient Maps In Photoshop

ฝัง
- เผยแพร่เมื่อ 14 พ.ค. 2024
- 21 Day Photoshop Expert: learn.bwillcreative.com/21-da...
---------------------------------------------------------------------------
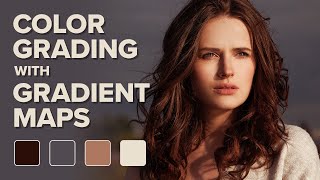
In this Photoshop tutorial, you'll learn how to color grade images with the help of Gradient Map Adjustment Layers. Gradient Maps allow you to add color to your images based on the different exposure ranges in your photo. They're a great way to complement your other color grading adjustments and are one of the best ways to add highly stylized color to a photo. Whether you want a subtle look of a stand-out color grade, gradient maps are the tool for the job. And by the end of this tutorial, you'll have everything you need to start with them as quickly as possible. Enjoy!
-----------------------------------------------------------
0:00 Overview
0:24 How Gradient Maps Work in Photoshop
4:41 Example 2 Gradient Map Applying
6:36 Adding Additional Colors To Gradient Maps
7:59 Blend If With Gradient Maps
9:51 Enhancing Gradient Maps With Additional Adjustments
---------------------------------------------------
My Instagram: / brnwills
Find More Tutorials Here: www.bwillcreative.com/


*Get the free PDF Guide To Build From This Lesson* 👉 bwillcreative.ck.page/7ae57b5bc4
So well explained. I’ve been using blend if for skin smoothing for years but never understood the logic until now. I never thought to use it on landscapes. This is a game changer.
Simple & Useful video with clear spoken english.Even a non english man can easily understand.
Great tutorial , I will use these technique . Thank you
One of the best tutorials so far with simple explanation and no jargon…
Excellent, easy to follow. Thanks.
Very In Depth. Amazing work
One of the best Photoshop tutorials is from Brendan William. His tutorials are always a clear concise, step-by-step description of how to navigate a particular tool. Most of my Photoshop lessons are learned from BW. Thank you Thank you
You are welcome!
Thank you, this was very helpful! I liked how you showed softening the use of Blend If with the gradient mapping because I’ve definitely had trouble getting it to look right and not so delineated. Very clear and concise.
Glad you enjoyed! Blend if is honestly my favorite adjustment for blending just about everything in an edit lol
Great tutorial !
Glad you enjoyed! :)
Excellent!
Excellent
Hello I like your videos and I wanted to ask you a question.
While using and hsl adjustment or other I quite can't understand the idea of decreasing some color for it to affect another, like decreasing yellow and red to change an orange color, can you do a video over that how we can understand decreasing one color could affect the other? Thank you
Love the combination of these tools for a final product! Specially Blend If! I thought to use the sliders of Blend If, they were directly related to the order of the layers on PS...🤔 (top layer:top slider on Blend If... is that the case? cause in this final example of the landscape, you used the lower slider of Blend If with the upper layer ....) thanks! ;)
Turn smoothness all the way down in the gradient editor! Your gradient may look worse, but the gradient map will not add unwanted/unintentional contrast to the image.
I use the same process in my photos but prefer soft light to overlay as it just looks better to me personally.
do you know how to remove black colour background when your design is black can you do a video on it.
How do you affect the opacity of each color levels in Gradient Map?
I change the opacity of the markers above the gradient bar in the Gradient Editor panel, and nothing happens.
What am I doing wrong?
I'm looking for an answer to this question. we see that the author does not know this, since he uses a different method to make the gradient map transparent
I am dissapointed.. your sreen went out of focus and stayed that way... Dissapointing
That is likely because your playback quality was set to 240p or 144p. Try watching again with the quality set to 1080p and it won't be blurry (click the gear icon at bottom of video to change that). It defaults to Auto quality and will choose a lower quality based on your internet connection speed but manually overriding this solved that.
@@BrendanWilliamsTutorials Thank you, I shall certainly give it a shot.