Lindsay Adler, you are always the most amazing instructor for photographers. Your videos are short concise get right to the point and are focused so that I don’t get lost. I have several of your guides and I hope one day to be able to take one of your classes.
Yes Mrs Adler you are very very creative browsing through your stuff _ the post production of the slit in the dress is a marvel Photoshop, obviously post processing is so important and without it - is just a lot of work it appears _ it is so nice to be a great teacher and share with us you are a blessing
Lindsay you so pretty! That even the way you style your own outfits are on point. I learn so much from the way you approach contrast and saturation. Lighting is so cool I hope I never go blind knock on wood.
Awesome to see your breakdown and the fixes in post processing! Often we will assume that these type of shots are captured as close to finished in camera - but like me working in a small home studio without much space I do need to work on the shots in post to refine and finesse to complete the looks.
Totally! I typically do try to get my end results as close as I can in camera, but there were some things that needed more tweaking in this one to get the final result. You could easily achieve this by just putting your subject on a white backdrop and not having to clean up seams like I had and just modify the color grading a bit to give it that warm feel of sunlight.
@@lindsayadlerphoto appreciate your wisdom, insights and feedback! Looking forward to your Hollywood lighting guide I pre ordered, I have always loved the look and feel of those images
Thank you again for showing the whole process, including the as-shot! We all see so many polished photos it's cool to see how they became works of art.
Appreciate you showing the out of camera shots through to the finished image. Love your editorial with Alina in L'Officiel with direct light combined with rim light; that would make for a great image breakdown!
hi, im from haiti and i just love the way you teach... i ve learn a lot from you and i will always watch your video .... Thank you so much.... i will be so happy to particate in one of your course,,,,,,... thank you so much Lindsay
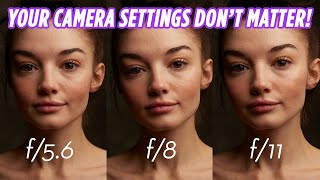
Beautiful shot. So amazing to see the before & after. Thank you for what you share, I’ve gotten value & inspiration out of every video of yours I’ve been watched. One question….in the camera settings (In description) it says 2.8 aperture. But in video you mentioned F8. Can you please confirm the aperture. Thank you so much for everything you share.
Great shot in its simplicity! BTW, how to make a v-flat for a home studio? what are the most suitable parts for this modifier? any types of foam plastic? or it requires something more robust and solid? Thank you.
Thank you so much for showing how the photo from camera looks. A lot of the time people only show the end result which isn't helpful as that isn't always what you get straight from camera and people would assume they've failed.
Arn't all the V-Flats the same height? I noticed you PS the hinges from the V-Flat in post but if you were to edit the seam out of the bottom of the shot wouldn't that give the model a floating in space look? I like the way you kept some seam in there to give it depth. I'm not great at PS so how do you extend the White background out to the left more?
Nope, V-flats are different height. Some are 6, 7, or 8ft (8ft is standard but there are also smaller collapsible ones). Try using content aware extend for adding white on either side. :D
Interesting and useful to see your approach to this task, however I have a question about the final edit. If you look along the floor you can clearly see the corner in the v-flat. In the area of the models head this corner is removed, which I noticed before seeing the before photo. I think that the "construction" or the corner would have looked more natural if it continued all the way to the top of the picture, even if it was barely visible there, like a diffused line. It would then have looked like a corner in a building. Is that something you considered when the photo was edited, and if yes, why did you choose to remove the line/corner?
I went back and forth on this, but in the end I just felt it was too much 'line in the back of her head'... and even if it looked unnatural it maybe was less distracting. could have gone either way.
Ms. Adler, to me, you are one of a kind. I am in love with your personality and positive attitude. Were I in NY, I would come to your studio and kiss you beautiful and skillful hands. You are the salt of the earth. Whenever I aim my camera at a subject, I feel you at my side, telling me, "You re good to go! " Let me finish by saying I love you. Dr. B. Delgoshaei
The DRASTIC difference between the SOOC and the photograph is always a real masterclass in true master process. We look at incredible photos on Instagram or in magazines, but we simply never see where those pictures started. We either think they were flawless SOOC or think everything was done in Photoshop. I truly feel the #1 thing that holds photographers back is either 1) thinking things have to look flawless SOOC, or 2) thinking everything has to be done in Photoshop…and never finding the balance between the two.
A great end photo for sure, an no surprise. I dislike you - you make me think, and you make me want to learn more. You make me break my lazy. Not cool. 💐👍
TH-cam keeps recommending these videos lol The words "Natural Look" and digital photography should never be used in the same sentence. This look is about as natrual as Kim Kardashian's face.


Lindsay Adler, you are always the most amazing instructor for photographers. Your videos are short concise get right to the point and are focused so that I don’t get lost. I have several of your guides and I hope one day to be able to take one of your classes.
Thank you Marco
Yes Mrs Adler you are very very creative browsing through your stuff _ the post production of the slit in the dress is a marvel Photoshop, obviously post processing is so important and without it - is just a lot of work it appears _ it is so nice to be a great teacher and share with us you are a blessing
Lindsay you so pretty! That even the way you style your own outfits are on point. I learn so much from the way you approach contrast and saturation. Lighting is so cool I hope I never go blind knock on wood.
I always keep open mind and refresh my memory on photography for fun or need it at an event. Thanks for the sample video. Great work!!
Light angle is representative of evening sun, and your color grade is perfect. Single bulb will give correct catch lights. Really nicely done. Thanks
Thanks so much Barry!
Best tutor on youtube as far is i know!! Love your work.
Appreciate that
I love the reflectors and beauty dishes as wall hangings!
Thanks so much!
Awesome to see your breakdown and the fixes in post processing! Often we will assume that these type of shots are captured as close to finished in camera - but like me working in a small home studio without much space I do need to work on the shots in post to refine and finesse to complete the looks.
Totally! I typically do try to get my end results as close as I can in camera, but there were some things that needed more tweaking in this one to get the final result. You could easily achieve this by just putting your subject on a white backdrop and not having to clean up seams like I had and just modify the color grading a bit to give it that warm feel of sunlight.
@@lindsayadlerphoto appreciate your wisdom, insights and feedback! Looking forward to your Hollywood lighting guide I pre ordered, I have always loved the look and feel of those images
Glad you enjoyed it and thanks for picking up the Hollywood Guide! So many great images coming! :D
Love seeing your editing process. Great tutorial as usual!
Thanks for watching! :)
You have fast become one of my favourite photographers, thanks so much for sharing your knowledge, so freely.
Thank you so much for the kind words!
You are amazing, your post production is something to marvel at!
Good refresher course on how to edit your photo and make it pop. Thanks.
What a phenomenal teacher you are, let alone photographer! Thank you for these generous tutorials and glimpses into your process!
Thanks so much for the kind words!
Thank you again for showing the whole process, including the as-shot! We all see so many polished photos it's cool to see how they became works of art.
Thanks for watching!
Thank you so much Lindsay!
I tried this look yesterday and it came out amazing!
That's awesome! Glad to hear it. I hope it came out great. :)
Appreciate you showing the out of camera shots through to the finished image. Love your editorial with Alina in L'Officiel with direct light combined with rim light; that would make for a great image breakdown!
I usually dont do bts for those as per magazine rules. But maybe someday. Thanks for the love on that one!
I have a close bts on lindsayadler.photo/learnplus in the editorial fashion week (roughly showing how that was done)
Your work is amazing! Love these tutorials so easy to understand.
Glad you like them!
All of your work is really spot on 👌 Bravo again 😊
hi, im from haiti and i just love the way you teach... i ve learn a lot from you and i will always watch your video .... Thank you so much.... i will be so happy to particate in one of your course,,,,,,... thank you so much Lindsay
Thank you so much for watching! :)
That worked very well. Thanks for the video. Nice and compact too.
Thanks for watching! :)
Great content as usual Miss adler
Thank you so much!
Great lesson! Thanks Lindsay!
Thanks for watching! :)
I love the RF 24-105 f4 lens so I can totally relate and understand.
Ouiiii c’était bon … merci Lindsay❤️
You are maybe the only showing the shot as it was taken!! thanks!
Beautiful shot. So amazing to see the before & after. Thank you for what you share, I’ve gotten value & inspiration out of every video of yours I’ve been watched. One question….in the camera settings (In description) it says 2.8 aperture. But in video you mentioned F8. Can you please confirm the aperture. Thank you so much for everything you share.
Very helpful. Thank you so much for this. Have you done dodge & burn on this image?
For sure! Especially on face/legs!
Beautiful as always and yes your One Light Artistry Videos are so fun to watch as well as to learn from and to gather inspiration. ❤️
Thanks so much for watching! Happy to hear you enjoyed the One Light Artistry videos! :)
Love it. Beautiful work as usual.
great video as always, love your work and your explanations
Thank you!
Amazing job!
Thanks for watching! :)
Stunning
Thank youuuu
thank you for the breakdown. well done
Thanks for watching!
Here is some ❤️ cause I ❤️ your work and overall being! 😎
Thank you so much! :)
Great shot in its simplicity!
BTW, how to make a v-flat for a home studio? what are the most suitable parts for this modifier? any types of foam plastic? or it requires something more robust and solid?
Thank you.
I wouldn't know I use pre-made ones from V-Flat World, done for you foldable and high quality! 😉 lindsayadler.photo/vflatworld
Great tutorial, I love to work with one light strobe in studio, even on location. And bare bulb is a great idea.
Thanks for watching! :)
Awesome work
Thank you!
This is a great video, love your work! thanks for sharing
Thanks for watching! :)
Thank you so much for showing how the photo from camera looks. A lot of the time people only show the end result which isn't helpful as that isn't always what you get straight from camera and people would assume they've failed.
No problem! I try to show where I started and where I ended up. It isn't always "perfect" out of camera!
Obrigado por compartilhar um pouquinho de seus imensos conhecimentos. Um beijo no coração, aqui do brasil
Thank you!
Arn't all the V-Flats the same height? I noticed you PS the hinges from the V-Flat in post but if you were to edit the seam out of the bottom of the shot wouldn't that give the model a floating in space look? I like the way you kept some seam in there to give it depth. I'm not great at PS so how do you extend the White background out to the left more?
Nope, V-flats are different height. Some are 6, 7, or 8ft (8ft is standard but there are also smaller collapsible ones). Try using content aware extend for adding white on either side. :D
@Lindsayadler thank you for this deconstruction. Great to see how it was done.
love it .. very easy and nice!
Glad you enjoyed it. :)
Interesting and useful to see your approach to this task, however I have a question about the final edit. If you look along the floor you can clearly see the corner in the v-flat. In the area of the models head this corner is removed, which I noticed before seeing the before photo. I think that the "construction" or the corner would have looked more natural if it continued all the way to the top of the picture, even if it was barely visible there, like a diffused line. It would then have looked like a corner in a building. Is that something you considered when the photo was edited, and if yes, why did you choose to remove the line/corner?
I went back and forth on this, but in the end I just felt it was too much 'line in the back of her head'... and even if it looked unnatural it maybe was less distracting. could have gone either way.
Hi Lindsay great video! I’ve been wanting to learn more about the single light on location. Are there any videos you have on that?
Yes! My Creativelive course on location lighting bootcamp would be a great fit!
Thanks for info!! What do you use to hang reflectors on the wall??
a flange!
@@lindsayadlerphoto Thanks
Would using a CTO gel be an easier way to achieve this look?
Does anyone know how she extended the highlight on the model's leg?
Clone stamp and general retouching would do it.
What kind of white paper did you use for the floor and what size
All details are in the description. Its Savage Seamless.
@@lindsayadlerphoto ok thanks
Can a CTO gel be used to get a similar result?
If you want more color, sure.
Question how would you crop that shot or resize it to fit Instagram or 8x5 or would you stretch the sides (white part)
I wouldn't crop it. I'd add borders around it to maintain the correct aspect ratio of the image.
@@lindsayadlerphoto question I know how do I add borders in photoshop or is it done In
Photo shop
@@xpy1 Squarefx app
Most of the time when you upload the image to Instagram it maintains the aspect ratio and does it for you.
What system do you use to hang the reflector dishes hanging on the wall in the background of the video? TIA
flanges
Could we get a tutorial on the way you color graded this amazing image?
Ms. Adler, to me, you are one of a kind. I am in love with your personality and positive attitude. Were I in NY, I would come to your studio and kiss you beautiful and skillful hands. You are the salt of the earth. Whenever I aim my camera at a subject, I feel you at my side, telling me, "You re good to go! " Let me finish by saying I love you.
Dr. B. Delgoshaei
You're too kind! Thank you for the nice words. :)
Nice video
Thanks!
Superbbb
Thanks for watching! :)
C'est Bon!
Thank u
Do you color grade or retouch first?
Color grade first in camera raw.
Hello, do you have digital training with Turkish subtitles?
Unfortunately not.
love u
🙌🙌🙌👏👏👏😍😍😍
What about a square foot of CTO and some tape? Maybe I am old fashioned....
could work!
Irving Penn background.
The DRASTIC difference between the SOOC and the photograph is always a real masterclass in true master process. We look at incredible photos on Instagram or in magazines, but we simply never see where those pictures started. We either think they were flawless SOOC or think everything was done in Photoshop. I truly feel the #1 thing that holds photographers back is either 1) thinking things have to look flawless SOOC, or 2) thinking everything has to be done in Photoshop…and never finding the balance between the two.
yasss. exactly
A great end photo for sure, an no surprise. I dislike you - you make me think, and you make me want to learn more. You make me break my lazy. Not cool. 💐👍
🇪🇬🇪🇬🇪🇬🇪🇬🇪🇬
You are so cute ...
TH-cam keeps recommending these videos lol The words "Natural Look" and digital photography should never be used in the same sentence. This look is about as natrual as Kim Kardashian's face.
It was about emulating the look of sunlight if you bothered to watch the video.