Easy and Accurate Router Edge Guide // Woodworking Jig // Great for Dados and Grooves

ฝัง
- เผยแพร่เมื่อ 10 ก.พ. 2025
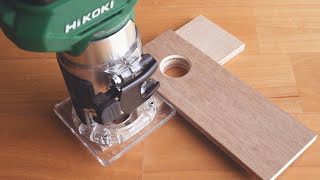
- For my next project I am going to use a router to cut a lot of straight lines. To make my life easier, I decided to make a jig so I can quickly and accurately set up a fence.
This jig is super simple to make and it will save me a lot of set up time in the future!
For more info check out the written article - www.3x3custom....
_____
AMAZON (Affiliate) LINKS
24" Piano Hinge - amzn.to/2K3xWZl
Screws - amzn.to/2DEnjLV
Vix Bit - amzn.to/2DByKEt
_____
FOLLOW
Website - www.3x3custom....
Subscribe - www.youtube.co....
Instagram - / 3x3custom
Facebook - / 3by3custom
_____
Links above are affiliate links, clicking on them helps me continue to make more projects :)
Some tools used in this video were provided to me, all opinions are my own.


Great jig. Love the outtake outro. "Yes, that makes sense." 😄
Haha! Routers are confusing....
@@3x3CustomTamar Routers are my go-to tool! I have three and all are continuously at the ready. I use routers for things a lot of folks do on a table saw.
I always tell people that routers command respect. I've not seen as many injuries as with table saws, but I've seen more stock ruined from mishaps. The main thing to watch out for is climb cutting as the router can really get away from you. After that, it's important to read the grain correctly to avoid ruining your piece. Master those few things and you've got it! Best wishes for continued safe success.
John Coloe yup. Nothing like some hard lessons learned.... if you’ve seen my 3 string guitar video I had a mishap with grain direction... hopefully it’s something I won’t do again!
Nao nao nao
Muito bom .serra do salitre mg
This is awesome. I'm going to make one for my circ saw and jig saw.
Awesome. Have fun!
I've watched 40 of these router jig videos and this is the only one that gets to the heart of the issue immediately and simply. Phew. Gracias!
Awesome. Glad to hear
This is brilliant! It's obviously applicable to circular saws, too, and it addresses every complaint about losing depth with "tracks" and "edge guide jigs". Thanks for showing this!
There’s no reason why I wouldn’t work!
Brilliant, especially for circular saws...
Was just saying to myself this would also be useful for my small, cordless circular saw and my dremel saw. I'm new to woodworking and dealing with measuring and clamping edge guides while taking into account the offset of the blade has been clumsy for me so far.
I've had a router for over 3 years and avoided using it--it slipped away from me several times, ruining my project, and for the life of me I couldn't seem to figure out how to control it enough to do straight lines. This jig changed my life--now I love using my router!
I think I want to hinge the other side of this jig to match up with the edge of the router bit. I needed to make a 3/4 inch dado, but the largest bit I had was 5/8. I spent the time matching up the edge of the bit to the pencil line and then used this guide as a straight edge, but I missed the convenience of plopping it down, opening the hinge, and just going.
This was super easy to make, and use. Thanks so much!
Awesome to hear!
This is fantastic! I’ve spent a while now subtracting 89mm from my cut line, to clamp a fence to my work. To use with my skill saw! This would work perfectly. Thanks!
Haha! I used to do that too.
Made this today. It works great!! Thank you!
Awesome
🤯 Genius. You're a bad ass 👏🏻. I love how you give credit where it's due. Not all TH-camrs do that. Most classy, respectful and appreciative ones do 😬. Just my 2¢ on that.
Thanks! The only credit I can take for this is actually remembering it! I tried finding more info on it from the woodsmith shop and just couldn’t. Hope this will help ppl!
I just made this jig for a chair project where I needed to cut a bunch of dadoes. The jig worked perfectly and was very simple to make. Thanks for posting.
Awesome to hear!
Thanks for reminding me about this jig, I had also seen it before but forgot completely about it. One idea that I had was on the underside of the flip up piece is to draw an arrow which direction to run your router, that way you see the arrow after you lift the hinged piece and get ready to make your cut.
That’s genius. Going to do that today
I'm a pro carpenter. And I learn little new tricks everyday! Great job.
Awesome. So glad to hear! Thanks!
OMG! Double stick tape to hold the hinge in place while drilling!! Genius!
Love your channel, really gives me the confidence to try new stuff, particularly when you show your mistakes and recovery, as that takes a lot of the fear out of starting a big job 😊 Thank you and keep up the good work!
Glad you like it!
I made this jig this evening because I'm going to need it to make your new crosscut sled. I'm crap at measuring, and you mentioned that there's a way to use the router itself to figure out where to cut your board. Here's one such way. I put the uncut board against the fence of my crosscut sled, dialed down a V groove bit in my router until it barely marked the wood, then pushed it in half an inch or so. That told me where to set up my table saw fence for the cut. Tested it out and man, is it ever accurate. Just a great simple jig. Thanks again.
That is such an awesome idea! Thanks for sharing that! Glad you like the jig!
I'm going to make one of these. I appreciate your attention to accuracy that you shared. This will really help with dados. Thanks!
Awesome! Good luck with it!
#metoo
Need it to cut the place for the house on the deck of my ark
@@k.a.2442 How many cubits will that be?
I'm building a teardrop trailer and need to dado cut several slots for countertops and cabinet walls. This is awesome and has solved a potential problem that I could see arising during construction.
Thank you.
Great, simple jig!
I always remember routing this way: if I'm holding the router, I go _counter-clockwise_ around the outside of the piece, or clockwise in an opening inside the piece. It's opposite if the router is upside down (i.e., a router table): you turn the piece clockwise.
Thanks! For some reason when working on the router table it’s more clear to me. Maybe it’s bc I have the fence for reference? I don’t know.... ha.
left to right tip thanks!
Another super simple, but super effective technique! And I swear I still have that moment like you did at the end whenever I am using a router.
Thanks Shaun! Even funnier, that clip went on for like 5 minutes because I wasn’t sure I was actually right 😂
Haha, I know what you mean! I have so much footage like that.
Shaun Boyd soooo much! 😂
@@3x3CustomTamar oh sorry router I meant as in modem router and then checked an awesome way to get stuff made though came for something else but learnt something else thanks ☺️
Pranav S Shah haha glad you still learned something!
Over the years I've invented a variety of ways to position and guide my routers. While "most" were ultimately successful, none were as easy to setup and use..............Until I made one of these!!
Unbelievable!...............You get 27 star!! 😘💯
27 stars! Yes! Haha! So glad it worked out for you you!
For years, I have been trying to figure out how I could make fluted columns to go between bookcases, and classical column stiles for wainscoting. This jig simply accomplishes that task, though the one for bookcases would need to be 7' long. However, I will probably also need a good powerful router too. The Triton always attracted my attention. You have great taste in tools. LOL.
Wow! Thank You! You are clever!
And thank you also for dressing modestly. It really bothers me when I search these videos and find women demonstrating these tools while they show off their bodies to get attention. I know they do it because they mistakenly believe that their worth and beauty is tied up in their body, and I don't fault them for the lies society has imposed upon them (been there done that), but I am very happy to see that you aren't selling your body to show your skill. You are clearly very beautiful, but you also are genuine and unpretentious in teaching us techniques to help us improve what we came here to learn. So thank you so very much, Tamar. As your newest subscriber, I wish you all the best!
Haha thanks! My channel is about my work. Not me. 💪
Awesome jig to make life easier
Thanks! Totally agree!
GREAT JOB!! THANKS FOR SHARING
Glad you like it!
“Anti - Clockwise around the outside” is sometime a less confusing way to remember your direction. Depending on the positioning of your set up and the work, you can occasionally be routing against the bit rotation when moving the router from right to left, since it is relative to the positioning of you, the router and your work. Where as clockwise or anti-clockwise remains constant.
Isn't it anti-clockwise around the outside and clockwise on the inside?
@@colinvipurs9586 yes it is, (I have edited this now), 🤦♂️ #embarrassed 🤫🤫 don’t tell🤦♂️🤦♂️🤦♂️
Thank you. Your explanation of which way to run is extremely useful as the natural way for a right handed person is the other way,
It's getting less often a jig or trick gives me that "ah ha" moment, but this one did, brilliant!
Sometimes it’s the simplest ones that are the best!
I MUST SAY I like your way of securing the hinge to the boards while you are drilling the pilot holes for the screws, the drill bit you used & how you used clamps to keep the pieces of wood together while installing the hinge!!! All 3 of those points (IMHO!) are upgrades to Mr. Hamilton's process of making the Router Edge Guide!! Well done!!!!
Thanks so much!
@@3x3CustomTamar You're very welcome!
Great video! I’m making it as well. Thank you!
Such an amazing idea! It's also smart to measure from the center so you only have the one jig, not multiple for different sized bits.
Thanks! It first I thought of cutting away at the excess with a specific router bit but then it would be limiting.
Great video and I love the idea. The way you do it without measuring is locking the board your going to make your jig out of up against something like your tablesaw fence, then use your router to cut a small groove in the board with your router up against the fence. Then cut the board and apply your hinge.
Thanks! Makes sense
@2:32 - "the jig is done" you missed an opportunity here for "the jig is up"
I like to do carpentery work but it's not my field so i am a beginner and i like to watch your tutorials. You're awesome carpentery expert and give us great tips for wood working. Respectable Lady love you from Pakistan.
Thanks!
I'll be making one of these. Thank you!
Awesome.
Awesome possum, thanks for sharing, just bought the same router 💕👍
Suggestion: take the "down" side of the main piece. Route slots into it at fixed distances (say, 1 inch OC), and a short strip to fit into those slots... Then, when you want to make repetitive cuts, you can put the strip into the correct distance slot and the strip should line up with the edge or previous slot. Then clamp in place. It makes moving it a fixed dx each time easy peasy.
I just made this in an hour. I dont have a table saw so used my track guide and a skill saw. Did a 30 inch. Just tested it like in the video and worked perfectly!!! I will use this jig for years!
Awesome!!!
Great Jig an Video. I guess u could just flush route the hinge part to size with another straight edge, then you wouldnt have to work very precise and still would get a perfect result.
I love the outake. I use a simple trick to find out which way to run the router. Just spread you thumb and the forefinger to 90 degrees and looking at your backhand. When pointing with the thumb to the side to cut at, your forefinger is pointing to the right direction running the router to. Hope that can help.
I seen that video as well.
WoodSmith measured from the center of the router bit.
The side of the router you run against the edge guide depends on the side of the router you measured to. If the bit is completely centered in the base plate, it will not matter as the measurement will be the same. If you have an off centered bit, then one side of the base will be longer than the other and it will make a difference.
The router used in the woodsmith video was off centered so he put a mark on the router to indicate which side to run against the edge guide.
Right. Mine was the same all around. Glad you saw that episode too. Ha
Scott Tovey p
Is there any link of that episode?
@@willem-freekkuipers5590
Woodsmith does not appear to have their TV episodes on the web, however I did find a couple of other videos on the same jig.
Tamara's instructions are spot on but if you want to see alternatives, here are two that I found.
James Hamilton of the Stumpy Nubs Channel has this tutorial.
He begins with the edge guide.
th-cam.com/video/OY5uTKehrBg/w-d-xo.htmlfeature=shared
Colin Knecht on WoodWorkWeb has a tutorial here.
Colin uses a different technique with his edge guide.
th-cam.com/video/CETqGP1vgBM/w-d-xo.htmlfeature=shared
Amazing, yet simple jig. Making one after I stop at HD for a piano hinge. Thank you so much. This is going to save me HOURS
Glad it helped!
I’m a little lost here. Wouldn’t this only be useful for that diamond shaped but as it cuts precisely in the center line? If you were using a wider bit, the edge of the cut would be off of that center. Or am I thinking about this the wrong way?
Well you just have to mark your work piece to differently. So let’s say you were using a 1/2” bit. You need to make a mark 1/4” in from where you want the cut. Then it will cut in the center line, cutting 1/4” on each side of that for a total of 1/2”.
Yeah, I agree. This would be a lot more useful if she picked a particular bit and made the offset the distance from the edge of the bit to the edge of the plate. I guess this way it works the same for all of your bits? Honestly, though, for a little bit more work you should just make an exact-width dado jig.
if I were building the jig it would be adjustable. I seem to always be trying to route to a line on the wood. By making the jig in 3 pieces with slotted plates, stove bolts and wingnuts it would be easy to adjust the jig rather than drawing additional lines on the wood...just my preference.
@@jchavins In woodworking, there are usually multiple ways of achieving the same result. This way works for Tamar and her next project. Your adjustable jig would be great, as well, I'm sure.
It all depends on how you prefer marking your cuts. This jig works when marking the center of the cut, regardless of the bit. Center is center.
This is cool, I made a T Square but rather than measuring the offset I would clamp the T to my work and run the router through the T potion. This left me with the thickness of the bit and it allowed me to line it up easily.
I mainly used it for dado joinery thought and it also meant that I have to rebuild the jig every time I change a bit size.
Cool. I made one of those for my circular saw. Works great
Shoutout to Woodsmith TV show!
Yes! Fellow woodworking nerd! 😂😂🤓
Indeed. I have around 60 of the shows either on my TiVo or backed up on my computer, just so I can reference them at any time.
I love Woodsmith Shop, but is it a nationally syndicated show? I thought it was an Iowa PBS only show.
This may not have been your design, but your video inspired me to make one. In the last week it has saved me time and missed guesses. Thank you sweetheart.
This jig is nearly great but I think that it needs a tweak. Fo my part I Do a lot of routing and mostly wiht a 19mm diameter bit. knowing the centre of the cut is not that useful and as one still has to measure to the centre of the line produced by this jig form the marked line still involves measurement and does not reduce the possibility of error of having to maek and offset line from the finished cut line. As I usually use a 19mm diameter bit I know that my router requires me to offset the line to the edge of my router base by 75mm. Were I to make this jig it would have a 75mm fold over flap such that it could be set down on the line of cut then flipped and the router run. This would of course mean that the jig would be dedicated for one bit and router combination only but it would save time.
I also regularly use a very simple jig for cross cutting with a router. This is basically a T square. The stock of which is cut into with the 19mm bit which gives a witness mark. the T square can be clamped in situ to a work piece with the witness mark lined up with a line marked on the job and presto it will be right and square.
I hope that this is of use.
Good point, Jack--especially for dado's. Using this jig for that, the cut line would have to be the center of the dado.
This is going to make my life SOOOOOO much easier. A huge THANK YOU for sharing this.
As a furniture and cabinet maker, I've tried for yrs to come up with a jig that was easy AND quick to. I'm on v1k I think. Few worked, but most didn't give me the ease and or speed I was looking for.
Now, to scale this up to 72" and I'll be a happy camper.
Glad you found it useful!
Shes beautiful♥️
Just finished using the router edge guide you featured in this video. I very much appreciate your ideas and helpful videos. I used the guide to install t tracks on my router table. Thanks
Awesome! I just used it today too!
I love this hinged jig. I'm visually impaired and struggle with my jigsaw. This will work when cutting sheet materials. Brilliant!
How could 255 people not like this video? Tamar, I think you are a fantastic job of your videos, you explain everything so well.
Ha. I don’t look at those 🤘
I made that mistake several times before I saw some video where some guy told it do I can remember, but if I had to describe it I probably can’t! You do a great job and it’s always fun to watch your videos because not only do you find the simplest and most straightforward approach you’re having fun.
So glad to hear!
I love the end …. The way you saying…. This makes sense …… so naturally and lovely you are 😊👍🌹🌹🌹
Have to say - this is the second video I've watched on how to make such a jig and your video was half as short in time and much more helpful. Good stuff...
Awesome to hear!
So simple. Just when you think you have to come up with a complicated jig, someone comes along with a simple and very useful jig. Thanks a lot. I will be making this bad boy!
Ha. Awesome. Glad you found it useful!
Amazing tip ,you don't know what did I learn from you ,I am cabinet maker and I always struggled with cut proper fillers and bulkheads (I am not patient enough to spend hours to cut and plain and ... ) I will make a 3 ft long of this jig today ,will give me clean and quick fillers/bulkheads every time.
Thank you very much for your great tip.
Awesome. I’m so happy I posted it then!
May not be your design, but your video has saved me a lot of work this past week. Thank you sweetheart for your post.
Thx for this. I made one today and it worked awesome for making matchfit dovetails in my table top. Cheers.
Awesome!
I was undertaking a small project where I needed to make a number of dadoes, but I don't have a dado set for my table saw. So I started looking for a way to make it easier with my router and came across your video. It was easy to build and worked like a charm! Thanks!
Awesome. Glad to hear it worked out for ya
A really useful jig,I can imagine a very long version of this jig making corresponding dadoes and rabbets on two cabinet sides or backs at the same time.Time saver for sure!
That would be pretty useful!
Just got the same router, perfect idea, thank you again. will be making one as soon as the shop gets warmer. -4 here in MO today.
Awesome
Tamar, thank you so much, just what I have been looking for. Works perfectly. hardest part was finding my vix/hinge bits.
a longer one would work good for the circular saw.
Tamar, that jig is awesome. Thanks for passing along the idea.
Glad you like it!
I have been contemplating between a table saw upgrade (for dado option) and purchasing a router table for groove cuts and somehow ended up here. I tried table saw single blade mult-pass method and it's just a PAIN. I am thankful for your video because the jig is exactly what I need to utilize current tools without spending the extra money! THANKS!!
Awesome! So glad to hear it was helpful!
Oh yeah she did it again... made it so simple that even I can understand how this one works. Thank you again. And hope y'all stay warm up in Yankee land.
Awesome. So glad it was helpful for you! Crazy snowstorm came in last night!
I have to say, this is my favorite jig you have made, love it, cheers!
Me too. Ha
Love this young lady for taking the time to share what she discovers. ♥️ 👍🏻👍🏻
☺️☺️
Thanks, not a lot of fluff straight to it. I LOVE IT
Thank you! The last tip on running it on left side was exactly what I needed. That’s where I’ve been going wrong. Thank you for that piece of info!
Nice!
Good evening. Always bright ideas and this one for a neophyte like me is really easy to do. I have a feeling that this top is a tool that you use a lot. Thank you very much for your videos, the energy you transmit and your sharing. Sincerely. Etienne ------
Bonsoir. Toujours des idées lumineuses et celle-ci pour un néophyte comme moi est vraiment facile à réaliser. J'ai l'impression que cette toupie est un outil que vous utilisez énormément. Merci beaucoup pour vos vidéos, votre énergie que vous transmettez et votre partage. Cordialement. Etienne
Glad you like it! Thanks!
Crazy simple but very effective. I love it.
Thanks!
Just made one, wow the most important router jig you can have 👏👏👏👏
Awesome
You wouldn't know how timely this video is for me making an 8" rout this week. Thank you!
Awesome!
Simple and effective, great tip. I use a sharpie to mark on my router the direction of rotation for when it matters
Haha yeah. Sometimes we need those little reminders
I'm glad you had to double check the direction: I use both a freehand router and a table router and, having fired a workpiece across the shop at high speed, I now have to have a really hard think about which machine and which direction!
Haha yeah, sometimes it gets confusing
Very good demonstration of how it's done. Thank you.
One more super amazing jig, easy to make easy to use and extra cheap. You are not just a woodworker you are a genius inventor
Haha thanks. But as I said in the video. This wasn’t my original idea. I’ll take the compliments though. Ha
Great vid about how to make this jig! I like your small suggestions, like clamping the two boards and using double-sided tape and a vix bit, doing both ends first. It all makes sense. Those small suggestions make all the difference in getting accuracy.
Awesome. Glad you found it helpful!
I love your channel and all your jigs. I'm super happy for you and the success your channel has, I've been a sub for so long. I even built your acrylic router base when you first showed it off long before you had them manufactured. You are amazing. Here's to a whole lot more continued success.
I like the simplicity of this jig. This will be a good beginner project for me to start with. Just ordered the hinge and the screws. Then I will be able to use this to make the cross cut sled for my Dewalt job site table saw next. :) Thanks for all of your amazing videos.
You could also make one for your cirkula saw...
Just brilliant, and exactly what I was looking for! I plan on building a workbench tabletop where I can integrate the Micro-jig- dovetail system. It calls for first routing out a groove using a straight bit, then coming in with a dovetail bit over the same groove. You can just use the dovetail bit, but starting with a straight bit saves wear and tear on your dovetail bit. I was trying to figure out how this could be accomplished while still keeping the lines of the cuts straight. All I need to do is continue the line on the side of the plywood and use that as a reference to line up the jig for the second pass. Thank you so much for this - you are a woodworking genius!
Awesome! Sounds like it would come in handy there!
Adjust learning wood working and really appreciate your videos.
👍👍
Awesome simple jig, I think we all clamp wood down to lline up the router, but this is perfect, fool proof, thanks!
So glad you like it!
Could you please build a router table. Love your videos your not only a builder but a awesome teacher too. I’ve watched other channels yours is the best.
That’s so awesome to hear! Thanks!
Love your videos, so down to earth and not afraid of showing that your just perfect, in being perfect I mean you will show things like that outtake at the end of your video. There is nothing perfect in pretending you don't make mistakes or have to think carefully about some things, often the ones that portray as perfect are far from it, so to me this make you a true down to earth honest PERFECT if that makes sense, it does in my perfect world hahaha
We all make mistakes! It’s all in how you deal with them
Fantastic. You had a master idea. Thanks a lot for all the informations.
Oliver from France
Thank you thank you thank you! My son just bought a router for me but I've been afraid to use it, you cleared up a lot of the mystery!
Awesome. Glad it was helpful!
Very clever Tamar. I have not seen this before so I give you all the credit.
Thanks! I can’t take it though since I saw it from the tv show. I will take credit for actually remembering it though. Ha
Absolutely marvellous 🎉🎉🎉🎉🎉🎉incredibly simple !!! well done indeed. It may not have been your idea but well presented in easy steps for dorks like me 😂😂😂😂😂
Hi. Made on for my jigsaw and small plunge saw, and my trim router. Just a great simple idea
So awesome!
Thanks for making it make sense
I’ve been through a lot of videos and this is the best idea
Glad it helped!
This jig would work perfectly for routing geometric lines for an added design feature on drawers or something. Thanks for sharing!
Yup! You can see me use it to make geometric lines on my balance board video 😉
Awesome and so simple! I ordered my first router some days ago. This will be the first jig, that I make for it! Thank you so much for sharing this idea!
Awesome! So glad you liked it!
Great jig. You dont need the hinge. Just hold the spacer strip beside the guide strip, clamp and remove spacer strip. Can have just spacer strips of various width to align any router/bit, outer/center/inner line to any straight guide.
If that works for you, great.
that's a GREAT idea!!! i'm gonna make a couple of them; one for a router guide and a longer one to use with my circular saw to rough cut sheet goods down to a manageable size before running them through my table saw! Thanks for the tip!!
Awesome! Have fun with it!
thank you for this video, I have been searching high and low for something like this. You are my favourite woodworker and I like your style
Awesome
Wow, haven't stopped thinking about this video since watching your making of the "Go" Board for your son....and Shezammmmmm, it popped up this afternoon(so will take notes this time.) cheers...rr Normandy
Hahaha! That’s funny. It’s a quick and easy one!
You never cease to amaze!! Thanks for sharing!!
You are so welcome!
This is the second jig I’ve made from your videos. This and the taper jig, which allows me to make some funky cuts.
BTW if anyone makes this jig make sure it’s at least 3/4 tall. I originally made mine from scrap 1/2 inch and couldn’t squarely begin a plunge cut with fixed base😩
Yes, that makes sense! Great work Tamar.
Haha! Thanks!
Ha I made one of your edge guides yesterday...awesome. Simple to make and use. I just put an arrow on it to remember the correct direction of travel...! Thx Tamar.
Ross Waring ha! Nice! Glad you like it!