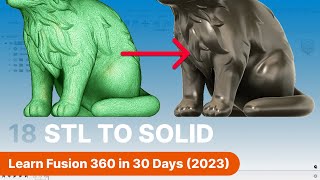
STL to Solid Body
ฝัง
- เผยแพร่เมื่อ 20 ม.ค. 2023
- Many times you will be given a STL file and need to convert it to a prismatic body. If you have a Fusion 360 Personal license you find this is a particularly hard job since you do not have this option in the Convert Mesh tool. Even when you have this option, you often find the process does not give good results. In this video I walk you through the process of using the Mesh Section Sketch Tool, located in the Mesh environment, to make this process a bit easier.
This process will work with STL files of contain basic prismatic shapes such as lines, arcs, circles, splines, etc. It is not intended to be used on "free form" STL files. - ยานยนต์และพาหนะ


![From Beginner to Pro: Conquer STL Files in Autodesk Fusion [UPDATED!]](http://i.ytimg.com/vi/3zweZhS5zcc/mqdefault.jpg)


Thanks John for taking the time to share this information!
Nice clean tutorial covering many steps within Fusion. Thanks
Great tutorial. I have been looking for this for a long time. I must admit I don't fully understand it and how it would work on a "More" complicated STL file. But I will experiment. Thank you for providing this technique.
Yeah, I wish I had prismatic - it looks like the "easy button" of mesh to solid. I need to make changes to an existing .STL with periodically and nearly always end up just doing a quick convert to mesh so I can get the dimensions and redrawing with tends to be less error prone than trying to delete+heal over and over. I followed this technique today and like it. I'll have to keep it in my toolkit. Thanks!
i wish it was easier than just recreating it, but this helped. Thanks!
Well-done tutorial. Thank you for thinking through the process ahead of time before “experimenting” while the camera rolls.
Please visit my channel for more Reverse Engineering video tutorials. Keep learning!
Excellent tutorial, thankyou for sharing
Thanks, I just needed a STL outline/shape to use as a cutting tool :)
Thanks for doing this tutorial 😎
WOW! 👍 Thanks!
Absolutely helpful! ❤
Please visit my channel for more Reverse Engineering video tutorials. Keep learning!
Siempre es bueno un tutorial nuevo sobre como modificar los documentos stl.
This is a great video. I have prismatic and have found it more times than not locks up Fusion because there are to many facets. I can not seem to reduce it far enough to make good solids.
Is there any STL type files that this method will not work on? Have you ever done a video on reducing mesh and using the prismatic option?
Great job on making this simple and easy to follow. Only thing I am unsure of is that vertical line on the left of the outer wall of the notches. Why does it do this? I noticed this on chamfers and fillets, but I dont know how to fix them. I suspect it is caused when a center point of origin is not exact center point of the outer walls or rings of the model, but I dont know for sure. Any idea how to remove that weird vertical spline or any spline showing on a chamfer/fillet? @ 9:10 you can see it on the left going through outer wall and the fillets.
That line is caused by Fusion 360. If you do not want to see it, go to your Display Settings, choose Visual Style and select Shaded instead of Shaded with Visual Edges.
@@jrhackney I think it is more than just a visual thing, and it is the result of a model not fully centered on origin axis. I noticed this only happens if I slightly move a model off the center origin point/axis, and then I edit the model using the origin center point. If i create component and ground a model before editing, i dont have this issue.
Ah, so you're using the STL to trace a new solid. nice! I wish it was easier #lazy
Hello fiend i m tryin to convert stl file to g code solid body but my 3d design a wheel rim after i convert missing the center. You know how i can fix that?
Great tutorial, but shame on Autodesk to make the feature that is literally a major feature designed for hobbyist usage (prismatic conversion) locked with that stupid expensive signature plan without at least a option to buy just that feature extension alone.
It's not STL to Solid Body, it's how to sketch over the existing STL so that you don't need to model it from scratch.
Still better than having 10 000 triangles slow down fusion until it crashes.
☺️ promosm
Please visit my channel for more Reverse Engineering video tutorials. Keep learning!