Dishwasher Not Cleaning Well - How to Clean

ฝัง
- เผยแพร่เมื่อ 12 ก.ย. 2024
- What's better than fixing your dishwasher? A spare car key without leaving home! I started Tom's Key Company (tomskey.com/?u...) so you can get quick and affordable DIY spare car keys and fobs shipped to your front door.
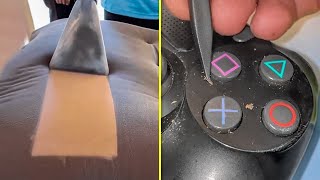
If your dishwasher isn't cleaning as well as it used to, it may need to be cleaned. This video will demonstrates how to clean the filter assembly of a Maytag dishwasher.
Find parts on Amazon: amzn.to/1ODFY8N
#Dishwasher #Easy #Clean
.174


Just what I needed. There are many videos on TH-cam about cleaning a dishwasher. Many claim all dishwashers are pretty much the same. But none of the videos could coach me through the Maytag Quiet Series until I found this one. Think about putting the "Maytag Quiet Series" in the title!
This is the video to watch for this repair. All other videos I saw only removed the covers and filters on the floor of the washer. Removing the top tray and the tube at the rear of the washer, made removing everything else a breeze. No struggling, jiggling, or awkward removing of components. Thank you so much. You turned a pounding headache into just a tiny little pain.
Even after 6 years - this video just walked me through step by step the very same dishwasher as in the video. Thank you for the easy to follow instructions!!
You're welcome! Glad to help
@@TomahawkDIY do you have any suggestions for what to do about the baskets rusting out. Or a place to buy new ones.
I have a Maytag MDB89100 dishwasher installed in 2000 (20 years ago!) that has been a reliable performer. Recently, however, the dishes were left with a number of light oily/greasy spots.
Thanks to youTube and your video, I was able to disassemble, clean 20 years-worth of gunk out of the filters, and reassemble the dishwasher. My process was slightly different than yours:
1. The spray arm does not disassemble for cleaning (the clip-on metal parts are heat deflectors for the heating coil)
2. Fortunately, my DW doesn't have an exposed column to bring water to the top sprayer (supply routed external to the tub), so I didn't have to futz with that. That said, for those who do, it might be helpful to reinstall the upper spray water colum prior to screwing down the lower part, for easier assembly.
3. While your model appears to have only one filter screen; mine has four. One of them is a vertical cylindrical screen (think auto air-filter shape). The top and bottom differ slightly, with the bottom resting on a gasket while the bottom slips over the lower assembly. The orientation is not marked, so make a note when removing.
Some additional thoughts:
1. Toothbrush and nail scrubbers are helpful cleaning tools
2. Take pictures as you disassemble; helps in putting it back together
3. Keep screws, bolts with associated pieces. If possible, stack in reverse order to speed reinstall time and eliminate second-guessing
4. Pay attention to how tight the screws are when removed, so you don't over (or under) torque. keep with assembly holes as noted in 3, above, so they don't get lost or misused.
I did it! I did it! Great instructions! It's much easier than I thought it would be, thanks to this video. I just finished taking it apart, cleaning it, and putting it back together and now I'm letting it run through to wash out any of the cleaning products I used before I put dishes in. So glad to not have to pay a repair bill or buy a new machine. And I learned something new... so I'm quite proud of myself. Thank you! Subbing now!
Cool. I have a different model but have to clean the screen assembly. The washer is smelly and I'm figuring on it needing a good cleaning. I never did it before and it's 20 years old.
I also did it today! Thanks for such a helpful guide
This video was a lifesaver for my family. I had run out of options. It took me 2 hours and I shudder when think about what came out but I am so happy my dishes will be cleaned properly now
Thanks so much for this video! Our dishwasher was making the most horrific grinding noises and this cleaning procedure solved the problem. Very helpful!
I did it! I've been asking my hubby for 2 months to fix it but he is too busy! Thanks for guiding me through the process!!
Not to busy they just don’t want to do it 😂 😡
Ain't nowhere near busy enough for 2 months he just doesn't care. Find a real one, my old lady doesn't do dishes,trash, groceries, oil changes. All of it is me. If we wanted to do it we would.
Thank you SO MUCH for your step-by-step, in detail, instructions. I'm a 63 year old retired elementary teacher and I was hesitant to tackle this job but it went GREAT! Thank you for your time as well. :-) 10/01/17
+Barbara Gillis So glad to hear it helped you! No pressure, but donations are always appreciated. www.paypal.me/TomahawkDIY or Venmo @TomahawkDIY if you want to send one. 50% of donations are sent to help people Build Better Lives in some of earths most dire circumstances (TomahawkDIY.com/about).
Barbara Gillis did you have to shut off the power to the dishwasher before tackling this project?
Thank you so much! This is exactly the same inside as our Jenn Air! My husband and I worked on it together, can’t believe how easy and it worked perfectly! Definitely couldn’t of done it without your video.
Hi! I’m trying to clean my Jenn Air and I’m having trouble loosening that black wheel with the screw in the center. Did you have any trouble with yours? The star screw that worked on everything else isn’t fitting with that middle screw, of course :)
@@camillepress8484 This is old.. but if you have issues with that.. pour some white vinegar in the hole of the screw.. it will remove the gunk and let you pull it out easily.
@@camillepress8484 If you have trouble with the screw... hold the black wheel and then unscrew it. If not it just keeps moving.
My Maytag dishwasher was leaving stuff all over my dishes and I couldn't figure out why until I found your instruction on the filter to my model.. I am 67 ys. young and was able to do it myself because of how complete your instructions are. THANK YOU!
Thank you so much for this step by step tutorial! I took apart the dishwasher yesterday and got it back together! Our dishwasher is over 10 years old, so while cleaning it out helped a great deal, it didn't solve all the problems - but it was a relief to find such complete and well lit directions!
Thank you very much for these instructions. My dishwasher of over 14 yrs old was leaving water in the bottom. I never would have thought the filter would be buried so deep, SHAME on Maytag. How many owners are led to an expensive repair or a new dishwasher when it was not needed. After using your tutorial, cleaning the filter (labels and other debris), it is working fine. Thank you for your time and expertise in making this video.
You're welcome! We're glad the tutorial helped get your dishwasher back in working order. It’s great to know you avoided an expensive repair. Thanks for your kind words and for sharing your experience!
I am in the middle of doing this. We got a used machine, and had never cleaned it. This helped so much, because I had no idea how to tackle this deep cleaning. There was so much gunk in the parts! Thank you so much for making this video, and for the easy to follow directions!
This was the perfect video to help us - we are not overly handy and would NEVER have completed this on our own. The steps are spelled out well and it worked just as the video. Thank you!
Glad to help. Thanks for watching
Perfect video! Our dishwasher was filthy and didn't know it or how to take apart and clean. Runs/cleans better than new. Repairman would have said ditch and get new, I'm certain. Thanks so much.
Glad it helped you! No pressure, but consider sending a tip my way. Half of all tips go straight to helping people in 3rd world countries Build Better Lives. Learn more here: tomahawkdiy.com/about. You can provide a donation via the "Support This Channel" on my channel page (th-cam.com/users/TomahawkDIY) or through Paypal (paypal.me/TomahawkDIY). Whether you donate or not, have a great great day!
Thank you for the step-by-step directions! Now my dishwasher is clean!
Awesome, detailed, clear. Really liked that putting it back together was also included! All done!
Thank You!! This was exactly what I needed to see how to get to my filter to clean it. I have been struggling how to remove the piece on the back and top of my dishwasher without tearing it up. Now I know how. Thank you!
Thank you so much for making this video. My dishwasher has not been cleaning my dishes well now for a couple of weeks. I knew it needed to be unclogged or cleaned somehow but didn't know how to do it. With your video I was able to take it apart and put it back together properly. You made it simple and it was pretty bad. Thanks again.
Whew! Very good instructions. Just running a vinegar bath through the reassembled machine to remove some of the harder calcium carbonate deposits. What a bogus design for the Maytag filter!! After maybe 10 years of not cleaning the filters, the glasses were showing foggy spots. it took many hours and several brushes and plastic utensils to scrape the filter parts (sort of) clean. The consistency of the soft gunk inside was indescribable. None of my cleaning fluids made it easier. I've got another cleaning six months from now on my calendar.
I should mention that the thin round tube for the upper sprayer assembly was pretty clogged and required a skinny brush with a very long flexible twisted wire handle to bend around the right angle. I hope it will clean up in the vinegar cycle.
Thank you so much! My dishes were coming out so dirty the last two loads. Your step by step made it so easy to take this apart and clean it all out. Can’t wait to run my first load of dishes to prove we still have life in this dishwasher and don’t need to drop big bucks on a new one just yet!! 🙂
Did it make a big difference? Mines is doing the same thing. I just took it apart it and cleaned it too
Fantastic step by step directions. Followed them and was amazed at how much gunk there was. Will put this on the calendar so it doesn't get that bad again.
Thank you for your disassembly and reassembly instructions!
Oh man... I made the mistake of trying to wash the drawer (?) of my air fryer in the dishwasher, and now my whole dishwasher is gunked up with oily black stuff. I need to do this..... Wish me luck!
EDIT: I did it! That wasn't too bad! Thanks so much for the step-by-step video!
Thank you. Honestly.
I don't know what I'd do without these videos.
Thank you for your kind words. Happy to help!
This was extremely helpful! Not that my dishwasher wasn’t working, it just could of been doing better. After pulling out something that looked like a q-tip covered in slime I followed this video faithfully! Thank you for making me feel confident I could do this! :)
This was so helpful!! My machine is so old and gunked up that it took me 3 hours to do everything in your 8 minute video. Lots of vinegar soaking involved thanks to our very hard Tucson water. Well worth it though. Thanks so much!!
Thanks for posting this. Looks just like my Jenn-air. I took one look at it and said nope. After watching your video it eased my concerns and the job was no problem.
Excellent, helpful TH-cam. Very well narrated, very detailed step-by-step instructions, made it a snap to go in, clean my dishwasher, and get out with it still working. Thanks!
Thank you so much! As a single mom I try to do as much as possible by myself to save money, this was just what I needed. I filled up the sink with hot water and added some vinegar, soaked the pieces in that to loosen up the calcium deposits.
Followed your directions & got my dishwasher cleaned!! Couldn't believe what I found in there! Thanks!
Glad it helped you! No pressure, but consider sending a tip my way. You can provide a donation via the "Support This Channel" on my channel page (th-cam.com/users/TomahawkDIY) or via Paypal.me/TomahawkDIY Half of all tips go straight to helping people in 3rd world countries Build Better Lives. Learn more here: tomahawkdiy.com/about.
Excellent video. Thanks. It was easier than I thought it would be...just have to put everything back in the correct order. Cleaning the screen by soaking with Dawn helps get the grease out.
Thank you so much for your video! 20 yr old DW looks brand new! Only problem I had was the black spinny thing was adjusted to the motor so when I lifted it up, the whole motor lifted up so I had to align the motor back up. Other than that, no problems at all. You’re a lifesaver, DW saver too! Thanks again!
You're welcome! Thanks for sharing your experience 😊 Happy dishwashing! 🍽️🔧
Excellent video, TomahawkDIY!
I posted replies to a couple of other commenters about clips that fell off during the removal of the sprayer arm. I had the same problem. The plastic support on the Maytag dishwasher body itself is shaped like an X (actually, more of a cross). If a clip gets dislodged, position the square hole of the clip over the X and then rotate the metal clip slightly so that the four legs of the X point to the CORNERS of the square hole. Then, while pressing the clip against the DW body, just twist the clip back to horizontal so that the legs of the X catch the clip and hold it in place.
Thank you for that. Happy to help as well
I am so grateful that I finally found your video... I had been looking and wasting time trying to find someone who took the bottom parts all apart and put them back together and made it so easily to see and understand....I took mine apart and can't remember exactly how it all goes back together......Thank you!!
You are so welcome! Glad to help you
Bless your heart for this, along with assembly instructions at the end! Tip for anyone else. The really small nut and screw fit in the soap dispenser so you won’t lose them during the process.
Thanks for the tip. Have a good day!
Thank you for the clear and detailed instructions. I found one challenge that seems to be peculiar to Canada. All the screws required a torx screwdriver and 2 different sizes were required - #1 and #3. I guess appliance manufacturers want to make it as difficult as possible for us to fix things. Second, getting the dirt and gunk out from between the fin-like protrusions is a job for a small bottle brush. If you don't have one, pick one up before you start. It will save you hours.
Thank you SO much I am visiting my Son and Daughter-in-law and just did this thanks to your help. I feel awesome to have done this myself!!!!! Old dogs do learn new tricks I'm 52!!
Well done...7 years now and still helping folks out!
What a great video. I cleaned my dishwasher as simply as you showed in the video. I watched the video until you had it apart, then I took mine apart and with the video, put it back together in stages with the video to guide me on each step. Wow! What a happy day this is.
+Julie Darling Glad to hear it helped!! Now you have the chance to help people in some of earths most dire circumstances solve a problem such as no clean water, no shelter, no medical care, hunger, etc.. TomahawkDIY is a business with a mission. No pressure, but donations are always appreciated. www.paypal.me/TomahawkDIY or Venmo @TomahawkDIY if you want to send one. 50% of donations are sent to help people Build Better Lives in some of earths most dire circumstances (TomahawkDIY.com/about).
Awesome DIY video, our filter had a lot of food debris. Followed the video and now clean as New. Thank you 😊
OMG, I cannot believe this exists. THANK YOU SO MUCH!!
Great video! It was so easy to follow your directions….I’m a 73 yr old woman and it was a challenging job but I did it and I now have it running a normal cycle.
Wonderful! Thanks for watching
This worked great! My wife was convinced we had to buy a new dishwasher, but your step-by-step instructions made it easy to try cleaning our Maytag washer. The result? Sparkling success. Thanks Tomahawk DIY.
Great to hear!
Thanks so much for the great video. I have a Maytag QuietSeries 400 and followed this video step by step and got great results. My unit was 18 years old and never cleaned until today. My dishes are now being cleaned like the washer was new.
You're welcome!
Video was very helpful. It's the exact same set-up as a Jenn-air dishwasher which I was working on. Found a broken piece of glass in there which was causing my noise. Thanks again.
Terrific video! Thank you for saving me the cost and wait of a service call. It went exactly as you explained.
This was exactly what I needed, and I was able to clean my dishwasher easily. It took me about 2 hours. Thank you for explaining and showing it so thoroughly. I was getting gross gritty deposits on anything glass in my top rack, and usually just hand wash all my glasses…now I don’t have to anymore, because my machine is clean and the nasty deposits are gone! I’m going to start using a monthly dishwasher cleaner product so hopefully I don’t have to do this again for a while.
Fantastic! Glad it helped
Thanks for the great step-by-step instructions! It runs so much better now and my dishes are actually clean.
Thank you! Thinking of writing a novella called Journey to the Center of the Dishwasher: a Horror Story :-( Cole // Cole Smith Writes
That'd be a reading that us regular folk who try to do our own work and save money for retirements and rough times could really relate to!
@@librealbedrio367 ". . . save the money for retirements and rough times." Exactly!
Both of my dishwashers have built-in food waste disposers, which grind up any bits that get into the dishwasher and flush them out the drain. But the best way to prevent buildup in the first place is to watch what you put in there in the first place. Needless to say, I've opened mine up before and cleaned them out as well, usually after glass breakage which is of course exceedingly rare.
Whatever stuff was left over in your dishwasher didn't look good. Amazing how dirty it can get, then we go and put our dishes in there thinking they'll get clean. The comedian Gallagher once said "Soup isn't even food. Soup is what's left over in the dishwasher after a good meal".
Either way, very nice tutorial on how to take apart the bottom strainer assembly.
This was an invaluable resource, thank you so much for making this
So excited to find this video but I am stuck at 2:43 minutes trying to get the black circle off. I removed the screw but that circle is not budging. It rotates but won't come off. I've soaked it in CLR, thinking maybe it was stuck, tho I don't see a build up of hard water there. Any ideas, smthg else I can try???
This was the perfect video for me. The operation was a success doctor, thank you! Be safe everyone.
A thousand thanks for posting this -- the info I needed with enough details, but without the useless babble. I truly am the family hero this Father's Day weekend.
Thank you! I think you just saved me from buying a new dishwasher!!! Going to attempt this. Great video.
Yes yes yes....great video, i followed along and was able to get it cleaned out without any help. Not bad for a 70 year old widow. I might have to teach my daughter how to get hers cleaned and working like new again. Great instructions, thank you❤
Nice work, Judy! You're very much welcome. Glad to help
Whew, I did it! 💪This video was great - step-by-step clear, good visibility. Now let's hope my dishwasher is cleaning dishes 🍽better than before - I haven't run a load yet so fingers crossed.🤞 THANK YOU!
Great job! Glad it helped
This video was so very helpful to me in cleaning my old and disgusting dishwasher. I had no idea that you should clean the filter. The gunk in the bottom and in the components was so gross. Now it looks brand new! Thank you very much!
I'm so glad!
This video could not be any more perfect. Step by step instructions and my dishwasher is much quieter not to mention cleaner.
Thank you so very much! I didn’t have much hope that our poor cleaning very smelly dishwasher could be cleaned except by a repairman. This is absolutely doable! (As long as I keep all the screws together 😉). We have VERY hard water so really, I should have done this years ago when we moved in to the house. Thank you!!
Thank you, thank you, thank you! You easily explained exactly what I needed to know! Incredibly helpful video!
Thank you for the very helpful video tutorial. Thanks to you, I was able to fix an issue we've been having with our dishwasher getting things clean, and it even runs quieter!
I tried winging it myself without your video because I didn't think Maytag or any mfg.would produce a machine with so complicated a procedure to get to the filter but that being said... it's been running 10 years now without doing this, so I am not complaining.(Probably not cleaning well for half the time)
Going to try again with your video.
Thanks for the video.
Mission accomplished. I do believe I saved buying a new dishwasher. I just wish I had known how to take the door off, it would’ve been so much easier.
Mine is a really old Kitchenaid but I think this gives me enough info to go on. Thank you for showing each and every step. Your camera work and lighting were good.
Appreciate your help and time to video this for us. Jesus bless.
Glad it was helpful!
This video just saved me and my old Maytag!! Thank you so much!
Wow! That's great to hear. Happy to help
thanks, my girlfriend wanted to buy a new dishwasher, took it apart following your example, runs like a new now. Not that it's hard but your video gives the confidence to do it...
I can’t thank you enough for this video! It was easy to follow and I was able to repeat in my own machine. 🙏🏼
Great instructions, my son and I completed this cleaning/repair in under an hour!
This was wonderful !!!! I can not believe the gunk that was underneath all the parts. I also didnt know all those parts came off. Thank you so much for this. I was able to get it apart and put back together myself. Saved me alot of money. Great video
Thank you so much for your simple step by step instructions. We never thought about cleaning our dish washer on a regular basis. Now we will and it is a "piece of cake" with your help!
Wonderful! Thanks for watching!
awesome vid, simple, informative, and thorough. I was ready to scrub the vid backwards to reassemble the dishwasher but you had that at the end ,too. thx so much for the tutorial!
I'm subscribing. I'm not an dumb person (generally speaking). I just lacked any kind of mechanical orientation in my raising, and a resource like this step-by-step of yours. You missed next to nothing (except maybe you could have cued when reassembling to switch to the smaller star bit for the small black disk piece - but easy to rewind if one forgets). I've never seen this kind of help done better than you. Thank you, thank you, and thank you.
Thank you for the kind words. Glad to help
Well done. Followed your instructions and it worked out fairly easy. Very clear instructions and much appreciated! Thanks!
Still very helpful years later. Thank you very much!
This is a terrific video, I just finished cleaning my very dirty Maytag dishwasher, going through the vinegar, then baking soda cycles and I am looking forward to seeing the results. Thank you!
THANK YOU SO MUCH. I WAS ABLE TO CLEAN OUR DISHWASHER FILTER FREE! YOUR VIDEO WAS VERY NICE!!
+Expose The Truth So glad to hear it helped you! No pressure, but donations are always appreciated. www.paypal.me/TomahawkDIY or Venmo @TomahawkDIY if you want to send one. 50% of donations are sent to help people Build Better Lives in some of earths most dire circumstances (TomahawkDIY.com/about).
Thank you! I couldn't find anyone else that had a how-to for my model since it's an older machine. I really appreciate the help.
Great to hear!
Thank you very much for this. A glass cutting board shattered in my dishwasher and I thought that I would not be able to use it ever again. I found this and cleaned it out and now I can run it without the fear of burning my house down. The book definitely does not show you how to do this.
Thank you Tomahawk DYI. It took 2 hours but was well worth the effort. I wish I could post my before and after photos to convince anyone who skeptical that it is pretty easy and they should follow your instructionst.
Perfect video! Thank you sir!
Thank you so much, exactly what I needed. My dishwasher now looks and smells brand new!
Thanks for the Video. Just finished the job thanks to your detailed video..It has been a lot of years and
certainly needed a good cleaning..Job done..Thanks again
Perfect video...While I don't have a maytag, the components were similar. Thank you for the instructional. It was very easy to follow and now I have a very clean dishwasher.
Fantastic instructional. I was able to follow this perfectly, and it was disgusting what was in there. This saved us from buying a new dishwasher unnecessarily. I have an Amana, which is exactly the same.
So glad to hear it helped you! No pressure, but donations are always appreciated. www.paypal.me/TomahawkDIY or Venmo @TomahawkDIY if you want to send one. 50% of donations are sent to help people Build Better Lives in some of earths most dire circumstances (TomahawkDIY.com/about).
Very well done tutorial! It was very easy to use to follow and fixed the issues of poor cleaning.
“Don’t ya remember how good it was cleaned new” I sure don’t this came with the house lol but I’m grateful for the video! Appreciate you have a great one.
Took apart and cleaned the whole thing, wife didn’t believe that it needed cleaning till I got that top housing offa there what a horror show lol
I did it thanks to you! I wouldn’t have ever done anything like this and was going to pay $150 i couldn’t afford for a maintenance call. Thanks doesn’t cover it. Great instructions!
Thank you so much! My first time trying to fix a home appliance and you made it easy! Thank God I had a star screw driver head on hand. I’ve never had a use for those extra heads. 😅
Great and to the point video, much appreciated and associated with what I might be dealing, I'll keep you posted! But excellent directions!
Super helpful step by step process, tear down and rebuild, saving for the next time my washer needs a deep clean! thank you for a great video and narration!
You're welcome! Appreciate your feedback.
Very helpful, let's see if it actually cleans better
Now I know why the Maytag repair guy is so bored and never gets calls .... your video!!! Thanks, this worked for me 👍🏼
Thanks for this video. You can also use a small Allen wrench if you don’t have a star screw driver
By FAR, the best video on the subject. Viewed many others before this first. Many thanks!!
Saved another washer from the dump, thanks for posting this it came in very handy!
Thank you for the video :) Helped me clean my dishwasher. I have always had issues with it since i moved into my new apartment and this has helped it actually clean my dishes.
So glad the video helped! Enjoy your clean dishes! 🍽️
Great video of Maytag dishwasher breakdown for cleaning. Very helpful. Thank you for posting this.
So glad to hear it helped you solve a problem! Now you have the chance to help people in some of earths most dire circumstances solve a problem such as no clean water, no shelter, no medical care, hunger, etc.. TomahawkDIY is a business with a mission. No pressure, but donations are always appreciated. www.paypal.me/TomahawkDIY or Venmo @TomahawkDIY if you want to send one. 50% of donations are sent to help people Build Better Lives in some of earths most dire circumstances (TomahawkDIY.com/about).
Perfect video - no idea how to go about cleaning this dishwasher prior to viewing this video. Thanks very much