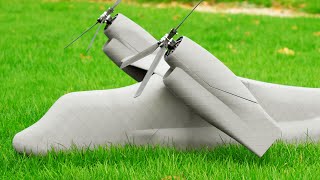
How to build a Flying Wing - Part 1 - Taping and Initial Design Thoughts

ฝัง
- เผยแพร่เมื่อ 1 ม.ค. 2014
- This Wing is for Advanced wing flyers. I have another build video for a KFm-2 44" wing which is more appropriate for wing novices.
Part 1, taping the foam and initial design thoughts.
First part of a multi part series on building the FPV30 wing. This is a scratch build and will cost you between $35 and $60 depending on the electronics you choose. The foam itself will cost less than $5. Other videos in this series will include:
Marking, cutting and glueing the foam
Installing the electronics
Final setup
Maiden flight - แนวปฏิบัติและการใช้ชีวิต


Just finished the maiden flight on this beast yesterday with some help from a friend at my flying club. I had to make a a minor modification to my motor mount to get it in the vertical center of the wing. Once that was done it flew like a dream. Thanks for your video.
Anthony McDonald Wahooo! Congratulations. Did you take any video of it, I'd love to see it fly. I just watched your bad motor video, I've had the same thing happen (never on a new motor, but after a crash). The same behaviour though, one of the motor wires is broken or has a bad connection.
Thanks I'm building this plane. not building it as fast as the one in this video build but it should be fun to fly.
Anthony McDonald Best of luck with it!
Daniel, those rolls of packing tape are only a couple of bucks each and are 150' x 2" which I think is 25 square feet. That would put the cost at about 10 cents per square foot. Not sure the Vinyl wrap can compare with that price. How heavy is the Vinyl wrap? Peel and stick in one sheet would certainly be easier, but looking at the pictures I would be worried about the extra weight. The packing tape is very light and thin, adds almost nothing to the weight of the plane. Thanks for the tip...you never know (although I did buy 36 rolls of packing tape). Just looking now, there are some interesting colour combos with the vinyl wrap.
Love the Video. You gave lots of info. I have a question. Where can I buy the tape you use and what kind of tape is that?
No sorry I was too excited to see it fly to even think of video, LOL maybe next flight
Anthony McDonald I'm just glad to hear that it flew!
Just looking again at the vinyl wrap. I'd love to do a plane in this one (blue chrome)...hmmmm:
www.ebay.ca/itm/Blue-Color-12-x-60-Car-Mirror-Chrome-Sheet-Wrap-Vinyl-Decal-Sticker-Film-/121320439695?pt=Motors_Car_Truck_Parts_Accessories&hash=item1c3f42ff8f&vxp=mtr&_uhb=1
Daniel Thomas I am pretty close to ordering it. I think it would look awesome in the sky.
thanks for your answer!!Did you try to paint the plane instead using tape .I do 1/10 rc race and i have some paint around ....I really love your videos ,im looking for many things about built my own .Did you try with wood too ?
No, I haven't tried painting. With this design I take the paper off of the middle piece (the thin foamboard). The tape on each side makes it stronger. A good example of how the tape does this is my lightweight desing (using all foamboard). You can see how "floppy" it is before it is taped and how it is much more rigid afterwards. If you paint you might need some extra carbon fiber support, or leave the paper on the foamboard.
Daniel, If I recall correctly you said that the CG on this build was seven or so inches back on the wing.How did you calculate that value? I feel like that is going to be mondo important to the way this guy flies. My CG calculator (Online) says 6.36 to 6.7 back. Not sure why the difference. Any ideas??
Anthony McDonald The original design for this style was by ProjectFlightDesign |(delta pusher). I think I got the CG from his vid. I've built several of the KFm2 versions of this wing and generally find that they fly a little better with a bit more weight up front (but launch is a little more tricky), so you might be right. A little more forward might help a bit. The first flight will tell you if you are right :-)
Why don’t you fly it after you build it I would like to see it before I would build it
is it really cheaper than a RTF plane when you buy everything separatly ?i love your video
Thanks for the comment. Yes, when you include shipping I think it is cheaper to build your own (shipping the small parts is not very expensive, but shipping the larger foam body can be quite expensive). The parts list for this plane is more expensive than some others because it is meant for speed. My FPV44 (about 42" wingspan) can be built for between $40 and $50 and is one of my best flying planes. Of course one advantage of building your own is that you will automatically know how to fix it and what the correct part is if something breaks.
Where did you purchase the colored packing tape?
Anthony McDonald I purchased mine from fast-pack.com