One of the best instructional videos I’ve ever seen on any subject. Excellent optics and close ups. Outstanding narration with confident, easy going style (being American, love the Brit accent, characterizations, and take on things) using only hand and body skills with no unnecessary props. Covered all the essential information without being too long or short. Love it, love it, love it!
Absolutely outstanding dedication and ability to pass the knowledge to even "totally inexperienced" people. I'm not a novice myself, but I wouldn't change one thing in your tutorial... Very valuable and useful, thanks for posting 👍🏻
This is a great video. Most comprehensive one I have seen. Even the end with cap etc he made some great points about dirt. I am also positive I have damaged a a tube with one of the screws that holds it in place.
Additional tip. Line the Tyre Logo ("Continental" in this case) up with the Valve. If the innertube is punctured, say 30cm from the valve, you know to check the tyre 30cm from the Logo for sharp objects. I've done thousands of miles on Audax rides. Soooo many punctures overnight in the dark, cold and wet. Anything to save time is a big help, and this tip helped me lots.
Yes, What a shame he missed that simple point. Just relating the location of the hole in the tube to the relevant point on the tyre can not only save ages in locating the cause, it can save cut fingers! In all other respects, very good instruction. 9.5 out of 10!
This is my second time posting a comment on this video. I just could not help it. Greatest instructional video ever uploaded on You Tube on how to remove and install an inner tube on a clincher tire. First time I watched this was to refreshed my inner tube installing skills. I had a flat in the middle of nowhere and screwed up installing an inner tube. I used 3 brand new inner tubes, all failed and ended up, calling my sister to rescue me. Now, at present, I just rotated my front and rear tires, followed this instructional upload. Took me less than 30 minutes to do both tires. No failures. Thanks David for making this grand slam. No wonder, it is the most viewed video in the channel.
I’m an ex-racer, priding myself in 40 years of road bike experience. But when I’m honest I must admit that you just ironed out a few of my basic mistakes which I never realized I made. Here I thought I had already nailed this to perfection. Excellently composed instructive video, this one. Thanks!
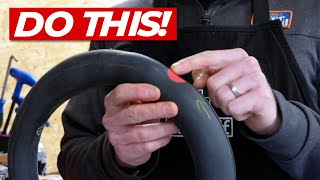
Great video. I would like to add a small trifle of info from my years of being a bicycle mechanic. Many tubes have a reinforcement ring of rubber where the valve meets the tube. This can cause the tube to be pinched between the tire and the rim right near the valve. The trick it to simply push the valve up into the tire cavity before adding air. It will move the stiffer ring of rubber into the tire cavity.
Perfect. I have done this for many years. Jam the valve up into the tire, pinch the bead sides against the valve, and press the bead down deeply at the valve stem. Otherwise you risk stressing and destroying the tube (or having the tire ride too high at the valve) when you inflate the tire!
I have literally (British English haha) watched more than a dozen videos on this topic and I can genuinely say this is the most informative and useful of them all. Well done!
A gem of a video. I am a 78 yr old woman and have never had a flat. Don't carry a tube or tools. One of these days I will have to watch your video on the trial while attempting to repair/change a tube. Thank you so much. subbed and saved for future reference.
@@eileenthomas856 ah, mine came without plastic leavers, unfortunately. Guess Ill have to pay the 5 bucks extra on Amazon or just fiddle around with other leverages. Thank you for the answer!
@@V-DTAJ I would say you just need something smooth. Maybe plastic spoons or knives just to get in there on the side and then move around the edge. The tire comes off easily.
Me too. But the entire idea of the plastic valve cap is to protect the end of the valve so that it doesn't puncture your jersey pocket after you've removed the old tube and put it in your jersey pocket or puncture the tube or your other new tube in the saddle pack.
Great video. 1) If you line up the tube’s valve with logos on the tire, you can use that as a frame of reference for finding the puncture. Put air in the tube, listen for the leak (or put the tube in a bucket of water and look for bubbles) then find the same spot on the tire. 2) If you put just a little bit of air in the tube to give it some shape, it’s much easier to mount it on the rim under the tire. Also helps avoid pinching the tube between the tire and the rim. 3) I try to rest the rim on the top of my bent leg, rather than set it on the ground. I don’t like the tube making contact with the ground and picking up any foreign objects. 4) Important to point out, when you’re using a lever to get the tire back on, the hook faces out.
@@zk4929 push the tire rim into the middle of the wheel then use one lever to open a gap and hold with left hand then push second lever into the gap and move to the right in the right hand, they only work one way round.
I just fitted a new Continental tire and a new tube in less than 10 minutes. No bruises on the knuckles. It was easy peasy lemon squeezy. Your advice is invaluable. I saw professional mechanics struggle more than I just did (or didn't). It was an eye-opening experience. Almost orgasmic.
That was the best video on changing and replacing a new inner tube. I wish I'd watched it before I attempted the job!! Thank you for all the great tips. Making space. Won't forget that.
I know it’s two years on since you published this video, but just wanted to thank you for the excellent tips. I just changed my tube and it was SOOOO much easier than it’s ever been for me. Making space and finishing at the valve… perfect!
David, that's the coolest, calmest & clearest inner-tube extraction ever. Just tried your techniques & you've sorted the many mistakes I've been making for so long. Thank you !!!
Agreed. Add a little air to the new tube before fitting it. I also remove the tyre starting at the valve not opposite the valve. I push the valve towards the tyre to reduce the risk of trapping the tube with the tyre lever. I use lock rings to give the pump something to push against. I use valve caps as I think they do help to keep the valves cleaner than without a cap. I have been known to oil the valve core thread but only a little…. I’d avoid using tyre levers to refit the tyre unless you really have no other option. For most tyres you can roll the last bit onto the rim using the heal of the hand. Lastly, spin the wheel with the refitted tyre, watching the bead to check it’s seated evenly.
Yep, standard, always put a little air in. The advantage of taking the tyre completely is to check for anything still penetrating the tyre. Takes a minute to put the tyre back on.
I lke watching bike videos during breakfast. I have seen other videos have to repair a flat tire. But yours is one of the best I have seen. Very calm and clear. Great job.
At first I thought oh my god this video is gonna take forever but as I kept watching I realized that this guy mentions a lot of great tips that other videos overlook. This guy REALLY knows his trade…
Really great, informative lesson. One thing I would add is to push the valve stem in when you're re-fitting the tyre, to make sure it's not trapped between the bead and rim.
Thanks a million, this worked great! I even found what caused my flat, a tiny piece of metal was still embedded in the tire (that I wouldn't have checked if I hadn't watched this tutorial!)
Great video! I'm 70 years old and have ridden bikes since I was a kid, and always found it difficult to change a bicycle inner tube. Wish I knew this when I was a kid. Excellent information, thanks!
I'm an occasional, low-mileage rider who is about to change a tube by myself for the first time. I've let myself remain mystified about tube changing for decades - until this video finally shined the light. David, you have a knack for teaching; this video was clear and answered all my questions. I'm am on the same page as you as well, regarding preventing litter and plastic waste. I think the world is way to desensitized to all that, even though it gets lots of lip service.
Wow! I'm floored by the sublime quality and execution of the explanation of something that is very simple in theory and execution, but that so many of us get WRONG, which is why I'm here this morning. I just ruined a brand new inner tube replacing my tire and I needed to be properly instructed as to how to do this, AGAIN. Now I know how to do it properly and this time, I won't ruin another inner tube by being hasty. Cheers to you! Thank you Jim for making an 18-minute video just fly by!
Thank you. Found your video after trying to wrestle with my continental tyres for half an hour. Then exploded an inner tube after taking the entire tyre off and pinched the new one. That's when I searched and found your video. Didn't realise the errors of my ways until now. So many good tips, especially pinching the tyre for slack. Very helpful! I like the way you explain too, very straightforward and easy for the lay person. Thank you again for making my next puncture easier!
Great tutorial, thank you David. One thing I would add: when you are checking the tyre for thorns, fragments of glass etc, I have found that looking isn't enough. I always run my fingers over the inside of the tyre. In this way I've often found fragments of wire that were effectively invisible at night, under overcast, or when one is getting on a bit and one's eyes aren't what they once were.
Coming from a medical education background, I will attest that we can sense through touch far finer aberrations that what we can sense through our vision.
Seems so basic, but checking the tire and rim for sharp objects is such a solid tip. All the other tips were equally helpful. I find my Contis to be super tight and creating space as shown is a tip I've never seen before. Thank you!
I have never, and tried many times, succeeded in changing my tyre. I run these exact tyres and have struggled and ended up paying way above the odds just to change a tyre. The whole pinching method, repeating and repeating allowed me to on my first try refit my tyre without using my tyre levers. I was amazed. Thank you so much for this video!!
I (mis)installed a trainer tire on my bike earlier today, then went looking for a guide on doing it properly when I came across this video. Redid the tire by following your instructions--much quicker and easier than my naive approach. Thanks for the video, you've helped me a lot!
Removing and putting back the tire itself was a task for me, that took about an hour, 3-4 tire levers and a lot of force. I just followed this tutorial and it took almost no force and time. Thanks man, now I can change a tire on the road too 🤘 I even put the tire back, without using any levers, which was unimaginable for me before
Great video as many others have said. My only suggestion is that I tend to line up the name of the tire with the valve stem location. Then, when I find the hole in the tube, I can more consistently find the potential puncture location on the tire based lining up the tube outside the tire with the valve stem location. This may be excessively OCD, but it has never failed me in finding the sources of tire punctures caused by foreign objects.
Good idea! It may only mean saving a few seconds but that is time my fingers are not unduly freezing because I can't find the damn sharp object in the tire without removing my gloves.
I used to mark Valve Location onto Tire with Chalk in order to align punctured tube with where to search tire for sharp object. Going forward, i'll: "Line up the Pressure Rating instead." Thanks!
I have NEVER commented on a TH-cam video before but I've just changed my inner tube in record time thanks to this video. Superb explanation and brilliantly communicated. Thanks so much!
I use to get frustrated changing out tubes and tires, after watching this video and applying what he taught I actually look forward to now! Thx so much! Plus how refreshing to watch a presenter who’s just being himself. Not trying to impress or be a hyped up actor. Great job!!
Excellent video thanks Jim. Nice to have confirmed that I am doing it right and an excellent point about taking care checking for the cause. I learnt the hard way and gashed a finger on a metal shaving sliding it around inside the tyre! A couple of things I would add... before inflating, check to ensure that the valve is pointing directly to the centre of the hub, i.e. perpendicular to the tube. If it isn't the valve stem will have fore or aft force exerted on it which will eventually tear it away from the tube causing total failure. Easy to adjust before adding air by moving the tyre back or forth until the valve lines up properly. Secondly if the hole is tiny and difficult to find (and you don't have a bucket of water to hand to look for bubbles) run the inflated tube past your lips. Much easier to feel escaping air as your lips are very sensitive. A little dab of spit on the spot will confirm the hole's exact location with bubbles.
Thanks! I can't tell you the number of inner tubes I've ruined by putting snake bites in my new tubes trying to force the tire back over the rim. Genius!
Changing my girlfriends incredibly temperamental, slim, tight and awkward wheel. Was very difficult towards the end but couldn't have done it without your help. Much love.
I always coat the tube and the interior of the tire with baby/talcum powder. It lets the tube and tire slide against each other as the tire flexes. It also keeps the tube from sticking to the tire. Ever notice how when you have a tube that has been inside the tire for a long time that there is a grittyness? That is the tube grinding against the tire interior. You won’t have that with baby powder.
40 years of changing tubes. Always use talc. I carry a spare tube in a zip lock bag that has been talced. Tubes and tires install more easily and they smell much better with Johnson’s Baby Powder ! Also, cut my thumb badly sweeping the inside of the tire finding a glass shard after 39 yrs of being lucky. I am 72, but not too old to learn.
Most baby powders you can buy today in the United States use cornstarch instead of talc. Lawsuits over the talc-based baby powder's alleged link to cancer and respiratory problems are ongoing and number in the thousands, and J&J has paid millions of dollars in settlement money to people who alleged the powder caused their cancer. The talc used in the infamous bathroom staple, the claims go, has a chance of being contaminated with asbestos, a known carcinogen that can lead to cancer or health damage with long-term use. In May 2020, Johnson & Johnson discontinued sales of its talc-based powder in the US and in Canada, citing declining use in North America due to "misinformation around the safety of the product," according to a 2020 news release from the company. The talc-based powder continues to be sold in other countries. Baby powder made with cornstarch instead of talcum is still available in US stores.
This was really helpful. Four years after doing my first tubeless install I wish I'd had this video back then. It confirmed lots of stuff I found out the hard way through trial and error along with some new handy tips. Great to watch someone who clearly has lots of practical experience and knows how to put the information across.
Been changing inner tubes for 20 years and still learnt something new. I'm guilty of over-tightening my lock rings. I've had many punctures where the valve failed, and I suspect my habit of over-tightening the lock ring was the culprit. Thanks for pointing this out.
Absolutely saved my butt the day after I watched this. Got a flat five miles out on the front wheel and remembering this video changed it problem free! Way to go David!
Excellent, thorough video. The only thing to add is to check the rim *tape* while looking into the possible causes of the puncture. Old tape may have slipped out of place or gone dry and ragged.
Yes! I helped a fellow several years ago with a flat. His wheel had the rubber rim tape/strip that is common on inexpensive bikes. The rubber had, somehow, slid to the side, exposing a spoke hole. I did not have spare rim tape with me, but I did have duct tape and a spare tube that was the right size. Had him back in motion in a few minutes. I told him those couple layers of duct tape would probably prevent a repeat puncture for several miles, but he really should replace it with fresh, good quality rim tape in both wheels before his next outing.
@@markholm7050 I had this very problem some years ago suffering several nasty blow-out punctures on my front wheel preferably at high speed or in the bunch, did not understand what was going wrong until halfway into the season (withe the most annoying puncture happening 4k into a 600k audax leaving me with the lantern rouge for a couple of hours). A new rimtape and I was good as gold. Won’t happen again …
2 flats riding my new road bike for the first month. Both caused by rim tape not quite exactly centered over the spoke holes on both wheels. Took me a while to figure it out but marking the tube to the tire before extracting it was the clue I needed to figure out the problem. Inspect your rim tape if you can before placing new tube into tire.
Watched it again. We get a lot of flat tires in New Mexico because we have A LOT of goatheads and pickers. Within a year, I should have this video memorized. It's the BEST!
I've changed tires for over 30 years professionally. But I was trained wrong and how to install tubes years ago and they come back all the time from two-wheel carts, bicycles to big trucks. It's been several years ago I learned how to install tubes correctly from the pros the best in the business. Rub your hands together keep rubbing them this is the same thing the tire and tube heat makes but a whole lot more. You could also check your bike with a laser heat gun at bottom of tire before and after installing the baby powder. I can assure you it will makes a difference in lowering the tire tube temperature. Put your hands in a sack of baby powder and now rub them together your hands don't make heat. Install the tire and tube with baby powder (Talc or no talc is fine) with no liquids. You can also use what's called a tubing deflator which will suck all the air out of the tube fast and you put your finger back over the hole on tubbing deflator to fill the tube take the valve stem out suck all the air out of the tube and put the valve stem cap over the tube core when installing the tube. So the tube valve stem doesn't go down in the wheel when changing it. I have had my bicycle tubes to last for years now by installing baby powder. I use about 12 oz per 2 mountain bike wheel shake the powder sideways before you start to air it up to try to balance it out and spin the wheel sideways stop and fill the tube with air. I install the tubes and baby powder outside with a fan outside because you don't want to breathe the powder. I used to run tubes in my street/strip car. But since they have made the best street radial out there that hooks no more tubes. And guys if you want to fix a tire with the bad puncture you think it's not repairable and you have it cleaned with some alcohol and ready because maybe you've had a puncture that you can't fix you could go to a automotive glass shop they have the black windshield urethane sealer. but you first use primer on it let it dry and then use the black windshield urethane sealer. This is the same thing they make motor mounts out of and it holds windshields in cars and more. But by the time you buy the primer and sealer you're probably talking over forty or fifty dollars and it doesn't last but a few years. If you have a tire clean with rubbing alcohol and ready they probably wouldn't charge much just to put some primer on the tire and then the urethane sealer. Years ago I also knew shops that would prepare over the road big truck and off road tire punctures in the sidewall. And they held up with speeds of 75 mph and more on the road. It's not something I would do but a lot of people did it back in the day. Hopefully this helps some people.
I grew up in The Netherlands and my bike was my primary mode of transportation until age 28. I have patched many tires over the years. Still I learned so much from this video. It was a masterclass. Very well done! Thank you.
Excellent video. BUT: Don't pull out the inner tube at the valve. Leave it in with valve still in place and inflate it half way and then check for the puncture. Put a finger on the puncture and look where the puncture corresponds to the tire. Take 2 fingers and carefully feel on the inner side of the tire. You'll instantly feel the thorn, or sharp shard of flint or broken glass. Your fingers are safe, btw. That's much faster to fix the puncture on the side of the road! The loosly tightened lockring is important if you want to pump up the tube because the Sclaverand valve is being pushed inside the tire and the hand pump has nowhere to push against to force the valve into the pump's seal ring. Without a lockring as a stopper it is a pain in the ass! ;)
@@andrewmurray5542 very useful indeed.. HEX coin $0.12 pulsechain and pulseX about to launch in weeks.. all 3 same founder. might find HEX useful too andrew
Definitely agree about the lockring when there’s low pressure in the tube. But to find the cause of the puncture I find it easier with the tube removed so you can inspect it more thoroughly, then just lay it on the rim with the valve in the right spot to find the cause.
@@silentdogfart4892 Exactly. This is the right and only way to do this, fast and efficient. I don't know why we should keep tube attached or waste time watching the tire.
Just used this video to repair a puncture on my rear. I used to run to the bikeshop to get it fixed but doing it myself feels so liberatiing. You are my hero!
Put some air into the removed tube to find where the puncture was in relation to the valve. Then find the corresponding place on the tyre to check for the offending foreign body.
this is why I always line up label to the valve and when I do get puncture I know where it is in relation to the valve on the tube. I do find it easier to completely remove the type from the wheel and inspect it
This is very helpful info thanks. Moving the label to the valve area to track the puncture. Here is some for you... HEX coin $0.13 pulsechain and pulseX coming soon. April 18 2022
It has been several years since I was an avid cyclist and the technology has changed a bit - including changing tubes! After watching Jim's video I'm confident I can duplicate the process and get going again
Really helpful video. I went from changing a tube in like 60 minutes to 20 just from watching this clip. Changed my tires the other week to more puncture resistant ones, and that was also really easy when following the tips in this video. Thanks!
Here's a fiver for ya! Thank you so much! I keep your video saved offline, share with everyone I know, and laude your space creation technique every chance I get!
Well done. I had always been "afraid" of what would happen should I encounter a flat. This video helped me through the steps and gave me a ton of confidence. And in fact, by following his advice, the process was much easier than I had feared.
This is the BEST video I've seen about changing a bike tire. The first time I changed a tire it took about an hour. Took the entire tire off. This time was far less time and now I'm more confident in changing a tire. Next time I might need to change it on the road, so I'm relieved.
Brilliant tutorial sir, I will recommend this for our clubs as there are many misconceptions. My only addition would be to check for rim deformations as well as the source of puncture. I had a hard “bump” (I am a Clydesdale) and it actually caused the aluminum rim to internally spur. Rare, but took me three flats to sort out. Again, great videos as always!
Great tips and bravo for your environmental concern! I carry a piece of chalk for 2 reasons: marking the puncture for ease of patching the tube and after patching to go over the patch and glue avoiding it sticking to the tire.
Thank you David! You have such a calm and pleasant voice for demonstrating a very unpleasant task. I’m 71 and bought a fat tire eBike. Your video has given me the confidence, to not worry if I get a flat tire. I can do it, I’m sure. I’m going to write down all the steps on a card and keep it in my tool box. I’ll also save your video. Thank you! I’m now a subscriber! 👍🏻
What an excellent tutorial. I’ve changed quite a lot of tyres by now but last time I put Continentals on it was a nightmare. This video made remarkably easy. I was genuinely surprised at the difference the technique of creating space made.
Sir, that pinching is the best trick I learned. Watched a load of videos and almost gave up. This video just automatically played on the background and figured I try it out. It worked!
Great video. I’ve seen the “pinch the tire into the well” method explained many times, but never seen it demonstrated so well. I see improvement in my technique in the future. Thanks. I’d like to agree with several other commenters that an examination of the tire before removing the tube can oftentimes tell you where the puncture is and save time looking for it on the tube itself. Adding some air at this point can help. With a little luck you can find the puncture and the offending object in one go. Also, I like to install the nut on the stem when re-inflating the tire with a mini-pump. It holds the stem out and in place, leaving both hands free to work the pump. It can be removed after, if you like. I don’t find this particularly necessary when using a track pump or compressor though.
I think its wrong to finish at the valve. That’s where the tire is most tight and the bead competes with the valve. I changed 4 tires for friends over tbe weekend and have to disagree on the end at the valve idea. Also, you don’t need more than one tire lever. Just sit on the tire and use leverage to push downward.
I have watched many videos of how to change tires/tubes by now from different creators and countries, and this is the best one! You Sir are my hero! :) You are calm and systematic, and cover every important aspect. Bless you!
Thanks so much for this! I have been looking for ever on the internet to try and find such an in depth instruction on changing an inner tube. This is exactly what I have been looking for. I have subscribed to your channel. I ride long distances and this is such a help. The next thing I would like is instruction on taking the rear wheel off and on when replacing an inner tube. I know it might sound elementary to some but I am afraid I am a novice at this and want to make sure I get it right if needed on a long ride to change an inner tube. Thank you again!
Thankyou! As a 77year old whose late husband used to do this for me.......... I did it on the back wheel of my three-wheeler! I now need a bigger spanner than in my 'repair' kit I loved the pinching tip. Thanks again
You should put a little bit of air in the tube when you insert it. This allows it to seat better inside the tire helping to prevent a pinch of it when you pump it up. It also lets you tell if the tube is clear of the rim.
As a newcomer to the world of bike repairs, I found this to be by far the most helpful instructional video. Your calm, methodical approach encourages a thoughtful, patient attitude to the work. Thank you.
I usually use the lock ring on my valves, because then it prevents the knocking noise of the valve against the edge of the valve hole in the wheel every time I go over a bump. I also use the valve caps also. I'm not too worried about water & grit, as I usually only ride on dry days. Also, the plastic cap can be hacked into an emergency 'shrader' valve, if it came down to that. Cut the tip off, invert it, screw it back on the valve. There's a video on TH-cam to show what I mean.
Omg. Literally broken a lever trying to fit my tire back on the wheel (seen millions of tutorials in the past) figured I can find another one on yt and came here. With the slacking tip I was able to fit it with my hands only. First time I come across this idea. Brilliant. You Sir have got yourself a follower. Cheers
Before you start removing one side of the tire from the rim, mark it where the valve is. When you find the puncture on the tube, the mark on the tire will help you locate where it punctured the tube.
Another good bit of detective work to do, especially after multiple unexplained flats, is to inspect the rim bed. Make sure the rim tape is in good condition, and that there are no wayward spokes poking your tube.
This is only the second video of yours that I've had the pleasure to view. Looking forward to the rest. IMO YOU'RE GREAT! Excellent and thoroughly educating presentation. Technically masterful product. LIKED AND SUBSCRIBED. I'm a 61 year old man, and use my mountain bike for trail riding and small grocery runs. Flats were the bain of my existence at one time. Upgraded my rim liner with that heavy duty soft puncture resistant vinal type, name brand starts with an "S". Bought the pre-filled "S" heavy duty puncture "resistant" tubes, and whilst I did get a puncture, upon locating the large "goat head " thorn, removing it caused rapid deflation until I remembered the sauce in the tube and upon rotating the wheel, viola! Leak plugged right up...I know that I have never been able to put as much flat prevention "S" in a bicycle tube as the pre filled with ones come with, maybe that's good for some cyclists like me who can't tolerate flats.
After being an absolute dunce and damaging a brand new inner tube earlier, your calm and clear instruction on how to do it properly came well needed for the 2nd attempt. Thanks so much, learnt a lot here 😁
Thanks for a super amount of help. I had to change a tire and tube recently and had a frustrating painful time getting the new (tight) tire on the rim. After watching and learning from your video, I went back to the project and followed your advice on space creation and introducing slack. 'Had to go around a number of times but eventually the tire went home in the rim with just a little help from a tire lever. It's been three days now and it hasn't lost even a single PSI of air - success! Now I'm getting used to this. In my last 6 rides, I've had 4 punctures from raspberry thorns. (nasty little things that they are and obviously hard to avoid).
It’s been 47 years since I last had a bike and fixed a puncture. I was so nervous about getting a puncture and making a right mess of it. This really helps add to my confidence that I can do this. Thankyou 👍🏼
Great instruction video. When you suggested pinching the tire around the rim more than once to create more slack that comment was right on the money. I tried it while watching your video, and it was done to perfection. I don't have to deal with anymore skin abrasions and punctured tubes from removing and changing the inner tube incorrectly. Your the best. Thank you.
It is certainly true that you are never too old to learn. I am 70 and have cycled nearly all of my life (and have repaired a fair number of punctures in that time). I just wish I had known your technique of pinching the tyre all around, especially on those "rainy lay-by" occasions. Thanks for teaching this old dog a new trick! 👍🏻😊
Absolutely excellent from start to finish. Could not have been clearer. Excellent pace, good diction and the step-by-step was very clear. No waffle or needless digressions. No showboating either. Brilliant. Congratulations. 👍
I've got similar tyre levers that had sharp edges that I sanded back to reduce the risk of cutting into the tube. Chris Hall doing maintenance vids now😄
Thank you for sharing your skill! With your help and guidance I was able to change my flat back tire. No skinned knuckles or lost fingernails! 😊 Saved me money and time of going to the bike shop! Also helped me silence a hater who didn’t think I was capable of doing it! I appreciate you mate!


![[LIVE] : ONE ลุมพินี 89 | คู่เอก "ยอดไอคิว vs คิริลล์"](http://i.ytimg.com/vi/Z3vYkHJ_5Ig/mqdefault.jpg)


Thanks! squeezing the tire made all the difference in the world
One of the best instructional videos I’ve ever seen on any subject. Excellent optics and close ups. Outstanding narration with confident, easy going style (being American, love the Brit accent, characterizations, and take on things) using only hand and body skills with no unnecessary props. Covered all the essential information without being too long or short. Love it, love it, love it!
Had the exact same reaction. Very well made video, I watched the whole thing and my tires were working fine.
Absolutely outstanding dedication and ability to pass the knowledge to even "totally inexperienced" people.
I'm not a novice myself, but I wouldn't change one thing in your tutorial...
Very valuable and useful, thanks for posting 👍🏻
He's like a mature Harry Styles who is good at repairing bikes. Handsome AND Handy
Absolutely agree!
There are few people who can make you actually want to change a tyre, wonderful video!
Easily the best puncture repair “how to” video on TH-cam by a mile 👏🏻👏🏻
50 years of fixing flats and I still learn something new from this video. Really thorough presentation.
50 years and you're still learning how to do this ?? You should be ashamed of yourself.
The Bob Ross of bike mechanics.
Best compliment i ever received.
I agree. Really patient the guy. I was struggling with my tire . He got me trhough it!
THE only video to watch to learn to change a tire. I've been dreading tires for YEARS but after learning this I do it myself in under 10 minutes.
This is a great video. Most comprehensive one I have seen. Even the end with cap etc he made some great points about dirt. I am also positive I have damaged a a tube with one of the screws that holds it in place.
Additional tip. Line the Tyre Logo ("Continental" in this case) up with the Valve.
If the innertube is punctured, say 30cm from the valve, you know to check the tyre 30cm from the Logo for sharp objects.
I've done thousands of miles on Audax rides. Soooo many punctures overnight in the dark, cold and wet. Anything to save time is a big help, and this tip helped me lots.
i wrote the same suggestion logo/valve
This is vital. He realy should have mentioned it
Anything that helps with your 15 km h minimum average speed is a hit with me.
And.. it looks better ;-)
Yes, What a shame he missed that simple point. Just relating the location of the hole in the tube to the relevant point on the tyre can not only save ages in locating the cause, it can save cut fingers! In all other respects, very good instruction. 9.5 out of 10!
This is my second time posting a comment on this video.
I just could not help it.
Greatest instructional video ever uploaded on You Tube on how to remove and install an inner tube on a clincher tire.
First time I watched this was to refreshed my inner tube installing skills.
I had a flat in the middle of nowhere and screwed up installing an inner tube.
I used 3 brand new inner tubes, all failed and ended up, calling my sister to rescue me.
Now, at present, I just rotated my front and rear tires, followed this instructional upload.
Took me less than 30 minutes to do both tires.
No failures.
Thanks David for making this grand slam.
No wonder, it is the most viewed video in the channel.
I’m an ex-racer, priding myself in 40 years of road bike experience. But when I’m honest I must admit that you just ironed out a few of my basic mistakes which I never realized I made. Here I thought I had already nailed this to perfection.
Excellently composed instructive video, this one. Thanks!
Great video. I would like to add a small trifle of info from my years of being a bicycle mechanic. Many tubes have a reinforcement ring of rubber where the valve meets the tube. This can cause the tube to be pinched between the tire and the rim right near the valve. The trick it to simply push the valve up into the tire cavity before adding air. It will move the stiffer ring of rubber into the tire cavity.
Great tip!!!!
Perfect. I have done this for many years. Jam the valve up into the tire, pinch the bead sides against the valve, and press the bead down deeply at the valve stem. Otherwise you risk stressing and destroying the tube (or having the tire ride too high at the valve) when you inflate the tire!
I was just trying to figure out how to get the tire around this. Thank you so much!
David, by far the best and most informative tube change video I've seen. Demonstration and instructions are very thorough. Great job!
Glad you enjoyed it and thanks for the appreciation 🙏
Agreed. This SAVED me
Thanks good video. Just got back into cycling senior citizen.
Can’t wait to put this to the test (and save myself some money with ‘wasted’ tubes 🙂
@@davidarthurshould i inflate the tube just a tad so it holds its shape before putting the tyre on or leave it deflated until the tyre is on?
Thanks Jim! Space creation and ENDing with the valve just saved me after about an hour of frustration
Works like magic
BEYOND helpful. Clear, concise, calm. Left me feeling confident that I could do this. Thank you!
I have literally (British English haha) watched more than a dozen videos on this topic and I can genuinely say this is the most informative and useful of them all. Well done!
A gem of a video. I am a 78 yr old woman and have never had a flat. Don't carry a tube or tools. One of these days I will have to watch your video on the trial while attempting to repair/change a tube. Thank you so much. subbed and saved for future reference.
Thank you for posting this video on changing the tube. I did it! A 71 year old lady who never attempted this before. I am grateful!
Did you do it with or without the plastic tube leavers if I may ask?
@@V-DTAJ I did use the two enclosed plastic leavers that came with the new tube. My tire came off easily and I used the leavers for a brief time.
@@eileenthomas856 ah, mine came without plastic leavers, unfortunately. Guess Ill have to pay the 5 bucks extra on Amazon or just fiddle around with other leverages. Thank you for the answer!
@@V-DTAJ I would say you just need something smooth. Maybe plastic spoons or knives just to get in there on the side and then move around the edge. The tire comes off easily.
As an old git, I have learnt something new... Subscribed.
Me too. But the entire idea of the plastic valve cap is to protect the end of the valve so that it doesn't puncture your jersey pocket after you've removed the old tube and put it in your jersey pocket or puncture the tube or your other new tube in the saddle pack.
i literally pulled this up, sat down at my bike, and changed the tire tube. I've never seen it done before or done it myself. 10/10 instructor!
I’ve been biking for years. Changed many tubes and still I learned a lot from this well paced video. Thanks.
Great video.
1) If you line up the tube’s valve with logos on the tire, you can use that as a frame of reference for finding the puncture. Put air in the tube, listen for the leak (or put the tube in a bucket of water and look for bubbles) then find the same spot on the tire.
2) If you put just a little bit of air in the tube to give it some shape, it’s much easier to mount it on the rim under the tire. Also helps avoid pinching the tube between the tire and the rim.
3) I try to rest the rim on the top of my bent leg, rather than set it on the ground. I don’t like the tube making contact with the ground and picking up any foreign objects.
4) Important to point out, when you’re using a lever to get the tire back on, the hook faces out.
Several of the points I was going to make!
Always find the worlds smallest little thorn hardly visible.
Does the hook the face inwards when taking tire off?
In. You want to get the hook under the tire bead.@@zk4929
@@zk4929 push the tire rim into the middle of the wheel then use one lever to open a gap and hold with left hand then push second lever into the gap and move to the right in the right hand, they only work one way round.
I just fitted a new Continental tire and a new tube in less than 10 minutes. No bruises on the knuckles. It was easy peasy lemon squeezy. Your advice is invaluable. I saw professional mechanics struggle more than I just did (or didn't). It was an eye-opening experience. Almost orgasmic.
An all-around excellent video. Been cycling (and fixing flats) for 25 years and still learned a thing or two.
That was the best video on changing and replacing a new inner tube. I wish I'd watched it before I attempted the job!! Thank you for all the great tips. Making space. Won't forget that.
I know it’s two years on since you published this video, but just wanted to thank you for the excellent tips. I just changed my tube and it was SOOOO much easier than it’s ever been for me. Making space and finishing at the valve… perfect!
David, that's the coolest, calmest & clearest inner-tube extraction ever. Just tried your techniques & you've sorted the many mistakes I've been making for so long. Thank you !!!
Clear, concise and fool proof with no rushing and fumbling . With that in mind, with a 20min video, changing a tire should take +/- 15min..great tips!
I like to add just a little bit of air to the new tube before re-installing, makes it a little easier to keep it's shape.
And me as I only recently managed to burst two brand new tubes because they got trapped under the tyre bead. 😣😣
Agreed. Add a little air to the new tube before fitting it. I also remove the tyre starting at the valve not opposite the valve. I push the valve towards the tyre to reduce the risk of trapping the tube with the tyre lever. I use lock rings to give the pump something to push against. I use valve caps as I think they do help to keep the valves cleaner than without a cap. I have been known to oil the valve core thread but only a little…. I’d avoid using tyre levers to refit the tyre unless you really have no other option. For most tyres you can roll the last bit onto the rim using the heal of the hand. Lastly, spin the wheel with the refitted tyre, watching the bead to check it’s seated evenly.
Me too, yes just a little air great idea.
Standard
Yep, standard, always put a little air in.
The advantage of taking the tyre completely is to check for anything still penetrating the tyre. Takes a minute to put the tyre back on.
Superb video. Clear, no waffle, no music, and said from experience. I just subscribed!
I lke watching bike videos during breakfast. I have seen other videos have to repair a flat tire. But yours is one of the best I have seen. Very calm and clear. Great job.
At first I thought oh my god this video is gonna take forever but as I kept watching I realized that this guy mentions a lot of great tips that other videos overlook. This guy REALLY knows his trade…
Some really good tips even for experienced cyclists. I could listen to this guy all day. Good series 👍🏻
Cheers Ian👍
It is impressive helpful. Before this video, it took me ages to change an inner tube, now just minutes.
One of the best tutorials ever.
Thank you
Really great, informative lesson. One thing I would add is to push the valve stem in when you're re-fitting the tyre, to make sure it's not trapped between the bead and rim.
Thanks a million, this worked great!
I even found what caused my flat, a tiny piece of metal was still embedded in the tire (that I wouldn't have checked if I hadn't watched this tutorial!)
Glad it helped!
Great video! I'm 70 years old and have ridden bikes since I was a kid, and always found it difficult to change a bicycle inner tube. Wish I knew this when I was a kid. Excellent information, thanks!
I'm an occasional, low-mileage rider who is about to change a tube by myself for the first time. I've let myself remain mystified about tube changing for decades - until this video finally shined the light. David, you have a knack for teaching; this video was clear and answered all my questions. I'm am on the same page as you as well, regarding preventing litter and plastic waste. I think the world is way to desensitized to all that, even though it gets lots of lip service.
Wow! I'm floored by the sublime quality and execution of the explanation of something that is very simple in theory and execution, but that so many of us get WRONG, which is why I'm here this morning. I just ruined a brand new inner tube replacing my tire and I needed to be properly instructed as to how to do this, AGAIN. Now I know how to do it properly and this time, I won't ruin another inner tube by being hasty. Cheers to you! Thank you Jim for making an 18-minute video just fly by!
I guess you have more info now, but there are far better ways to change a flat.
Thank you. Found your video after trying to wrestle with my continental tyres for half an hour. Then exploded an inner tube after taking the entire tyre off and pinched the new one. That's when I searched and found your video. Didn't realise the errors of my ways until now. So many good tips, especially pinching the tyre for slack. Very helpful! I like the way you explain too, very straightforward and easy for the lay person. Thank you again for making my next puncture easier!
Great tutorial, thank you David.
One thing I would add: when you are checking the tyre for thorns, fragments of glass etc, I have found that looking isn't enough. I always run my fingers over the inside of the tyre. In this way I've often found fragments of wire that were effectively invisible at night, under overcast, or when one is getting on a bit and one's eyes aren't what they once were.
Coming from a medical education background, I will attest that we can sense through touch far finer aberrations that what we can sense through our vision.
Seems so basic, but checking the tire and rim for sharp objects is such a solid tip. All the other tips were equally helpful. I find my Contis to be super tight and creating space as shown is a tip I've never seen before. Thank you!
I’ve fixed quite a few flats in my cycling life, and I am now glad to know I have followed most of David’s advice. Top job Sir
I have never, and tried many times, succeeded in changing my tyre. I run these exact tyres and have struggled and ended up paying way above the odds just to change a tyre.
The whole pinching method, repeating and repeating allowed me to on my first try refit my tyre without using my tyre levers. I was amazed. Thank you so much for this video!!
I (mis)installed a trainer tire on my bike earlier today, then went looking for a guide on doing it properly when I came across this video. Redid the tire by following your instructions--much quicker and easier than my naive approach. Thanks for the video, you've helped me a lot!
Removing and putting back the tire itself was a task for me, that took about an hour, 3-4 tire levers and a lot of force. I just followed this tutorial and it took almost no force and time. Thanks man, now I can change a tire on the road too 🤘 I even put the tire back, without using any levers, which was unimaginable for me before
Great video as many others have said. My only suggestion is that I tend to line up the name of the tire with the valve stem location. Then, when I find the hole in the tube, I can more consistently find the potential puncture location on the tire based lining up the tube outside the tire with the valve stem location. This may be excessively OCD, but it has never failed me in finding the sources of tire punctures caused by foreign objects.
Good idea! It may only mean saving a few seconds but that is time my fingers are not unduly freezing because I can't find the damn sharp object in the tire without removing my gloves.
Line up the Pressure Rating instead. If you own multiple bikes thats what you want to know when you go to pump up the tire.
My autism at work, have done this with car and bike tyres for years
I used to mark Valve Location onto Tire with Chalk in order to align punctured tube with where to search tire for sharp object. Going forward, i'll: "Line up the Pressure Rating instead." Thanks!
@@DrDonO Write back in a few and tell us how you like it!
I have NEVER commented on a TH-cam video before but I've just changed my inner tube in record time thanks to this video. Superb explanation and brilliantly communicated. Thanks so much!
I use to get frustrated changing out tubes and tires, after watching this video and applying what he taught I actually look forward to now! Thx so much! Plus how refreshing to watch a presenter who’s just being himself. Not trying to impress or be a hyped up actor. Great job!!
very well explained with the many issues involved in changing a tube
Excellent video thanks Jim. Nice to have confirmed that I am doing it right and an excellent point about taking care checking for the cause. I learnt the hard way and gashed a finger on a metal shaving sliding it around inside the tyre! A couple of things I would add... before inflating, check to ensure that the valve is pointing directly to the centre of the hub, i.e. perpendicular to the tube. If it isn't the valve stem will have fore or aft force exerted on it which will eventually tear it away from the tube causing total failure. Easy to adjust before adding air by moving the tyre back or forth until the valve lines up properly. Secondly if the hole is tiny and difficult to find (and you don't have a bucket of water to hand to look for bubbles) run the inflated tube past your lips. Much easier to feel escaping air as your lips are very sensitive. A little dab of spit on the spot will confirm the hole's exact location with bubbles.
Thanks! I can't tell you the number of inner tubes I've ruined by putting snake bites in my new tubes trying to force the tire back over the rim. Genius!
Watch and learn. We can always use a refresher course and pick,up new tips. Thanks so much.
Changing my girlfriends incredibly temperamental, slim, tight and awkward wheel. Was very difficult towards the end but couldn't have done it without your help. Much love.
I always coat the tube and the interior of the tire with baby/talcum powder. It lets the tube and tire slide against each other as the tire flexes. It also keeps the tube from sticking to the tire. Ever notice how when you have a tube that has been inside the tire for a long time that there is a grittyness? That is the tube grinding against the tire interior. You won’t have that with baby powder.
I was taught to do that when I was a kid, I wasn’t sure if it was still a thing! I always talc my tubes.🙂
Very detailed and good info!
I even like people's comments!
good tubes came from the factory coated with talk already, but if you installing latex tube - you gona need some additional powder
40 years of changing tubes. Always use talc. I carry a spare tube in a zip lock bag that has been talced. Tubes and tires install more easily and they smell much better with Johnson’s Baby Powder ! Also, cut my thumb badly sweeping the inside of the tire finding a glass shard after 39 yrs of being lucky. I am 72, but not too old to learn.
Most baby powders you can buy today in the United States use cornstarch instead of talc.
Lawsuits over the talc-based baby powder's alleged link to cancer and respiratory problems are ongoing and number in the thousands, and J&J has paid millions of dollars in settlement money to people who alleged the powder caused their cancer. The talc used in the infamous bathroom staple, the claims go, has a chance of being contaminated with asbestos, a known carcinogen that can lead to cancer or health damage with long-term use.
In May 2020, Johnson & Johnson discontinued sales of its talc-based powder in the US and in Canada, citing declining use in North America due to "misinformation around the safety of the product," according to a 2020 news release from the company. The talc-based powder continues to be sold in other countries. Baby powder made with cornstarch instead of talcum is still available in US stores.
This was really helpful. Four years after doing my first tubeless install I wish I'd had this video back then. It confirmed lots of stuff I found out the hard way through trial and error along with some new handy tips. Great to watch someone who clearly has lots of practical experience and knows how to put the information across.
Been changing inner tubes for 20 years and still learnt something new. I'm guilty of over-tightening my lock rings. I've had many punctures where the valve failed, and I suspect my habit of over-tightening the lock ring was the culprit. Thanks for pointing this out.
Yes, it's amazing how much we can learn when we revisit a task we "know" how to do.
Absolutely saved my butt the day after I watched this. Got a flat five miles out on the front wheel and remembering this video changed it problem free! Way to go David!
Excellent, thorough video. The only thing to add is to check the rim *tape* while looking into the possible causes of the puncture. Old tape may have slipped out of place or gone dry and ragged.
Yes! I helped a fellow several years ago with a flat. His wheel had the rubber rim tape/strip that is common on inexpensive bikes. The rubber had, somehow, slid to the side, exposing a spoke hole. I did not have spare rim tape with me, but I did have duct tape and a spare tube that was the right size. Had him back in motion in a few minutes. I told him those couple layers of duct tape would probably prevent a repeat puncture for several miles, but he really should replace it with fresh, good quality rim tape in both wheels before his next outing.
@@markholm7050 I had this very problem some years ago suffering several nasty blow-out punctures on my front wheel preferably at high speed or in the bunch, did not understand what was going wrong until halfway into the season (withe the most annoying puncture happening 4k into a 600k audax leaving me with the lantern rouge for a couple of hours). A new rimtape and I was good as gold. Won’t happen again …
2 flats riding my new road bike for the first month. Both caused by rim tape not quite exactly centered over the spoke holes on both wheels. Took me a while to figure it out but marking the tube to the tire before extracting it was the clue I needed to figure out the problem. Inspect your rim tape if you can before placing new tube into tire.
This is one of the best videos on how to change a tyre. It’s so clear, lots of good tips and has made a big difference!!!
Watched it again. We get a lot of flat tires in New Mexico because we have A LOT of goatheads and pickers. Within a year, I should have this video memorized. It's the BEST!
😂 goat herds (turds?) and prickers, you mean?
I've changed tires for over 30 years professionally. But I was trained wrong and how to install tubes years ago and they come back all the time from two-wheel carts, bicycles to big trucks. It's been several years ago I learned how to install tubes correctly from the pros the best in the business. Rub your hands together keep rubbing them this is the same thing the tire and tube heat makes but a whole lot more. You could also check your bike with a laser heat gun at bottom of tire before and after installing the baby powder. I can assure you it will makes a difference in lowering the tire tube temperature. Put your hands in a sack of baby powder and now rub them together your hands don't make heat. Install the tire and tube with baby powder (Talc or no talc is fine) with no liquids. You can also use what's called a tubing deflator which will suck all the air out of the tube fast and you put your finger back over the hole on tubbing deflator to fill the tube take the valve stem out suck all the air out of the tube and put the valve stem cap over the tube core when installing the tube. So the tube valve stem doesn't go down in the wheel when changing it. I have had my bicycle tubes to last for years now by installing baby powder. I use about 12 oz per 2 mountain bike wheel shake the powder sideways before you start to air it up to try to balance it out and spin the wheel sideways stop and fill the tube with air. I install the tubes and baby powder outside with a fan outside because you don't want to breathe the powder. I used to run tubes in my street/strip car. But since they have made the best street radial out there that hooks no more tubes. And guys if you want to fix a tire with the bad puncture you think it's not repairable and you have it cleaned with some alcohol and ready because maybe you've had a puncture that you can't fix you could go to a automotive glass shop they have the black windshield urethane sealer. but you first use primer on it let it dry and then use the black windshield urethane sealer. This is the same thing they make motor mounts out of and it holds windshields in cars and more. But by the time you buy the primer and sealer you're probably talking over forty or fifty dollars and it doesn't last but a few years. If you have a tire clean with rubbing alcohol and ready they probably wouldn't charge much just to put some primer on the tire and then the urethane sealer. Years ago I also knew shops that would prepare over the road big truck and off road tire punctures in the sidewall. And they held up with speeds of 75 mph and more on the road. It's not something I would do but a lot of people did it back in the day. Hopefully this helps some people.
I grew up in The Netherlands and my bike was my primary mode of transportation until age 28. I have patched many tires over the years. Still I learned so much from this video. It was a masterclass. Very well done! Thank you.
One of the most clear and concise videos about fixing tires and smart things to keep in mind! Great video!
Excellent video. BUT: Don't pull out the inner tube at the valve. Leave it in with valve still in place and inflate it half way and then check for the puncture. Put a finger on the puncture and look where the puncture corresponds to the tire. Take 2 fingers and carefully feel on the inner side of the tire. You'll instantly feel the thorn, or sharp shard of flint or broken glass. Your fingers are safe, btw. That's much faster to fix the puncture on the side of the road!
The loosly tightened lockring is important if you want to pump up the tube because the Sclaverand valve is being pushed inside the tire and the hand pump has nowhere to push against to force the valve into the pump's seal ring. Without a lockring as a stopper it is a pain in the ass! ;)
Thanks. Great tips
Very useful comment and something that I do too. At least this gives you a rough idea of where to look in the tyre for the cause of the puncture.
@@andrewmurray5542 very useful indeed.. HEX coin $0.12 pulsechain and pulseX about to launch in weeks.. all 3 same founder. might find HEX useful too andrew
Definitely agree about the lockring when there’s low pressure in the tube. But to find the cause of the puncture I find it easier with the tube removed so you can inspect it more thoroughly, then just lay it on the rim with the valve in the right spot to find the cause.
@@silentdogfart4892 Exactly. This is the right and only way to do this, fast and efficient. I don't know why we should keep tube attached or waste time watching the tire.
Just used this video to repair a puncture on my rear. I used to run to the bikeshop to get it fixed but doing it myself feels so liberatiing. You are my hero!
Put some air into the removed tube to find where the puncture was in relation to the valve. Then find the corresponding place on the tyre to check for the offending foreign body.
this is why I always line up label to the valve and when I do get puncture I know where it is in relation to the valve on the tube. I do find it easier to completely remove the type from the wheel and inspect it
exactly !
This is very helpful info thanks. Moving the label to the valve area to track the puncture. Here is some for you... HEX coin $0.13 pulsechain and pulseX coming soon. April 18 2022
It has been several years since I was an avid cyclist and the technology has changed a bit - including changing tubes! After watching Jim's video I'm confident I can duplicate the process and get going again
Really helpful video. I went from changing a tube in like 60 minutes to 20 just from watching this clip. Changed my tires the other week to more puncture resistant ones, and that was also really easy when following the tips in this video. Thanks!
Next target: 10 mins. Then 5. Then 2. At that point you can show off to your mates :-)
Here's a fiver for ya! Thank you so much! I keep your video saved offline, share with everyone I know, and laude your space creation technique every chance I get!
Well done. I had always been "afraid" of what would happen should I encounter a flat. This video helped me through the steps and gave me a ton of confidence. And in fact, by following his advice, the process was much easier than I had feared.
This is the BEST video I've seen about changing a bike tire. The first time I changed a tire it took about an hour. Took the entire tire off. This time was far less time and now I'm more confident in changing a tire. Next time I might need to change it on the road, so I'm relieved.
Brilliant tutorial sir, I will recommend this for our clubs as there are many misconceptions. My only addition would be to check for rim deformations as well as the source of puncture. I had a hard “bump” (I am a Clydesdale) and it actually caused the aluminum rim to internally spur. Rare, but took me three flats to sort out. Again, great videos as always!
Best instructional video I've seen in ages! Almost feel bad I don't have a flat at the moment to test it out.
Great tips and bravo for your environmental concern! I carry a piece of chalk for 2 reasons: marking the puncture for ease of patching the tube and after patching to go over the patch and glue avoiding it sticking to the tire.
Thank you David! You have such a calm and pleasant voice for demonstrating a very unpleasant task. I’m 71 and bought a fat tire eBike. Your video has given me the confidence, to not worry if I get a flat tire. I can do it, I’m sure. I’m going to write down all the steps on a card and keep it in my tool box. I’ll also save your video. Thank you! I’m now a subscriber! 👍🏻
What an excellent tutorial. I’ve changed quite a lot of tyres by now but last time I put Continentals on it was a nightmare. This video made remarkably easy. I was genuinely surprised at the difference the technique of creating space made.
Sir, that pinching is the best trick I learned. Watched a load of videos and almost gave up. This video just automatically played on the background and figured I try it out. It worked!
Great video. I’ve seen the “pinch the tire into the well” method explained many times, but never seen it demonstrated so well. I see improvement in my technique in the future. Thanks. I’d like to agree with several other commenters that an examination of the tire before removing the tube can oftentimes tell you where the puncture is and save time looking for it on the tube itself. Adding some air at this point can help. With a little luck you can find the puncture and the offending object in one go. Also, I like to install the nut on the stem when re-inflating the tire with a mini-pump. It holds the stem out and in place, leaving both hands free to work the pump. It can be removed after, if you like. I don’t find this particularly necessary when using a track pump or compressor though.
A very thorough & complete inner tube changing video. Thank you David!
I have always started at the vaulve, now I know the correct way. thanks for this very nice guide 👍
I think its wrong to finish at the valve. That’s where the tire is most tight and the bead competes with the valve. I changed 4 tires for friends over tbe weekend and have to disagree on the end at the valve idea.
Also, you don’t need more than one tire lever. Just sit on the tire and use leverage to push downward.
I have watched many videos of how to change tires/tubes by now from different creators and countries, and this is the best one! You Sir are my hero! :) You are calm and systematic, and cover every important aspect. Bless you!
Thanks so much for this! I have been looking for ever on the internet to try and find such an in depth instruction on changing an inner tube. This is exactly what I have been looking for. I have subscribed to your channel. I ride long distances and this is such a help. The next thing I would like is instruction on taking the rear wheel off and on when replacing an inner tube. I know it might sound elementary to some but I am afraid I am a novice at this and want to make sure I get it right if needed on a long ride to change an inner tube. Thank you again!
Thankyou! As a 77year old whose late husband used to do this for me.......... I did it on the back wheel of my three-wheeler! I now need a bigger spanner than in my 'repair' kit I loved the pinching tip. Thanks again
You should put a little bit of air in the tube when you insert it. This allows it to seat better inside the tire helping to prevent a pinch of it when you pump it up. It also lets you tell if the tube is clear of the rim.
Thanks for this reminder. I heard the same thing and actually found it works better.
Your mileage can vary with this one. It's worth trying, but don't overdo it, especially with larger tyres.
As a newcomer to the world of bike repairs, I found this to be by far the most helpful instructional video. Your calm, methodical approach encourages a thoughtful, patient attitude to the work. Thank you.
I usually use the lock ring on my valves, because then it prevents the knocking noise of the valve against the edge of the valve hole in the wheel every time I go over a bump. I also use the valve caps also. I'm not too worried about water & grit, as I usually only ride on dry days. Also, the plastic cap can be hacked into an emergency 'shrader' valve, if it came down to that. Cut the tip off, invert it, screw it back on the valve. There's a video on TH-cam to show what I mean.
Haven't looked at video but I know what you mean. Great idea.
Electrical tape around the valve stem gets rid of the knock sound.
Omg. Literally broken a lever trying to fit my tire back on the wheel (seen millions of tutorials in the past) figured I can find another one on yt and came here. With the slacking tip I was able to fit it with my hands only. First time I come across this idea. Brilliant. You Sir have got yourself a follower. Cheers
Before you start removing one side of the tire from the rim, mark it where the valve is. When you find the puncture on the tube, the mark on the tire will help you locate where it punctured the tube.
I just used this video to change my first tube successfully. Really appreciate the thoroughness and calm pace he works at, very easy to follow.
Another good bit of detective work to do, especially after multiple unexplained flats, is to inspect the rim bed. Make sure the rim tape is in good condition, and that there are no wayward spokes poking your tube.
BIG TIP!
Overlooking this common problem is the most common internal puncture
This is only the second video of yours that I've had the pleasure to view. Looking forward to the rest. IMO YOU'RE GREAT! Excellent and thoroughly educating presentation. Technically masterful product. LIKED AND SUBSCRIBED. I'm a 61 year old man, and use my mountain bike for trail riding and small grocery runs. Flats were the bain of my existence at one time. Upgraded my rim liner with that heavy duty soft puncture resistant vinal type, name brand starts with an "S". Bought the pre-filled "S" heavy duty puncture "resistant" tubes, and whilst I did get a puncture, upon locating the large "goat head " thorn, removing it caused rapid deflation until I remembered the sauce in the tube and upon rotating the wheel, viola! Leak plugged right up...I know that I have never been able to put as much flat prevention "S" in a bicycle tube as the pre filled with ones come with, maybe that's good for some cyclists like me who can't tolerate flats.
After being an absolute dunce and damaging a brand new inner tube earlier, your calm and clear instruction on how to do it properly came well needed for the 2nd attempt. Thanks so much, learnt a lot here 😁
Your video was the only one I found that had the details and technique I needed to get the tube back into the wheel. Thank you for posting it.
Well done video. Clear demonstration, really good tips for beginers. Good work :)
Thanks Martin
Thanks for a super amount of help. I had to change a tire and tube recently and had a frustrating painful time getting the new (tight) tire on the rim. After watching and learning from your video, I went back to the project and followed your advice on space creation and introducing slack. 'Had to go around a number of times but eventually the tire went home in the rim with just a little help from a tire lever. It's been three days now and it hasn't lost even a single PSI of air - success! Now I'm getting used to this. In my last 6 rides, I've had 4 punctures from raspberry thorns. (nasty little things that they are and obviously hard to avoid).
It’s been 47 years since I last had a bike and fixed a puncture. I was so nervous about getting a puncture and making a right mess of it. This really helps add to my confidence that I can do this. Thankyou 👍🏼
Great instruction video. When you suggested pinching the tire around the rim more than once to create more slack that comment was right on the money. I tried it while watching your video, and it was done to perfection. I don't have to deal with anymore skin abrasions and punctured tubes from removing and changing the inner tube incorrectly. Your the best. Thank you.
It is certainly true that you are never too old to learn. I am 70 and have cycled nearly all of my life (and have repaired a fair number of punctures in that time). I just wish I had known your technique of pinching the tyre all around, especially on those "rainy lay-by" occasions. Thanks for teaching this old dog a new trick! 👍🏻😊
👍👍👍
Absolutely excellent from start to finish. Could not have been clearer. Excellent pace, good diction and the step-by-step was very clear. No waffle or needless digressions. No showboating either. Brilliant. Congratulations. 👍
I've got similar tyre levers that had sharp edges that I sanded back to reduce the risk of cutting into the tube.
Chris Hall doing maintenance vids now😄
Thank you for sharing your skill! With your help and guidance I was able to change my flat back tire. No skinned knuckles or lost fingernails! 😊
Saved me money and time of going to the bike shop!
Also helped me silence a hater who didn’t think I was capable of doing it!
I appreciate you mate!