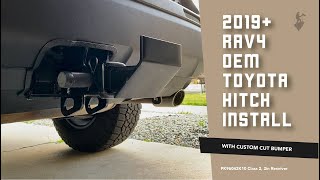
2019-2021 RAV4 OEM Trailer Hitch Install DIY

ฝัง
- เผยแพร่เมื่อ 26 เม.ย. 2020
- Installation of 2019-2020 Toyota RAV4 Tow Hitch Receiver 2-Inch Class II Kit OEM - Toyota (PK960-42K10).
I shopped around on Toyota Online part store and was able to get my hitch from a SoCal Toyota dealer for less than the EcoHitch shipped (which was the one I originally intended on replacing my Curt with)-$288.73 to my door w/tax and shipping included.
********************************
2019 Toyota RAV4 Adventure - Build List
Wheels/Tires
fifteen52 17”x8” (+38mm) Traverse MX
Toyo tires 245/70R17 Open Country AT3
Suspension
Eibach Pro-Truck Lift Kit
Lighting
Diode Dynamics SS3 Pro - SAE Fog (fog lights)
Diode Dynamics SS3 Pro - Flood (ditch lights)
Diode Dynamics SS42 Amber Light Bar
Diode Dynamics SSC2 Sport - Combo (chase lights)
Lasfit Auto Lighting T10 LED Side Marker Bulbs
Tigger Wireless Controller 4 Plus Wireless Accessory Trigger System
LP Aventure Ditch Light Brackets
Power train
Ultimate9 Performance Throttle Controller
Comms
Midland Radios Micromobile MXT-275 2-Way Radio
Midland Radios Micromobile MXTA25 3Db Ghost Antenna
Midland Radios X-Talker T71VP3 2-Way Radio
Kit:
Prinsu Modular Rack System
Dirt Complex Trail Swing Wheel Carrier
Pelican Vault V800 Hardcase
Roam Adventure Co. 5’ Awning
RNOFIT Fabrication R4 Ladder Version 1
LP Aventure Skid Plate
RRW Bolt-on Sliders
Cascadia4x4 VSS Solar Panel
SetPower USA AJ50 50qt 12v Fridge
Audio
JBL Club 3020 3.5” Tweeter
Aesthetics:
BuiltNKO RAV4 TRD Grille
BuiltNKO ‘16+ Tacoma Raptor Lights
AutoClover RAV4 Window Visor
********************************
See more photos and content of my RAV4 Overland Build on blueyota4
********************************
Want to contribute to the build, channel, or just buy me a coffee⁉️
You can donate funds via Venmo: @dannyrocksteady
******************************** - ยานยนต์และพาหนะ


I just did mine on the weekend with the help of youtube. the hardest part was removing the plastics. the option from toyota is $2000 cad or you can buy the kit from toyota for $500. I cut the L bracket off and shrank the cutout to fit tighter. It was fun.
This looks great. Love the video! It’s awesome knowing you won’t lose ground clearance with the OEM! Thanks!
Tavo Rojas thanks for checking it out!
Cool to see you make mods and upgrade again. Your videos are fun to watch. Thanks for the detailed information that will help me with my Rav4.
Jonathan Fulgencio thank you for the support and checking out the videos. Hoping to do a walk around video soon to show off everything I’ve done to my Rav4
Thanks for the video. Helped me make my decision on going with the OEM set up.
Glad I could help!
Love this hitch !!
Great Video! Keep up the good work man!
Justin Romano thank you 🙏🏻
Hi Danny, great video and nice installation! Thanks for mentioning our video. :)
Thanks for putting up all the videos you do-most of my installs starts with researching on your channel to gain as much insight as possible. Very helpful!
Looks very clean and I can see where that would be handy. Not sure I’m going to that effort though!
Love this!!
Great video!!
Thanks for checking it out!
Great video, I have a 2020 TOR, waiting for the the lock down to end to head to Pismo!
Alex Lau air down and you’ll be solid in pismo. I hit the dunes last year and had a blast! Almost rolled my Rav4 down the face of a steep dune hitting it at a poor angle haha.
DM me your address on IG for your sticker!
@@DannyRocksteady Yea I'm not worried about it, Pismo is my stomping grounds. My old tow rig was a Camry and trailer that had my moto on it. I'm stoked to see how the Rav handles it!
Looks sick, I’d be too scared cutting a brand new car.
I installed a Class III Curt Tow Hitch on my wife’s 2019 RAV4 XLT Premium with no issues at all. It is low but it only took me about 40 min of installation by my self. This is crazy to much work plus cutting, I can just imagine how much the dealer would of changed you if you took it in. The best thing I got the hitch brand new in the box from a local guy who picked it up in an auction .
Looks good great video. Very helpful. I'm looking at getting this bumper and putting it on myself instead of the Ecohitch. I like the extra clearance. Did you have to get other hardware kit that came with it? Tow Hitch - Toyota (PK960-42K10-HW)
Good stuff! I'll probably do this down the line
mongrel420 thanks for checking it out! Send me a DM on IG to claim your #AWDBOYS sticker
@@DannyRocksteady haha cool will do!
Thanks for the Great video! Can't wait to install mine. I want a sticker lol 😏
E G thanks for watching. DM me your shipping address on IG and I will send out one of the last ones!
Hi...not sure about the classification of the OEM vs Curt but I feel like the OEM is at least as strong. The ground clearance others were saying isn't critical (because the exhaust is the same) isn't about the point at the receiver, it's about the item you're attaching. Like a bike rack that will definitely ground out when its lower because it extends further back.
Good job!
Love it Danny! Do you plan on hauling anything specific? Or did you add it for recovery? Also, I’d love to see more of your interior mods.
John Clark first and foremost: recovery. I have no idea why Toyota eliminated all the recovery points for the USDM RAV4 adventures 🤦🏻♂️. The hitch is also going to be used for a full sized spare carrier.
I’ll add interior mods to my list of video ideas! DM me on IG with your shipping address for a sticker.
Have you ever figured out any front recovery point options?
Nice video, if you don't use the toyota wiring harness, how to get lights on your trailer?
Nice video, thank you. Do you know what would be the added wight to the car from installing the hitch?
What type of harness did you end up choosing? I’m curious as to the other options beside OEM.
Did you use a torque wrench to get all the bolts to 90nm? If so, what model do you have that will fit in such a tight space?
Did you have to cut off the trailer hitch power connector bar since you didn’t cut out that part? It looks like the bottom valance bows out.
Hey there! Thanks for making this video. Just to clarify, did you have to buy the hardware kit (PK960-42K10-HW) separately, or did it come with the Tow Hitch Receiver (PK960-42K10) as package?
I did not purchase anything additional to PK960-42K10. It included everything I needed as well as components like the ball hitch that I didn’t end up using
Hi Danny, thanks for the video. Do you think that I would be able to make the cutout at least 1/2" smaller? Great tip on installing finishing strip 1st.
yes
great video Danny, just wondering, how did you remove the clip beside 10mm bolt from the trim ( on the mud flap/guard) on both side?
Yueh-Chung Su there is a specialty tool you can use to remove the push clips-or you can do what I did an use a smaller flat tip screwdriver to pull up the center pin. Once you give yourself a little room with the screwdriver you can pull the pin up with your fingers-keep pulling to pull out the clip completely.
Hey Danny, great video! How long did the full install take? Thanks!
maybe 2 hours tops
🤝👍👍👍
With the one part number do you get the ball hitch adapter/ball in the kit or is that a separate item/part number?
utp216 it’s in the kit
I wish you did a step by step. It would've been super helpful from your perspective.
Check out the story highlight I have saved on my Instagram-it’s broken down more into steps if you need more info on how it’s done. It really is super easy I’m not sure how much more I could’ve broken down the process.
Hi Danny - Did your Tow Hitch (PK960-42K10) come with hardware/fasteners? The toyota website is trying to add a hardware kit (PK96042K10HW) for $40 that I hope I don't need. Thanks!
Everything I needed to install my hitch was in the box for the hitch. Not sure what the extra hardware would be for
@@DannyRocksteady Thanks Danny - not getting it then. Thanks!
Does the steel bumper gets put back or do you just toss it?
Alexander Xiong tossed it.
Hi I recently purchased the hitch assembly for my 2021 RAV4. Did you put the metal bar back on after attaching the hitch assembly and bumper cover?
No the metal bar is ‘trash’ at the end of the install
@@DannyRocksteady Can I send you a picture of of what my dealer install looks like? They ended up cutting my bumper from the bottom leaving a chunk of plastic out and it was nolonger able to be clipped back in position at the very bottom.
@@csmith31 you can send it to the email address listed on the channel info. That being said I have seen countless installs butchered by incompetent techs at the dealership (which is why I typically prefer to do installs myself). If it is as bad as you described it I would go back into the dealership and demand that they repair/replace the bumper and wouldn’t let up until they do.
Where's your torque wrench?
Like your set of tool do you have a link for it?
The set if from Harbor Freight like most of my tools
Info on the portable camping power?
Check out my weekend overland videos-there are currently 2 of them and I go into some portable camping power options in both of them.
Tire and wheel size pls.
I don't see the problem with the curt it sits at the same height as the exhaust tips so ground clearance isn't changed really
The Curt is a great budget friendly option for a hitch. The loss of ground clearance would be negligible for most. When I had mine, however, it scraped on things the first week I had it so it wasn’t for me and sold it.
Cool vid, nice ride. When you scraped with the Curt, were you driving on regular streets, driveways, or off roads?
@@jdekuwento1272 both off road and steep driveways/parking lot ramps
If you add a bike rack or other extended item, you will definitely notice the loss of clearance.
Can you post the full list of tools you used for the install?
It’s been over a year since I did this install-the only other tool aside from the wrenches/sockets (sizes shouldn’t be difficult to figure out) is a dremel to cut the bumper.
@@DannyRocksteady Thanks! Just the long 14mm and a normal 19mm socket? Were you able to get the socket wrench in those tight spaces for the brackets or did you use the normal wrench?
@@aaronjhall yeah-my wrenches fit. It’ll help to have some “low profile” wrenches to the right bolt on the passenger side
How much does this cost ?
Please see the video description
Toyota oem vs curt hitch no contest.
Agreed!
Today I drank a skinny white latté. It had côol’ whíp And that’s about it.
I'm to much of a bitch to do this a trunk rack it is