How to: Complete Wheel Restoration. Prep & Paint = Professional Results at Home

ฝัง
- เผยแพร่เมื่อ 6 ต.ค. 2021
- Products Used
Acid Wheel Cleaner: amzn.to/3FjHz26
3m Sanding Sponge: amzn.to/3ApcNBc
220 Grit Sand Paper: amzn.to/3iGlwZW
400 Grit Sand Paper: amzn.to/3Fp1qNx
DupliColor Prep Spray: amzn.to/3uP7xWm
DupliColor Self-Etching Primer: amzn.to/3lku7mH
DupliColor Filler Primer: amzn.to/2Yq5xI3
DupliColor Primer Sealer: amzn.to/3AgNuRL
DupliColor Chrome: amzn.to/3Fu6zDR
VHT Plate Finish: amzn.to/3AkLatg
VHT Cast Aluminum Caliper Paint: amzn.to/2YvYOw4
DupliColor Silver Wheel Paint: amzn.to/3oGZJVR
DupliColor Graphite Wheel Paint: amzn.to/3anZrdP
DupliColor Gloss Clear Wheel Paint: amzn.to/3Agbe8R
Rustoleum Gloss Black Enamel Paint: amzn.to/3FtdxJi
Yellow Carnauba Wax: amzn.to/3uOQzaR
Mineral Spirits Paint Thinner: amzn.to/3mwMzYO
Tack Cloths: amzn.to/3AjQDAn
Half Mask Respirator: amzn.to/3BlFWP9
Aerosol Can Squeeze Trigger: amzn.to/3gWrg05
Since making this video, I have found better Clear coat options:
Spraymax 2k Gloss: amzn.to/43KbyMK
Duplicolor 1K Gloss: amzn.to/3UKXheM
Duplicolor 1K Matte: amzn.to/3A5i6rY
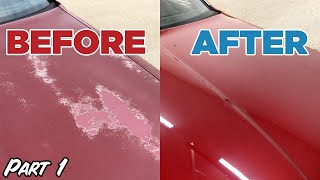
Today I’ll show how to restore old corroded crusty aluminum alloy wheels with aerosol spray paint, and even using can of paint and a brush for the accents.
I achieved professional results with a mix of different products that were never designed to be used together, right at home in my garage.
No compressor or spray gun equipment needed!
For the 5 wheels, I probably used about 2.5 cans of the Self Etch primer, 1-2 of the filler, 1 of the sealer, 2 of the DC Silver, 2 of the VHT Silver, and 5-6 cans of clear total.
I don't have Patreon or ask for donations but you can support the channel with some rad gear from my store: 6thgeargarage.com/merchandise/
Follow Us:
Instagram: 6th_gear
6thGearGarage - ยานยนต์และพาหนะ


This is, by far, the best wheel painting video on TH-cam.
I’ve watched hundreds, and while there are lots of great videos, this one is in depth yet extremely simplistic. Your narration and explanation sounds like it was professionally produced. Well done and the wheels look like new! I also enjoyed your reaction when your son made his cameo! 😂
9⁹⁸
i fully agree. learn from eachother. greetings from belgium
0
Absolutely. Simplistic. In detail. And you narrate so fluently. No fumbling. No repeating or boring us with unnecessary info. Even when yor son walked in you never spend a whole 10mins on him, ack owledge his presence n then got on with the job. Very professional. I'm a subscriber. Happy one too
00
I’m just an old lady that has more time than money, you’ve inspired me. I’m gonna give it a go, nothing to lose. Thank you.
You’re a classy lady
I painted for about 36 years. The self etching primer is an acid and is not made to be sprayed to cover. One light coat is all you need. If you need to cover things up like scratches or plastic filler you will need to use a regular primer like a lacquer primer or a 2k primer for example.
This is exactly what DIY content should look like. No expensive tools. No difficult processes. This man not only gives clear and concise instruction but could very well be the hero we all needed to save our stock ish builds. Is it the "right" way probably not. Is it the "best" way again probably not. Is it something that every single person that watches this video is capable of doing in a lasting and good looking way if they take their time; abso(expletive)lutely. This is great. I wish I would have had the motivation to figure this out or the information to solve this problem years ago. 99% of us are doing 1 of 2 things. Living with the problem or replacing the wheels. I have lived in both scenarios.
Thanks to 6th Gear Garage keep it up brother. You have my attention.
Thank you for the encouraging words! That was my goal- to show what is possible in an ordinary garage, on a budget. Thanks for watching. I just finished the center caps the other day and will have that video up next week.
@6thGearGarage to be fair you had a buddy sand blast the rims for beer. How much would that cost for people without the tools and without the friends? Not criticizing, just asking.
Obviously DIY mean DUDE IT YOURSELF, seeing as sand blaster dude got involved 😂
@@dirtyhobo4252it’s a service that’s available to those that can accommodate it into their process. Otherwise, OBVIOUSLY, there are alternate methods.
Great video!!! Better part of 20 years ago I worked for an aircraft component overhaul facility that did wheels, brakes, and landing gear. That summer I worked the paint shop and learned a lot of the basic rules you mentioned. I did mostly aircraft wheels and an awesome trick I'd like to share is... Buy a cheap "lazy Susan" which is a circular set of bearings and cut some plywood into circles a few inches larger than the wheels. Install the lazy Susan on the bottom. Now you have a ideal "base" to put the wheel on!!! Spray can in one hand, and turning the wheel with the other. You can now spray continuously without stopping and it will cut your spray time immensely!!! Another good tip: When your finger gets tired, I simply swap to using my thumb!!! I have found that I have similar "dexterity" and that thumb is way stronger than my index finger. Years later I started doing my own car wheels. I bought my own (old) commercial sandblast cabinet (2x4x4 dual entry), an old industrial air compressor, and I bet I have now refinished roughly 25 to 30 wheels over the course of the past 8 years now. It's a super fun hobby and very rewarding! My next step is getting into a set of HVLP spray guns like I used to use in that actual paint booth all those years ago...
Now the lazy Susan idea in genius!!
Love the lazy-susan idea. Practice with the thumb is paramount, the added strength of that digit could result in over-sprays.
Always just made a mount for them, but yeah spinning the wheels with either a lazy Susan or something homemade will help a lot if you restore wheels as a hobby or professionally.
A $20 spray gun works just fine for a while, the paint is the deciding factor, but engine enamel works well too. Clear coat is necessary in my opinion.
I currently work on aircraft wheels as well. We also use the lazy susan. The sandblasting machine gave me tuberculosis. 😂
They look awesome! Well done. I have painted many wheels in the last 40 years, but never put as much effort as you have here. You have taught this old dog some new tricks to utilize when I tackle the next set! Thanks!
Well done! The rims look better than some I have seen that were refinished by so called "professional" wheel refinishers.
I lived in NY for 60yrs, I feel your pain! Nice job restoring the wheels. Good tip with the spray can top for cleaning brushes
They look absolutely fantastic on the vehicle man. What a difference! I don't know if I would say "professional results" with the scalloped edge insets, but who cares. They made the truck look great.
I love the look of those rims, you've done a great job man.
Love it when skilled people share theirs on here, whether they were trained or have learnt themselves by trial & error. It's very refreshing to learn or even gain the confidence do do a job yourself, knowing you can possibly do it, but need that little extra support, without having to fork out mega bugs to have it done for you.
Thank you for your perfectly narrated & videoed step by step honest, real, informative video. It must of been good to keep me watching for nearly an hour Lol.
Cute kid, future helper...
Nice one 🙂
This is why I love TH-cam.
This is brilliant! Every imperfection on the final result can be traced back to the a step mistake was made and then learned from. If one is happy with the result, then just follow the steps in the video, if you feel that the result is not good enough, either trust it to professional refurbishers, or rethink some of the steps.
Thanks!!! A great informative video, and you did a great job.
I want to do this to my 1987 F150 4x4 factory wheels. So this video has given me some good points, to do a good job. And I would love to see a video about how that you did the high polished wheels. I will be looking for more videos from you. Be careful and stay safe.
As always, Jeffrey !!!
Wheels came out looking great. I hope they last a while. Duplicolor isn't known for holding up to the elements for very long, especially on something that takes a beating like wheels. If I went through all that work I would have used a good urethane base coat and a 2k clear coat like the factory. Both are available in rattle cans too.
I would have done a 2k clear, but urethane shouldn't be applied over enamel, or it can cause the paint to lift. I will use 2k on other wheels in the future where I don't use any enamel paint.
@@6thGearGarage Not true. I restore motorcycles. Spraymax 2K works great over enamel. I use it clear coat Rustoleum all the time.
@@2ndborn186 Good to know, thanks!!!
The amount of work you did was well worth it.
Looks real good.
Thank you very much for the thorough step by step. You have high skill and wishing you the best.
Thank you
Rudy
Great choice of music!
Nicely done!!! Looks awesome dude 🤙🏻 glad I could help ya get em done quicker!
By far the best video I've found. And just so happens I'm using the same colors. Much appreciated
Fantastic video, very complete. Probably the best I've seen in years due to the amount of important detail you included. You have a talent for teaching and laying things out clearly. Well, done.
Thank you!!!
Loved how much attention was paid to detail despite it being a garage project. Nice finish.
Thanks!
This has to be the longest spray paint video I've ever watched, all the way through. And that, sir, is a high complement. Well done, and so sorry about the damage the tire counters did to your rims, from a guy who used to work mounting tires from 12" car tires all the way up to big rigs, farm tractors, and earth moving machinery. There really is no excuse for it other than laziness and apathy. Done correctly, the machinery used for mounting those tires should never damage the rims or even a spray painted finish.
BTW, in the future, when testing a new method, like brushing on the recessed black sections, start with the designated spare like you had in this set. The lessons learned on the first wheel can then be carried over to the mounted wheels. (Just a thought.)
Nice looking wheels, and great video. Well done.
Wow! What a detailed and informative video. A lot of really great tips and tricks that I will be employing in my wheel repaint. Thanks so much!
Looks really good! Gonna try it myself. For what it’s worth, I would like to see a paint job with an air compressor. Would the process be much different if the wheels were on the vehicle?
You'd really be better off removing them for painting to avoid overspray on the brakes, plus doing all that work on the dusty ground where you'll be hunched over isn't worth the time it takes to remove the wheels. You don't have to dismount the tires, you could mask those off.
If you want a professional job take the wheels off and follow this video.
I find Spray cans much easier than a compressor.
I’d only consider leaving wheels on if you don’t care about the finish and are putting hubcaps on.
I usually have a small cup with thinners in and drop all the paint nozzles in to keep them from blocking up
Maybe try that
Just use thinners not turps based it cleans so much better
You needed to do a guide coat when sanding the filler and then you would see all imperfections
They do look good
Scratches ar,e always a problem with painted wheels
Very helpful tips. I've done one set and now through trial and error I can get much better results thanks to your video. I like the filler primer to fill imperfections. You can use a glaze putty on road rash dings that won't shrink too. Thanks 👍
I like how you did your homework on testing the clearcoat that helps alot. I do appreciate how you describe what your doing for the diy at home people, very good job.
The brush on black paint i though was a good touch considering im about to do that to my truck wheels.
Keep up the good work and I can't wait to see your next video.
Thanks Terry
Shouldve ditch that etch primer as its porus & old school, epoxy primer provides a better bite & protective barrier right on the ally
Right on the ally?
If you use a high velocity urethane spray it won't dull the reflective shine on piece your painting..same thing they use on guitars for a very high Sheen..
The only issue was that chrome paint was an enamel, and urethanes can cause enamels to lift. I'll have to find something reflective like that in a lacquer or urethane to be able to put urethane over top. I'd prefer urethane over enamel any day.
@@6thGearGarage clear epoxy flood coat?
Wow, the work is crazy impressive. When I get over the shock I plan to do the rims on my 93' Miata. Thanks for the tutorial.
Nice job. Thanks for sharing and honesty. It helps to know the what ifs and how to fix mistakes.
I was gutted when you got the wheels back with tyres and marks. I felt so bad and to be honest after all the hard work I'd wouldn't of been pleased, but you kept it cool and touched them up nicely.
Look forward to more videos 👌👍
Those little lines that you see on your wheels from the lathe are what is called tooling marks. It's where the cutting tool made it's path during the machining process.
He said that
*After watching this, I feel much... older now.*
Thanks, best wheel restoration video on TH-cam;
Thanks for the video , the result for a DIY in a garage, is really good, but also a lot of work!!!
those wheels look really good. In my experience those can paints get scratched so easily, so much work just to see them scratch rather quickly.
Thanks... I would have used a 2k clear, but I read that it could cause the paint to lift when sprayed over enamels.
I just used some rustoleum matte clear on my truck's wheels holding up even after 2 years. It's all in the prep. Also let them cure for 2 weeks. Had another set of wheels at the time.
A great way to keep the wheels from scratching or lifting due to the clear coat issue, Use a professional grade ceramic coating for the wheel faces !!!! Would have a 10h hardness and last for a good 3 to 5 years . Also helps protect from brake dust and environmental fallout!
@@6thGearGarage yes, don't EVER 2k with enamel
@@6thGearGarage - Not if you apply the clear right after spraying the enamel.
Removing rust... without getting tired.
A small container with molasses. Drop the wheel inside. Put a cover on the container. Wait 2 weeks. Take out the wheel. Rinse with water. And voilà. No rubbing. No more rust.
Excellent! I've done it using electrolysis as well and will have a future video on that process.
That is a lot of molasses, to cover a rim. And two weeks? That's ten weeks to do five rims, or quite a bit more molasses and several containers. And the molasses is basically useless for anything else afterwards. I suppose if you do rims a lot, and you have room to keep tubs or drums of molasses stored, it would be okay.
Thanks for the humor, man. Good to have a laughter after a long day of work.
Great to see all the steps you went through. What worked. And what didn’t work. Fantastic video!
Thanks for watching!
I have (4) of almost the same style wheels except they're the spiral teardrop type. They've never been in salty weather since I live in the west coast. I was thinking of selling them as is and getting a few bucks for them but your tutorial makes me want to redo them.
They're the 6 lug that came from my pre 2000 Toyota Tacoma and the only reason I had to replace them was because Discount Tire supposedly "doesn't carry" the Michelin Defender series tire in that size so I had to go a little bigger.
Personally, I think they were just upwelling me which I bought into because my wheels were looking very worn and I wanted new ones anyway (got $170 back in rebates though).
Though I highly doubt I'll be able to get the high quality results like you got, I'd like to know about how much you think I should charge for them once they're done.
Thanks in advance for the feedback, and great tutorial man.
Hey, I'm trying to picture the wheels you have and the only 6 lug ones I can picture are the tri-claw wheels that are a split 3-spoke design. Are yours aftermarket?
Should paint Toyota in red
Man did I find the right channel. You’re doing it right my guy. Highly appreciative of the knowledge you’re sharing
I appreciate that!
You did a great job on those wheels!! Very good video with so many tips!!
Oof, those scratches from the mounting machine must've hurt you deep down, I know I would've felt it. Gracious of you to deal with it so easily. Even with great care, mistakes like that can happen, but with such large sidewalls it is a bit unexcusable.
Yeah I was bummed, but I guess it happens. I'm glad they weren't expensive aftermarket wheels.
It always confused me how untrained most tire changers are at some places. One that had a 1/4 inch gouge , and a rash half way around, I welded over the lip , and on one of the spokes, on a set of wheels that were excessively dinged up from untrained dipstick. It was an oddball style that was discontinued. So I couldn't find a match to it. After way to much time grinding filing sanding and polishing, they were nice enough nobody ever noticed.
@@ryurc3033 You need a youtube channel - I'd love to see your repair process!
@@6thGearGarage as much as I would like to, it always takes so much longer to film and show what I'm building. I DO much better than I teach, if you get what I'm saying. But I'm the guy that can change out a motor faster than any book says it's possible, or fab anything under the sun. I just lack the clientele for the hot rods and cool stuff. And have to do things like swapping fuel pumps on crappy 96 dodge, or water pump on a cobalt......ugh....
@@ryurc3033 I hear you... there are some things I don’t bother to film because I need to work fast and listen to the radio (can’t have copyrighted music in videos)
I was fully with you until you took them to be sandblasted. That's not an "at home" fix my dude. Get your sandpaper or a wire brush out!
If your wheels are as bad as mine, be prepared to have them sandblasted to start with. You could spend a few days with sand paper, but it makes sense to have them sand blasted to save time and get in all the recessed areas.
Might as well just get them powder coated at that point. Most powder coat places do blasting too.
That was my thoughts exactly! I don't happen to have a sandblasting machine at home. Getting wheels sandblasted - £30 a wheel. Getting wheels totally refurbed - £60 a wheel.
@@dougiemiller5030doing it yourself and developing a skill, priceless.
if this is a business of yours, you need to invest in dry ice.
Been waiting for this! Can’t wait to do it to my 1993 VX.
Thanks for your vídeos mate!
You’re so Right they do look good with just primer !
Great tutorial video, well explained instructions & the finished product speaks for itself they look fantastic & would look great on my Hilux👍👍👍
I am more than impressed! That was a lot of work but the results are well worth it. You must have saved hundreds of dollars by doing this. Maybe more! An outstanding video by far!
The hand polished wheels are gorgeous and you should be proud of that work! Very handy video!
Thank you!
great video ,your a good teacher, learned a lot. thx now it is time for me to do the same
Man, I freaking love your work. ❤️ Keep it up!!!
Best wheel prep and paint vid on the tube
I need to refinish the wheels on my XJS, thanks for the help and inspiration.
You're welcome!! Best of luck!
I watched your entire video. Those rooms came out really good.!!! Give me a good idea for my thank you.
These look great! Thanks for the in depth video and all tips/misshaps!
Thank you I appreciate videos like this not the wasting time one learning something new comes in handy in the future
I like how u showed ur imperfections and flaws great video definitely a keeper nice 👍
Really love your videos. You are Fabulous in every way. Technique , information and presentation. Thank You
Looks Amazing, Great Job !! I did my Toyota 4runner 15" wheels
looks great, I did my window areas with a brush too.
Pure innovative genius. That is an awesome high-value low-cost way to have beautiful results. Thanks so much for sharing. Great Channel!
Thanks for watching!
Job well done sir, I learned a lot from you.....ricky from the Philippines
Very nice job! Not sure I would have that kind of patients for detailing like you do!
To be honest, I wouldn't do it again! Next time I'll just have them powder coated in all one color.
Great work. Great details. Great results. Thank you.
I did similar to this on my land cruiser wheels. I opted to only paint the “D” shaped areas and sand and polish the aluminum on the rest of the wheel. It was well worth the work. Good video!
Thanks! That's really what I wanted to do as well, but that polished aluminum wouldn't do well in winter, here in Ohio.
They look great man you did a fantastic job super overkill just like I do it I figured tire machine will get some nicks they make it look fabulosa
I love your use of the 1812 Overtoure!
Thanks for your comprehensive video. It is really helpful to see what works and what doesn’t and why. Great video!
Thanks for watching!
Thank you for the video.
I would definitely like to see you polished aluminum wheels, like the ones shown in the video.
Keep up the good work.
Yes, Please do the polished wheel tutorial. Over on the WrenchMine TH-cam channel we have a set of 1985 Toyota Celica wheels that are going on our AE86 that are in need of restoration. We'd love to polish them on the flat surfaces. Thanks for the GREAT video!!
To easily polish aluminum wheels, get some 0000 steel wool and Mothers aluminum polish or Diamond polish works great. Scrub the wheel with the wool using the polish as a lubricant. Wipe off once it's black. Mirror finish!
Looks great !! Therapeutic to watch too !!!
Yea please do a how-to video on how to do hand polished wheels! Thanks for all these amazing videos!
Great video! Really appreciate the detail you provided.
Dude they look amazing. I get it about the small imperfections and accidents but still.
Great video mate, thank you very much I’ll be watching this again just before I do my rims.
An excellent tutorial . You have unbelievable patience . You did an excellent job . Well done .
Thank you!
Awesome job! A few years back I did the same thing to my 07 4Runner wheels, they also turned out looking great. Enjoyed the video!
Thanks! 👍
You can use dish sponge too👍
This is definitely the way to go. Forget about harsh, toxic, carcinogenic chemicals that will consume a ton of time and effort and will not even produce good results. Don't ask me how I know.... Great video edition.
Damn bro. That's a helluva job you did there. 👏
Nice work I like what you did with those wheels they look great. You put some some work into those Wheels, like your work ethnics and nice detailing on the work. I appreciate that video could be the best so far for home garage wheel restoration the gloss black came out great look like those wheels came with the Land cruiser. You can get alot of work doing wheel restoration, Peace.
Good job man, Looks really good 👍
Using the paint cap from the spray can to clean the brushes is a high IQ move. Thanks for sharing
You bet!
I like it how positive u are about the wheels even with the little imperfections :)
Thanks 😊 I try not to let the small things get to me!
Great video. The wheels look awesome.
Liked extra time spent to finished good.
Great detailed DIY video. Sharp looking LC.
I'm just about to take on clearning and painting some motorcycle wheels and can't powder coat them myself, so am going to follow your steps.
Thanks for sharing so much detail.
Excelent Job, congratulations
wow the ending is great . You wont see the rougher parts when you are driving -so cool
Came out clean buddy thanks for the information I learned something new today
What a very good explanation on all brother what you make por hour doing this pro job nice brother 👍
Thanks! $0 per hour haha, I'm just a guy refinishing my wheels in my garage. Glad to see the video has helped so many!
Those look incredible. Lots of positive notes but mainly that paint brush cleaning hack. 10/10 😎
Thanks a ton!
😊HEY I APPRECIATE IT VERY MUCH AND I LEARNED A LOT FROM YOU GUYS 😊
Awesome! Thank you!
Great video! Excellent detailed information.
Great indepth video, with real advices for diy projects. Great job on rims and on video.
Thanks!
Nice video. One change is that if you want better finish on the rough areas, use a file to remove the high spots and you could use filler if there are some deeper gouges than what filler primer can cover.
That's a great idea, thanks!
i used to have a 96' LandCruiser with those wheels and the machine finish had that same kind of corrosion. Never got around to making them nicey nice but enjoyed the truck when we had it. Great job you did refinishing them
Thanks!
I use on both the rim and tire bead silicone grease,it has multiple benefits: it stops the rim from coroding,it seals better,and the lip of the bead slips on it like on command.
Awesome transformation