Six beginner/low budget end mills for milling aluminium: Test video with Feeds and Speeds: th-cam.com/video/M-1dYJWh3rw/w-d-xo.html Afilliate links: Tool 1: ⅛ inch 2 flute: bit.ly/2N2DyEE Tool 2: 4 mm 3 flute: bit.ly/2N2DPXZ Tool 3: 5 mm 3 flute: bit.ly/2N2DPXZ Tool 4: 4 mm 2 flute: bit.ly/2N1KYb2 Tool 5: 4 mm 2 flute: bit.ly/2SxnT6g Tool 6: 6 mm 2 flute chamfer: bit.ly/2tmihfX
Hi, I'm Liz, could you teach me how to put the male 3 configured for this cnc ?. I bought it and I have not been able to start it yet. Thank you. my email is makerizd3@gmail.com
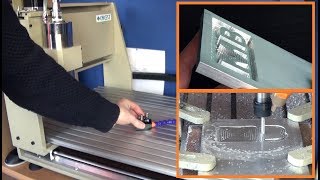
MBcreates Could you please give me the specifications of this machine. My friend would like to buy it but he needs to be 100% sure which one it is. Thank you!
Hi MB great video , lots of information to help . I am a fully trained miller with about 30+years working in a toolroom . You are doing all the right things about aligning the spindle head , But need to align the X axis to the machine table , This needs to run parallel to the table before you align the spindle . Your clocking bar is the same type of equipment as we would use , Just make it longer & use the full size of the machine table. Also using shims between the two surfaces is the correct thing to do (but use steel shims ) this will stop any vibration when using paper or card. one last point you need to try & align head to table with a tolerance of below +/-0.02mm . good luck :)
BEFORE you start tramming, you need to make sure the Z axis travels perpendicular to the X and Y axis. I was thinking about making a video about squaring up a machine myself. I have a 6040 for my home use, but i do machine tool metrology on highly accurate machines for a living (less than 1um in all directions). Most people think if a axis goes to where you tell it, the machine is accurate, but there is so much more to the story.
Jeff: How do you check that? I can understand the tool MB made rotates perpendicular to the spindle axis, and the glass plate is brilliant; but what [budget] technique can you use, since I have the exact same CNCEST 6040?
@@BrilliantDesignOnline I used a 123 block, and have an indictor arm permanently mounted to the spindle housing. Place block on table and move Z up/down in both X and Y direction. You won't like what you see though ;) i got mine to within .2mm, but without slotting screw holes/complete disassembly it was a lost cause. Tram came in OK after adjusting the cheap clamp system around on the spindle. That being said, the darn machine has been pretty reliable.
@@jeffgreenfield7025 Thanks Jeff. I will be making a video on electronic touch probe which has changed my efficiency up a huge level. You can watch where I got it from Charlie Sarsfield th-cam.com/video/tvV2Vmrxarc/w-d-xo.html and watch the X/Y vid, too.
Another great video, thank you. I like all of your videos but the 6040 vids are how I found your channel. As a new 6040 owner I really appreciate your documentation of improvements and suggestions for the 6040 machines. I look forward to more.
Yeah tramming in is a thing. Better is better too. Don't be afraid to beat on your machine with a hammer. You're doing it the right way. Tapping is how pros precision align stuff. If it was me I'd use metal shim stock though. I'd worry about paper compressing from machine vibrations. But often paper works.
For the X axis, just drill two holes and thread them, above the lower bolts that hold the spindle, place the bolts from the back an tighten until you have the rotational X axis calibrated.
if you drill and tap four holes next to the mounting holes you can put screws in those holes .the finer the thread of the screw the finer the adjustment . you can turn the screws in or out against the backer plate to get the adjustment
This is what I needed for a 3d printer bed because they use 3mm due to the very fine pitch but 3mm is garbage and needs to be 4 or 5mm but then you lose the fine pitch. A lathe you can make your own and thread whatever you like for the nut as well as the screw. Same thing for this. Make an 8mm bolt with 0.5mm because you can't buy that and they have the thread cutting inserts. Too bad I don't have a lathe because it is the only thing that can do this for od and id threading regardless of the size of rod or hole.
First of all great video ;) for the X axis you can add additional grubscrews to the corners of the spindle mount. To tilt it you can have them poke out the back by tge needed amount and tighten against that. This would be similar to how mirrors on co2 laser cutters are adjusted.
this is a Great video - and has helped me a bit after Today I moved my C6040Z with a job in progress (Paused) - but when I contiued the job the Z axis height was 0.3mm Lower on one side, so it ate right into the piece of work. One issue I have here though - is that adjusting the X and Y with the Spindle in the Centre of the entire unit fixes your Misalignment with cutting - but I figure won't account for the issue I think I have - which is that the entire Gantry must be out in the Z axis. When I went to adjust it with the Alen Bolts - I unscrewed them, and both will no longer go in - a Good indication like you said, that both the Holes are tapped poorly, and I even noted the Bolts are slightly tapered at the end, so Not able to Fully grab on So I think I know what has happened - When I moved the unit to put some guards at the back and side, I may have lifted upwards from the Gantry, and then this may have loosened the Side bolts.. But I now need to figure out the best way to Level both sides of that Axis (I think my X and Y are swapped compared to yours too! - so my "Side to Side length ways" across the gantry is the X - and the LONG end of the entire Mill is the Y axis.)
one thing that may work well could be cam washers spin some up on a lathe using off center turning for the drilling of the hole and leave an indicator flange that can be milled so it can be turned with a wrench. I also agree over time the paper shims will compress I would replace them with metal. but I do thank you you have given me many ideas on how to beef up my cncest 6040
I had been pushing off buying a tramming-tool for my diy mill, but never really thought about making my own. Thanks for this! Looks like I got myself a new weekend project :-)
It is also possible that whole gantry is leaning forward or backwards (ask me how I know...)...shimming only spindle bracket may result flats to be "flat" but deep walls may not be true perpendicular.
Alignment is a process. What we're seeing here is just the start of it. They're going to need an angle plate to check the X axis. Something perpendicular or square. Maybe a plain 1 2 3 block?
@@MBcreates someone at the factory could have done everything you're doing to get your machine dialed in. But the cost of doing that is market prohibitive. So they don't. They'd rather sell more units. I can't say they're entirely wrong in their decision either. To the people it matters to they can make the effort themselves. You used your machine for how long before it became an issue? If you were doing other work it may have never come up. Why price that segment out of the market?
Am just starting out with a mini CNC engraver project...your vids are fantastic! Thanks so much for going to all the trouble of recording your learning journey! best wishes from Australia...
I do field service on cnc mills and lathes, to tram the spindle you put indicator on bed with indicator against the spindle, adjust z axis and drill tapper pins, then cut or tram table square to the z, a lathe is the same take a 6" test cut and adjust headstock so no taper then adjust turret
Drill and dowel pin the mounting off centre a little so you have a fixed point so the mount can be rotated around without shifting in two planes at the same time. Tap a thread or two on the bottom edge of the mount and install grub screws to jack from.
Love the vid ... I have the same machine. The problem I found doing it this way, was it did not correct the alignment of the Z axis. I had to shim the gantry first to correct the up and down alignment of the Z before adjusting the spindle bracket. I also found that once the machine was cutting, and because the machine is not as ridgit as a milling machine, it pushed the spindle out of correction again.
Excellent video on the topic of tramming these inexpensive mill's. I just have one thing to mention. Everything went well until you trammed the motor mount for Y. By shimming the mount your Z travel will move in Y the correct way to adjust Z tram for Y is to move the linear rails. Your rails are still off causing Y scallops. X is the correct way by over sizing the holes . Great video though and very thorough.
How about if you put an indicater on outer diameter of the spindle and manually feed up and down in z-axis I am sure the spindle will not square to xy axis .I surggest square the spindle in xy axis first then remachining the table surface.
I might suggest that instead of using shims, you might try drilling and tapping holes to add set screws so you can make fine adjustments. We used to use this system to level X-ray tubes on machines.
May I suggest adding allen head set screws with a jam nut. I would drill & tap holes above and below the attaching bolts of the router mount. That is for the Y axis. Then you wouldn't need shims.
Once I had it shimmed correctly, my first instinct would have been to remove the material from one/both of the faces of the mounting z axis bracket to try maintain a full contact area between the two faces. Just my 2cents
Good informational video, thank you for the tips, I have the same machine and the same problem, although Jeff has a point in saying that the Z axis should be perpendicular to the X and Y plane, you have done a great video, thumbs up!
Another great video you made. Very well executed. But it is time you change that X axis and show the world how it is done. And yes, before tramming you verify XY is perfect 90 deg. But I know you did that. Keep it up, great work
make 4 more holes with m6 in them and screw some screws in there wich want to press the plate away from the other one, while the ones you have now, pull the plats together
One major design flaw with all these gantry routers is the gantry moves and not the table. I am building one now where the table moves instead. It will use more room but rigidity, accuracy, tool life, lower noise level, and flatness will be gained.
USE THE MACHINE TO MAKE A NEW BRACKET FOR THE SPINDLE AND MAKE IT BIGGER TO PUT JACK SCREWS ON THE OUTSIDE OF THE SCREW HOLES TOP AND BOTTOM THIS WILL LET YOU ADJUST THE X EASY AND THEN YOUR WAY FOR THE Y AXIS WILL WORK
I appreciate you making this video 👍 But I don't get why you put a glass plate on the bed and shim it, because you need to calibrate your spindle to the bed on which your work pieces are held down. I also note that your bed is too large, the cutter can not reach all corners to flatten the entire bed, leaving you with cupped bed which is not really handy?
Hi there beautyfull machine! Could you share, the mach3 motor set up? I mean the step per revol,velocity,aceleration, step pulse,step dir, Because i lose steps some times when i millimg, also if you can share the picture of the 7 position red switch on the tb6560ahq board,were where ínside the físical driver box we can see the step divider, decay, etc..I think that could help me and other people a lot! Anyways thanks for your time and your study about the milling speed and tool, its sumply usefull, im really apreciate,i hope you will have the time to do it, thanks you bery much! Have a good one
The angle of the finger on the indicator is too steep giving you a larger error than you actually have. For an accurate reading the finger should be parallel to the face your checking.
een aantal opmerkingen eerst wordt de glasplaat opgehoogd aan een zijde met 0.8 mm daarna wordt er getrimd op die glasplaat daarna wordt de glasplaat weggehaald waarmee al die moeite voor niks is geweest....... trimmen gebeurt nooit door bouten minder vast te zetten die bouten hebben niet voor niets een aantrekkoppel juiste wijze: eerst hoogte meten van bed ten opzichte van het portaal op de hoeken daarna bed waterpas / parallel met bovengeleiding stellen daarna spindel haaks op bed stellen.
I was thinking of drilling a hole on the bracket then tapping it. ill then use that find thread screw as a fine adjustment to set up the x axis. that way you dont have to use paper. Not sure if i got my point across?
Nice video and all looks good .but i would do one adjustment..instead of wood that you are using to hold down your things(projects) you are working on i would use Aluminium with holes inside..on top side there would be only hole and on bottom there would be place to place normal nut (maybe special safety nut if needed..but you would have to cnc place for nut with correct shape and then just use some superglue or such ..just to hold it up ) and this i would have instead of wood..Al is much more stable that wood..and you don't have problems with change in wood..i know you might not think about it as problem..but i think this is the best alternative ..and it would cost only that big plate of Al ..brass would be good too...but i expect that would cost much more..
I have the same 6040. Without supported rails on X tramming is useless as gantry twists on unsupported rails by 0.2mm while spindle is on the center of X just by weight of spindle and Z axis assembly. I did many tests with precision granite block. You can buy some aluminum extrusions and make X way stronger utilizing 4 ball bearings. Pm me for more info.
Circular measurments around spindle axis are not enough, I think... Are you sure the movement axis are accurately perpendicular? That's why accurate CNC mill machine cannot be cheap.
I love the video! Thanks for posting. How hard have you got the glass clamped? I would expect it to change the shape of the glass. When we tram machines at work, we support a large glass or granite artefact on 3 feet and don't hold it down at all. I'm glad to see that it gave you improvements, I wasn't expecting it to quieten cuts on aluminum.
Thanks Greg. My fixture plate is sanded to a silk smooth finish so the glas bed was sliding when I was zeroing it with the digital indicator. The clamps were fastened very minimal, just enough that I wouldn't move.
Playing with the torque of the spindle bolts might not be the best idea, because the more loose ones could really come loose due to vibration while the machine is working...
Torquing the hardware is a legitimate tramming method. What you do is make some fasteners tight and the others even tighter. Just a fraction of a turn makes a huge difference.
@@1pcfred A good point here 👍 At such important parts like the spindle, where lot of vibrations occure, I believe some "thread-lock" in addition isn't a bad Idea ;)
@@dunichtich100 CNC machines vibrate but I am not sure if those vibrations are strong enough in a machine of this type to rattle anything apart. Now if we were talking about flywheels or U joint bolts then I'd say yeah give it some. Another thing you can do is drill through screw threads and put some trimmer string plastic in there. That makes a locking thread too. I don't think this guy even has a drill press though. He's pretty hurting in the tool department when it comes to fixed machinery. This is my baby i.imgur.com/T8CM5rk.jpg Nothing is thread locked on her either.
It’s not that simple. You need to start from the bottom and work your way up. The last thing to tram is the spindle bracket. A machinist precision square level is a good tool for this. Dont go crazy and get a 0,01 mm/m... Get one around 0,2 mm/m and your more than fine!
Viktor Freeman Good job man. But you do it wrong. First of the all - you make your wood part of the table "flat", when you already have curved spindle. Also your metal base plate was curve too. It's not important (because you will make a table finish mill later) , but you should to align spindle first. To do that best - use special polished (grinded) metal, or stone plates. Than - correct your spindle position. Do not use glass. It's curved +-0.1mm. You can use special optical plates, but it horrably expensive.
CNCRouterParts designed a tramming plate you should take a look at to help inform your design. They have dxf and step files as well. www.cncrouterparts.com/tramming-gmt-spindle-mount-p-360.html
Don't you think that thin shims made of amulinium foil would be better than shims made of business card? I'n my honest opinion the best shims should be made of thin steel! This way you wont squeeze them much by tightening the screws ;)


Six beginner/low budget end mills for milling aluminium:
Test video with Feeds and Speeds: th-cam.com/video/M-1dYJWh3rw/w-d-xo.html
Afilliate links:
Tool 1: ⅛ inch 2 flute: bit.ly/2N2DyEE
Tool 2: 4 mm 3 flute: bit.ly/2N2DPXZ
Tool 3: 5 mm 3 flute: bit.ly/2N2DPXZ
Tool 4: 4 mm 2 flute: bit.ly/2N1KYb2
Tool 5: 4 mm 2 flute: bit.ly/2SxnT6g
Tool 6: 6 mm 2 flute chamfer: bit.ly/2tmihfX
Hi, I'm Liz, could you teach me how to put the male 3 configured for this cnc ?. I bought it and I have not been able to start it yet. Thank you. my email is makerizd3@gmail.com
MBcreates Could you please give me the specifications of this machine. My friend would like to buy it but he needs to be 100% sure which one it is. Thank you!
Hi MB great video , lots of information to help . I am a fully trained miller with about 30+years working in a toolroom . You are doing all the right things about aligning the spindle head , But need to align the X axis to the machine table , This needs to run parallel to the table before you align the spindle . Your clocking bar is the same type of equipment as we would use , Just make it longer & use the full size of the machine table. Also using shims between the two surfaces is the correct thing to do (but use steel shims ) this will stop any vibration when using paper or card. one last point you need to try & align head to table with a tolerance of below +/-0.02mm . good luck :)
BEFORE you start tramming, you need to make sure the Z axis travels perpendicular to the X and Y axis. I was thinking about making a video about squaring up a machine myself. I have a 6040 for my home use, but i do machine tool metrology on highly accurate machines for a living (less than 1um in all directions). Most people think if a axis goes to where you tell it, the machine is accurate, but there is so much more to the story.
Hi Jeff, Thanks for your comment. Would love to to hear more about your approach. Could you send me an email? mbcreates.channel@gmail.com
Jeff: How do you check that? I can understand the tool MB made rotates perpendicular to the spindle axis, and the glass plate is brilliant; but what [budget] technique can you use, since I have the exact same CNCEST 6040?
@@BrilliantDesignOnline I used a 123 block, and have an indictor arm permanently mounted to the spindle housing. Place block on table and move Z up/down in both X and Y direction. You won't like what you see though ;) i got mine to within .2mm, but without slotting screw holes/complete disassembly it was a lost cause. Tram came in OK after adjusting the cheap clamp system around on the spindle. That being said, the darn machine has been pretty reliable.
@@jeffgreenfield7025 Thanks Jeff. I will be making a video on electronic touch probe which has changed my efficiency up a huge level. You can watch where I got it from Charlie Sarsfield th-cam.com/video/tvV2Vmrxarc/w-d-xo.html and watch the X/Y vid, too.
Another great video, thank you. I like all of your videos but the 6040 vids are how I found your channel. As a new 6040 owner I really appreciate your documentation of improvements and suggestions for the 6040 machines. I look forward to more.
Thanks Colt, I appreciate your comment.
Yeah tramming in is a thing. Better is better too. Don't be afraid to beat on your machine with a hammer. You're doing it the right way. Tapping is how pros precision align stuff. If it was me I'd use metal shim stock though. I'd worry about paper compressing from machine vibrations. But often paper works.
For the X axis, just drill two holes and thread them, above the lower bolts that hold the spindle, place the bolts from the back an tighten until you have the rotational X axis calibrated.
if you drill and tap four holes next to the mounting holes you can put screws in those holes .the finer the thread of the screw the finer the adjustment . you can turn the screws in or out against the backer plate to get the adjustment
This is what I needed for a 3d printer bed because they use 3mm due to the very fine pitch but 3mm is garbage and needs to be 4 or 5mm but then you lose the fine pitch. A lathe you can make your own and thread whatever you like for the nut as well as the screw. Same thing for this. Make an 8mm bolt with 0.5mm because you can't buy that and they have the thread cutting inserts. Too bad I don't have a lathe because it is the only thing that can do this for od and id threading regardless of the size of rod or hole.
First of all great video ;) for the X axis you can add additional grubscrews to the corners of the spindle mount. To tilt it you can have them poke out the back by tge needed amount and tighten against that. This would be similar to how mirrors on co2 laser cutters are adjusted.
Next time if you don't have shim stock, you can cut feeler gauges. It should help keep your adjustments long term.
this is a Great video - and has helped me a bit after Today I moved my C6040Z with a job in progress (Paused) - but when I contiued the job the Z axis height was 0.3mm Lower on one side, so it ate right into the piece of work.
One issue I have here though - is that adjusting the X and Y with the Spindle in the Centre of the entire unit fixes your Misalignment with cutting - but I figure won't account for the issue I think I have - which is that the entire Gantry must be out in the Z axis. When I went to adjust it with the Alen Bolts - I unscrewed them, and both will no longer go in - a Good indication like you said, that both the Holes are tapped poorly, and I even noted the Bolts are slightly tapered at the end, so Not able to Fully grab on
So I think I know what has happened - When I moved the unit to put some guards at the back and side, I may have lifted upwards from the Gantry, and then this may have loosened the Side bolts..
But I now need to figure out the best way to Level both sides of that Axis (I think my X and Y are swapped compared to yours too! - so my "Side to Side length ways" across the gantry is the X - and the LONG end of the entire Mill is the Y axis.)
one thing that may work well could be cam washers spin some up on a lathe using off center turning for the drilling of the hole and leave an indicator flange that can be milled so it can be turned with a wrench. I also agree over time the paper shims will compress I would replace them with metal. but I do thank you you have given me many ideas on how to beef up my cncest 6040
I had been pushing off buying a tramming-tool for my diy mill, but never really thought about making my own. Thanks for this! Looks like I got myself a new weekend project :-)
Buy or DIY :) Good luck tramming your machine!
@@goober-ll1wx each to their own, friend
It is also possible that whole gantry is leaning forward or backwards (ask me how I know...)...shimming only spindle bracket may result flats to be "flat" but deep walls may not be true perpendicular.
Alignment is a process. What we're seeing here is just the start of it. They're going to need an angle plate to check the X axis. Something perpendicular or square. Maybe a plain 1 2 3 block?
After seeing how bad the spindle was aligned I wouldn't be surprised if that was the case.
@@MBcreates someone at the factory could have done everything you're doing to get your machine dialed in. But the cost of doing that is market prohibitive. So they don't. They'd rather sell more units. I can't say they're entirely wrong in their decision either. To the people it matters to they can make the effort themselves. You used your machine for how long before it became an issue? If you were doing other work it may have never come up. Why price that segment out of the market?
Those animated 3D graphics must have taken a lot of work. Kudos to you and thanks:)
Am just starting out with a mini CNC engraver project...your vids are fantastic! Thanks so much for going to all the trouble of recording your learning journey! best wishes from Australia...
thanks mate!
Dude, I love these videos, am absorbing as much as I can for when I get my mill. Thanks for all the useful information I had to subscribe!
Thanks!
I do field service on cnc mills and lathes, to tram the spindle you put indicator on bed with indicator against the spindle, adjust z axis and drill tapper pins, then cut or tram table square to the z, a lathe is the same take a 6" test cut and adjust headstock so no taper then adjust turret
Drill and dowel pin the mounting off centre a little so you have a fixed point so the mount can be rotated around without shifting in two planes at the same time.
Tap a thread or two on the bottom edge of the mount and install grub screws to jack from.
Love the vid ... I have the same machine. The problem I found doing it this way, was it did not correct the alignment of the Z axis. I had to shim the gantry first to correct the up and down alignment of the Z before adjusting the spindle bracket. I also found that once the machine was cutting, and because the machine is not as ridgit as a milling machine, it pushed the spindle out of correction again.
Great job. You can accomplish the same results by shims on your gantry bearings. It's a pain to do but can be done.
Excellent video on the topic of tramming these inexpensive mill's.
I just have one thing to mention. Everything went well until you trammed the motor mount for Y. By shimming the mount your Z travel will move in Y the correct way to adjust Z tram for Y is to move the linear rails. Your rails are still off causing Y scallops.
X is the correct way by over sizing the holes .
Great video though and very thorough.
How about if you put an indicater on outer diameter of the spindle and manually feed up and down in z-axis I am sure the spindle will not square to xy axis .I surggest square the spindle in xy axis first then remachining the table surface.
This guy has a good mind....good worth ethics...and common sense....great video
Super!
I was just thinking about alignment screws when you suggested it. lol.
My hobby is astronomy, and the subject of collimation comes up a lot!
Any more 6040 videos coming soon? Looking forward to that :D
I might suggest that instead of using shims, you might try drilling and tapping holes to add set screws so you can make fine adjustments. We used to use this system to level X-ray tubes on machines.
May I suggest adding allen head set screws with a jam nut. I would drill & tap holes above and below the attaching bolts of the router mount. That is for the Y axis. Then you wouldn't need shims.
Once I had it shimmed correctly, my first instinct would have been to remove the material from one/both of the faces of the mounting z axis bracket to try maintain a full contact area between the two faces. Just my 2cents
Good informational video, thank you for the tips, I have the same machine and the same problem, although Jeff has a point in saying that the Z axis should be perpendicular to the X and Y plane, you have done a great video, thumbs up!
Thanks Calin!
Another great video you made. Very well executed. But it is time you change that X axis and show the world how it is done. And yes, before tramming you verify XY is perfect 90 deg. But I know you did that. Keep it up, great work
I used your method and got to an unallignment of 0.4 mm, from 1.5 on the Y axis.
make 4 more holes with m6 in them and screw some screws in there wich want to press the plate away from the other one, while the ones you have now, pull the plats together
One major design flaw with all these gantry routers is the gantry moves and not the table. I am building one now where the table moves instead. It will use more room but rigidity, accuracy, tool life, lower noise level, and flatness will be gained.
USE THE MACHINE TO MAKE A NEW BRACKET FOR THE SPINDLE AND MAKE IT BIGGER TO PUT JACK SCREWS ON THE OUTSIDE OF THE SCREW HOLES TOP AND BOTTOM THIS WILL LET YOU ADJUST THE X EASY AND THEN YOUR WAY FOR THE Y AXIS WILL WORK
I appreciate you making this video 👍 But I don't get why you put a glass plate on the bed and shim it, because you need to calibrate your spindle to the bed on which your work pieces are held down. I also note that your bed is too large, the cutter can not reach all corners to flatten the entire bed, leaving you with cupped bed which is not really handy?
I had the same problem, last week I Bought a Edge technology pro tramming tool. now my spindle is 100% aligned
Hi Eddy, That’s a nice tramming tool. Unfortunately it doesn't fit my spindle. What machine do you have?
100%? Good for you!
Hi there beautyfull machine!
Could you share, the mach3 motor set up? I mean the step per revol,velocity,aceleration, step pulse,step dir, Because i lose steps some times when i millimg, also if you can share the picture of the 7 position red switch on the tb6560ahq board,were where ínside the físical driver box we can see the step divider, decay, etc..I think that could help me and other people a lot! Anyways thanks for your time and your study about the milling speed and tool, its sumply usefull, im really apreciate,i hope you will have the time to do it, thanks you bery much! Have a good one
Great video...how the hell do you do the cool 3d animation..thats kick ass
You need to increase your feed! Don't baby the cutter when milling aluminum! Keep the FPT above 0.025mm when using 3mm to 6mm end mills.
Nice video. Thanks, I learn a lot from you!
The angle of the finger on the indicator is too steep giving you a larger error than you actually have. For an accurate reading the finger should be parallel to the face your checking.
Do you have the specs for the stepper motors? I can't find them anywhere. I need to replace the Z axis motor.
Could you share your 6040 3D model ?
een aantal opmerkingen
eerst wordt de glasplaat opgehoogd aan een zijde met 0.8 mm
daarna wordt er getrimd op die glasplaat
daarna wordt de glasplaat weggehaald waarmee al die moeite voor niks is geweest.......
trimmen gebeurt nooit door bouten minder vast te zetten
die bouten hebben niet voor niets een aantrekkoppel
juiste wijze:
eerst hoogte meten van bed ten opzichte van het portaal op de hoeken
daarna bed waterpas / parallel met bovengeleiding stellen
daarna spindel haaks op bed stellen.
I was thinking of drilling a hole on the bracket then tapping it. ill then use that find thread screw as a fine adjustment to set up the x axis. that way you dont have to use paper. Not sure if i got my point across?
Good one
What is the name and model number of your machine and where did you buy it
Nice video and all looks good .but i would do one adjustment..instead of wood that you are using to hold down your things(projects) you are working on i would use Aluminium with holes inside..on top side there would be only hole and on bottom there would be place to place normal nut (maybe special safety nut if needed..but you would have to cnc place for nut with correct shape and then just use some superglue or such ..just to hold it up ) and this i would have instead of wood..Al is much more stable that wood..and you don't have problems with change in wood..i know you might not think about it as problem..but i think this is the best alternative ..and it would cost only that big plate of Al ..brass would be good too...but i expect that would cost much more..
Just discovered ur page and I love ur work buddy!!! 👍👍👍
What is the name of your machine and where did you buy it
SHouldn't that dial indicator not move when rotating? How do you get it not to change no matter where you move it to?
I have the same 6040. Without supported rails on X tramming is useless as gantry twists on unsupported rails by 0.2mm while spindle is on the center of X just by weight of spindle and Z axis assembly. I did many tests with precision granite block. You can buy some aluminum extrusions and make X way stronger utilizing 4 ball bearings. Pm me for more info.
Circular measurments around spindle axis are not enough, I think... Are you sure the movement axis are accurately perpendicular?
That's why accurate CNC mill machine cannot be cheap.
Can you Suggest from where to buy this online..is good for hard wood ? I'm from India.
Thank you for the tutorial ! great work.
Why your website doesnt work?
I love the video! Thanks for posting.
How hard have you got the glass clamped? I would expect it to change the shape of the glass. When we tram machines at work, we support a large glass or granite artefact on 3 feet and don't hold it down at all.
I'm glad to see that it gave you improvements, I wasn't expecting it to quieten cuts on aluminum.
Thanks Greg. My fixture plate is sanded to a silk smooth finish so the glas bed was sliding when I was zeroing it with the digital indicator. The clamps were fastened very minimal, just enough that I wouldn't move.
Are you sure the head is misaligned or the table?
Great Video 👍🏻
Great video what software did you use the make the video graphics
Thanks. The animation @ 0:15 is made with fusion 360 animation. The rest is just a screen recording from the CAD design (also in fusion 360).
Thanks for good information.
Playing with the torque of the spindle bolts might not be the best idea, because the more loose ones could really come loose due to vibration while the machine is working...
Torquing the hardware is a legitimate tramming method. What you do is make some fasteners tight and the others even tighter. Just a fraction of a turn makes a huge difference.
@@1pcfred A good point here 👍 At such important parts like the spindle, where lot of vibrations occure, I believe some "thread-lock" in addition isn't a bad Idea ;)
@@dunichtich100 CNC machines vibrate but I am not sure if those vibrations are strong enough in a machine of this type to rattle anything apart. Now if we were talking about flywheels or U joint bolts then I'd say yeah give it some. Another thing you can do is drill through screw threads and put some trimmer string plastic in there. That makes a locking thread too. I don't think this guy even has a drill press though. He's pretty hurting in the tool department when it comes to fixed machinery. This is my baby i.imgur.com/T8CM5rk.jpg Nothing is thread locked on her either.
A lot of great info here, thanks
Thanks Scott!
Can it do steel or just aluminum?
CNC 6040 How much is this
Very good. Thank you!
It’s not that simple.
You need to start from the bottom and work your way up. The last thing to tram is the spindle bracket.
A machinist precision square level is a good tool for this. Dont go crazy and get a 0,01 mm/m... Get one around 0,2 mm/m and your more than fine!
“Edge technology products” sell a Pro Tram unit that I found useful. Cheers
Wow that was crazy far out of alignment :)
Could I get in touch with you?
Add me as a friend on TH-cam! youtu.be/addme/S2zjgX0IGytFaF7k5i2xyKUPgM7a7Q
Viktor Freeman
Good job man. But you do it wrong. First of the all - you make your wood part of the table "flat", when you already have curved spindle. Also your metal base plate was curve too. It's not important (because you will make a table finish mill later) , but you should to align spindle first. To do that best - use special polished (grinded) metal, or stone plates. Than - correct your spindle position. Do not use glass. It's curved +-0.1mm. You can use special optical plates, but it horrably expensive.
thats an awesome idea
CNCRouterParts designed a tramming plate you should take a look at to help inform your design. They have dxf and step files as well.
www.cncrouterparts.com/tramming-gmt-spindle-mount-p-360.html
Hope he know glass isn't flat 😂 he should of got tool steel
Don't you think that thin shims made of amulinium foil would be better than shims made of business card? I'n my honest opinion the best shims should be made of thin steel! This way you wont squeeze them much by tightening the screws ;)
I agree.
i ilke yours videos