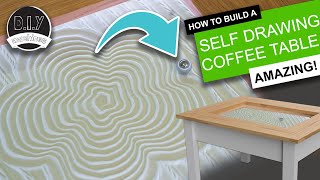
Build an AMAZING kinetic sand art table - Part 2

ฝัง
- เผยแพร่เมื่อ 17 ก.ค. 2021
- I'll show you how to finish building your own kinetic sand art table. We'll add some smart LED lighting & a control panel - set up the software and build an Oak veneered top. I'll then explain how to create your very own drawings... 👇 More info below 👇
Search, collaborate, and share your 3D models with Thangs! Start exploring at: bit.ly/3h34OT0
Part 1: • Build a Sisyphus MAGIC...
It is incredibly captivating to be beside this simple DIY wooden table as the steel ball magically carves out an endless and ever changing series of beautiful geometric patterns in the sand.
Support future projects, see DIY Machines' Amazon Wish List: www.amazon.co.uk/hz/wishlist/...
Links to the professional sand table - Ampersand:
■ Moving Pieces website: movingpieces.studio/
If you’re in the UK I highly recommend Oakdale Crafts as veneer supplier: oakdalecrafts.co.uk
I used their European Oak and applied some boiled linseed oil to bring out the grain detail. It looks fantastic.
List of items used in this project and where to find them:
■ 12v Nema 17 stepper motors (x2): geni.us/StepperMotor
■ GT2 Timing belt (3m was used in the video): geni.us/TimingBelt5m
■ 5mm bore idler, 6mm or 10mm width, 20 teeth (x2): geni.us/6mmIdler5mmBoreToothed
■ 5mm bore idler, 6 or 10mm width, toothless (x4): geni.us/6mmIdlerWheel5mmBore
■ Elegoo Arduino Uno (x1): geni.us/ArduinoUno
■ Nuts, bolts and screws (See list below): geni.us/NutsAndBolts
■ M2.5 x 6mm bolts (for securing Raspberry Pi) (x4) - geni.us/PiBolt
■ Stepper drivers - TMC2208 (x2): geni.us/TMC2208
■ Raspberry Pi (Zero W can cope but I recommend model 3 A+) geni.us/RaspberryPiAPlus
■ 10k potentiometers (x2) : geni.us/Potentiometers
■ Contact switch (x3): geni.us/ContactSwitch
■ Arduino CNC Shield (x1): geni.us/ArduinoCNCShield
■ Magnets, I used three x 15x3mm and one countersunk 20x7mm all high strength: geni.us/CountersunkMagnet geni.us/N52Magnets
■ 30mm 5V Fan (x1): geni.us/30mm5vFan
■ Micro SD Card 8Gb or higher for Raspberry Pi (x1) - geni.us/Micro-SD
■ Neopixels/WS2812b on a 30 per meter roll. - geni.us/5mWS2812B30m
■ 12mm momentary push button (x3): geni.us/MomentaryPush12mm
■ Some filament for the printed parts (I used PLA, including the wood infused LumberJake from 3D Jake) - www.3djake.com
■ Wiring blocks - five wires (x2) and three wires (x2). I used the Wago 221 series - geni.us/Wago221
■ Mini360 Buck Converter (x1): geni.us/Mini360
■ Faux leather fabric (enough to cover the surface): geni.us/FauxLeather
■ Steel ball - 20mm:
■ Sand (I used around 600g):
To make a table frame which measures roughly 80 x 60cm:
■ 40cm long linear rail with block - MGN12H (x2): geni.us/LinearRail400mm
■ 60cm long linear rail with block - MGN12H (x1): geni.us/LinearRail600mm
See www.diymachine.co.uk for instructions on how to build a larger or smaller version.
■ Arduino Nano (x1): geni.us/ArduinoNanoV3
■ Electrical wire: geni.us/22AWGWire
■ 12v power supply - 2A or greater (x1): geni.us/12VPowerSupply2A
■ Barrel Connector - Female (x1): geni.us/FemalePowerBarrel
■ Pocket hole jig: geni.us/PocketHoleJig
Nuts, bolts and screws needed:
■ M5 x 20mm (x6)
■ M3 x 8mm (x18)
■ M3 x 12mm (x19)
■ M3 nuts (x6)
■ M2.5 bolts for Pi (x4)
■ Short wood screws (x45)
■ Optional pocket hole screws (x24)
These are some of my favorite tools I use and recommend:
■ Battery-powered glue gun: geni.us/BoschBatteryGlueGun
■ Bosch Bit Driver: geni.us/Bosch-Screwdriver
==========
DOWNLOADS:
3D printed parts, code, and wiring diagrams can be found and downloaded from here:
www.diymachines.co.uk/kinetic...
3D files on Thangs: bit.ly/3h34OT0
DISCORD SERVER:
/ discord
==========
SAY THANKS AND SUPPORT THE CHANNEL:
Provide continual and dependable support through Patreon:
Support me on Patreon: / diymachines
Buy me a coffee to say thanks: ko-fi.com/diymachines
INSTAGRAM: diy_machine...
FACEBOOK: / diymachines
==========
List of camera and lighting equipment I use:
■ Sony A7 III: geni.us/Sony-Alpha7-III
■ Tamron 28-75mm F2.8 RXD A036SF Lens for Sony-FE : geni.us/TamronRXD-28-75mm
■ Aputure Amaran HR672C: geni.us/AputureAmaranHR672C
■ Aputure MC: geni.us/FAPGL
■ RØDE VideoMic Pro+: geni.us/RodeVideoMic-ProPlus
■ Blue Snowball iCE: geni.us/BlueSnowball-iCE
■ Philips Hue Lightstrip Plus: geni.us/PhilipsHue-LightStrip
Disclaimer:
This video is shared for demonstration purposes only.
Raspberry Pi is a trademark of the Raspberry Pi Foundation - แนวปฏิบัติและการใช้ชีวิต


![ถ้าเธอไม่รักทำไมไม่บอกฉัน - PAPER [ Musicvideo ]](http://i.ytimg.com/vi/pfeBhDda7m4/mqdefault.jpg)


oh wow, my unlisted plugin made it to TH-cam. Thanks for the shoutout.
Hello. I'm trying to make this project, and my problem is that playlist just doesn't work. The button "add to playlist" is on its place, but does nothing. Could you please help me to figure out what can be wrong? It's a gift, and deadline is tomorrow.
@@BogdanKolchygin are you in the OctoPrint Discord?
@@jneilliii Yes. PMed there.
@@BogdanKolchygin I'm in the support-plugin channel...
@jneilliii is there a link to join the discord channel. I can't get my octoprint to recognise the printer which is the final stages of making this project and I'm struggling to find any knformatikn that will help
2.1 stereo with a Just Boom amp hat should do that trick;)
would be cool to have a Smaller circular version of this and mostly 3d printed with electronics, more of a mini table top version
You are absolutely right and there is one on my future projects list. Stay tuned..... :)
Thank you so much for this resource. I have plans to build at least one of these as a donation to my alma mater's charity auction. The second one is going in my living room. :)
such tutorials are amazing to learn and follow . thank you for really not skipping any steps and not making any assumptions
Glad it was helpful! I try to make them as complete as possible. :)
Thanks!
Thank you so much for your support. It's super appreciated and you are very welcome. ☺️
Quite the involved project.
I came here (and your first video) on a whim. This is all so cool!! What a great project and resource! All of the instructions are so well described! Thanks! I'm headed to your website next!!! Who knows what else I'll find!!!
awesome! Now I want to build one.
Amaaazing again, thank you for part 2 !!
Glad you enjoyed it!
This is the most amazing project I've ever seen!
Thanks KETTiL. :)
Thanks for the video. I am truly inspired.
You are so welcome! I'm glad you enjoyed the project. :)
WHAT AN AMAZING DIY!! THANKS!
You are so welcome!
Thank you, you are the best!
You're welcome!
You sir are a legend. I never watch these kind of you tubes but was captivated by yours. Your calm and detailed explanations make me think even I could built this. I also very rarely comment on videos but just wanted to let you know how much I enjoyed your video and will file it away to try and build one day. Keep up the good work. You have inspired me.
Wow, thanks!
He is a legend indeed. Great videos
So amazing! You make it look so easy and you have explained it so well, thank you
You are so welcome!
Love you bro, you make me feel like I can do anything!
Brilliant! You're welcome.
It would be great to see you build a round kinetic sand table.
this is soo coool. this is my new fav channel
Fantastic work , keep it up!
Thanks, will do!
Excellent presentation, well explained.
Thank you Michael, I'm glad you enjoyed it.
Amazing! Great job!
Thank you 😊
Wow, such an amazing project. Thank you that you share it with us.
But there is one question. Is the Bug Converter powerfull enough to handle the LEDs and the Arduino for a longer time?
keep going your work is amazing
Thanks, will do! I plan to keep going as long as I can afford it.
Great work mate.....
I just wanted to suggest a project....
'Cloud chamber coffee table without dry ice......'
Verry cool...👍🏻👍🏻👍🏻
Well done!!
Thank you 😊
What would be cool is adding a shaker motor that vibrates the table and flattens the sand between designs.
Totally agree, but it would be noisy and you would need the ability to lock the ball away while shaking, otherwise it will likely pop off the magnet.
And shake your coffee cup into the floor?
I've had that idea too.
Thank you so much! These two videos are just awesome, and you have a great personality for this. Question - and sorry if I miessed it or it's in the comments - is there a way to synch the ball movements with a soundtrack? Thanks!
what a fantastic teaching system, thanks.I can only imagine that was nothing but hard, frustrating, long hours of hardwork. Can the teaching method be taught? :) cheers
Very fun project. I would love to see it expanded to have a web gui (only accessible locally of course) that allows for drawing or uploading an image. From your phone or PC.
ETA I just got the Sandify. The internet is so amazing that someone already did it! A simple script could move it automatically.
I'm glad you enjoyed the project. Yes, the creator of Sandify is brilliant to create and share the tool.
Thanks 👍👍
No problem 👍
Nice channel!
you have created a tint machine. and gave it to the people. Thanks .
Enjoyed these videos.
I have a round table that I’d like to try to convert to build this project.
I’m m assuming that I over build the size to accommodate the entire circle footprint and then restrict the print size in the software so that it knows to only print patters of 500mm diameter.
Anyone do this for a round table!
Love this! Does anyone have a rough total cost for this build?
I'm almost completed making this and I'm trying to solder the control panel now, Where do I need to connect the red wire of the speed potentiometer? Directly to the 5V?
Great project. Very well explained. Definitely on my list for projects to complete. Out of interest, what 3D printer are you using?
Thanks Owen, I use a Prusa Mk3s.🙂
Great video,thank you! I see on your control board you have 2 knows that are not listed or have I overlooked the part links. Are they variable resistors behind them?
Thanks mark. The knobs are sat onto of 10k potentiometers. :)
Hi thank you for this video, I built a sandtable but the power drops out and everything resetting does anyone know why this would be doing this?
thanking you.
Sean.
Some guys have all the luck, Cute and clever!
☺️
I'm not really in the know with 3D printers, can I order the 3d printed parts required somewhere?
Could you tell us how quiet these tables are. I'm going to order all the parts next week. Excellent videos
I think it is very quiet - everything in my living room must be off and no-one talking to be able to hear it. I was very concerned with volume whilst designing it and took measures (such as the faux leather and Trinamic stepper drivers) to minimise noise.
Thanks for the great video and detailed instructions. Will your 3D-printed case hold newer versions of the Raspberry pi such as the model 4?
Try cadding it yourself 😛
Amazing, thank you!! I ordered all the components and some I dismantled from my old 3d printer. I’m wondering if could be add a small Arduino Compatible X and Y Axis Joystick Module. Will be fun for my kids to move the ball around 😜
You're very welcome. 😊 That is a great idea, I'm sure it could be done - I suspect that soon enough someone will fork the code on Github and implement it. It could be as simple as a four way joystick connected to the raspberry Pi which sends the codes as GCODE to GRBL running on the Arduino Uno via the USB serial connection. As it stands you can drive it around manually using the on screen controls in Octoprint.
I know of a USB Keyboard plugin for OctoPrint that may allow for using a USB number pad for direction control.
There's also this unlisted plugin. github.com/OutsourcedGuru/OctoPrint-Xbox
@@jneilliii That look good. I love the fact it's a wireless game pad for the controller. :)
Sorry for the necro-post.
I really enjoyed your video and this project, and I'm trying to replicate parts of this project, but had a few questions.
First, why is an auxiliary Arduino nano used for the lighting? Wouldn't it be possible to also run that off the UNO?
Second, is a Raspberry Pi truly necessary? It appears to be mostly for user convenience, and pattern drawing. I will only need to move the stage to an xy coordinate every so often, so wouldn't interfacing with the UNO directly also be possible?
Third, how fast are you able to run those motors with the friction and slop from the rails? I'm trying to recreate the stage as thin as possible, and was wondering if I could use lower profile but also lower torque / rpm steppers instead. I also won't be running the stage continuously, but in rapid bursts lasting just a few seconds.
Lastly, thanks again for the great video. This isn't a question, just wanted to really emphasize how great you and your projects are. Keep up the fantastic work.
Can you share me a link to buy ball, and magnetic. Thank you
Do you have an approximate pricetag?
is there any specific type of sand or its just normal sea sand
I would love to make this but no 3d printer :(
You should make a full kit to buy :)
Maybe one day - for now I'm working hard on the next project. :)
Hello, I'm an student that is very interested on your project, and I wanted to build that, but in a minor scale. I can't use your table sizes, so I wanted to ask if the code of Arduino has the possibility to modify and get the servos adapted to my table size. Thank you so much, keep sharing projects, this is so valuable.
Of course it can be, I guess there are values specificaly defining the size. But I guess you would have to take a look into it.
hes so smart
💕👌👍
You need to make sure stick pads are used on the glass or it could be knocked off and make sure. Tempered glass is ordered.
Good advice, I did use tempered glass in my project - but will add some sticky pads. :)
Please make driver drowsiness detector using raspberry pi and usb camera
greetings !! I love this project !!! Does someone know if there's a special name for the type of steppers configuration ? with x and y at the same height ? I'm trying to run this to grbl software and i can't pilot the steppers correctly.thanks a lot!!
I don't know if this still helps you but its called a CoreXY configuration
Very nice project and well done! I have a question about "marble wobble". A small team at our MakerSpace is building a kinetic sand table and the steel marble is not moving very smoothly through the sand. There is good magnetic connection with the steel marble and the mechanism is moving smoothly. The steel marble draws a smooth line but it has minor variations in speed and appears a bit "herky jerky" I've looked at a bunch of video's of different sand tables and can't tell if the same behavior is going on with them. I did see a lower cost commercial kinetic sand table its marble moves like ours. Sooooooo, does your table's marble move smoothly, and if so, do you have any suggestions as to how to smooth the movement of the marble? We have tried different sized marbles and the larger ones are smoother. There is ~2 mm gap between magnet top and sand table, with roller bearings maintaining a constant distance. Thanks!
I’m considering building one of these tables and thought of the issue you are referring to. I’ve seen other videos on YT where they too differ from the marble jerking. I had thought about attempting to suspend the marble magnetically just above the table top, but still in the sand. I think there’s a way to make the magnet ball bearing “float” at a specific height so that the constant jerking doesn’t happen. Wondering what your thoughts are about doing this.
One solution is less magnetic force to act on the ball. If the magnet is strong, it tries to pull the ball tightly against the table and any sand particles will make it brake and thus jerk around.
@@JaakkoF thanks for your reply. I purchased a powered device that suspends a metal ball in the air just an inch or so above its base. While I haven’t had the time to make a prototype yet I was thinking a z axis input from a old 3D printer could actually “lift” the ball bearing up and out of the sand to move to new coordinates and then drop back down where needed to start the next line of the print. This could change the designs that are capable since it’s not a continuous line being drawn.
But doing it is the difficult part.
How would you go about doing it with a round table? How could you reduce the amount of empty space where your railing system cannot reach?
You could use a polar coordinate solution
How much did you approximetly pay for all the parts?
Dimensions of the glass?
Interesting build, you have just solved one gift idea I needed for Christmas. Like what do you get the person who has everything? ;-) So if I were to make the sand table bigger or smaller would I just change the parameters in the software as you did at 27:32 accordingly?
Yes, that's mostly it. I've written out a mini guide in the FAQ section here: www.diymachines.co.uk/kinetic-sand-art-coffee-table-self-drawing which explains all the changes required. :)
@@DIYMachines Thank You!
I have a proposal for you as a smart specialist. Make a table clock with flip-down time, day of the week and date.
This is a very long shot, since I don’t have a 3d printer (yet), and you are the expert, is there a way to buy all of the components in one box from you? Like a “DYI project box, here is all you need you lazy bum, now watch the video and assemble”. Please say yes!
Is there a way to customize the sand drawing to a logo or something like that?
Hello, I have an Etsy shop: diymachines.etsy.com
On there I sell electronics kits, and hopefully when I move home this year I'll have some space to keep an extra printer or two so I can also begin to sell the printed parts as well.
I don't have kits for this project yet, but thanks for checking. 🙂
@@DIYMachines Ill be patiently waiting for this! thanks for your channel, and if somehow possible, keep us updated!
Hello, I am having an issue with drawing patterns. It goes to the start point of the pattern and then stops. Can't I get some assistance with thi, please?.
What kind of 3D printer do you think would be sufficient to print the parts required for this build? Does it have to be big or fit a particular criteria? Thank you!
I used my Prusa i3 Mk3 but a Prusa Mini would be capable. The largest printed parts foot print is about 150mm along, and I printed all my parts in PLA. None of the parts are 'tricky' prints either. I do rate the Prusa printers if you were thinking of buying one, they are a little more money but are feature rich and their support is brilliant if you ever need it. Building one from a kit is also easy and leaves you with full knowledge of how it works: shop.prusa3d.com/#a_aid=diymachines
@@DIYMachines Got it! Thank you for the suggestion on a 3-D printer and so a Monoprice-113860 Maker Select 3D Printer v2 With Large Heated (200 x 200 x180 mm) Build Plate, would work just fine correct?
@@sebastiancortes1298 Yes, I've not used that printer before but on paper that should be fine. I could not see what stepper motor drivers it used - it's worth getting one with decent stepper drivers to ensure no skipped steps and quiet operation. The Creality is better reviewed on Amazon and has the high quality Trinamic stepper drivers: amzn.to/3wNAn8T
@@DIYMachines I see and thank you for the input you provided on this matter and for the amazing project as well! I look forward to building this one and cannot wait for the projects to come! Take care! 😄👋👏👍
@@sebastiancortes1298 You're welcome. Someone helped me out when I bought my first printer and now I've repaid the favour onwards. :). Enjoy 3D printing, it's amazing. (I'm assuming this will be your first printer).
Apart from the time invested and without tools, how much money would you say you need to invest to get this project going if you start from scratch? Around £200?
Yes, including buying the wood and linear rails I would say around £180. I bought very strong toughened glass for my table top at that cost around £90, though you could opt for acrylic instead which should be cheaper.
@@DIYMachines meanwhile it’s costing me like $570 🥲
Hey Lewis, what is that arm with a clip called? Looks really usefull!
Hello. 👋 . What time in the video do I use it?
@@DIYMachines @9.10 its an alligator clip on a base?
@@allornothing7957 Exactly what Jason said below - 'Helping hands'. :)
How do you clean all the drawing in the sand?
The ball does a pattern back and fourth from side to side of closely packed lines which 'erases' the drawing.
I am having two issues with the sand table that I have built according to your instructions. The LED speed potentiometer is working backwards. If you turn the knob to the right (up), it slows the lights down. If you turn it to the left (down), it speeds up the lights. I've checked the wiring multiple times and can't see anything wrong. Any ideas where I should check to fix it? Secondly, Everything works perfect when tested separately. All control buttons works for the lights, the gantry works great, and it will run a pattern. This issue is when I run it all together, the pattern button will not change patterns. It stays on the default rainbow pattern. But is I unplug the Pi and just run the LED lights, they work perfectly. Any ideas what I should check to get this fixed?
Thanks
I had the same issue. So I basically set the 0 value to the max and then everything went inversely (correct direction). But then I had the issue that the peak speed would be somewhere in the middle of the rotation so I just adjusted the range of values for that variable. This is the edited loop with only the speed function (sorry about weird TH-cam formatting):
void loop() {
tableSurfaceLEDs.service();
unsigned long check_time = millis();
if (check_time - last_check_time > 200){ // If checks come faster than 300ms, assume it's a bounce and ignore
// read the input on the potentiometer to determine the requested brightness for the LEDs
totalBrightness = totalBrightness - readingsBrightness[readBrightnessIndex]; // subtract the last Brightness reading:
readingsBrightness[readBrightnessIndex] = analogRead(inputBrightnessPin); // read from the Brightness sensor:
totalBrightness = totalBrightness + readingsBrightness[readBrightnessIndex]; // add the reading to the total:
readBrightnessIndex = readBrightnessIndex + 1; // advance to the next position in the array:
if (readBrightnessIndex >= numReadings) { // if we're at the end of the array...
readBrightnessIndex = 0; // ...wrap around to the beginning:
}
averageBrightness = totalBrightness / numReadings; // calculate the average:
int ledValueBrightness = map(averageBrightness, -47, 900, 0, maximumBrightnesAllowed); // Map the brightness value to range of LEDs
Serial.print("Brightness of LEDs is set to ");
Serial.println(ledValueBrightness);
tableSurfaceLEDs.setBrightness(ledValueBrightness); //set the table LEDs brightness value
int potValueSpeed = analogRead(potSpeed); // read the input on analog pin 2 to determine the speed for the LED patterns
long ledValueSpeed = map(potValueSpeed, 0, 1100, 0, 10000); // read the input on the potentiometer to determine the requested speed for the LEDs
Serial.print("Speed of LED pattern set to ");
Serial.println(ledValueSpeed);
tableSurfaceLEDs.setSpeed(9300 -ledValueSpeed); //set the table LEDs pattern speed
last_check_time = check_time;
}
}
I would love the ball to have sort of a mind of its own. Meaning if it is lazy it Just rolls a little slower but sometimes it gets energybursts and races through the Sand.
Also the ball should be able to get scared when there is a loud noise detected. Which then frightens the ball so it moves from its path and stays in a state of shock for 5-10 seconds and then slowly creeps back onto its path and continues.
Is Something like that achievable?
Yes , but you’d need to code all that yourself
@@mintgardener i have absolutely no experience in coding. If i where to invest my time into learning it how hard would it be to achieve something like this on a scale of 1 to 10?
Would i need months to be able to do something rather komplex like this?
@@nf794 I also have 0 coding experience so I am in no position to give you an estimate, but I suggest asking around to your friends if any of them program or know someone who does
@@nf794 I am beginner in coding and I'm pretty sure it is possible to do.
First of all with your idea, in order to the achieve the effect of scaring when detecting noise, there'll be a concerned with electronic modules - noise sensor in particular, then you have to have code that work with noise sensor, from that you'd create a sequece of movement that show the ball's scaring mode.
Beside all that, then there'd be steps where you'd have to insert your code into his where you gotta make it works inside his everything.
So yea if 1 is easy in your scale, I would rate its about 8-9 in order for you to achieve what you want. But if just do exaclty what he guide, I would say maybe 5? since I think he pretty much publish everything and all we have to do is just get the parts and assemble them all together, even the code.
Will part 3 be a round table? 😇
Take a look at the Discord channel for this project - someone there has just posted some stunning images of how they adapted this project to a round one: discord.gg/JxM3jxFhv8
@@DIYMachines Nice! Will check that out 😃
I really waiting for you to upload a DIY 3D printer
🙂 Still a little way away, my knowledge is still growing....
@@DIYMachines I can't wait : )
How much ?
It is a nice looking project, but what is the point of a Pi board? it really seem like overkill to install a full linux distro with a 3d printer server just to talk to the arduino.
Up the size of the arduino board to something like an 8266 or ESP32 with an SD card and you can do everything on that. not much code to get it to read gerber files off SD card in random order and 'print them' directly. Control buttons and WS2812 can be connected to that and whole thing would burn a lot less power and could still provide a web interface to interact with table or manage contents of SD card
You should make an instructable on how to do this, seriously, it's a great idea. That is the wonderful thing about open source and sharing your ideas with the world. Most people following this build (including myself) would have no idea how to do that.
Hi I wondered if anyone knos why on octoprint it just won't connect I've tried everything and followed the videos exactly.
@diyprojects
check if the hello comand has saved as blank because I am having the same problem and the hello command is not saving for me, but I have not found a way to fix it
Went thru the same problem, try using an older version of better grbl as the latest version doesn't work strait (in the video he is using 1.7.3)
10:42 Anyone else annoyed that it's not parallel to the table?
Sure you won't see it but still.
Ha, yes. It is slightly annoying - it dropped slightly whilst filming and I never thought to straighten it. Though you're right that it should never be seen once the table is flipped upright again. :)