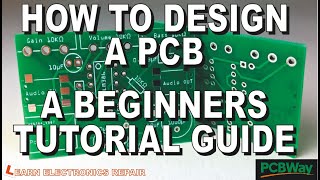
Beginner's PCB Design Guide Using EasyEda

ฝัง
- เผยแพร่เมื่อ 19 ก.ย. 2020
- Beginner's PCB Design Guide Using EasyEda
A viewer asked me for a more complete how to design a PCB video. While this video applies to EasyEda directly. The facts and techniques can be applied to any software like, Kicad, Eagle, Altium, Diptrace etc.
WIN PRIZES in our 100,000 subscriber Giveaway, register here: forms.gle/i8uqTqt5TQJMti4T9
My Amazon link: Anything you buy through this link helps support the channel, it doesn't cost you extra, and I make a few%. amzn.to/3706t6c
Yes!! I now have merch: teespring.com/stores/learnele... Electronics themed T-ShirtsIf you are shopping for electronic components, test gear or consumables please consider visiting my Amazon shop @ www.amazon.com/shop/learnelec...
Please check out / learnelectronics and pledge a dollar if you can. It will go a long way to keeping the channel alive. It costs a bit of money to buy all the items and produce these videos. You help is appreciated.
---------------------------------------------------------------------------------------------------------------------
Or....if you'd like to send a one-time donation you can use this link: paypal.me/learnelectronics
----------------------------------------------------------------------------------------------------------------------
Buy Now, Pay Later with Abunda:
Rigol ds1054z - www.shopabunda.com/products/r...
Siglent technologies oscilloscope - www.shopabunda.com/products/s...
Power supply module - www.shopabunda.com/products/p...
Owon oscilloscope - www.shopabunda.com/products/o...
Alloet multi tester - www.shopabunda.com/products/a...
Walfront multi tester - www.shopabunda.com/products/a...
Here is all the gear I currently use:
Oscilloscope 1: Rigol 1054Z amzn.to/2PRybtN
Oscilloscope 2: Siglent SDS1202X-E amzn.to/31Kk1yH
Power Supply 1: TekPower TP3005N amzn.to/2TeQnxI
Power Supply 2: RUIDENG DP50V5A amzn.to/2sNicSe
Signal Generator: JS2800 ban.ggood.vip/d9vk
DMM1: Owon18B amzn.to/2SbIGLs
DMM2: Aneng 8008 amzn.to/2sNQncI
DMM3: Aneng 8009 amzn.to/2S5qeEp
DMM4: Uni-T UT801 amzn.to/2S89SuL
Soldering Station1: Zeny (Yihua)862D+ amzn.to/2S49z4e
Soldering Station2: KSGR T12 amzn.to/2Wk7Dn9
Light Meter Smart Sensor AS803 amzn.to/2B2gyRg - วิทยาศาสตร์และเทคโนโลยี


![[4K] TREASURE(트레저) “KING KONG” Band LIVE Concert 킹콩은 라이브를 찢어🦍 [it’s KPOP LIVE 잇츠라이브]](http://i.ytimg.com/vi/p8bLLOxPDD8/mqdefault.jpg)

This, by far, is the clearest tutorial on EasyEAD I have ever watched on TH-cam. Thank you very much, Paul.
You know an educational video is very good and it covers everything one needs out of the topic in a good manner by the number of comments. The lower the number of comments, the better... this means the student came, saw, learned, and applied without further questions.
Which is a bit against the all mighty algorythm since it is designed for brainless and useless "tik tok style" videos and not for actually usefull stuff.
So here I am... posting a coment on how good the video is (and this guy's videos in general) to nudge the algorythm a bit into his favour.
Edit: I have meathooks instead of fingers and I can't type right on a screen... :))
This is the ONLY tutorial on YT directed towards the layman. Every other tutorial I've watched assumed you knew the software already and was, pretty much, just a walkthrough and not necessarily a structured lesson.
This video was concise and definitely aimed at beginners such as myself. You started with an introduction to the physical structure of the PCB and used an elementary circuit example rather than rambling and then designing an entire arduino mega from scratch.
You've set the ground work for me. I found some really interesting schematics for guitar effects pedals that I want to try and create PCBs for, instead of using a little breadboard. I think i am now prepared for slightly intermediate lessons that I've seen.
Thanks!
Thank you. I appreciate that.
In 36 minutes i learnt more than in hours of watching other Videos on designing boards!
Please consider doing more such tutorials as this would be most helpful to lots of people i feel?
Maybe a short series on designing some of the classic circuits from start to finish?
Also a video showing comparing the design of the same circuit but comparing the process in different PCB design software might be handy so we could get a feel for which software might suit each of us best?
Again a top quality video - My Thanks!
Finally someone's shown us how , I'm going to have a go at this.
Paul, this video was exactly what I needed and answered all my questions. Now I can go from pencil schematic to an actual PCB, This will help a lot with using my Bantam PCB mill. thanks
Excellent!
Sound isn’t too bad . I though it was going to be worse.
I’m telling you, you should start a electronic components/engineering 101 series .
Excellent starters guide. With EASYEDA, lots of the concept details are buried in the software documents. This video helped a lot.
This was a good video. I like the robotic mic.
That was the best pcb video I've seen! Better than the actual easyeda docs and tutorials! Thank you! and keep making great videos!
Excellent! I learned a lot from this tutorial and it addresses a number of points of confusion that I had with EasyEDA. Hopefully you will do additional videos that build on this one and go more in depth on additional features of EasyEDA. Thanks again for producing your videos.
Best tutorial I’ve found. Thank you very much, people like you inspire me to learn electronics as a hobby
thank you very much for this. i am learning electrical engineering but i havent learned about making pcbs in class yet. your channel is very helpful for new learners. thanks again :)
Great video. Thx. I used to do 12 layer boards in the ‘80s testing ICs at Signetics. It’s good to get back into itin my retirement.
Exactly what I was looking for to kinda start dipping my feet in designing a pcb for my RFID system
Very nice Paul, I haven't done PC layout since the days of tape and doughnuts on acetate sheets back in the early 70s. As the tech I would fill in when the draftsman was out.
Paul, you are a genius in teaching. Excellent descriptive video. Thank you very much for sharing your valuable knowledge. May God Bless you.
Thank you! This is the video I needed to help me use PCB software. Talking through how to use the items in the software is exactly what I needed.
Glad it helped!
Thank you so much i have been wanting to learn this fir so long now but had not the time to enroll to a college and travel miles to get there for months only to learn this for strictly hobby purposes thank you for putting it into one short video👍👏 👏 love this
Excellent presentation, Paul with your usual crystal clarity. From numpty to novice in just a few minutes. Very grateful.
GREAT !!! thanks for the detailed tutorial for this software... cheers!!
Excellent lesson. The video and audio were great. Thanks, Paul.
I've got EasyPCB but haven't tried it yet, now maybe I can. Great tutorial and video. Thanks!
Have fun!
This tutorial is AMAZING! Thank you so much!
Great video. You explained many things that were causing me to make rule check errors - like putting ‘x’ on unused push button pins and the via for routing. Thank you! 🙏
Glad it was helpful!
One of your best videos yet- thank you.
Just to let you know that thanks to you releasing this video I have designed & ordered my first ever PCB.
Decided to start REALLY simple so it only has 3 components. Looking forward to receiving it , soldering it up & 🤞it works !
Already planning my next PCB. Going for 6 components this time !!!
Have tried tried to design the same board on Ki-Cad but , at least on my system , there seems to be quite some work to get all the required library & footprint files etc installed correctly. Hopefully they can sort this out soon as it looks a very interesting bit of software ....
Again I & my soldering iron thank you
Keep up the fantastic work
TTFN
Awesome, I'm, glad to hear and here if you need any help
Awesome lesson Paul 👍 Thank you for creating such a great educational video 🙏🏻
Wow Paul, what happened to the audio when you went to the computer?
If you swapped the jack and switch position you wouldn't need a via. I only knew that from watching you 🤣. I started playing with EasyEDA for the first time just last night. You taught me heaps. Thank you.
As usual, excellent video and explanation. Thank you my friend!
Lovly tutorial Man... Love it.. hope to see more....
Thanks! That's a great explanation. I always wanted to know.
Well now I do.
😁
Excellent job as always!
Re-subscribing after my rant about adverts the other day. Great stuff ... can’t keep away. More easy
EDA please.
Welcome aboard!
Brilliant Thank You! Really helpful.
Thanks for your tutorial! It was very helpfull for me!
Thank you so much for posting this. Clear, slow enough and easy to understand, I like your style :) EDIT: just one more thing: please add a decent microphone into the mix because the screen sharing thing's audio is really bad unfortunately. That would greatly improve your channel!!
Great video for beginners thanks!
very helpful. thanks so much!
Your video today was very timely. I’m designing a alarm system and I need about 20 small sensor boards.
I used a breadboard to work out my design. Next step will be a custom PCB. They will be placed into a 3D printed holder that designed. I will try your method first. Hope all goes will.
Thank you paul Great video! The audio was not that bad, I kinda like the Robot voice... :-)
I like to etch my own small boards like that. It gives me the sense of a DIY completion to the project. I make all my boards single sideboards and when there is no way to rout the wire I do hardwire vias across the top. Not always a bad thing I use pretty colors for the wire in top... Lol
I may have to give your program a look. I have been using Fritzing for 3 or 4 years, someday it will come out of Beta... HaHaHa
I'm no expert by any means but you did show me the issue I have with switches and rules checks, never figured that out but I have never had boards made before either so I did not worry about it...
Thanks again for the video!
LLAP
Thank you, very nicely done!
Nice basic tutorial. When you have time I'd like to see the process for something a little more complex.
Thanks a lot. Great video. In half an hour I 've learned more designing PCBs than from when I started last year tinkering with Electronics. 18:30 Is this design correct? Shouldn't we be taking the anode of the leds to the output of the switch?
Excellent video , thanks.
Maybe you could do another one explaining "pitch" and how to size components?
Greetings from Ireland :)
Cool, I am going to have a go.
Good video Sir, Please do more of PCB designs to show us the different tricks
Nice video, well done, thanks for sharing it with us :)
Reminds me of OrCAD from college days 30 years ago. Thanks
Hiya great tutorial. One question I have is the components on the top layer. Are they all to be sourced yourself or can they be included on the board? I am concerned about small components and where to order them and the soldering concerns. Thanks
Nice! Very helpful video.
Paul you reminded me that I have a board in EasyEDA that I'm working on but didn't finish, guess I should do that! Sounds like you went underwater for the EasyEDA portion lol.
It sounded fine until I uploaded it, don't know what happened after that.
@@learnelectronics it made it interesting!
Great explanation. What's a bit annoying about EasyEDA is that the component selection is super US-specific - in europe we can't easily get 2nxxx transistors, for example, but we have our own BC xxx.
nice... can the Vishay IL300 or the Broadcom HCNR200 opto-isolator be simulated in the EasyEda workbench? 🤔thanks, great video 🥳
Back in the day, the whole board was screen printed. From etching the pattern then solder mask and last the legend. Those 2 and 3 once boards were real pains to print solder mask on because the copper was so high that you would skip ink on one side of the traces. This was bad because those boards needed to handle high amps . You would also get blurring. This is when you have ink bleeding onto your solder pads. Photo development made the process a lot easier with less defects.
Great expiation on this topic.
A great video as usual
thank you very much for this
Helpful video
Thank you paul
What tool would you use if you wanted to be able to solder a input voltage to the board instead of a barrel connector?
I have old PCbs I need to rework, can we import Gerber files into easyEDA?
Thank You
This was a good video.
it was a super good video.
but you made two 90 degree angles but it is recommended that you make a maximum of 45 degree angles.
Hi Paul for through hole components don't you want the tracks on the opposite side to the components, unless the holes are plated through
I think the ground plane and copper pours are the things beginners get confused about. Especially since you mentioned he asked about layers. They watch videos and see them mentioned everywhere and nobody explains when they are needed and when you don't. These days people have access to much more advanced things than back in the day so I think that everyone needs to know this or they will quickly have a problem when they try to use an ESP32 for instance which only needs 7 external parts but because of the BLE and Wifi needs more care with keep out zones etc.
super gut erklärt!
Hey Paul nice demo with a simple example. How would you compare EasyEDA to Kicad? Currently I use Kicad but considering trying out EasyEDA since it's free and actually looks "easier" at first glance. Kicad has a few quirks. Also have you tried any home based fabrication methods such as toner transfer? I've seen two methods - one is the heat transfer and the other uses acetone transfer (no heat) method which I think is cool but have not tried it, OTHO, home fabrication involves more work and you have to drill your own holes - no plated thru vias too - so although the costs are lower in home fabrication, it's a lot more trouble I think.
They are all about the same. I like Easyeda for the components. you have to add a lot of components manually for Kicad.
how do you get the parts to snap to the grid????
If i could give it 9 stars i would
Excellent Video Friend. If you could tell more about Crossing Tracks(Circuit). Actually If two tracks cross what would you do. Was it a Jumper connection in the Video. Anyway This was an excellent video. Thanks a lot
You use a via to bring your track from top to bottom or vice versa
@@learnelectronics I am new I did not get you. Sorry Friend.
i LOVE
Hey Paul, I am hoping to get into the raspberry pi game in the next few months and I need a little help. I have know idea where to start there are so many different pi boards out there and the costs are all over the place. What raspberry pi board would you recommend for someone just starting to use one?
Very cool and informative video today, thanks for all you do man.
Hi Mike, The 3B will handle just about anything you need.
Thanks man now I just need to save some pennies up.
I'm completely confused when I open the dropdown menu for various components. Is there a guide anywhere as to what each abbreviation means or some resource to help me decide which one to choose?
No not really. This is where modern tech fails. In my day we had shelves full of bound product guides from manufacturers like Ti, and Silicon Labs. If you wanted a dip8 opamp from Ti you went to their book and looked it up.
Everything is in a giant pile now that you have to root through. The best info I can give you is to go to Digikey or mouser and find your part there, then copy the manufacturer's part number and paste it into easyeda
@@learnelectronics I agree about missing books and a physical library. Since writing this comment, I've learned that EasyEDA has the LCSC component library option, which is laid out very much like Mouser, and you choose the component you want and add straight to your schematic. That's a real game-changer for me in regard to using EasyEDA with confidence. Cheers
been trying to make something and having trouble finding the most common barrel jack 5.5x2.1 driving me crazy
Would like to use EasyEDA to then make my OWN board, not to simply send out to JLCPCB to manufacture. How about completing the tutorial to print out the layers, silkscreen and solder mask to then use the various methods for making ones own boards.
You never talked about defining trace widths and via sizes.
👍👍👍
Just found this video Thank God. Can you help if I send a tip? Dennis
email me arduino0169@gmail.com
I would help viewers follow you better if you increase the size of your cursor for these videos,. With a small cursor as you have on here its very hard to follow were the cursor has has moved to.
The trace width is too narrow, but maybe that's for another video.
At 3:37, a bottle appears in the left hand upper corner, what magic is this?
Time warpage
@@learnelectronics
And you didn't even WARP around the sun!
WITH SPECS OF FUNCTION, are there guys who can assemble the PCB( or offer PCB and components i will assemble myself)its for a project
Didn’t need the via.
The point was to SHOW how to MAKE the VIA
Audio is terrible, good video though...
Paul I'm a retired paramedic please DON'T do the high lighted letters as if I'm stupid. I DO LOVE your Channel and please, please keep them coming. I use EASY EDA all the time and have loads of PCBs. Please accept people showing some things of experience, NOT, NOT a criticism
I'm sorry, but winging the commentary has meant you have poorly described the PCB make up and left some useful information out for the beginners. I.E. Ounces per foot square denotes how thick the copper is. Just saying it's available in different weight is meaningless to those learning. Good effort, but lets those learning down a bit. Your audio started fine, but as soon as you jumped to the CAD screen, it sounded like you were being strangled....... Did you review your video before posting? I was listening with headphones and the screeching change in audio was very unpleasant. Sorry.
The microphone is a mess. Really annoying.