5 Things I Do Before Starting a New Project

ฝัง
- เผยแพร่เมื่อ 19 ม.ค. 2023
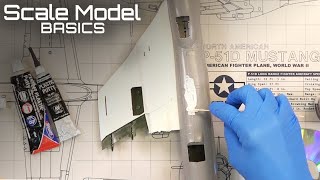
- Doug shares what he does when starting a new scale model project to ensure he stays focused, energized, and not lose time or car parts! Hear why he's chosen this Jeep as his next build.
Become a Patron of Model Car Muse. As a thanks for supporting the channel you'll see weekly posts on our Patreon page describing details of the build in progress.
Visit our Patreon at: / modelcarmuse for weekly posts from Doug's Bench.
If you choose to purchase from the following affiliate link we may receive a small commission at no extra cost to you. As an Amazon Associate I earn from qualifying purchases.
Three places to find organizer trays: (office) amzn.to/3XQGKpL , (makeup) amzn.to/3Eyn4jp , and (jewelry) amzn.to/3ZfC1ih
'Subscribe' clip by Imotivation, from Pixabay, CC0 1.0
Music: Happy Mistake - RKVC, TH-cam Audio Library, Standard
© 2023 by Model Car Muse. All rights reserved. - ยานยนต์และพาหนะ


Several people have asked where I got the tray seen in this video. We've left three Amazon affiliate links in the description to search results of office, makeup, and jewelry organizers, to help you find just what will work for you. Someone gave mine to me a long time ago, I don't know the origin and have not been able to find another one just like it. I like that the inner corners are rounded; make it easier to pick up small parts. Office drawer organizers often have rounded corners. Makeup organizers are often clear acrylic. Jewelry trays are shallow, with many compartments, but are often lined with felt; more protective but harder to clean.
As adults we can appreciate what we couldn't do as kids... your set up is really proper! Great content Mr Model Maker!!
The time and patience we earn as adults is something to be very grateful for.
I've remembered Doug very well from the pages of Scale Auto Magazine. Absolutely Amazing Builder.
As someone who doesn't have a permanent place to work, it's always interesting to see how people organise their workbenches. You're definitely right that having a commitment to the build and doing research is super important. Personally I love to visit car museums or shows and take photos and videos. Thanks for the video!
You are the goat
Doug, I just found this out today. Instead of buying bare metal sheets that appear to have a shelf life, I saw how some buy an alternative to this product. a roll of foil tape used for furnace duct work fixing leaky duct seams. It come at about 1.88" wide by many yards long for about $9.00 a roll. Looks like the same stuff.
I really like how you are set up and work! No wonder you build AWESOME models!
You have established a great routine for building. I agree with you about the importance of research. Thanks for sharing.
All really good practices. Its kinda funny, our work spaces are set up pretty much the same. I really cant wait to follow along with this build!!
I worked at a company that built drafting tables for the Jeep corp back in the seventies! When we delivered these tables the shop manager took us on a tour of the factory ( after that I knew why jeeps would rust out so fast). They would go outside in bare metal at least seven times throughout the assembly process! The new factory isn’t like that now! I had a few friends that worked there! Every morning I would go outside my house ( 2 blocks away) and could smell the fresh paint ! That was 40 years ago that I moved from Toileto Ohio! No regrets! 😝🫡😎✌️🇺🇸
Ps good video sir Doug !🫡🇺🇸
I always love to hear a bit of Toledo Jeep history!
this is excellent - Nerd 101
GREAT ADVICE DOUG !!!!
Excellent ideas......like your approach!
I always put all decals in airtight zip lock bags before I put them in the stash
That's a good idea!
I would have never been able to build a model without this information
I don't think I'll ever be that organized! Looking forward to seeing the finished build...
Imagine the Board of Directors at JEEP being this organised about their own products.
Well Mr I have the green grid and I like it 😊
Thanks for the tips. Have a great weekend.
I can't wait to see your build, it's going to be amazing.
Great planning tips. I love organized model making.
Love watching your vids, well put together, informative and enjoyable. Thanks for keeping the hobby alive.
Awesome video Doug. These are the types of the videos I love. I love to see how builders build and their process. Thanks for sharing Doug.
Lots of great suggestions, thank you.
That’s going to look great! Can’t wait to see it finished, very informative video, Thanks!
Looking forward to how your Jeep comes out i know this will bring back a lot of memories for you to enjoy again. thanks for the video 😁
Thanks for sharing
Thank you for sharing these tips, really helpful!
Great advice. Thanks for sharing! I really like your bench.
Just discovered you...I'm an old guy that has recently taken up model cars again.(stopped in mid 70's). As an old guy,I can put into these what I didn't have the patience or ability to do as a kid. Everything you touched on in this video made sense and is highly inspirational information. You've really gotten me excited... Thanks so much...For the education and for jogging many dear memories. I'll be doing Roger Penske's L-88 but not yet...GREAT VIDEO!!!
Welcome, glad you enjoyed it!
As one "old guy to another", I'm , just getting restart. I'll celebrating my 81 first in Oct. The magnifies are on order (of course) haha. One of the things that I just don't get is the lowering of autos. Sometimes just inches off the ground. It's not practical and does nothing for the lines of the original design. Still working on getting storage stuff. Small containers etc. The air supply is still being researched. Got a good air brush ( Iwata Eclipse), now getting the correct air supply. I like to show what "old cars" were like and how they ran to young people. Girls are getting into the bay working as a mechanic. Good for them, it's not just a guy thing. Quite frankly, a cute young lady with a little dirt on her face is sexy (to me). haha
Great topic! I share many of your building processes.
Thank you so much for sharing your valuable advice on scalemodeling, it's greatly appreciated. I particularly liked your idea of keeping parts in a tray, it definitely makes the building process more organized and efficient! I will definitely put your all advices into practice! :)
I really enjoy your videos....I cant wait to see this jeep when you are done with it
Getting all the reference material for your builds is part of the fun of the hobby. It's also a great motivation to finish a project as opossed to putting it to the side because of the lack or better yet, difficulty of acquiring what is needed to finish off a project. Thanks for the motivation always my friend....
Thanks for sharing your process for model building, Doug 👍 I generally try to follow most of the steps you have laid out, but I learned even more tips today! Best of luck with the Willys Jeep 👊🏻👊🏻 Thanks for sharing your knowledge 🙏
Great Share
Awesome tips Doug!
Thank you!
Great advice by a seasoned model builder.
Thank you for doing this project, I have always loved Jeeps. I'm going to try and follow along with this project
Great tips Dave. Thanks for sharing. 😎🇨🇦
Great vid Doug.... 👍🙂
Great tips Doug! I have a dozen or more binders full of magazine articles that i use for research material. I also keep the parts of in progress builds in small storage boxes.
Nice project.
I cant wait to the final video.👍
So I understand the promotional effect of showing the in progress to patron's. For your main channel having a time lapse after the fact is a great channel booster. You still maintain the benefits for the patrons since you do it all after the fact and the patrons have seen detailed in progress information. The time lapse gets voiced over as it plays and teases those inclined to look deeper into being a patron and gives a deeper look for those who follow the main channel at the same time.
I always enjoy seeing the "how" different builders apply to their projects - whether its the desk and workspace(s) or the many facets of the projects themselves. Thanks for sharing
Great Video!!!! Thanks for sharing
All great ideas! I do some research with pics and colors. Never did a binder like yours. Impressive! I recently built a 53 Studebacker for a patient. It was a car he had in high school. So much fun! I had to modify the chassis because they 3-1 build was really meant for a drag car. So I used parts off an old truck model. Worked out well.
Thanks again for the ideas.
Great tips !
Cool as always.
Great video, your workbeng is very impressive
Great video and great setup!
Awesome video!
Nice video. I love that tip on separate project trays. Now if I could only convince one of my kids that I still love them even though their bedroom has been converted into my dream hobby room. Maybe this video will convince them. Maybe it might be easier to convince them if I waited until they graduate from high school…
Lol yea I always jump right in to a build keep them coming
A very organized method. Thanks for showing us how you get set up for a build. That black mat looks like a great building surface. Where can someone obtain this material?
Some great ideas for setting up a New Project enjoyed the video 😁
I love building models. I took a break for 25 years as I became an auto mechanic. Now it drives me crazy to see a model that is not to exacting specifications. Thanks for the ideas.
I love your work spaces! Thank you for sharing your planning process. I am only on my 3rd model (Revell 1956 T-Bird) and am finding that to be a critical component in the hobby. I look forward to watching your other Jeep videos to see how it comes out.
great video
Them I wasn’t that lost on that part 😂 😂😂, I do the same thing but I haven’t get my research organized like that, that’s something I can try to do, I’m always lost when I’m trying to get my photos in one place, thanks for sharing
Great video. Interesting I also have two work areas on my bench. I call them the "clean" area and the "dirty" area.
The first thing I must do is find a room that size I can solely use for modeling. Atm I work on my home office desk and spray paint in a small room in the basement, next to the gas heater of the apartment building. Research and almost memorizing the plan helps me a lot. I like your very orderly and structural planning. You have great love for detail.
Great video my brother has my dad's all original 47 cj2a
Great vid
Wow your amazing I hope you do alot of build videos with the jeep build 🚙
I like the black mat....I'll be getting one! I'm a little 'ocd' so my work area has to be very organized & clean. I also go through the kit and organize all the parts I want to use into 'build groups'...i,e,: engine, interior, etc. I always do internet research before any of my builds and I write a detailed 'numbered punch list' for what customizing I want to do in the build. I take the instructions and write in the #'d punch list item in the steps that they apply to.
Great tips. I like going a totally different direction. I start with a loose idea of what I want it to look like but I flow through the project without a specific course. Every part of the model gets plenty of attention and at the end I feel satisfied with the results.
Thank works, too!
Doug, an update. Finished the air compressor/ tank addition project. Works real good. The tank is ~ 3 ltrs, not quite a gallon (3.75 ltrs). The reserve tank is just great for keeping the cooler. If you'd like, I'll sent pix.
Some say he's very well organised. All we know is, that we call him "Method Man"!
Great video as always I just love them. 🙂Thomas over at The Model Hobbyist
Awesome video Doug!! I do the same thing. I call mine "Project Boxes". (just don't ask how many of these boxes I have! LOL)
Thanks, Mark!
Haven't done this since I was a kid. I'd love to find out where to get a bunch of extra parts of miscellaneous cars, trucks, or whatever is in the pile. Thank you for this idea to be creative and finding something to focus on. Love the content. I have no social media but would love info on more. Thanks
EBay might be a good resource for parts.
ACE!
Bob
England
It's very hard not to get frustrated when things aren't working out the way I expect when I build. I'm working on it, but it's an ongoing challenge.
When I get frustrated I leave the bench for a while so I can come back refreshed. Sometimes it’s a sign that I should find a different way of accomplishing the task and that can lead to new discoveries.
amen
Great advice 👍
I agree with the clean slate idea. I do that too.
Colour influences, are big.
I forget cars based on their colours.
The car can be right infront of me and another car grabs my attention because of it's colour.
How do you get out of being an adapter to everything.
Everyone's buying random collections and I find random feels terrible after 10 years.
Might want to dust your shelves as part of your prep 😆
Subbed 🤙🏽
Thanks and welcome!
Thank you For Showing your Methods for Hyper Detailed Builds and Exact Copies it's Great. I approach mist of My Builds Differently which is Neither Good nor Bad. I start by Unboxing kit Body inspection and Sharpie marking for mold lines, Ejector pin Marks, and body flaws like low Spots & imperfections. Next is Engine planning looking Carefully at parts, Anything I'm not happy With I make written note of on lined paper so I Correct these as I go often Deleting poor Detail & Fabricating replacement detail or improving detail by modifying Existing part planning Tires n Wheels Comes next often Rears require Widening if both Rims & Tires as well a Time Consumptive Task but highly Rewarding when completed. Chassis Building Next and So on
Thanks for sharing your approach!
Hi MODELS CAR MUSE, good nigth greetings and congrautlations of share your video,,, Tips for start a new. Proyect,,, thanks and have a good time,,, your friend Oscar de Playa del Carmen Q R.
OK Doug, got the compressor thing complete, got the spray booth thing done, now ready to finally ready to build my first car. I say car but actually the Jeep truck. Any hints? How 'bout tips on details on things like spark plug wires, vacuum pipes and fuel line for the engine. I think I've got all the colors I need to start. Now, let's get started!
Sounds like you will be ready for paint. We will be doing some content on wires and stuff at some point. Good luck on the build! Which Jeep is it?
@@ModelCarMuse I got the Tamiya Jeep MB kit. The real challenge is that the instruction sheets are in Japanese. I just use the pictures to put it together.
1st time viewer here I am amazed so well done! Do you take orders for builds? I have two requests please if possible!! Best wishes
I have that italeri Jeep. Almost made me not want to build anything ever again.
Sometimes I find the research is more fun than the build.
Great video thank you for sharing! Have you had any issues laying your rattle cans sideways? I’ve heard from others they can loose pressure quicker that way. It’s certainly more convenient otherwise.
I've been storing them this way for about the past six years and have not experienced any loss of pressure.
The very early CJ`s had a steering column shifter ,# on a Tree
Yes, they did! Maybe one day I'll do an early column-shift version.
Great vid and great content. I searched all the comments and you didn't put anything in the description as to where we can get the black ice skating locker room flooring mat. Can you Please Post the info where we can get it?
I bought the pieces have over 30 years ago at a store on Canal Street in Manhattan. It was a remnant. We looked for similar material on Amazon to post a link, but didn't find quite the same stuff. I think one would have to check with a commercial flooring company, rather than places like Home Depot. Let us know if you find some!
Where do u get all these decals?? I never seen this before!!
Locate shelf space for display?
I’m getting ready to start a build on a Mark Martin #6 Folgers car. My question is would you happen to know where you can get Matching air brush body paint? The use to be a website that made nascar matching car paint colors. But I can’t find it anywhere. Thanks, Jeff
We checked with our NASCAR model expert, Billy Kingsley. He suggests ScaleFinishes.com.
DrGusGreenfield approved!
What kit is that one at the start of the video, #2 Valvoline Indycar.?
That's from the Monogram Valvoline Indy kit. The kit was the speedway version but I scratch-built spoilers to make it into a road course version.
@@ModelCarMuse it looks super cool in your display shelf, need to find one of those kits. Thanks for letting me know.
Do you primer before you paint?
Always for the body. Optional for other parts where I don't want to build up too many layers of paint that will obscure detail.
Where did you buy that tray to hold your parts?:
A few people have asked me that. It was passed to me by someone else and we haven't been able to find another one exactly like it. However, we've added a pinned comment and some links in the description above that you may find helpful in finding something similar. Thanks for asking!
👍
How do you dust your models without breaking off any parts.
I'm glad you asked! The answer is in our latest video "Removing Dust From Your Scale Models" th-cam.com/video/cDM3OcoRyps/w-d-xo.html
Yeah those jeeps would go anywhere. I couldnt get it stuck. lol
I’m curious as to why you would file away unused parts from the previous project instead of adding them to the spares box / boxes. Seems like that’s a needless memory test of where they’re located and would take up a lot of space too.
That build was a special case, a commissioned build. If it ever needs to be duplicated or repaired I have the parts held aside. I also have spares boxes!
@@ModelCarMuse so that’s not something you’d do every time you start a new build, just for that particular Corvette?
Makes sense to me. Sometimes I’ll build a kit a second time using lessons learned from the first. Also, when kit bashing, the parts are easier to find than having them all be in one giant box where all those delicate greeblies are grinding against each other.
@@alancabrera7116 that system simply wouldn’t work for me. I have specific parts boxes for wheels, tyres, carbs etc. Then if I have two or more of any part I’ll individually bag them. I’d find trying to remember which specific car might have had which sized part leftover from it virtually impossible. Plus I like to be able to compare parts side by side so having several wheel choices all different widths right in front of me is far easier than searching through numerous folders. I build a lot of custom vehicles so requiring factory stock parts is rarely an issue.
Scale modeling is expensive and needs lots of space.
Good video, great workbench! Lots of good tips but, do you have fun building?
Yes, I have fun, that's why I do it. Fun is the number one reason!
Hello Mr.Whyte. I'm a big fan of your work and love your personality I hope you see this comment/question. I am starting on a AMT 1958 Edsel Pacer kit.
I bought it at a Car Museum/Car Model show in South Philly.
Simeone Car museum? Very nice place. Anyway, I decided to go the extra mile on this kit. So I mail-ordered a Photo-etched metal
kit made for 58 Edsels . My question is this. The word EDSEL on the Photo etched kit has individual letters. You need to place one letter at a time which is extremely hard .
I had a idea I want to run by you to see if you think its a good idea.
My idea is to take clear cello-tape and score a line across with a very thin marker. Then turn the tape sticky side up and fix it so it doesn't move. Then take one letter at time and line it up with the marked line and place one letter at a time.
Next. With a toothpick, apply a small amount of thin CA glue,and lay it over the area where the letters are suppose to be,carefully burnish in ONLY the letters , let the glue sit for awhile, then carefully pull the tape up, leaving the letters glued to the body . Doug, is this a good idea ? Does it sound like a method you would try ? Thank you for your time
Hi Howard, I can see the logic of the method you propose, and that is the way it's done on real cars, but those letters have a solid pre-applied glue on them (like an address label). The risk here is that any liquid glue will seep out from behind the letter onto the tape and get messy. This is what I've done successfully in the past: 1) I use a water soluble adhesive that dries clear (if you've painted the car with enamel or lacquer, it's a strong finish that would not be affected by a water-based adhesive). I do not recommend using CA because it cannot be repositioned and when dry may leave a fog on the surface nearby.
2) I put a tiny dot of the glue on the car then position the letter over it, tapping it down with the tip of a round toothpick. I use a damp paint brush to mop up any seepage. You have some time to nudge the letters around before they dry.
If you come back the next day and find one letter is slightly off, you can take a damp Q-tip, apply some water to the area, and after a few minutes you may be able to get the letter loose to reposition it.
For a guide to be sure the finished name is level and the letters properly spaced, you can place a strip of colored tape or even the sticky part of a Post-It note, as a line, on the car, just under where the letters will go, with vertical marks on the tape for the placement of each letter. Then glue the letters just above the tape, then remove the tape. Good luck, have fun! I hope this helps.
For many years - I built only 1/24 and 1/25 scale kits. A few years ago, I started building the 1/35 scale vehicles ( cars and trucks - not tanks ). I like the intricate detail
of the 1/35 scale kits and the (mostly civilian) figures to go with them. I am retired an will sometimes spend several months on assembly. I have seen other TH-cam
channels where the builder removes all the parts from the sprues before assembly....I don't like this - it is too easy to lose a random small part on the floor or bounce off
into oblivion. I have also found - only open and start ONE project at a time.....way more likely it will be completed.
🤟🤠👍