Breadboard Circuits Tutorial - 555 Police Lights

ฝัง
- เผยแพร่เมื่อ 3 มิ.ย. 2021
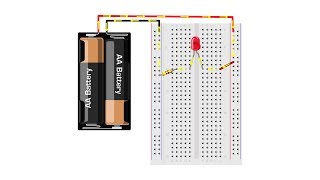
- Use a new type of circuit part, and integrated chip (IC) called the 555 timer as we wire up alternating red and blue lights in this breadboard circuit building tutorial.
Take our entire Breadboard Circuits Class as we build simple circuits, begin to use chips like the 555 timer, and even program in Arduino!
Support us at Patreon.com/RosieResearch


![[Full Episode] Hell's Kitchen Thailand EP.12 | 28 เม.ย. 67](http://i.ytimg.com/vi/xCjbu5t25Pw/mqdefault.jpg)


Thanks for explaining the 555 timer
Excellent tutorial! I’m glad I’m not the only person who doesn’t know why pin 6 and pin 2 are connected. It just seems like a part of life 😀
this is to trigger the flashing effect that alternate between the led polarities, thats why blue pos(+ or anode) and blue neg (- or cathode) is inverted to the red + and - .
Beautiful clear video. You are a gifted teacher. Thank you.
Excellent share. thank you for this I shall prepare it with my 7 year old daughter as her first tuturial to Breadboard
Thanks so much. Very helpful and clear
The rst(reset) pin of the 555 timer is active low, meaning when you connect the rst(pin 4) to ground(-supply voltage) the 555 is locked into the reset mode. Generally one connects pin 4 to +supply voltage(pin 8) to make certain it won't drift low with electronic noise present in the environment. Also the datasheet recommends a small value capacitor, 0.1 uF, or 100 nF, between pin 5 and ground if you won't require the CTRL function, for the same reason.
Neither is required in most instances for a standard 555 IC, but becomes more important for the low power CD7555 CMOS IC.
Otherwise well done.
Many thanks
Thank you for this easy to follow 'monkey see, monkey do' tutorial, it's my first time using a 555 timer and literally brightened my day when it all worked, I appreciate you sharing your knowledge :)
Nice video, thanks for sharing it with us, well done :)
I want to do a traffic light situation but with like several rows of it being led lights green, then yellow then red. How would I go about this and I also need to use timed relays.
I tried it
Most versions of this circuit connect the capacitor to positive supply not pin 3. And you don't have the capacitor connected through a resistor to pin 7 to discharge.
Please include a picture of the circuit diagram in the beginning.
You connected to pin 7 instead of pin 6 threshold in one of the steps
Capacitor negative always in whait line marks
your awsome
Priddy gudd
If i want to light two blue and two red leds how can i connect them?
You can simple connect 2 more led parallel to the other ones
Your videos are great and the little animations thing you added was a very big move but I think you should also le us see the schematic representation of the connections you are doing so we can understand clearly. Some of us are struggling with Basic Electronic course. Thank you😊
agree , I was hoping the schematic woul shoow up, would really hel out alot
Amazing my friend ♥♥♥♥♥
Nice to meet you ♥♥♥♥♥
Best wishes for you ♥♥♥♥♥
Keep it up .............. ♥♥♥♥♥
what is the value of capacitor
She stated it in the video, pay attention.!
I did this, only the blue light is on(not flashing) red one is off, even tho I copied the whole layout
Me too
Try to put a 300ohm resistor, + side of the battery before connect it to the main circuit
Maybe should have clarified when your connecting to board pins or chip pins. Kinda got confusing but over all good vid
This is fantastic. The only missing detail is to note that the Red and Blue LEDs operate on different voltages. I was using two reds and got wonky results.
Red operates on about 2-3 volts, blue is about 5 volts.
100uf capacitor was a really slow blink, but 10uf was an easy swap.
resistor and capacitor values?
She stated them in the video, pay attention!
1k( which include red line) other one is 10k, and cap value all on you, 100uF works well. Cap valuse is just about the led lighting tine
What size of the resisor were used?
When in doubt use 220
She mentioned 1k at the start.
She stated it in the video, pay attention.!
What is the value of resistor ??
the led resistor is 500 green=5 black=0 so 50 * 10^4 /1000=500
She stated it in the video, pay attention.!
Circuit diagram please 🥺
𝓦𝓱𝓪𝓽 𝓲𝓼 𝓽𝓱𝓮 𝓿à𝓵𝓾𝓮 𝓻𝓮𝓼𝓲𝓼𝓽𝓸𝓻
Haha, it didn't work as it should have 😮
You're teaching to build a circuit on a live board!!. You should only connect the power when the circuit is built. Terrible teaching
terrible? really?
Perfectly fine for detailing this video and showing how to connect the power rails. She’s using a whopping 9V battery. Be real.
Excellent tutorial! I’m glad I’m not the only person who doesn’t know why pin 6 and pin 2 are connected. It just seems like a part of life 😀