Wrap Your Design on a T-Shirt! Displacement Map Tutorial for Affinity Photo

ฝัง
- เผยแพร่เมื่อ 1 มิ.ย. 2024
- 🟢 Download my Free T-Shirt Mockup Bundle here:
👉 trenttech.gumroad.com/l/tshir...
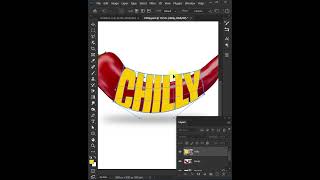
Ever want your design to have a more realistic texture on a surface? Displacement Maps are the perfect tool. In this video, you’ll get a deep understanding of how Displacement Maps work and also how to use them in common scenarios like T-Shirt mockups.
CONTENTS
00:00 Intro
01:52 How They Work
04:24 Tips for Creating Displacement Maps - วิทยาศาสตร์และเทคโนโลยี


I have been watching Affinity tutorials for years now and I'm pretty good at photo and publisher. Your videos are simply the best. Why? Because you provide a theory of operation as well as the recipe. Not only do I learn from your videos - but the half life in my brain hardly diminishes, because I think back about the theory. I have asked other tutorial contributors to add theory backgrounds, some do. You are the reference for this excellent means of teaching, in short, simple to understand videos. Thank you. I am in the midst of watching your designer course.
Thanks @pedropuckerstein4670 !
In agreeance with every word written @pedropuckerstein4670, the why and reasoning is always behind he actions to push the memory muscles. Natural skill I believe. Btw, brilliant video this software has surprises at every turn for us beginners.
In addition to temporarily blurring the mockup image with the GAUSSIAN BLUR live filter, I've been also temporarily desaturating the mockup with the HSL adjustment before creating the displacement map. That way the map is based on BW/gray scale as you discussed in your video.
Trent, again an excellent video. Your explanation of using displacement maps is the most thorough and short (i.e. concise) I've seen so far on TH-cam. 👍👍
Great point, @lowellaguno! I actually forgot to mention using B&W in this video. It didn't matter too much because the shirt is white/gray, but if it was a colored object, using the B&W filter first would be useful.
Bro, I absolutely love your videos, thanks for making them
No problem, @LarryBuysNotes!
Fantastic!!!
You are the best!!!!
Thank you ! 🙏🙏🙏
Great tutorial. I must try this out.
Yes, give it a try and let me know how it works out :)
muito interressante!!
Your video is really interesting
Thanks mtm7031!
This is one tutorial I've been waiting for. I'm so glad it happens to be from you Trent, thanks so much.
Glad you like it!
Very informative video. ❤
great video, thanks! i had previously only used mesh warp to manually tweak this kind of stuff.
Thanks! Yup, there are several different ways to do it. Something I'll use mesh warp, too, depending on the surface.
Another wow for you, Trent. Who said that art and science were at opposite ends on the continuum?
Thanks, CremeCut!
Another great video, Trent. Thank you.
So, here’s a question: if we can choose between destructive Filters and Live Filters, why would one want to use them at all?
I don’t quite understand why you used the Gaussian blur then turn it off.
Thanks again!
Hi Doug, thanks for watching!
I believe the destructive Filters existed before the Live Filters, so Affinity left them in there. Also, some of the destructive Filters aren't yet supported in Live Filters. And finally, Live Filters can be more CPU intensive because they are calculating things in real time (this could be very slow if you have a big complicated document). If you are 100% sure that you want a Filter effect to be permanent, it could make sense to use a destructive Filter. You can also create a backup copy of a Layer before applying a destructive filter.
I used the Gaussian Blur filter when creating the Displacement Map. It can help make sharp edges flow a little more smoothly. I find that when I don't use the Blur filter and don't set the bit depth to 16 bits, using the Displacement Map can make edges seem frayed. I recommend trying some example images and you'll see what I mean.
Hope this helps!
@@TechnicallyTrent Thanks for taking the time to share your experience and knowledge.
Hi Trent, I have another question for you regarding importing a displacement map. Have you tried this? I wonder how the comparative size matters?? Like, if the base image is one size and the import is totally another, you know? I’ll have to look into this. I got curious about this as it sparked the thought of importing any file (which I’ve never done). Now, I have added many images, to create comps, etc., but never for this type of purpose. Yes, I must investigate.
Damn, I had ANOTHER thought. You could make a mask of the shirt, use Threshold, blur it, export it, and import as the displacement map, right?
Hi @dougdina!
I did a few tests importing a displacement map of different sizes and it is kind of tricky to know what is lining up with what. I think if I was going to import a displacement map, I'd try to make sure it matched my original image size exactly. If possible, I like to stick with "Load from Layer Below". But I understand that may not be possible sometimes.
Yes, you could definitely try other effects on the displacement map like masking / thresholding. But as long as the graphic you are trying to distort is small (like a logo), you don't really have to worry about masking out the shirt. The parts of your displacement map that extend beyond the logo will have no effect. Hope this helps!
Thank you for the tutorial but what if .psd smart object file has a lot of layers with shadows, textures, and highlights?
Hi @jharper74,
I've used PSD files in Affinity Photo a little bit, but I don't have super deep experience. Perhaps I will make a video on this topic. Sometimes, with PSD files, you can bring them into Affinity and then set the shadow layers to "Multiply" blend mode and it will still look good. But sometimes it will not. I'll add this to my topic list!
Any black coloured T-shirts for downloading Trent ?
Hi @jimforrest5011, I don't have any yet, but I'll add it to my TODO list :) If I do another video about working with mockups, I'll base it around black Tshirts.