TinkerCAD Tutorials - Alignment Pegs - Save support and join models after printing

ฝัง
- เผยแพร่เมื่อ 19 ธ.ค. 2021
- In this video, I show you how you can use the free online CAD program 'TinkerCAD' to separate your 3D model and add alignment pegs, ready for re-assembly after printing.
Let me know if you have any questions and I'll provide additional guidance.
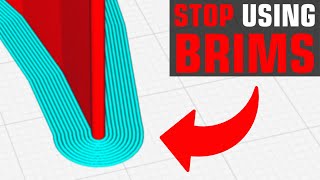
Hopefully, you'll enjoy this video and put the method into practice, so you can benefit from some support-free printing in the future.
Smash that like button if you enjoyed the video, then it can help others too. If this is the sort of content you like, then remember to subscribe!
If you enjoyed this video and want to support me here's the link to buy me a coffee: www.buymeacoffee.com/callumcoles or paypal.me/callumcoles
Equally, if you are in the UK and want to support British manufacturing, why not try 3DTomorrow Filament. We're working on new colours and product lines all the time: 3dtomorrow.com
#tinkercad #makeprintable #tutorial - แนวปฏิบัติและการใช้ชีวิต


![[TH]FFWS SEA Spring 2024 Knockout Stage - Day 17](http://i.ytimg.com/vi/f6Zd-OGk278/mqdefault.jpg)

Callus, this is a great video. Thanks for the easy to understand explanation!
Thanks Courtney! Hope you and the family have a great Christmas🎄
8:40 Instead of copying, pasting, and making sure they're aligned, just click Duplicate. The duplicate will automatically be in the same place as the original.
Good shout :)
Thanks :) very helpful tutorial.
Great video!
Very good explained, thanks a lot!
Glad it was helpful! Cheers for the comment :)
Awesome video!
Smalle tip! You can Hide the blocks with the Lightbulb icon.
And then reveal it again with big light button next to group.
Then you don't need to move do much.
Thank you, that’s a great tip will add to the description! I don’t believe that icon was there when I first started using TinkerCAD years ago, did it come in an update?
@@CallumColes Heey!
It has been there for many years, but I also only discovered it about 2 years ago.
Changed my workflow quite a bit and made some complex Parts easier to achieve.
@@jamiegoegebeur2239 yes can imagine, it’s a great feature, very helpful in other software packages too!
Gold
Cheers :D
Trying to watch while someone moves quickly back and forth is truly a torment.
Just split it down the middle & lay both halves flat. Then after printing is done you can super glue them back together.
Yeah but this way is easier so you can align it properly