PCB Design For Beginners: Ugly Tracks Are Noisy

ฝัง
- เผยแพร่เมื่อ 5 ก.พ. 2025
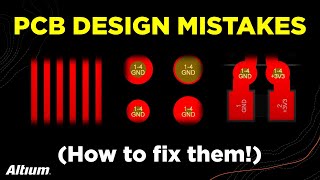
- I laid out dozens and dozens of PCBs (printed circuit boards) and could never figure out why my tracks always looked crappy. It turns out that laying out "pretty" PCB tracks is just as much function as it is form. It's all a function of capacitive coupling. The short version goes likes this. If you want noise to jump from one track to another, put the tracks as close as possible. Obviously, almost no one wants that. So, we spread them out. When we spread them out equally and minimize the amount of space in which traces come in close contact, we end up with pretty tracks and a low-noise layout.
-- Podcast Subscribe Options --
@ iTunes podcasts.apple...
@ Stitcher www.stitcher.c...
@ Spotify open.spotify.c...
@ ElectronInjection.com www.electronin...
-- Follow Me --
Patreon / brandondrury
My Personal Website www.brandondru...
Instagram / brandotronics
Twitter / brandon_drury
Facebook / brandon.drury.967
Tindie www.tindie.com...
Github github.com/bra...
- Electronics Tools And Kits at My Company --
Electron Injection www.electronin...


One thought. If your design has signals much slower than 30MHz and has four layers - your actual coupling will be miniscule. It may create some crosstalk but not as strong to make digital glitch. For very sensitive analog signals passive or active guarding (depending on your source internal resistance is a must). And then you will face signals so weak, that surface resistance of FR4 will make them offset by tens of milivolts. This is when the fun starts. I've been working on contactless ECG electrodes. Exotic PCB materials, low bias opamps, double guarding. But their noise level was lower, than classic silver chloride ones.
Don't forget high rise/fall time. 30MHz square wave with reasonable sharp rise/fall contains frequencies (harmonies) of x5 of that. Super-sharp will have higher harmonies. Not all squarewaves are created equal (Or was that what you referred to originally?)
Cool! I also worked on contactless EEG electrodes some years ago. Spun up lots of coin sized PCBs with electrometers, like LMP7721, and guard traces ect. I actually just found some of my old sensor boards kicking around the shop. I also did the traditional AgCl + inamp setup and we did all kinds of amazing things with both. Audio stimulus and lock-in detection to the brain allowed us to test hearing and more.
Holy crap! I went to school with you! I even revised/updated your KiCad tutorial that you made for Dr. R!! Wow!! I’m glad you’re still at it!
I don't know what C9 is for, but i believe it doing some decent job and very critical
true
IIRC it's called stitching capacitor. It is something to do with the current return path and EMI.
Looks like a dick 😂 pun for sure
The sound of your swallowing is almost comedically loud, maybe try to mix your audio differently or cut the swallows out😂
Yeah this was super distracting
@@eggyparrot3844 so it's not just me noticing it. It must have something to do with the distance to certain types of microphones.
Crosstalk depends on the length of your tracks and the distance of the track from the ground plane, for a track as short as that I can't see any issue even with fast CMOS, best to use a cross-talk calculator and a practical experiment to prove this. The main goal in most PCB design exercises is to reduce current "loop area" with short tracks and ground planes. A "good looking" board is is a functional one, tracking isn't cosmetic. Your layer stack-up is also a little odd. I recommend Rob Feranec and Eric Bogatin's PCB lectures for anyone that wants to get into PCB tracking.
Yeaaa my man, SATURN PCB a good trace calculator, no need a art course to do pcb
Nice work! If I may make a remark: prevent copper angles sharper than 90 degrees. I consider them ugly. They can create noise/EMI, depending on the frequencies. At high voltages (like 1 kV) these sharp angles can create arcs as well.
This all may be beside the point you’re making, but worth mentioning :)
90° turns are bad for one more reason. In fab this is place most vulnerable to etching issues. For HS you should use arcs.
@@brylozketrzyn The etching thing is a myth that was true only 20 years ago (or maybe even before that). Not an issue with modern processes.
Yep, electrons will fall out when making those turns /s
Supposedly the main reason for going from 90s to 45s is that the 90 has an impedance discontinuity where the 45 does not, because of the change in geometry of the cross-section of the trace as you sweep through the turn.
At high voltages, points will create an e-field concentration and breakdown point as @electheo said and severe acute angles can cause acid traps and over-etching historically, but that seems to be less of an issue lately. I still don’t like it on higher spec (6 mil trace/space) boards though because it’s easy to avoid.
The tracks near C9 looks like a nice pair of balls...
It is a special design for discharging!
Sharp edges are ugly, too. They act like antennas.
Beautiful acid traps. Keep up the good work :)
Why not changing orientation of all components 90º counter-clockwise, to make all lines straight to the connector?
While a good board position is key for good designs, in many cases you just trade complexity from one side of the chip to the other. So knowing tricks is still essential.
45° for larger chips can be a really neat trick, as it's only another 45° to get to two sides of the PCB.
Great video and well explained. Personally, I'd have rotated U2 by 90 degrees counter-clockwise so that the pins connected to J4 will be (mostly) parallel with their destination. Pin 8 on U2 will still need to be routed underneath the IC as it is now but it'd just look a bit neater 🙂
Honestly as someone that's an absolute beginner and barely played around in EasyEDA, that was my first thought - unless there's a reason I'm missing?
@@ethzero look to the left, I think we can assume he can have it as is and then "wiggle" the lines to top component or rotate it by 90° and have "wiggly" lines to the components on left side.
It depends on what has to route to the left hand side of the device. It may result in longer/weird routing of tracks to make the connections to that side if it were rotated 90 degrees counter clockwise. However, I don't know as I don't what circuit/board this is.
In a video of an MRI of a Thunderbolt cable, it showed some [i think microscopic] tracks that were intentionally zigg-zagged to make their length equal with the other tracks.
Kicad also has push&Shove option!
3yo video prob didn't had it at that time 😅
It's good to know that capacitive coupling can be alleviated through spacing. What about inductive coupling? How do we avoid that?
Magnetic fields fall off at a rate of 1 / (distance^2) so the same spacing considerations that give good capacitive coupling benefits, give GREAT inductive coupling benefits. Inductance increases with length, so keeping traces short is a great idea. At high frequencies, wide traces aren't super helpful but they can be beneficial for "medium" frequencies (whatever that is). Inductance is dependent on dI/dt, so using a small resistor on clocks can radically reduce inductance although it may smooth out a square wave a bit.
Doesn't ground plane help alot with inductance?
@@samueldavies646 sometimes, depends on what you're doing and what you're trying to achieve. Sometimes two tracks which create inductance between them is desired.
I've done nice boards in kicad and sent them off to be done by pcbway/jlpcb etc, but what I wish for most of all is a way to simply output my design (copper front/rear) as a simple BW bitmap for my laser to do a mask etc. it outputs svg in the strangest way possible with a layer for everything... if you just 'print' the board I get a lovely set of tracks on my epson so it can reduce the board to BW single layer, just wont export it as such!
Have you seen some of the 3D printing guys using the UV screen of their resin printer for setting a board before etching?
I wonder if it can be done from the Gerber viewer?
@@DeShark88 oh theres an idea. I could also have a word with the laser softwares writer, see if he has an idea how to convert the kicad svg into something the software can read. kicad exports a white square as board area, the laser engraves it onto the pcb resist, so just one big square of bare copper lol
@@welshdave5263 yes i did think of trying to print the tracks on the board just with my pla printer, but lightly spraying a board with some black rattle can paint and putting it in my laser engraver seems an easier method. this summer i'l have the time (and hopefully money) to build an a3/a2 sized cnc and more powerful laser
@lezbriddon is seen laser etched spray paint done here. Also seen PLA printers with a waterproof permanent marker attached and used as a plotter to draw the tracks etc before etching the still bare copper.
Quite right... I did clean the routing a lot tot make is very poper. But making the routing chaotic results in less crosstalk problems..
Easy ways to have less crosstalk can be using ground ref layers on internal layer 2 and 3; make the traces thinner; increase the distance between them. They can be beautiful and follow these guidelines.
Angles of 45 degrees between pad and track on U2 pin 1 and 16. Altium can warn you on that. 45 degree angles are bad for the edging process.
The only concern with 45 degree angle tracks is at very high frequencies. Reflections will bounce back from a 45 degree angle. I guess I need to pull out the books to see which frequency that starts to matter. If I had to guess, I'd say anything less than 100Mhz is totally safe. I could be wrong on that. Keep in mind that every via is a 90 degree angle and it's impossible to make a dense board without a zillion vias.
@@BrandonDruryI think he means that
@@tookitogoYou're right, it really doesn't matter.
Why not use arcs instead?
They take longer to do than a 45 degree angle in a CAD and provide not much benefit except they "look pretty". Now-a-days it's about the speed of turnaround on the routing to final production, functionality and proper operation rather than looks. KiCAD also doesn't allow you to draw arcs on copper layers for some reason.
I design tracks on INTERNAL layers with ground tracks between them. Ground planes top and bottom, and ROUNDED corners
For all boards? I work on too many boards where hitting a price point is more important than electromagnetic factors. At what frequency do you decide the rise time is fast enough to necessitate the extra time required for rounded corners?
@@BrandonDrury with a KiCad addon it happens in seconds by the press of a button
@@martinvollderpro Isn't it more expensive to manufacture rounded corners? Or am I imagining that.? If it's the same price to manufacture round corners, as it is to have them just make them angled, then it would seem like the automatic default of the designers, would be to always request rounded corners.
@@Inertia888 @darrick.S I didn't get extra charged for using rounded tracks. Why would it be more expensive, a rounded corner is "smoother" than a 45 degree angle thus easier to print
rounded corner make the board mechanically more solid, if the board hits a corner its less likely crack mechanically.
Hi, I have two questions: 1) making these tracks equal length would help? 2) back in the day, they used to do beautiful round tracks. I wonder why isn't the case anymore?
Making traces equal length is the kind of thing you only bother to do when you really need to - just because it takes extra time and potentially extra space, so no point wasting that unless you need to. That's only really done if there's a timing margin (for example I routed some Ethernet RGMII interfaces recently and the datasheet for the PHY specified < 11ps margin between each of the five signals going in each direction). For arcs as well, I mean you can it's just it's easier to route a lot of signals with 45 degree corners, I think it's just going from hand drawn to CAD that people stopped bothering. Again it's just a matter of ease and time - the arcs look nice but take longer and don't provide much benefit. Even at microwave frequencies often you can just get by with chamfered corners (the chamfer makes up for the changing width which causes a discontinuity in the characteristic impedance of the track).
@@stephengentle2815 wow, thank you!
They don't do "rounded tracks" any more as those were hand drawn. It also takes up more board space to do an arc instead of a nice 45 degree, 45 degree turn.
Have you considered a ground plane pour between your signal lines?
wouldn't having traces with round bends help? also, rotate the chip so it is parallel to the connector....
You'll see rounded traces in SUPER high speed digital designs. Off the top of my head, I don't recall which rise time that starts to matter. I believe it's in the Ghz range. Below that, it's generally acceptable to use the 45 degree method. The shape of the trace is a factor, but at lower frequencies, it's nothing compared to that bug catcher net absorbing noise created by the area within the loop of the signal AND it's return current. This is where using a ground plane underneath the trace and a stackup with thin prepreg come into play.
@@BrandonDrury But with modern PCB design and manufacturing methods, why not just use round bends _always?_
Straight lines are from pen-and-ruler era.
@@u2bear377That's called pre-mature optimisation with little to no benefit. There are many other things that give more benefits for the time spent.
@@u2bear377 One reason is your EDA tool might not support it since it's a lot more complex to implement. I don't think KiCAD can do rounded bends in the editor yet, although now there are at least plugins/scripts for it and they keep talking about how it's coming to the editor eventually. The straight lines and 45 degree bevels are from the 80s CAD era, look at boards from the 60s and 70s when they were laid out with tape on glass and they're generally very curvy.
@@treelineresearch3387 How is the rounded trace more complex than a truetype font?
actually its distance² .. so even stronger relation
Why do you have two vias per ground connection? Wouldn't it be better to just have a single via touching the pad? Or have a via on either side if you really wanted to have two of them.
Each of the vias have its inductance and also current limit. Two vias (or more) are necessity for many fast MCUs. Otherwise you are just killing your capacitor ESR. For BGAs that could be hard to avoid, that is why many packages have multiple VCC balls, each decoupled separately.
2 vias per ground in this case is mostly me playing. In theory, 2 parallel inductive paths knocks our inductance if half although I'm still looking for a definition of exactly how to define two paths. In other words, if 2 return paths are 98% identical, does the inductance for that return path divide in 2. Probably not. I'll need to pull out the text books for that one.
Interesting! I didn't factor in ECR to using multiple vias, but I have to admit that off the top of my head I don't see how 2 vias would achieve this. Can you explain it or point me in the right direction? Thanks!
@@electroninjection183 not really in half for all frequencies (yes, spatial simulation is needed for microwave frequencies) but is very close to half for about 500MHz or so.
As for ESR via is a path ideal to generate additional inductance. ESR is a product of both real and imaginary part of reactance. Vias can easily reach nanohenries by themselves (full length of course) and at 100MHz this is already 600mOhms per nanohenry in series with your low-ESR capacitor. Now increase frequency 50 times and single via And that does not even account for return paths. In reality inductances may be lower, depending on stackup - but closing all current loops can be much trickier. If you have access to 3D EMF resolver for PCB you may be very surprised. This is why many high-speed ICs have at least some power supply at the perimeter - so you can close loops without chamgimg sides. Also, at higher frequencies having more layers dedicated to power distribution helps in creating decoupling much closer than on the other side. Also, there are special prepregs with high epsilon for power planes in very naughty designs.
@@electroninjection183 www.x2y.com/publications/decoupling/jul24-06.pdf
This powerpoint, on slides 30/31, shows the pad arrangements I was thinking of. The terms they use are:
"Interdigitating Vias - Maximizing mutual inductance coupling between alternating vias cancels H-field flux, thus lowering the over all net inductance of vias."
Just from a quick glance it seems like what they mean is that by splitting the current's path, the net magnetic field is halved, which in turn lowers the overall inductance. If the vias are placed on the sides of each pad as opposed to the opposite ends, the current loops generate magnetic fields that oppose each other's direction. Slide 29 shows an example of the current path, and I'm thinking of how the right hand rule applies if the vias were placed on both sides.
How did you move sections of track around so easily?
I think it's either m or w in kicad
@@leandroebner1405 'd' is another way in kicad
@@leandroebner1405 I'm sure I heard him say "D".
You made one layout mistake so; it has acute angles, e.g. circuit U2 pads 1 and 16. Acute angles cause problems during PCB fabrication, particularly the etch.
yes, that indeed used to be true 30 years ago gramps, times change, no issue for modern fabs
I need a PCB DESIGNER to create a device.
I'm having some interest in doing circuits. What I don't get is ... why the programs don't calculate the optimal path given properties like the width of a trace and the kind of signal/frequency expected on it?
Great question! The problem is in the word "optimal". A trace with 20A DC flowing through it on a military board has a radically different definition of "optimal" from a trace with 2uA DC flowing through it on a child's toy which has a radically different definition of "optimal" for a 3Ghz clock. As of now, we don't really have an "Intent" setting on traces yet, but it's plausible to have this in the future. There may be a time when two high speed digital traces could let us set the "Intent" to be time aligned and the tools just do it. As is, we have to recognize the need for time alignment and do that ourselves at this stage of the game. I see vast changes occuring quickly, though. So you may be on to something!
@@BrandonDrurysome programs have parallel track routing options for high speed signals. Keeping the tracks exactly the same length.
Also, many, if not most programs have auto routing, but as mentioned above, it doesn't know what your circuit is supposed to do. It only knows that two contacts or pins are supposed to be connected together. It would be very time consuming to define each and every track's "intent" and have the program try and reroute all of them. Sometimes it's just easier to route them manually
Aside from specific impedance requirements (for which PCB routing tools *do* calculate the proper trace widths), there's never a "right width" for a trace, it's always a trade-off between heat production, space available, distance to other traces, etc. etc. If you have the space, might as well make the traces wider, like, 0.5mm width traces are massive and I have only used those for high power traces, but in a board like in the video there is the space, so why not...
@@rrrrrrrrrrrrrrrrrrrrr because sometimes too low of impedance can cause stability issues things like SMPS or other high frequency switches. It's a balance. Just creating the lowest resistance track is not always the best approach
EMFT lecture helps
By the looks of things, I would have put the chip horizontal to the connecter, rather than vertical
Would have made that side neater, but might complicate the layout to the left. The other thing is the connection at pins 1 and 16 has such a tight angle. I was always told to make pad and track connections at 90 degrees, avoiding acute angles.
Using correct design rules eliminates this beginner's blunder.
I'm just wondering: why didn't you turn u2 90 degree? Than your connection-path's would have been nearly straight to the Pins.
Best wishes
great man :-)
You got Joe Exotic's vibe
Yu software name please send me
He uses kicad
@@小島敬弘 Thanks. I used Kicad and JLCPCB.
I'm a hobbyist and I still have a lot to learn. Designing my first professionally fabbed board was a big deal, for me, because it was 2 sided and had a single smd. I wanted to make the jump from tht to smt.
If you have OCD no education is required
your traces are unevenly spaced and not as pretty as you think.
fix the spacing and it would be chefs kiss good.
Tracks would be prettier if they had rounded corners.
Why is every trace on the top layer? Shouldn't you really maximize the top layer for ground planes and try to route as much as you can on the bottom layer? Obviously, this is not always going to be an option, especially on 2 layer only boards. Sometimes, you have to jump from the bottom with a thru-via to the top and sometimes back again to make the connection. You now have 1000 subs. Congrats!
I get your point, IO have been doing that for decades.
btw you idea of "even" spacing is not the same as mine, ...hint, outer track! :)
You contradicted yourself about 20 times in this absolutely pointless video.
TRACES
***GULP***
THANK YOU PRESEDENT TRUMP FOR MAKE AMERICA GREAT AGAIN GOD BLESS YOU PRESEDENT TRUMP GREAT CHRISTIAN WAREOR SUN OF GOD PRINCE OF PIECE!
🇺🇲❤️✝️🇺🇲❤️✝️🇺🇲❤️✝️🇺🇲❤️✝️🇺🇲❤️✝️🇺🇲❤️✝️
[throat and mouth noises]
Welcome to the real world. People make noises. Be a man and ignore it.
This is good information, but the thing is, most people on YT are not intersected in good information. Good information requires assimilation which requires effort. I know this from experience. Sad.
What's your point? Should we stop making videos with good information?
@@GerbenWijnja My point was clear. Nothing between the lines. People in general are not interested in good information. Example, this video has good information and got 26K views in 2 years. An idiotic video with zero useful information from The Beast will get 100 times that in the first minute. Take from that what you will. It's a fact.
Hello