3D Printed Car Audio Parts? Don't make THIS mistake adding threads!

ฝัง
- เผยแพร่เมื่อ 8 พ.ค. 2024
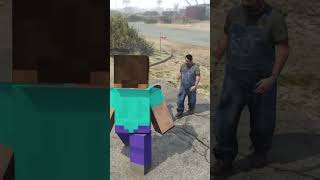
- In car audio we can 3d print many different helpful parts: Amplifier racks, speaker adapters, speaker pods, subwoofer boxes etc. But when we need to attach different parts together we need to use heat set inserts. A heat set insert allows you to add metal threads to a part and take it on and off many times without ruining the threaded hole. But you need to design for the heat set insert properly and use this mounting technique to get the best results... Here's how!
Need wire and power distribution blocks? Get it from KnuKonceptz!
www.knukonceptz.com/
Thank you to them for being a monthly channel sponsor!
🔨 Recommended Tools and Materials:
✔️ Standard Insert Tips - amzn.to/3ltidtG
✔️ Metric Insert Tips - amzn.to/3LHSdFL
✔️ 10-24 Heat Set Inserts - amzn.to/42pZhg1
✔️ Metric Heat Set Insert Kit - amzn.to/3lkSaVC
As an Amazon Associate I earn from qualifying purchases.
🔊 Want more? Check out these links:
✅Car Audio Tutorial Library: bit.ly/CAFlearn
✅ FREE weekly training program: bit.ly/CAFlist
✅ Box Designs, BUILD YOUR OWN BOX!: bit.ly/CAFdesigns
✅Join the CAF Patreon Member Team: bit.ly/CAFpatreon
🔊🔊🔊 FULL VIDEO SERIES PLAYLISTS:🔊🔊🔊
- Ported Downfiring Subwoofer Build: bit.ly/CAFdownfire
- Dad's Sound Quality Daily Driver Build: bit.ly/CAFdadsSQ
- SEMA F150 Subwoofer Box Build: bit.ly/CAFf150
- LOUD Wrangler Build - bit.ly/CAFloudwrangler
- SQ Grand Cherokee Build - bit.ly/CAFgrandcherokee
- Stealth Hidden Bass SQ Build - bit.ly/CAFstealthaudio
Here at Car Audio Fabrication I teach you how to Master Car Audio in an effort to Design, Build, and Install your ideal car audio system. Whether you are a hardcore basshead or a HiFi focused audiophile I would love to have you subscribe and join our community!
SUBSCRIBE
th-cam.com/users/subscription_c...
LET'S CONNECT!
Website: www.caraudiofabrication.com/
Facebook: / caraudiofabrication
Instagram: @caraudiofab
Snapchat: @caraudiofab
Music:
Switch It Up - TH-cam Audio Library
Licensed under Creative Commons: By Attribution 3.0
Use of information from this video is at your own risk. You MUST view the full disclaimer here: www.caraudiofabrication.com/di...
Car Audio Fabrication - Master Car Audio - Design, Build, Install - ยานยนต์และพาหนะ


Would you guys like to see more 3d design videos in the future? What 3d printer do you have?
😎Thanks for watching! I appreciate you!
Def would and how to use a 3d printer!
Yes!! Id like to do this in my overland suburban
Definitely more 3D printing tips and tricks. I have an older printer but it works and I’m using the Fusion software. There’s a lot to learn in that program so it’s helpful to see someone doing something I made need to do.
I would like to see more 3d design videos! In particular, I would love to see one that tackles block off plates. I am dealing with a Honda Accord's inner door, and they have a lot of curves for the block off plates which is making it difficult. I am currently using a Prusa mini as well as an Elegoo Saturn2 Resin Printer.
Interested in more 3D printing info
Pro tip:
Design your parts to accommodate the threaded inserts in reverse. Install the threaded inserts into the rear of your parts.
That way, the machine fasteners pull the inserts into the parts, and you arent relying on the melted substrate and mechanical keying of the insert alone to hold the torque of the screws.
Would be good to see a video with this idea in mind
Yeah. He made a newbie mistake there. Inserts on 3D printed parts are best inserted from the back... otherwise if you tighten hard enough, you'll pull the insert with not much holding it in.
I use 3d printing for car audio, air ride parts, controller amounts. It's been a game changer as far as what I can fabricate! I have 3 printers. Ender 3 , Flash forge Creator pro 2 and an any cubic Photon M3. I use Fusion 360 to design everything. I use Send cut send a lot for metal / carbon fiber parts too. Love to see more 3d printing on the channel. Keep on rocking!
I need some 3d pri ting services
Which one do you like out of the bunch the most?
I can’t figure it the design programs for it. Gotta find the right one
Definitely keep the 3d printed content coming. It’s a big part of the future of so many industries, not just car audio.
Love KnuConcepts - Great Products ! Glad to see them as a sponsor
Jealous of the shop, all the right tools, and being able to really enjoy the variety of tasks. Thanks for helping me set goals :)
Id love to see this entire process. Even if i dont plan on using this method or maybe using it down the road, the knowledge gained cant be replaced. I think its an awesome tool to 3d print and that adapter looks top notch
I’ve inserted a lot of these overs the years… I’ve found that if possible adding them to the bottom of the part is much stronger, so the threads can’t be pulled out if over tightened.
I am new to 3D printing. I printed my own speaker adapters, but the one install I did for myself is too new to evaluate the long-term durability of my prints. So, take this with a grain of salt. That said, I have two 3D print design options to consider:
1. Rather than increase the line counts of all walls to reinforce the area around the insert, I designed in a very thin tube (0.05") concentric about the insert hole to trick the print slicer into doubling the wall thickness around the insert only. The print slicer sees two walls, but the printer melts them together as one double-thick wall. The goal is to speed up print times for printers that are ungodly slow.
2. I installed the threaded inserts on the backside of the part to reduce the risk of the insert pulling out, in case that is a mode of failure. For thicker parts, you have to be extra careful in making sure the insert is perpendicular to the mounting surface. The speaker adapter in this video would not be the best candidate for this approach due to the mounting surface angle, which would make an underside threaded insert a little trickier to keep perpendicular to the speaker mounting surface.
Both great ideas. I’ve had 2) happen to me as I once tried to sandwich the interior panel in between the bracket and the speaker.. that was not a great idea.
Yes! 3d printing parts would be an appreciated addition to your education. Love your videos
Ive had to mono price ultimates for about 5 years and they are still kicking and working like champs. Love seeing 3D printing used in areas other than novelty items.
Nice! 3D printing is a must!! Thanks!!
The quality work you do is remarkable on TH-cam. Quality Car audio, 3D printing, clean finishes. 🤌🏾
One suggestion I have would be to set the from the rear/bottom of the part so you are sandwiching the remaining material between the basket and the insert rather than relying on the insert alone. Recently printed two rings for my car using PETG and inserts
good idea, you also don't have to worry about the insert being flush this way.
PETG on a car? Hopefully it won't melt in summer time
@@alejandroperez5368 petg is OK, having a glass transition temp of 175f...I'd be more worried about all the peeps using pla which has a Tg of just 130f.
Starting following your videos about a month ago. Very interesting how far the technology has come with regard to car audio from when I was younger. Looking to build a system into my Subaru once I get the car running. Yes, would like to see more videos like this with regard to 3D printing and fabrication. From measuring to software design. Keep up the videos.
Thanks for this. I bought a heat set insert kit a while back but was not sure how to use them. Another great video.
So sick. Perfect for cars that don’t have speaker or tweeter adapters available.
I designed and printed a horned port once. Worked amazingly well.
3D printing has been such a useful tool for me. I didn't measure my sub before buying it so my box was too shallow for it. I ended up making a bezel for it with my printer to extend the sub out about an inch and it fits perfect. Took me a total of about 5 hours to design and print it all.
I designed and printed nearly identical spacer adapters in 2019 to fit larger speakers into my doors without hitting anything inside the door. Though, I used small holes and course thread screws as self-tappers instead of threaded inserts and hadn't thought about angled spacers!
Had a shop quote me an outrageous amount to do a simple door speaker replacement, the big selling point was “we make these custom acrylic brackets”…ok cool, but for less than their install I was able to buy a 3D printer and make my own adapters.
Came out so good and in the end I was able to replace my tweeters and center channel speakers much easier as well by printing custom adapters that would’ve been impossible to cut from wood
I started out with a creality ender 3 v2 but have upgraded, since it’s such a useful tool for more than just car audio, to a bambu labs x1 carbon
Loved this video, looking forward to see more 3d designing and printing car audio parts. 👍
Yes, I use 3D printing for Car Audio Parts as well as for drift- and racecars, custom parts, karting and home applications. I currently have a Flashforge printer with a slightly to small bed. Still a favorite tool alongside the AC/DC TIG.
YES! More 3D printing content! Ended3 v2, Fusion360, Cura. Great video as always!
Yes, would really enjoy seeing your process for creating speaker rings. We have an Ender 3 V2 Neo.
I have not considered using my 3d printer for car audio, but now it is on my list to do. I do need to print some new tweeter mounts for my F150! I am currently using an Ender 3 V2, but also looking to get a 2nd printer that has a larger print surface and can print ABS. Keep the 3D print videos coming!!
w a box around an ender you can do abs
Great video. I have used my 3d printer mainly for tweeter rings and for boxes to mount passive crossovers in. Currently using a Creality Ender 3 Pro. I mainly use pla filament for prototypes and then abs filament for final production.
Ender makes some solid machines for sure! Definitely need ABS for in the car environment, PLA unfortunately gets too soft once the sun starts beating on it, I wish it didn't though, its soooo much easier to print with. Thanks for being a CAF member and getting early access!
PETG works well too and it's not as prone to warping as ABS, nor does it require the ventilation that ABS does.
@@CarAudioFabrication PETG is definitely the way to go. It prints almost as easy as PLA, and doesn't need the high temperatures of ABS, but it will hold up to warm and cold car temperatures in ways that PLA will not. It also won't crack as easily as PLA if you're using it to make parts that support weight or experience forces like a phone mount or something like that.
Yes more 3d printing designs please!
Some 3d design videos would be awesome. Your videos are always very descriptive and helpful!
I'd love to see some videos specifically on the design side. I have not gotten into 3d printing but I am looking todo so in the very near future. I just would love to see more videos on it and see your options and even your failures to help those like myself that are getting into it.
I need to start getting into using these inserts. Awesome video! Haven’t done much with my audio in my x5 lately but with most definitely be making some custom speaker mounts and amp racks when I get my printer properly set up to print higher grade materials.
Just an fyi at the very least I would only use Abs for any type or bracket in a vehicle. A material like pla will not last especially with heat it’ll melt.
My printer is a Bambu lab P1P. Currently getting a custom heated enclosure made to be able to reliably print abs, nylon & pc.
i love the videos mark! thanks to you i have now started my little audio shop where i install systems and fabricate! i would love to see a video where you use suade as a material for wrapping a box or tweet panel!
Great video! I actually just bought a creality ender 3 V2 printer and having ways to incorporate 3d printing into custom car audio is something I’m definitely interested in watching. Keep up the great work!
i just put the tip of my soldering iron in the hole of the insert and push in, works every time
Love the 3D stuff I need to get into it
I do like the 3d printing ideas for custom audio. I have a Prusa MK3S which is well supported vs a generic one. Thank you for your content I’ve learned a lot from your videos.
I have a Creality CR10-V3, which I've used to print tweeter mounts, speaker adapters, and fog lamp mounts for my vehicle. 3D printing definitely takes customization to the next level.
you can also put the heat set on the bottom of the part to make it more resistant to pulling the heat set out of the plastic
Yes, more 3D printing software please. Also, some recommendation on 3D printers and the plastics used in it. Thanks, I love your channel by the way.
This is an awesome idea, using the 3d printer to make the bracket for the speakers.
I have used my ender 3 pro to make custom Tweeter mounts for my car. Great video, just make sure that you're using a suitable printing material, PLA will deform in a hot car during summer.
I have done exactly this for my car as it had non-standard speaker hole placement, it works really well as I could also use it as a spacer
in fact the adapter i made was super similar to the one you showed!
3d printing has definitely changed the game for making up some custom parts!
Thanks. From Sweden.
Thanks for watching!
Videos on the design process would indeed be interesting.
Yes, I'm interested do an in-depth tutorial.
I have a Creality Ender 3V2. I’ve converted the bed to coated magnetic spring steel. I converted the Bowden setup to direct drive with the Microswiss NG all metal hotend. This lets me print hotter temperatures and flexible filaments more easily. I converted the firmware to klipper using the Creality Sonic Pad. It adds a lot of features. I can send prints to it directly from my slicer and I can control it and see it on a webcam from my web browser. It also greatly increases the speed and somewhat increases the quality of prints. Klipper isn’t for everyone, but it’s great if you are familiar with computer programming or Linux terminals and editing Linux files.
Oh yeah, don’t buy an ender 3 of any variety anymore. They used to be the flagship cheap printer, but so many competitors have better printers for the same price or less now.
I have 3d printed speaker adapters for use in doors of the car before but never had good luck with the inserts holding with 3 outer walls.
I have an ender 3 pro (sitting on the shelf) and a Bambu P1P. I print all my abs/asa/PET-CF with the P1P.
I do the same with making thicker walls, It makes the whole part stronger. I have two 3D printers, a DMS DP5 for PLA and an enclosed and heated Bibo for ABS.
I have not used 3D printing for car audio. But I have used it for spacers and mounts on my car and motorcycle. I have the Bambu Lab X1 Carbon with AMS. I also have 2 Ender 3 Pros.
I use a Prusa Mk3S+ and Fusion360 to make parts. I just printed some 4x6 to 4+Tw adaptors for my 1980 Corvette and next is a switchplate to replace the ashtray.
Yep, I am looking to buy a 3d printer. I didn't trust the earlier models but think the technology is worthwhile getting into now
Great video.
definitely use mine, im running a very modded out Ender 3v2. direct drive, dual Z screws, metal hotend. running octopi. I see you use ABS. note to others, if you make your part from PLA or PLA+, IT WILL melt or get brittle in a car over time or if its really hot. I live in Texas and printed a 2 liter cup holder adapter. I replaced it with one made from PETG+ and have had 0 issues.
Yes, would love to see how you designed this. Also what software is a good and cost affective (preferably free software)
This would have been quite helpful for me about a year ago! I have an Ender 3 Max and have printed numerous things for my installs. including custom door panel adapters for my F-150 using Audison 8's.
I would suggest installing inserts on the opposite side, so the tension would pull it IN the print, not out of it
This video is very cool and I am going to get me a good 3d printer to do just that
The Conductor from sparked innovations is s great ground distribution block too
Very awesome 😎
More 3d printing please.
Please make a detailed video or series on 3d designing, 3d printing and 3d scanning. Software and hardware/tools that you use.
Use the Ender 3 Neo V2. I use it for custom USB and peripheral components. Usually wind up wrapping in leather or suede, to avoid post processing for painting.
Yes I’m interested in designing 3d speaker adapter
Awesome!
I bought one to print rings for tweeters and mids on the dash, moved and broke a part on my ender (just have to order the parts). Definitely would be interested in learning the designing portion as well.
You can add more walls to holes for threaded inserts without adding extra walls to the whole print by designing extremely thin rings that cut around the holes. This will cause the slicer to add extra walls around those rings. If you make them thin enough they will print as additional solid walls. You can also add strength to other areas of prints or block LED light bleeding without increasing infill or wall count by adding thin lines that cut from the model.
I’m using a Prusa mini and I have a Prusa XL on order. Keep up the good work also, what material are you using ABS or PLA. I am asking due to the heat in inside a car during the summer.
Can you do a video on the making of the bracket ?
Hi I found your channel and I’m acquiring the knowledge to wire my truck. I would love to see what equipment and methods you use to print 3d components. Thank you and keep up the great work.
Enders 3v2 neo. Would love to see more design work on the channel.
I could be wrong, but I believe I remember hearing an engineer I worked with say that you only needed 4 threads deep on a mechanical screw to achieve maximum, or near maximum hold.
Definitely interested in the design side of the printing. BTW my printers are a OG Ender 3 and a Ender 3v2
Definitely seeing a lot of guys rocking the Enders. Thanks for watching!
@@CarAudioFabrication bro I've been watching since you had Doug in a cameo. You're the reason I started watching him
Cool.
I deal with steel more. So rivnuts are my thing.
Have you tried simply threading holes directly? Works flawlessly for me. I've had no issues with PETG doing it this way. I find it helps to add ~0.1 - 0.2 mm to the I.D. of the hole I model for the tap drill size depending on the diameter.
plastic threads are not as good as metal. They are fine for many things, but as he said in the video "we can take these screws in and out as many times we want without degrading the quality of that hole". If for some reason you have to take your speakers in and out several times, it can be quite easy to strip out those holes. Inserts like this are pretty overkill as far as holding strength goes, it's more of the serviceability part. Plus he seems to like to go overkill on random things like this.
I use these when printing pew pews 😀
I also have the Ender 3v2 as yours. It was my little workhorse. If you upgrade go straight to the E3 S1 pro or non-pro line. It's a much more reliable printer and much faster with the Sonic Pad.
Hi love the video on brass inserts and the 3D Printing. I am looking into getting a 3D Printer and wanted to know what’s a good one to get in the budget range $1000 to $1500. Tks
thanks for the video. Which kind of filament did you use? Is it ASA?
Awesome video! Your top layer looks a bit under extruded. It could definitely use some more flow to produce a better looking and stronger print.
i was just doing this!
Hello Sir, really liked your detailed video, but I just need to ask something is that I want to upgrade my truck speakers, can I install the car component speakers in 24v truck… looking forward to hearing from you soon, thank you in advance
I use 3d printing for creating speaker adapters the same way you do. I want to build a 3d printer sub enclosure next, have you done that before?
This is very useful.. the 3d printing for things like this. Question though.. is the 3d print going to alter the sound in any way.. e.g. vibrations from sound being affected by the material of the 3d print vs say.. wood.. or fiberglass? If so.. would using rubber washers between speaker and mount aid in that in any way? As well.. what material to handle potentially loud audio? I would think you'd want ABS or CF material for its stronger properties? Or is PETG or even PLA enough?
I love 3d printing. I have an ender 3 pro Neo. I’d like to get a larger one eventually.
I got a larger printer. The challenge so far has been bed leveling. My bed is cupped. Thus far, auto bed leveling hasn't fixed the problem.
Large prints and small prints require different settings... or a Post-it notes under the removable layer of the bed. Prints that require the entire bed haven't been great. So, I've been able to print router guides for subwoofers, 6" speaker adapters, but not both (or two medium-sized parts) at the same time.
@CarAudioFabrication Hi Mark! What software are You using in video? Thanks!
The extractor is used mostly to recycle the inserts, not to replace a broken insert with a new one.
If you want to replace an insert you should add a bit of plastic with 3d pen before inserting a new insert and also lower your expectations.
I highly recommend you DO NOT use PLA for any 3D printed part that will be in a car. PETG will withstand the heat without warping MUCH better. Printing ABS is prolly the best for this application but it's nasty to print as it tends to give off lots of fumes. BUT YES, I am so glad I have a 3D printer where I can design and build EXACTLY what I need. It's amazing!!! (edit: I use a Prusa Mini with the Prusa Slicer and it works flawlessly but I've been seriously considering switching to CURA slicer for the tree supports. Turns out they are far more important than I originally thought.)
Plus ABS sucks ass to print in general if you dont have an enclosed printer. I run Cura and I like it. tree is awesome, careful when using them with ABS, they dont like to stick. I usually end up with 0.5 kg of spiderwebs in the trash can per print.. LOL
I use a Prusa MK3S+ for other projects and have been wanting to get into more car audio deigns with it - I would love more of this content. What material are you using? I don't think PLA would be a good choice due to the heat - I was thinking ASA or ABS but I don't have an enclosure.
Thanks a lot. Which application do you use while designing? 4:52
I would love to see more design ideas and tips-and-tricks for designing 3D car audio parts. I know using PLA would not be advisable for in car applications and I’ve had issues printing with ABS, can anyone speak to the durability of PETG for door speaker brackets? Also, I use an Ender 3 v2 and an Ender 5 Pro.
I would love to see more 3d printed content. I have a prusa 3d printer and live it. Are you going g to sell 3d speaker adapter files?
I would have thought adding the heat mounts on the other side would sandwich the plastic and hold together much better.
I had a 3d printer that I got for like $200 back in 2016 when 3d printers weren't cheap for good ones. I was able to get a decent print out then the next one would always have something weird happen we ended up just throwing that one out and haven't really messed with it since. I was thinking of getting a cr-10 s5 so I can print up to 500mm but I only really help my friends and family with car audio so I don't know if I would have a large enough use case to justify it.
I have a question on those inserts. How well do they hold out long term with the constant vibration of that speaker hitting? Do you see fail rates using a shorter stem?
I would love to see how create the piece in the 3D software.
You can add a capacitor 1 Farad for 1000W
Hi Mark
Do you use these same insert on HDPE sheets?
I have a 2013 GS350 and am planning on 3D printing sail panel tweeter pods. Currently it has no sail panels
Presumably removing the inserts:
1. Allows you to reuse the insert.
2. Allows you to recycle the plastic without contaminating.
If I'm removing inserts it is likely that I'll be binning the plastic.
Im using a Anycubic Mega S.
Its a cheap but good to go if you use good Fillament and add some Hairspray to the Heatbed if you use Abs oder ABS+ what i do.
Just the leveling is a little pain during the process to learn what distance you have to use for a good result.
But if you have leveling tins (mostly used to mesure car sparklingplugs)
And have enough time than it will be yours.
Its a good cheap way to start with 3D Printing.
And the best is, you can it fit into a IKEA cabinet so i build a computer dest that has at one side the cabinet and at the other side 2 standart cheap ikea desk legs. And the deskplate is a standart kitchen plate 😂
It looks like so that you can buy in a Designer Furniture shop.
But its all just made by me 😂
And no one recognize that there is a 3D Printer in my Home.
And you pretty need a Cabinet to Print ABS or Abs+ for good results.
But pay attention and dont start a fire 😂
You have to know what you do