
ฝัง
- เผยแพร่เมื่อ 9 ก.พ. 2025
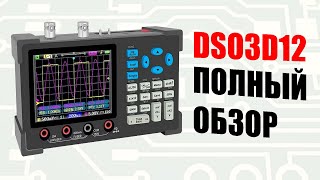
- A new small, battery powered oscilloscope with digital multimeter functions I bought. So far I like it.
This is a quick review.
This guy did a multi-part detailed review. This is the first video:
• Uni-Byte 0177 - A deta...
=========================
DIGITAL OSCILLOSCOPE DSO3D12 User’s Manual Designed by ZEEWEII
BUTTON FUNCTIONS -- Default function (function on button)
OK Auto 1: When the menu opens, as the OK button. 2. as an "Auto" button
Stop: Run / Stop
Single: Single trigger
AC/DC: Switch DC/AC coupling(CH1)
CH1/CH2: Change the CH1/CH2 priority
Menu: Open/close the menu
Shift: When this button is pressed, the functions on the case will be performed.
x1x10: Probe attenuation, which tells the oscilloscope what probe range you are using. (CH1)
Gen: Turn on/off the signal generator interface
Save: Save a screenshot of the waveform
50%: Quick centering (CH1)
DMM: Turn the multimeter on/off. (Press Shift+DMM to full screen)
Select: Multimeter function selection
mV/V: Adjust vertical sensitivity (voltage of one grid)
s/ns: Adjust the time base (the time of one grid)
2.SECOND FUNCTIONS (Shift + other button)
Auto2: Enter real-time auto (CH1 only). Press any key to exit.
Zoom: Turn on/off zoom mode.
Ref: Reference waveform, the current waveform is locked to the screen as a reference.
AC/DC: Switch DC/AC Coupling (CH2).
CH2: Open/close CH2.
TgMode: Change trigger mode: Auto / Normal.
x1x10: Probe attenuation, which tells the oscilloscope what probe range you are using. (CH2)
TgEdge: Change the trigger edge: rising edge/falling edge.
View: View waveform screenshots
50%: Quick centering (CH2)
Full: The multimeter is displayed in full screen
Tg1/2: Switch trigger source: Ch1 / CH2
Note: CH1 cannot be turned off, CH2 can be turned on or off. When two channels are
not required, CH2 should be turned off for higher sample rates and reduced power
consumption.
TRIGGER LEVELS:
The small arrow on the right side of the screen is yellow to indicate that the
trigger source is CH1, and green indicates that the trigger source is CH2.
The default trigger level is automatic adjustment, if you need to adjust it manually,
you need to set the trigger level to "manual" in the menu, you can adjust the trigger
level position arbitrarily (click the Shift key to move the trigger level up and down).
Auto2: RtAuto appears in the upper right corner of the screen, indicating real-time
automatic adjustment. When the probe is connected, the oscilloscope automatically
adjusts the range in real time. Press any key to exit.
Turn off the signal generator when you don't need it, which can slightly reduce
power consumption.
SAFETY PRECAUTIONS
-High voltage. The x10 range of the probe measures up to 220V. An x100
probe is required for overreach.
-Probe attenuation. Before measuring voltages greater than 40V, switch the
probe to the X10 position.
-Charge. The charging voltage is 5V, use a computer or mobile phone
charger.
-When measuring high-voltage or non-isolated circuits, it cannot be used
while charging (powered by a built-in battery).
-Do not use a multimeter while charging.
-Never insert the red probe into the current hole to measure the voltage, it
will blow the fuse or even damage the machine. After measuring the current,
remember to change the red probe to the voltage hole, remember!!
-When the multimeter measurement current is greater than 6A, the
duration should not exceed 10 seconds to avoid line damage caused by heating.
-When measuring high voltages, do not use the oscilloscope and multimeter
at the same time.
MODEL DSO3D12 SCOPE SPECS
Channels: 2
Coupling: AC/DC
AUTO: Supported
Screen size: 3.2inch
Measurements: 14 types
Sampling rate: 250 Msa/s
DC Offset: + or - 2%
Bandwidth: 120M
XY mode: Supported
Equivalent sample: 500M
Screenshot: Supported
Rise time: less than 3ns
Frequency: + or - 0.01%
Storage depth: 128K
Single shot: Supported
Impedance: 1Mohm
FFT: Supported
Time base: 5ns - 10s
Wave out amp: 2.5V = or - 0.05
Ver sensitivity: 10mV/div-10V/div
Wave out freq: 5MHz(sin) 1MHz(other)
Max voltage: + or - 40V(x1) + or - 400V(x10)
Shell size (width*height* thickness): 145*86*33mm
Trigger modes: Auto/Normal/Single
Trigger type: rise/fall
Charger: TYPE-C / 5V
Display mode: YT / Roll
Charge current: 700mA
Persistence: None/1s/Inf
Weight: 266g
MULTIMETER PARAMETERS
Function Range precision
DC Voltage: 600mV/6.00V/60.0V/600V/750 ±(0.5 + or - +3)
AC Voltage 600mV/6.00V/60.0V/600V + or - (1%+3)
DC Current 600mA / 10A + or - (2%+5)
AC Current 600mA / 10A + or - (3%+5)
Pay attention:600mA hole with 1A fuse, 10A hole without fuse
Resistance
600.0ohm + or - (1.5%+3)
6.000kohm/60.00kohm/600.0kohm + or - (1%+3)
6.000Mohm + or - (1.5%+5)
60.00Mohm + or - (3%+3)
Capacitance 60.00nF/600.0nF/6.000μF + or - (10%+5)
60.00μF/600.0μF + or - (15%+5)
Diode 0.0V〜3.3V,Display “OL” above 3.3V
Continuity Sound at 50ohm and below


It's a fairly good gear to complement to Multimeter. For less than 100 bucks, what a wonderful DIY world. 😁
@@clementihammock7572 Agreed!
😎
What is the input capacitance? Thank you!
@@Anna-Z-000 I put the manufacturer's specs in the description, but they don't say.
Ordered today with latest firmware for US $76.36 include shipping and brand new.
Nice, that's a good price!
The 10A multimeter input is not protected by a fuse!!! POORLY!!!