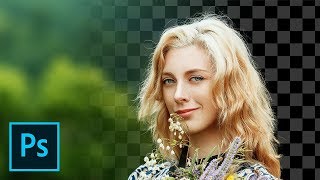
Actually Understanding Anaglyph 3D Effect in Photoshop

ฝัง
- เผยแพร่เมื่อ 15 เม.ย. 2018
- Create an Amazing Anaglyph 3D Effect in Photoshop! Build Dramatic filters and learn how to stylize your images with Red-Cyan 3D overlay. We will learn the concept of Anaglyph 3D effect and use the fundamentals of Channels to recreate the same.
In this tutorial, we will also learn how to build and stack effects and filters to really give our image the moody and stylized look that we are going for. I hope this tutorial helps. Thank you for watching :)
⚡ ENVATO ELEMENTS | UNLIMITED STOCK DOWNLOADS
Unlock more than 510,000+ Stock Photos, Photoshop Actions, Fonts, Brushes, Graphics & More!
► Subscribe to Envato Elements with the link: piximp.com/envato and submit the screenshot of your purchase (or order confirmation) to submit@piximperfect.com to get access to a HUGE library of PiXimperfect Photoshop Assets as well!
► LINK TO ACTION FOR ENVATO MEMBERS:
piximp.com/anaglyph3D
► DOWNLOADS:
1. Sample Image: piximp.com/4ACB
2. Finished PSD: piximp.com/4ACE (Only for our Patreon Family)
► HELP US CREATE MORE FREE VIDEOS:
Support us at Patreon: / piximperfect
► SHARE: goo.gl/IUhnUl
►LET'S CONNECT:
Facebook: / piximperfect
Twitter: / piximperfect
Instagram: / piximperfect
Google+: plus.google.com/+UnmeshDinda


You are the best Photoshop channel tutorial!!! Thanks for sharing
This was so much more than just a "how to make 3D" tutorial. I appreciate that you showed the creative possibilities. Thank you.
Thanks for all you do Unmesh! You continue to really help me!
I Love You :D amazing tutorials
You are such an underrated TH-camr... Your tutorials are so great, very clear, very easy but an amazing outcome... Love it
You make photoshop so easy!! You are very fluent and explain well! Subscribed!!!👍🏼
This was so much fun to try out, thank you!
Hi sir,
Your videos are great I loved them,Liked them.
Great video. I learn a lot from it!!
I love your channel. THANKS A LOT. Gracias. From Brazil, Rio de Janeiro, Rio
You are awesome! Straight to the point!
Fantastic! Thanks for sharing!
You are seriously amazing!
Keep up the good work! I love your vids! :D
Hey man your video style and fashion style is pretty dope
Awesome man. Thank you.
Thank you so much for this tutorial! This is exactly what I was looking for and I didn't even know the name of the effect haha.
smart & simple,
great !
Thank you very much! I am new to your chanel and I learn a lot. :-D
Wow amazing tnx a lot sir...
New to your channel and so far it has been very helpful
We don't simply call u d BEST in the business❤
You are a Star!
It was awsome...👌👌👌👍👍
nice laptop and nice work
thank you so much
Awesome Sir
Loved it....
super nice
Can you make a tutorial for the new curvature pen tool and would you recommend that option over the regular pen tool? Please and thank you
Great video an channel!, Witch software you use to record your videos?
Thank you.
Thanks 😊
thx, so much
Fantastic
you're the best!!!!!!!!!
so nice
Great...!
Hello Umesh Sir,
I really enjoy your photoshop tutorials, the way you explain stuff is great.
I have question that if we use this technique to create anaglyph 3D effect, it won't make any difference, because the image was a 2D image.
For anaglyph 3D to really work both of the image should be taken from 2 different angles???
Yes, exactly. This is not creating an actual 3D image to look through the glasses, but a fun effect to look at without the glasses.
PiXimperfect Indeed
Sir, can you please make few photoshop tutorials on working in 3d environment within photoshop?
Sometimes I've tried to use 3d environment, but it's a lot confusing.
I would love if you reach us 3D too
Thanks
U R AWESOME
I would like you to do a tutorial on the lenticular technique
Do more explanation type vids.👍👍👍👍👍
you are awesome !!
Hey Bro! Im a great fan of yours...Not Fan of only Your teaching but also your smiling attitude!!!
By the way...Which Version of photoshop are you using currently???It will be a great help for me if you reply!
Thanks in advance☺
Sir do some more videos on album designing and colours
great
:)
fantastic!
FYI - You can enter SBS VR videos into Photoshop, edit them with a great deal of flexibility, and re-render them back out as true SBS VR videos. The one big secret it that objects added must be in the EXACT same xy position relative to each half frame, or they will distort and blur. But current 3D content can be resized and moved without consequences using smart object croppiing of muiltiple layered video copies and/or clipping masks. Remember, just keep the xy position the same after you move and/or resize it. Also remember each half frame is different for 3D. Also depth can be controlled to a certain degree with semi-transparent outside background blending with the object behind it. This is amazingly effective at controlling the look of depth of the overlying layer.. This is going to become really useful as TH-cam's new 180 VR comes into widespread use (and it will). These videos are simply captured with Nvidia's Shadowplay or equivalent. I size all of these captures at 3840 by 1920 but that is not actually necessary. And they play back really well in the Whirigig Media Player for VR. While Whirligig has a stiff learning curve, it is the "Photoshop" of VR video players at just $4.99. Unlike all the others, it is a very complex VR player and "barrel mode" removes most of the edge distortion. One can create amazing VR experiences this way.
Best School Teacher!
Hi Unmesh,
What is the best Budget laptop for Photoshop ? pls suggest bro. give me options
Pls make an tutorial on brandon woelfel's editing skills
Will you please add movie poster techniques or tricks
Can you please make a video of all the shortcut keys of Photoshop?
很详细很棒棒
hi sir. please if you can. make some text effect tutorial with Photoshop. thanks for hard work thou :)
If I wear 3D glasses would I be able to see the 3D effect?
I was thinking about printing a canvas
Thank you very much for sharing your time and knowledge 👍👍👍👍
Hi, could you make a VHS or bulb tv effect tutorial?
What does analog Efex pro did in Photoshop
Explain abt that bro
You da man!
Very nice. :)
Can do explanation of rgb and colour theory kinda vids
How to I use the move tool....
Can be it called "Glitch Effect" ?
make tutorial on animated pic please in 3d animated
sir how to send you the screen shoot ??
can you do vidio how to change a photo to cartoon plz
Please make a video on How to combine profile picture and cover photo in facebook?
You are great bro.....
Make a tutorial to make glass effect.
that download link is broken maybe :/
Если кто-то ищет инструкцию, как сделать анаглиф в Фотошопе - вы нашли ↑ лучший ролик. Я тоже искал. Просмотрел штук десять. Этот самый вменяемый.
Автор не только внятно объясняет, _как_ это сделать, но и _как это сделать лучшим образом._ Так что можете внимательно смотреть трижды, запоминать или записывать, и делать )
Автору - спасибо 👍🏻
Всем - удачи! )
thanks for you
ADMIN HERE - Updated Link To Download Sample Image: drive.google.com/open?id=1SEWjdx4lsA91W_Gz0JDXM_-9sPqPanHF
Bhai zraaa html ko continue kro
About photo mask work sir
Next time please do on how to add fake piercing on the face or how to add fake tattoo
Great explanation and all, but it doesn't look 3D in my anaglyph glasses. I think that separation of colors of one photo is not enough. You need two photos made. One for left eye, second for right eye, and then place them in one place. Then seperate colors.
Since you seem to know more about PS than anyone else, there is a need to explain keyframes for the advanced user. Everyone knows what keyframes do, but NOT how they do it. What exactly are they setting for both smart objects and regular objects ? One is position relative and the other apparently is not. Some copy, some don't. This becomes important because a large group of keyframes cannot be modified as a group in smart objects (for the most part). But if you go into the smart object and move or resize it, the keyframes seem to update (sometimes, if you do it right and expand the area evenly). So is the keyframe the center point of that object or what ? Then keyframes embed in the smart object if you make it a smart object a second time. Now you have two sets of keyframes. What's with that ? And they sometimes update with a clipping mask if they are linked. Other times they don't If one truly understood the inner workings of keyframes (what they really are), they could figure out how to deal with them when bulk changes are needed with out a complete redo. This is a PS can of worms which is totally out of date for the advanced user. They need to work on this, not all this worthless cloud crap they give us in updates.
I wonder what this finished image would look like through red/cyan 3D glasses? 😊
dunnymonster it would look like a normal image! However, if you want them to look 3D, you can select and move different elements to different distances to create actual depth.
do I need special 3D glasses to see the final result?
Anaglyph 3d
I am not getting effectively
Are the youtube ads enough to pay for the hair gel? :D
I want a lesson for how can i use 3d panel in photoshop , please .
Early
i would think you would need to understand 3g anaglyph to teach about it first? you never use anything red or blue if you are using red/cyan anaglyph, this is why they make multiple colors of anaglyphs, if i was to do this pic it would have used trioscopic or magenta-cyan, maybe even color-code 3-D. you seem to know photoshop pretty well though I will give you that, but you should have learned a little about anaglyphs before making this video. thumbs up for photoshop skills, the end result is pretty without glasses on, but with anaglyph glasses it is a eyesore and all red. btw this is what actually understanding anaglyphs looks like.
I love your videos, but saying "actually understanding anaglyphs" seems kind of weird, considering you completely missed the point here. You want to deliver one image to the eye and another to the other eye by using complementary colors (such as red and cyan). However, the illusion of perspective is given when objects that are closer to the camera exhibit a larger shift in parallax than objects which are further away. If you just take the same image, duplicate it, and extract the red and cyan channels, you will not get any 3D effect no matter how much you shift them, because all features of the image are equally shifted irrespectively of their actual distance from the camera.
dude why you put watermark on the models photo? :/
Indian version of PHLEARN 😂
Photoshop shod do kal k din
too much going on in your intro imo, all the glitching etc is just too much. try keeping it more tasteful. good vid none the less
No image no like :-)
Baki saab to bahut acha hai, lekin yaar teri angrezi ko kya hoga? Be real!
It's unfortunate that this video is a complete misdirect and bad information. This in NO WAY explains how anaglyph 3d works, nor does it explain how to create an anaglyph 3d image correctly.
For those of you who actually care, here's how to understand anaglyph 3d... objects that are closer to the camera(s) would have more of a spread between the red and cyan, while objects in the distance would have less. Just like how your two eyes work. Your offset eyes allows you perceive depth. Anaglyph 3d replicates this ides and tricks your eyes into seeing depth. This means that you either shoot the same image with 2 cameras that are slightly offset (then apply red and cyan to them), or you separate all the objects in the photo and apply different distances between the red and cyan to replicate depth. Closer items have more spread, further elements have less. The latter takes a lot of work, but it is possible. There is a couple videos on youtube that explain how to do this... but this isn't it. But if you want to pointlessly offset your image and apply red and cyan to the layers and not make it 3d in the slightest? Then this is your video.
Not what it says. Ridiculous.
did not help at all. I'm not looking to make a magazine cover. Just a simple anaglyph.
Sorry, but you are completely missing an essential point with anaglyphs - one, global displacement for the whole image will create an 'effect', but not a real depth effect. For that to happen you need the amount of displacement to vary with depth in the image, to be different for e.g. nose tip and ears. This may superficially look a bit like an anaglyph, but certainly does not do the job of an anaglyph when you put one red-cyan glasses (which is what anaglyphs are for)
you talk too much
But she has no soul(