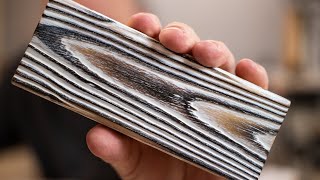
One Of These Things Is Not Like The Other / Shou Sugi Ban Face Off

แชร์
ฝัง
  • เผยแพร่เมื่อ 23 ส.ค. 2024
  • In this video I go over the two more popular ways to get a shou sugi ban or charred wood finish. One requires a little more steps, but they both have very different looks. Links to everything I used today are just below!
    BRUSHES TO REMOVE CHAR -amzn.to/2MjDMqv
    GENERAL FINISHES BLUE DYE STAIN -amzn.to/2MiO4HA
    VARATHANE VINTAGE AQUA -amzn.to/2T21Gcy
    VARATHANE EBONY -amzn.to/2MjY8Qg
    “PROBABLY WHISKEY” MUG - amzn.to/2M3wIhP
    Looking for BLEMISHED PEC COMBINATION SQUARES, DOUBLE SIDED TAPE and overall great savings ALL THE TIME? Shop where I shop! lddy.no/go67
    YOU CAN SAVE 10% ON STARBOND CA GLUES AND ACCELERATOR!
    Use the code “INSPIRE10” at checkout! www.starbond.com
    SAVE 10% ON OLIGHT FLASHLIGHTS, TACTICAL LIGHTS AND HEADLAMPS!
    Use the code "INSPIRE10" at checkout! olight.idevaff...
    BANGGOOD WOODWORKING TOOLS: www.banggood.c...
    MY HAND TOOLS, POWER TOOLS, CAMERA GEAR AND MORE:
    www.amazon.com...
    VISIT THE INSPIRE WOODCRAFT SHOP: inspirewoodcra...
    Adjustable Box Joint Jig Plan: inspirewoodcra...
    Multipurpose Shooting Board Plan: inspirewoodcra...
    All Purpose Tapering Jig Plan: inspirewoodcra...
    EMAIL: inspirewoodcraft@gmail.com
    WEBSITE: www.inspirewoo...
    PATREON: / inspirewoodcraft
    INSTAGRAM: / inspirewoodcraft
    If you appreciate this content and would like to help give back FREE OF CHARGE, simply give this video a “thumbs up”, leave a positive comment, subscribe to Inspire Woodcraft’s TH-cam channel and SHARE THIS VIDEO with someone who you think would enjoy it. Some of the links that we’ve provided above are affiliate links. That means that when you make purchases through those links, we earn a small commission of the sale at no additional cost to you. While we do use affiliate links where we can, we only endorse products or services that we believe in. That commission is a big part of our income, which also goes back into making more videos, so by using the links you help support what we do and for that we are very grateful.

ความคิดเห็น • 819

  • @InspireWoodcraft
    @InspireWoodcraft  5 ปีที่แล้ว +65

    What are your thoughts? Hard way or easy way? Maybe a time and place for both?

    • @InspireWoodcraft
      @InspireWoodcraft  5 ปีที่แล้ว +1

      A lot of times I do short pieces because I use them for collage type art pieces. Sometimes I make long runs and then cut them up into the pieces I need too. Just for production's sake. I've never done a jewelry box though.

    • @fred_derf
      @fred_derf 5 ปีที่แล้ว +11

      Great job showing the contrast between the two techniques.
      For me the long way produces a "proper" finish while the short method produces a faux-finish. It looks good from a distance or at a glance, but not close up. Not that a faux-finish is necessarily bad, sometimes it's what's called for.

    • @thegoodfight365
      @thegoodfight365 5 ปีที่แล้ว +4

      You covered that issue really well. Either way is fine, that's the nature of all art 🎨 in general. Personally I think I'd take the extra time and brush technique. Again, nice video

    • @quixoticjedi942
      @quixoticjedi942 5 ปีที่แล้ว +1

      Like you said, it's all about what someone is looking for. I prefer the hard burn and brush style over the simple one, but I like to see that deeper texture..

    • @jonnyb636
      @jonnyb636 5 ปีที่แล้ว

      I prefer the textured look. If I’m making a shadow box or a frame for something I used the textured look on then I usually just do the none texture on the frame so it doesn’t take away from what I’m displaying. Did I say that right?

  • @MrBonney1990
    @MrBonney1990 3 ปีที่แล้ว +22

    I only did any of my work using “ surface burn”, until I watched how you did it big guy. I’ll go ahead and say it for you. Your way produces works of art, and is far superior to anyone, who has actually seen a true, textured piece. You do beautiful work my friend. Keep it up!

  • @CaptainObvious1973
    @CaptainObvious1973 4 ปีที่แล้ว +96

    The "char and brush" process definitely leaves you with richer looking result. More texture and contrast.

    • @joseluislopez5539
      @joseluislopez5539 4 ปีที่แล้ว +2

      I think it would be a cool effect to exterior furniture

    • @muffemod
      @muffemod 2 ปีที่แล้ว +1

      Agree, but I like the low contrast look better. There is no right or wrong, just preference.

  • @emjay9323
    @emjay9323 3 ปีที่แล้ว +18

    Full burn is way more beautiful, however, sometimes you may be seeking a smoother surface, and the tradeoff is less color variation. This is a very helpful video. Thanks for the very clear explanation!

  • @subjectmatteramateur16
    @subjectmatteramateur16 5 ปีที่แล้ว +2

    I like your videos, you don’t ramble, you get to the point and aren’t wasting my time. I like your work too.

    • @InspireWoodcraft
      @InspireWoodcraft  5 ปีที่แล้ว

      Well thank you very much for the kind words!

  • @TellurianMarc
    @TellurianMarc 5 ปีที่แล้ว +12

    I did my first stab at “your” way this week and the texture and depth I got by brushing off after the char process is exactly what I was looking for. Thank you SO much for your videos and look forward to more ways a noob like me can fake it till I make it 🤘🏼

    • @InspireWoodcraft
      @InspireWoodcraft  5 ปีที่แล้ว +3

      Hey how do you think I've been getting by all this time? Ha! Thanks so much for watching. I'm really glad you got great results!

  • @daviddaniels6263
    @daviddaniels6263 5 ปีที่แล้ว

    Your method is so much better than the other. You get what you put in... time, care and attention pays off and creates a true piece of art. Skipping steps or cutting corners gives you a product that will never stand up against a job well done.

  • @adezone866
    @adezone866 4 ปีที่แล้ว +2

    I definitely like your char and brush method the best - the contrast and the "colour-fastness" of the dyes made the piece vibrant and "alive". I can appreciate, though, how some people would prefer the other way if they want a softer, more misty, look for their task at hand.

  • @sarahvail6777
    @sarahvail6777 2 ปีที่แล้ว

    Finally someone who shows and tells the steps AND the how's and why's of most of it. Love ur teaching style

  • @v-dub1317
    @v-dub1317 4 ปีที่แล้ว +5

    It’s well worth the extra time and effort to create that amazing texture and contrast. The difference, one looks good, the other (charred and brushed) looks amazing. Loved your shou sugi ban tutorial series! Thank you for the knowledge!

  • @aaronupton4584
    @aaronupton4584 5 ปีที่แล้ว +89

    Char and scoop, only way to go. IMO just adding a surface burn for coloration, then staining, looks dreadfully cheap and novice. Great videos by the way bro! I watch'm all!

    • @InspireWoodcraft
      @InspireWoodcraft  5 ปีที่แล้ว +1

      Much appreciated my friend!!

    • @kevosabum1
      @kevosabum1 5 ปีที่แล้ว +2

      To be fair, you can light burn and still get texture with brushing, kinda the best of both worlds: a fairly flat surface that still has some textural pop

    • @disillusioned070
      @disillusioned070 4 ปีที่แล้ว +1

      100% agree. Char and scoop or the long way is the only way to go if you want that true Shou Sugi Ban look. Japanese Shou Sugi Ban is charring the wood down to an alligator skin texture and then brushing it out. For furniture and crafts stopping short of the alligator skin is ideal in many cases but some amount of charring is needed. Many people don't realize the technique actual helps to preserve the wood. I also agree that anything less looks fake or novice and doesn't produce that 3d contrast of colors that really makes the work POP.

    • @gianttravelsbyvan9670
      @gianttravelsbyvan9670 4 ปีที่แล้ว

      Not at all. It made my van conversion one of a kind, and a sheen like no other finish has.
      th-cam.com/video/qKLlNyhTedE/w-d-xo.html&lc=UgzG_KFYSHTnaX70O1h4AaABAg

  • @toddkuhrt4380
    @toddkuhrt4380 5 ปีที่แล้ว +2

    The texture of yours is so much better. It has so much more character and depth.

  • @francoiselandriault8164
    @francoiselandriault8164 4 ปีที่แล้ว

    I started the Shou Sugi Ban method last year and I just love it. Nothing beats the texture that you can get with it. Thank you so much for your very informative videos. They help me a lot in creating a whole bunch of wall art.

  • @aldosv73
    @aldosv73 4 ปีที่แล้ว

    No, they don't look the same, one is the lazy way and you're way is the correct way to do it. I built a barn looking door for my washer and dryer room and did something similar to your technique and my wife loved it. Thank you for doing this and showing us all how to do it right!

  • @DBLOCKDBLOCK-uf3yy
    @DBLOCKDBLOCK-uf3yy 5 ปีที่แล้ว +4

    I will say this bro ! I like your choice just because it has more “ texture” and I see 3 tunes...
    1. the burn wood
    2. The grain on the wood
    3. The actual original wood when you sanded...
    But like you said ... and your right ... everyone has there preference... but I’ll definitely go with yours... just saying my opinion !

  • @pingman2
    @pingman2 5 ปีที่แล้ว

    I just started doing this technique and your way is night & day different ( Better ) so anyone who says your way takes too long, or there is too many steps,,,,,,Well they just don't care about quality.
    Your videos are great, very informative. I have learned a hell of a lot by watching you. Thank You for your time.!

  • @uptopmikep7065
    @uptopmikep7065 3 ปีที่แล้ว +1

    I really like using water based dyes mixed from dry powder. Lots of control of dye density and intensity. Stains are great too. It all depends on the look you desire. In this series I love the dimensionality of the charred wood. Thanks for your tutorials.

  • @HeatherWrightArt
    @HeatherWrightArt 3 ปีที่แล้ว

    Totally agree, the hard way is definitely the most beautiful... the texture, the contrast, so phenominal!

  • @laboulesdebleu8335
    @laboulesdebleu8335 5 ปีที่แล้ว +2

    I like both! Technique used depends on the application. Hard method produces a dark char of hard wood and allows the bare soft wood to soak up stain for a nice contrast. Whereas the Easy method only lightly chars the soft wood and the stain only lightly soaks in to the uncharred hard wood and also only lightly soaks in to the lightly charred soft wood, resulting in a color washed appearance (seems to resemble old barn wood that has had a wash applied rather than a stain).

  • @bryanseward3649
    @bryanseward3649 5 ปีที่แล้ว +3

    Each year I teach my students how to make a true shou sugi ban board. It’s dirty, it’s time consuming, and it’s a lot of fun. Charring that wood is the way to go, and correct way in my opinion. Another person commented that the other way was incorrect and more like what his wife shows him in Pinterest, I couldn’t agree more.

  • @johnemmons9087
    @johnemmons9087 2 ปีที่แล้ว

    One IS better. Too many steps?! Unbelievable! There is a CLEAR DIFFERENCE! Your technique was really awesome. In fact I’m gonna use it on a project I’m currently working on.
    Thanx! Don’t let arm chair woodworkers get you down!

  • @dav2wen842
    @dav2wen842 3 ปีที่แล้ว +1

    Nailed it!!! Thank you for your explanation. I realize now that I was mixing the two techniques without realizing. At times, I am a little heavy handed on my burning. This helped me to understand what might be happening. Great tip

  • @amycyclenut
    @amycyclenut 5 ปีที่แล้ว +2

    I wanted to say thank you for your Shou Sugi Ban series. Mostly, thanks for the info on which brushes you use. That was what really sets it apart from just a steel brush. I made a really cool looking bench with your method. I haven't figured out how you get that subtle coloring you do. Maybe using the wrong product. Anyway, thanks man, my bench is bad ass because of you.

  • @rossking2126
    @rossking2126 5 ปีที่แล้ว +23

    Ive done both methods, in my opinion digging out the char is by far the better quality finisb, i epoxy over the top and it gives a real depth to the piece.

    • @InspireWoodcraft
      @InspireWoodcraft  5 ปีที่แล้ว +7

      Full char looks absolutely AMAZING under epoxy too!

    • @beefknuckles
      @beefknuckles 4 ปีที่แล้ว +1

      That sounds amazing I'd love that try that. Thanks for the idea Ross (& Inspire Workshop)

  • @Golgafrinchamdent
    @Golgafrinchamdent 3 ปีที่แล้ว +1

    I see your old green DeWalt radial arm saw and it brings back memories of my Dad's shop. He had two of those permanently mounted in a high bench along the wall. Bearings were so smooth the blade would spin forever. Until one day he had someone _repair_ one and monkeyed it up.

  • @allieb452
    @allieb452 4 ปีที่แล้ว

    I think the right way is a richer look. You get people in a big hurry and don't want to commit time in to a project. We live in a "I want it now" world. I like your way and I am going to try and use that technique on a pull out trash bin for the kitchen. My first project ever. Thanks for the tips.

  • @jaden9037
    @jaden9037 3 ปีที่แล้ว

    I think what you’re doing is awesome there’s a very clear distinction between the 21 you have a death in the contrast in the other one is just a piece of wood with stain. What I don’t understand is people criticizing other peoples creativity and how they do things clearly yours is one that really makes a statement !! I would purchase your furniture that you make over theirs any day. Stay true to You !!

  • @ryanhendricks7304
    @ryanhendricks7304 5 ปีที่แล้ว +3

    Customers love the texture and feel of the brushed wood. Definitely adds character and beauty to the piece, especially smaller pieces like picture frames or plaques. I use Minwax water based stains for their variety of colors. Great video. Your first how-to vid inspired me and my customers are very happy, so thank you!

    • @InspireWoodcraft
      @InspireWoodcraft  5 ปีที่แล้ว +1

      That's so awesome to hear! Seriously that's what our very namesake is all about so thanks so much for sharing that!

  • @Yeshuaschosen
    @Yeshuaschosen 4 ปีที่แล้ว

    I agree with you! One of those is not like the other. They're two separate techniques that will give you totally different results.

  • @dr.davidamador1158
    @dr.davidamador1158 5 ปีที่แล้ว +8

    Great explanation, just started doing this procedure, and have always done the surface burn, but you get so much more texture and character with the char/brush technique. The extra work is worth the time and your eye is on point.
    Great vid

  • @1stfu
    @1stfu 5 ปีที่แล้ว +3

    Hard way for sure! I’m my opinion my woodworking isn’t about cutting steps. It’s about making the best looking piece I can for myself or someone else.

  • @1satisfiedmind
    @1satisfiedmind 3 ปีที่แล้ว +1

    I've never seen Shou Sugi Ban before, very cool. I did see something similar with wire wheels on unburned wood, it removed the softer parts and left ridges as well, but I like the burn effect.

  • @timeenuf4200
    @timeenuf4200 3 ปีที่แล้ว

    The full burn is so much brighter and offers more color and design outcome. Thank you for the side by side.

  • @kaimanacortez
    @kaimanacortez 4 ปีที่แล้ว

    I agree with you. The way you did it with the char and brush off looks much nicer than the other way.

  • @trouttrapper
    @trouttrapper ปีที่แล้ว

    Amazing, worked with wood most of my life and never knew of this technique until now, thanks for showing the differences between both

  • @tomim7187
    @tomim7187 5 ปีที่แล้ว +1

    Have to give to Jodi, preference trumps all else. If you are just doing for the sake of doing but, don't want to spend a lot of time, then by all means go the quick route. If it is not what you or your client likes, well, then make the "right" choice.
    Thanks, that was a great tutorial. Keep 'em coming.

  • @aliciamoon9816
    @aliciamoon9816 5 ปีที่แล้ว +1

    Yours looks so gorgeous, there's so much dimension to all the colors in there.
    Very glad I stumbled upon this video.
    Each method absolutely produces a different result.
    I'm making a reclaimed-wood looking table, and I want the wood to look as if it came from different places, so I'll definitely alternate between both techniques.

  • @GTX1123
    @GTX1123 4 ปีที่แล้ว +1

    Just did my first burn yesterday with a large propane torch for a box spring cover I'm building made out of 2x10's. Char and scoop seems counter intuitive at first and it is a lot more work but the problem with a very slight surfacy burn is you just don't get that 3D texture. The more the char, the more the 3D texture you get and the scoop reveals the magic.

  • @CandiceWA
    @CandiceWA 3 ปีที่แล้ว +2

    What you put in is what you get out. Yes, I like how your way of doing it, it is a world difference to me. Thank you so much for demonstrating it, that I know what steps should not skip :D

  • @krishudgens9913
    @krishudgens9913 5 ปีที่แล้ว

    As someone who has used your process and built an entire desk using it...I can assure you that there is no other way to create that 3D contrast other than to char, brush and stain the wood. Great breakdown @inspirewoodraft.

  • @yoursotruly
    @yoursotruly 5 ปีที่แล้ว +1

    It's not real Shou Sugi Ban unless it's fully charred, that is the traditional method and the other way is just a lazy short cut, the quality shows and I thank you for gently steering me down the right path as I begin my first project!

  • @mathius8645
    @mathius8645 5 ปีที่แล้ว +1

    I just discovered this method a week ago and your videos are insanely helpful... I agree time and place. I did a pine outdoor table and did a light burn and just used poly and it came out amazing... but for a smaller piece I charred to get the raise grain for staining also looked amazing...

  • @missingstaleydaily706
    @missingstaleydaily706 3 ปีที่แล้ว

    Wow! This video is so informative. It really shows the effects of burning deep and barely burning. I now get the concept of burning.Thank you! And their is a huge difference! Awesome!!

  • @ivorytelecaster
    @ivorytelecaster 5 ปีที่แล้ว +1

    Your technique is miles better. It’s that third colour tone between the char and the stain that makes your style pop. As soon as I clear off my long list of projects I’m making a guitar using your technique. 🙏

    • @InspireWoodcraft
      @InspireWoodcraft  5 ปีที่แล้ว

      I want to do a guitar and a rifle stock really bad (mainly because I've been asked a thousand times). Let me know how it goes!

    • @ivorytelecaster
      @ivorytelecaster 5 ปีที่แล้ว +1

      Inspire Woodcraft will do. Unfortunately, building an addition on my house is one of the projects in line before the guitar so it may be awhile 🤘🤣🤘

    • @danky-_-stanky4500
      @danky-_-stanky4500 3 ปีที่แล้ว

      @@ivorytelecaster you get to that guitar 🎸 yet lol I’m interested in what that would look like 👍

    • @ivorytelecaster
      @ivorytelecaster 3 ปีที่แล้ว +1

      @@danky-_-stanky4500 I wish! Still building my house addition. Maybe in about a year I’ll finally get to it. 🤬

  • @MakerCuisine
    @MakerCuisine 4 ปีที่แล้ว

    Burned and brushed, true Shou sugi ban, looks the best and there's no way you're going to beat the dimensional look you can achieve that way it just brings some much beauty to a piece

  • @briandstone1able
    @briandstone1able 5 ปีที่แล้ว

    More work = Better product. I like the contrast of the second one better, I like how the colors pop more. The first one is very muted. I can see value in both methods depending on what the project is. And, it's nice to know different ways of doing things.

  • @ericschmidt3560
    @ericschmidt3560 5 ปีที่แล้ว

    They are so obviously not the same! I love the deep burn but also like the surface burn. I’d say subtleties are lost on some people but the difference is not subtle. Thanks for the video!

  • @Jkcreswell
    @Jkcreswell 3 ปีที่แล้ว

    I am SOOO in love with the burned and brushed piece of wood with the Varathane Vintage Aqua stain! I went out and purchased a torch and the stain 💙

  • @haroldbartley5970
    @haroldbartley5970 5 ปีที่แล้ว +1

    I agree with you, the charred and brushed way has a much better finished look. The other way might be useful if a client wants that look or something a little less expensive. Time is money.

    • @InspireWoodcraft
      @InspireWoodcraft  5 ปีที่แล้ว

      Yeah very good point. Costs in material may be the same but the labor is way higher.

  • @nicop2938
    @nicop2938 5 ปีที่แล้ว +1

    I char like the first one and brush or sand lightly buy hand, but only tried on pine.. turns out real nice like the second one tho..and been playing with watered down blue food color, it can go from dark blue to metallic green and looks amazing with 3to6 coats of floor polyurethane. Watered down old toll paint makes good cheap dye as well. Good vids

  • @kylerunyan5950
    @kylerunyan5950 3 ปีที่แล้ว +1

    I love how you take the time to do a comparison of the two. My 2 cents on this is part of the decision may need to be made as to the application of the wood itself. If I was going to make a table and wanted a smooth top, the deep char and removal method would take away from the evenness of the board and create peaks and valleys that unless you used a clear acrylic on it could have some bored kid picking away at it and ruin your project. The one where you just darken it and don't remove much, if any of the char other than a soft sand or wipe down would leave the wood mostly intact and you wouldn't have those peaks and valleys to be ripped to shreds with someone with ADD/ADHD or has a destructive behavior. I agree with you that the deep char and removal method adds a much more amazing look to the wood as it adds extra levels of shading and dimension to the wood where the other method does not.

  • @lukefitt56
    @lukefitt56 5 ปีที่แล้ว

    I like it! I wonder how many people who think it’s the same have never had a true side by side comparison? I appreciate the explanation!

  • @samrasimplicity
    @samrasimplicity 3 ปีที่แล้ว

    Full char and brush is gorgeous in my opinion. I love the texture and contrast. Again like you said, to each their own and the two techniques do not produce the same result. Thank you for the video. 🥂

  • @wendyhenschel.
    @wendyhenschel. 2 ปีที่แล้ว

    Your way shows up way better for me. The contrast is so much better and i love the 3d look

  • @amandawood419
    @amandawood419 3 ปีที่แล้ว

    My personal opinion...hands down the way you did it, even if it takes longer. When you compare the two I dont see how anyone could not choose that one. It has so much more detail and contrast.

  • @jasonyoung8215
    @jasonyoung8215 4 ปีที่แล้ว

    Your way is baby far much better for my taste. Your videos are quite informative and inspiring. Thanks for the time you take to put them together. Very much appreciated.

  • @angeepanjee
    @angeepanjee 4 ปีที่แล้ว +2

    I totally think it's worth doing the extra steps. I love the look it achieves.well done!!!👍

  • @jeremyholdenful
    @jeremyholdenful 4 ปีที่แล้ว

    The Shou Sugi Ban method has a richer look and feel. It will come down to preference though. Thank-you for the videos! They are very helpful.

  • @msmith2961
    @msmith2961 5 ปีที่แล้ว

    This is like a laminate flooring versus real timber flooring argument. Sure, laminate is cheaper and easier, but it ain't never gonna be real wood.
    Love your method and can't wait to give it a go.

  • @kayhaskins7271
    @kayhaskins7271 3 ปีที่แล้ว

    WELL!!! Thanks a lot. You just made a lot of work for me. LOL. I have looked at so many ideas and experimented with paints for a bookshelf husband made me. Thought I had settled on one till I watched this video. This is so gorgeous.....have to do it.

  • @ryanpetersen3037
    @ryanpetersen3037 4 ปีที่แล้ว

    Epic video brother!!! I'm using upcycled pallets to remodel the walls and floor in my 1984 Sunflyer Motorhome... I have been watching videos on this technique of staining wood for some time now but I think your video just sold me on it!!! Both samples look really good, though as an old painter, I have to agree that your method leaves you with with a more vibrant, interesting and just more enjoyable piece to look at and the art is more of a love and passion, so the steps by the right person truly aren't a waste of time... Again though as you mentioned, it's all in how each perfers and enjoys their surroundings to look... New sub for sure, can't wait to see more!!!

  • @duderino1950
    @duderino1950 5 ปีที่แล้ว +1

    I’ve just binged on all your videos. I like your presentation style. You’re a natural teacher. I’ll definitely try your techniques. I agree with you about your preferred look for final product. I don’t understand people who complain about “too many steps”. It takes what it takes to get what you want. I think the quicker way looks. . . quicker. My own interest will be to apply these techniques to wood sculpture. Can’t wait to see what I get. Nice knowing you.

    • @InspireWoodcraft
      @InspireWoodcraft  5 ปีที่แล้ว +1

      I really appreciate the kind words and feedback, Larry. Good luck on the sculpture!

  • @kerrycreel4776
    @kerrycreel4776 4 ปีที่แล้ว +8

    I love how you handled that. You’re a genius!

  • @elwood212
    @elwood212 2 ปีที่แล้ว

    I used the burn brush and white wash with a watered down chalk paint and then polyurathane sealed our alfresco table about 8 years ago. It’s needing a redo now so it lasted a surprisingly long amount of time this table takes a beating and is regularly used for my material cutting larger pieces.🇦🇺

  • @hugeackman7524
    @hugeackman7524 4 ปีที่แล้ว

    Personal opinions are what get us all into trouble. Take information at face value and do what you want. My philosophy. I dig both for different reasons but I am partial to charred, brushed, leave on. Thanks for the video.

  • @KimiW
    @KimiW 5 ปีที่แล้ว

    I much prefer the barnboard'ish look and feel of 'the hard way'. Beautiful tutorial, I'll be dusting off the old torch for my dresser project ~ thanks to your fine tutelage! 👍👍

  • @andrewrance
    @andrewrance 5 ปีที่แล้ว

    Great Video, I get it that engaging with comments and responding to differences of opinion is a great way to maintain interest. My main sense in this video is that it's divorced from the main idea or Shou Sugi Ban. Aesthetic is only one part of the concept. What about performance? Deeper grooves in wet are likely to cause the wood to age quicker as it will retain more moisture however the deeper burn may have closed the pores of the wood further than the quick technique and hence made the service of protecting the wood more successful. Be great to see them both after having been exposed to the elements...

  • @martalo580
    @martalo580 3 ปีที่แล้ว +1

    I very much appreciated this tutorial and the explanations of both techniques. I am terrified to burn anything but this has inspired me. Great video!

  • @fixityourself1111
    @fixityourself1111 5 ปีที่แล้ว

    Spot on informed explanation...I'm just about to do 2 different pieces of work one an old cable drum and an old table, this video has made me understand how I can at least try to get the same finish if I dig into the grain or not to gauge my finish.
    Spot on dude...🖒

  • @serenityjewel
    @serenityjewel ปีที่แล้ว

    The charred wood is GORGEOUS!

  • @mrjarrett718
    @mrjarrett718 5 ปีที่แล้ว

    Hey man I did it both ways and you're absolutely right there's honestly no comparison. It takes a bit more time but your way is also more forgiving, doing it the other way and not getting splotches isn't easy. Thanks for doing all these videos on the subject it really helped. My round table came out pretty good, I used a blue dye and it came out darker than expected but I probably didn't dig back the wood enough. Still looks good though!

    • @InspireWoodcraft
      @InspireWoodcraft  5 ปีที่แล้ว

      The blotchiness and hot and cold spots is the WORST! It does take some patience and practice for sure, but I'm really glad the end result is something you're happy with!

  • @barstad-9591
    @barstad-9591 5 ปีที่แล้ว

    I think that it’s the texture that matters and absolutely worth the time. The easy one looks half-assed to me.

  • @birdenagage13
    @birdenagage13 2 ปีที่แล้ว

    I was SO Happy to view this!! It's just Amazing what finishes are doing to wood now!! I Love the process & can't wait to use it. Great Artistry, thanks for showing both ways for those not as into the artistic process. I myself am into it & I Love it Best & will be following you for sure. Thank you Very Much for sharing Your Great Talent, & Instruction!!
    I am working on a coat rack my Dad made years ago on a single board, i want to use this color on it. (It may be a cherry board, but its going in a Bathroom with Ocean decor.) I'm replacing older/cheaper coat hooks for black fancier hooks. This will be SO Beautiful, if the burn takes the orangish color out, which it should.

  • @wood4nothing284
    @wood4nothing284 5 ปีที่แล้ว +2

    I agree that the one on right was best and if you put in the extra effort it shows in your work.
    Cheers
    Tim from wood4nothing

  • @JohnathonWhittaker
    @JohnathonWhittaker 5 ปีที่แล้ว +2

    one is a cheap rip off and one is an art form. no comparison. some people will always prefer the easy option. great video!

  • @arnavcryogen
    @arnavcryogen 4 ปีที่แล้ว

    Thank you Inspire Woodcraft, for the video. As I understood, doing the complete burning and sanding technique will leave areas which will not strain sand remain brown.
    I planning to a dining table with almost a midnight blue and thing the black grain will give it a good texture but brown grain will not pair too well with the colour. I guess I'll go for the light blowtorch and not sand it down. 👍.
    Thanks for the video.

  • @NorseForse
    @NorseForse 5 ปีที่แล้ว

    Your technique looks sharp! Has a noticeably higher quality appearance. It really brings out the contrast. And I LOVE the texture created by it! Thanks so much for showing the step by step! 👊

  • @jennhoff03
    @jennhoff03 5 ปีที่แล้ว +1

    What I'm wondering is which will hold up in the elements over time. The way I understand it, one of the benefits of shou sugi ban is that it tempers the wood such that it holds up longer when used in outdoor structures or furniture. I'd love if you could put both those samples out in the yard for a year, and after all the rain and snow and weather, see which one lasts better.

  • @4444angelique
    @4444angelique 4 ปีที่แล้ว

    so basically if you don't char the wood and brush it you don't get texture or the color variation!!! this is a great tutorial!!!

  • @mhaz49
    @mhaz49 5 ปีที่แล้ว +2

    Once you understand what Shou Shugi Ban is, there is only one way - burn to charcoal, brush out and finish. It is the burning to charcoal that gives the protection that will last for years.

  • @Sly_Wolf_1
    @Sly_Wolf_1 5 ปีที่แล้ว +1

    Keep doing what you're doing!
    Your way is the only way inmho, you only get out of a job what you put into it.
    Thanks for taking the time to film and post this video. 👍

  • @myRefuge3710
    @myRefuge3710 5 ปีที่แล้ว

    That's real shou. The many step one. The flat is just a soft version of it. But yeah your right. It's the look your looking to achieve. Preference. I like the real way. Looks nice. Thanks for putting it out there on the web. Well done explaining and sampling.

  • @chrisgriffith1573
    @chrisgriffith1573 3 ปีที่แล้ว

    So many people remove steps that are game changers, and claim they "do it better with less steps" -aaaand they don't. I think your way is better. It shows more contrast and has depth of color.

  • @davidvgoliath
    @davidvgoliath 5 ปีที่แล้ว

    Gotta say you really inspired me. Your technique works!!!! Got ahold of a beat up dining table and used your technique on it, now it looks like a million bucks. Thanks man keep the awesome videos coming.

    • @davidvgoliath
      @davidvgoliath 5 ปีที่แล้ว

      Wish I could show you the before and after!!!

    • @InspireWoodcraft
      @InspireWoodcraft  5 ปีที่แล้ว

      Thats so awesome to hear! Thanks a ton for sharing!

  • @corina148
    @corina148 5 ปีที่แล้ว

    I have a spool that I'm turning into a table and have been waiting for the weather to clear to start. I started today and burnt the wood to the char then followed what you did and am loving how it's looking! Thank you for your video!!!

  • @satanssugarbaby7898
    @satanssugarbaby7898 5 ปีที่แล้ว +6

    Love it! Your video is super well explained, really good quality, good angles and is not the "ugh... go to the point!" Type of video♡

  • @MrCubas69
    @MrCubas69 3 ปีที่แล้ว

    I have what I needed for my old electric guitar!!! your way is so much beautiful in my opinion, thank you for this video, well explained, not too saturated with too much information, just right.

  • @BobMuir100
    @BobMuir100 3 ปีที่แล้ว

    I really enjoy your view point and how you stand them up and do it fairly in front of us , well as best as the medium allows.

  • @tony.g20
    @tony.g20 4 ปีที่แล้ว

    Great video to show the difference in techniques. The life lesson however is almost as old as time itself. A+ effort, A+ result..... And for those that prefer to save time because they prefer the result, well then I guess you the best of both worlds.

  • @wschr3771
    @wschr3771 5 ปีที่แล้ว +1

    Love all your stuff. I agree that it does depend on what people want to see and it's all " in the eye of the beholder" BUT...in order to make it POP as you would say, one must deep burn, brush, and sand.

  • @terrmaso
    @terrmaso 4 ปีที่แล้ว

    It's human nature to look for shortcuts. Those who do not understand a process will criticize and try to find an easier way. Your video does a great job of demonstrating the vast difference in craftsmanship. Keep doing what you do, don't let the "critics" bother you. I love you videos and will be attempting to incorporate this technique into some of the things I do.👍

    • @InspireWoodcraft
      @InspireWoodcraft  4 ปีที่แล้ว +1

      Completely agree with you. Thanks for continuing to watch and for the positive feedback!

  • @prettycali3851
    @prettycali3851 3 ปีที่แล้ว

    That blue and burnt look is gorgeous

  • @mattmarcoux2530
    @mattmarcoux2530 5 ปีที่แล้ว

    Good video. You demonstrated what the original purpose of shou sugi ban actual was (way of preserving wood/or water proof) right around 4:40 or so. 👌

  • @faustinomendoza8437
    @faustinomendoza8437 ปีที่แล้ว

    I don’t mind putting in the time your way is very artistic, and much better. Your very cool in not taking sides👍🏻

  • @PieroBonamico
    @PieroBonamico 3 ปีที่แล้ว

    Great explanation! It didn't seem like a “rant” to me! I can see valid applications for both and appreciate the time you took to show us.

  • @koolrob8829
    @koolrob8829 4 ปีที่แล้ว

    I personally do it the long way in order to get that nice gran texture especially when making a computer desk.
    Now I know that you wont be able to use the desk for writing, but it's primarily a gaming desk.
    I find another option is polycrylic finish that drys clear but gives the wood a wet look making the colors pop out at you and if I wanted to be able to use the desk for writing, I could just add layers of the sealer or just epoxy the entire desk.
    For me it wasn't about the challenge, but more about what color I wanted and if I would appreciate the grainy texture. In other woods my aspect between the two pieces is not difficulty and shortcuts but about color and style.
    Inspire Woodcraft I really appreciate you going out of the way to explain these differences.

  • @Angelspotter
    @Angelspotter 5 ปีที่แล้ว +2

    I absolutely prefer the brushed one. Texture, more vibrant colours and a larger colour spectrum. Next to it the other one looks dull.

  • @atlas5651
    @atlas5651 3 ปีที่แล้ว

    This is super well explained. Im so grateful you shared this! Because I've been wondering how to get this particular look. Very professional video. 👏🏽👏🏽 Thank you for making this!

  • @traceyroy3754
    @traceyroy3754 5 ปีที่แล้ว

    In my opinion, if you want a quality textured finish then burn and brush is the only way to achieve that. The depth of colour and texture is simply stunning!

  • @JAHManeShaker
    @JAHManeShaker 3 ปีที่แล้ว

    Personally, no contest. The full burn gives such a beautiful rich variety of colour tones and textures. I’ve never tried this but would love to give it a go. Have blow torch-will burn 🔥❤️