Improve Ender 3 print quality: OMG DM1 dual gear lightweight direct drive extruder upgrade

ฝัง
- เผยแพร่เมื่อ 16 ต.ค. 2021
- Welcome back to Aurora Tech Channel.
In my previous video, I upgraded my Ender-3 Pro to have a dual Z-Axis, a dual gear extruder, and a Capricorn bowden tube. It works pretty well compared to the stock Ender-3. The Bowden setup does have its limitations, like how it can’t print flexible filament like TPU. Furthermore, when I print something like this Eiffel tower, it can’t handle the crazy amount of retractions and the model does not look good.
I also tried the Creality direct-drive upgrade kit. It improved a little, but the weight of the stepper motor is a problem. Another problem is that it just came with the standard single gear extruder which is the same as the stock one. I’ve always been trying to find a high-quality direct drive setup for the Ender-3. It has to be lightweight but powerful enough to push and retract the filament and deliver a better print quality.
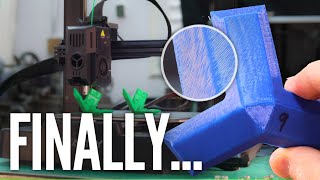
Today, I will test this OMG DM1 Extruder by My3D. This thing is not cheap, it costs $85. It’s compatible with MK8 and E3D V6 hotends. You can install it as a Bowden setup or direct drive. It came with a Japanese brand ASPINA mini stepper motor. The weight of the motor is around 94 grams and the extruder is around 65 grams, so the total weight we add to the hotend will be just around 160 grams. You also don’t need to 3D print another mount to fix it on the X-carriage, it screws directly to the hotend. The dual gear inside the extruder actually works like 2 extruders. It looks like a well-engineered extruder. I will assemble and install it on this Ender-3 Pro and see what kind of print quality we can get.
Affiliate Links:
MY3D OMG DM1 Extruder
amzn.to/3p8gt8B
Creality Refurbished Printers (SAVE UP TO 50%):
bit.ly/3q17mGi
Used Ender-3 ($79):
Maybe in bad condition, but if you know how to fix some common issues of a 3D printer and have spare parts to replace by yourself, that could be an amazing deal:
bit.ly/3LPnzHw
Related Videos:
Prusa Mini+: Review and fixing layer banding issue:
• Prusa Mini Plus 2021 R...
Prusa $750 MK3S+ VS $155 Ender-3
• PRUSA i3 MK3S+ 3D Prin...
Follow us on Twitter:
/ aurora_lung - วิทยาศาสตร์และเทคโนโลยี


Even though your channel is new, it has quickly become one of my favorite 3d printing channels. I love you videos!
WOW, what a great video. Clear, concise and packed with content. Well done!
I wasn't going to go direct drive but now I'm rethinking that strategy. Thanks, Aurora!
Lovely clear and concise review, thank you!
Just getting into 3D printing and your videos are the best ones I've found by far! Please keep it up!
I just installed the OMG DM1 on my Ender 5, I agree it is awesome, thank you for reviewing it.
Thanks for the advice. This was a well-planned tutorial.
Great walkthrough of the upgrade process 👍
Great video as always 👍😀.
I've seen this extruder before, but dismissed it, but the LDO motors make it a great option for an upgrade 👍
Thanks for sharing your experience with all of us 👍😀
Thank you Aurora. This video is the richest in details for the product. Excellent review.
awesome video! i blindly bought this extruder and decided to see if there were any videos about it and from watching your video im glad i bought it. great job on the video.
I had my eye on this extruder :) hadn't found other reviews on it but looked great. I ended up buying the biqu h2 for my tronxy d01 still haven't installed it as I've got to design an adaptor for my carriage..your fusion 360 tutorials are a great help :)
Fantastic print quality! Thank you for sharing!
This has been a very useful review to me, as I am upgrading an Ender 3 V2 clone from Voxelab. Thank you for your assistance and enthusiasm!
This is exactly what I am looking for. Awesome review as always
Great review! I would have loved to see you use the same filament roll for comparing prints between each printer.
Thank you so much for this video , loving my OMG D1 , you saved me alot of confusion as omgextrd's videos not descriptive! Let them make carry on making great extruders!
That's gotta be the cleanest benchy I've seen. Looks like a great extruder.
Excellent video and presentation. I will be tackling this topic soon on my Ender 3 Pro. You go girl, go.
You are an intelligent and well-spoken young lady.
Good, informative and detailly guided video. I'm thinking now about next upgrade.
This is brilliant and seems like the perfect thing for me. I have bought a dual gear extruder but I’m now learning that dual gear extruder a have their own problems.
Great video young lady. These are the exact upgrades i like to do to my ender 3. Right now I'm using the direct drive from creality and my only complaint is it should have been duel gear as i do have slippage on rare occasions.
I don't see a big enough difference using this extruder over stock. This is a very well produced video and you should be proud of yourself. Thank you for sharing this information.
Greetings and thank you for this upgrade video.
After watching your efforts here I decided to upgrade my Ender 5 Pro with the OMG Direct Drive Extruder. In the beginning the extruder worked fine but after a while I started to experience " clicking " and under-extruding with my prints.
After a lot of work with the Hot End assembly I found out that the Ref voltage setting of 0.57vdc that came with the kit was too low and would not allow enough current to maintain the torque required to overcome the running filament pressure in the hot end. The stepper manufacture Aspina allowed for a 1 volt reference and 80 degree C temperature. So I adjusted the Ref voltage to 0.700vdc and recalibrated the e-steps and ran some prints. To my delight the clicking and under-extrusion issues were gone and the Gearbox of the extruder was at 38.55 deg C and the Stepper Motor was at 34.88 deg C. I added a 25x25x10 12vdc axial fan for a little additional cooling which resulted in a Gearbox temperature of 31.85 deg C and a Stepper Motor temperature of 30.16 deg C.
I thought that if anyone else might be having similar issues this information might be helpful.
Thanks again for sharing your upgrade it is great work.
Doc'
What a beautiful video. Well spoken and well executed. Top.
These 2 kids are gonna go far in life
So concise and helpful. Very professional presentation.
like a new brand 3d printer! looks amazing! Thank you Aurora!
@@dangerous8333 I'm printing petg and pla, still the stock hotend works fine. I change the mk8 extruder by a full metal parts from creality and capricorn PTFE tube. It's a must have. 👌
your videos are well presented and the explanations are clear , very well done and thank you for sharing your experience , you have a good feature in front of you keep on your good work ! and like i always say to my 3 daughters it's girl power !!! 💪 👍
Works like a champ. Thanks for the video and advice.
The cadence of the speaking in this video reminds me so much of Teaching Tech. Good review!
Clear and Concise...thank you.
You appear to be a highly intelligent young lady. You are clear and concise. I thank you.
Limiting factor is the bed slinging deal. That will be the main limiting factor of speed on that printer. Great video and great production quality.
Amazing video! May I suggest you use the same dark color filament to print all your tests? The white doesn’t show up well and it’s hard to see the differences.
I just bought this extruder 2 weeks ago I still haven't installed it. It's good timing you released this vid, a bit of a preview of what I got myself into. You are suppose to lower the amperage on your board's extruder to 0.8 by adjusting the potentiometer from what I can recall because the smaller motor cannot handle the default settings, after awhile it will burn out.
I have printed 50+ hours straight and it seems OK, the stepper motor temperature is normal, not getting too hot at all, according to the manual, the max temp of the motor should not be over 80C, I didn't measure it, but when I touch it, it should be way below 80C.
@@AuroraTech That's good info, thanks!
With how detailed you are in your videos I'd love to see a video of you installing Klipper on the Ender 5.
Great review/tutorial. The price recently went up to $97, but sure it will go back down like most new upgrades. Cheers
Quality info and walk through sub'd
Hello! Love your videos, so detailed and very informative! Just wondering if the DM1 will work on an all-metal hotend like the BTT. Thank you!
Awesome video of this extruder, the only thing I'd say is to use a Capricorn PTFE! They handle more heat, and have a lesser chance to offgas from heating. Not to mention they are more accurate as far as inner diameter!
Thank You
This was useful.
On cube printer like Ender 5 series, the Bowden setup can still provide improved retraction by using a dual gears and mounting in the middle of Y plane. This will shorten the filament length to the print head vs gantry setup.
I've been looking for the details and reviews of a dual extruder for the ender 3! And then your video popped up! Looks great! Do you have videos with Nylon, Peek, and TPU?
I used to run a Stratasys Fortus 900mc for an oil tools manufacturer. One of the big things I saw in there that I've often wondered about implementing on my own 3D printer as soon as I become smart enough was the existence of drivers at both ends of the Bowden tube. One right at the filament reel to relieve tension from pulling and one right at the hot-end with a tiny drive motor since it only managed the back-lash and retractions. With a micro-switch at the hot-end to detect filament ends or breaks, it was possible to add a new reel to the feed and pick up right where a print left off. I'm no programmer and couldn't possibly figure out how to use a similar-but-distinctly-different-for-commercial-purposes setup on my home printer but have you considered trying such with that cool tiny hot-end driver?
Running two 900mc and one 450mc as I type this haha. My home printer has a nice filament sensor that works great, it will pause the print and retract. Pull out the filament remnant and load another reel and it's good to go. A much simpler and cheaper process then all the proprietary garbage on the stratasys machines.
Great I just finished my extruder upgrade of the OMG DM1 I got 2 gears in my package. I assume it is either an extra gear or a different gear ratio. Not sure? Watching the video as I assembled my extruder and the video made things easy. I also got a new X-axis carage adapter for the extruder since I was not sure how to install this extruder to my E3D hotend. So with the adapter carage I am going to try it with a very short Bowden tube and see how that works.
Well done great video would be interesting to see some flexible filaments
Well done 👏
Excellent, clear and interesting videos! Very straight forward. Thanks! You got my subscription and thumbs up with ease. Regards from Germany. ;-)
Excellent video
Thank you for doing this video.
It is very well done.
Did you think about also upgrading to an all metal hot end at the same time?
Would it be that much more work?
You should give the microswiss direct drive a try. The all metal hotend and direct drive mount are 100 bucks but its worth it. Its a very simple yet really effective, light and really good quality and the prints are night and day compared to stock
great video! thanks for sharing~
Yeah I get paranoid with the paper test for clearance. That's why I got a sheet caliper set, took out the 0.20 and now I just check if it can slip between the bed and hotend.
I've had this machine for 4 days.
Voxelab Aquila. (Pursa variant)
On a side note, I would recommend using a Capricorn tube, and/or an all metal heat break (preferably both) to not only keep a plastic tube which decomposes at higher temperatures away from the heat, but also improve reliability
just found your Channel. great videos. trying to see what motor to use with the
so many printable solutions for ender 3 combining bmg and v6. clones are had very cheaply and it prints fast and clean
True, but the use of the small motor helps reduce weight a lot.
The extruder itself is likely about as heavy as a BMG (since this is a fully aluminum extruder) but the reduction to a 36mm round nema 14 vs even a pancake nema 17 is quite a bit.
With the extruded above the head, does it hit the top of the frame when you print a model that uses the full height? I really like the mechanical design of this extruder.
Hi, I enjoy your videos very much and you can be proud of yourself to have such a high quality at such an joung age. In the background I see you also have a resin printer. Is it planed that you will also make a video about resin printers?
Maybe, but I am not a big fan of resin printing, that's why you can only see one resin printer in the background :)
Thank you for doing this video! I just bought this extruder and there's zero info on it. I use a dragonfly hot end and am trying to figure out a more rigid connection method. I have no threads to insert the rigid connector, this, I use a short piece of Capricorn tubing to attach it. I cut it as short as possible but when retracting, the extruder slumps a bit onto the wheels on the "X" tram. I have access to CNC mills though and CAD software. I'll come up with something...
Good video, and oh so cute a host 😍
awesome info thanks
very good video! Have you tried the Orbiter extruder? I would be interested in how it compares.
Can't wait to watch your channel blow up. 50k subs by the end of the year?
Thanks, I hope so, but I think 8-10k subs would be more realistic by the end of this year :)
great video thank you
I didn't think about the ptfe tube squishing together for a tight fit. The ID is bigger than the filament and so there shouldn't be any worry about that tightening and gripping the filament
I like your channel very much, I was thinking of purchasing the COREXY Sapphire Plus (now I have che CR10) because it has 300x300 mm plate, caan you make a video with all the coreXY printer you presented in your channel (a comparison)?
Good day! With pleasure and great interest watched your channel and I want to say that the quality of presentation and display material, many bloggers to you very far!) At present I am facing the choice what to put on my Ender-3: Orbiter (Sherpa) or OMG V2? In favor of the first extruder is a big gear ratio and less weight. In favor of OMG a more reliable filament feed due to the double contact to the gears, ease of installation, and ostutvie need to print additional parts fixing and blowing. If you don't mind, please answer a few questions.
1 - OMG is fastened on two bolts of the hot rod. Is this mount strong and rigid enough? IMHO, the extruder should also be attached to the X axis carriage.
2- What is the diameter of the drive gear on the Aspina motor? (AliExpress shows gears with diameters of 8.0, 8.4, 8.8mm).
3- Your presentation shows a PTFE thermal barrier with PTFE tubing. Have you tried, OMG with a bimetallic or all-metallic thermal barrier and printing elastic plastics, like BFlex?
4- Is one Z-axis screw enough to increase the weight of the printhead or is a double Z-axis drive required?
I guess this is a lot of questions and they can be replaced by one, personally you as an end user, what would you choose for yourself Orbiter or OMG.))) Once again, thank you very much for your work and good luck in all your endeavors!)))
Nice and Thankes.
I hope much this comes quickly to germany.
Lovely Greetings to you
Great video. Thank you for being so informative on the things you are using and upgrading. I ended up buying this extruder instead of the MicroSwiss direct drive one. I have a coupe of questions about your setup that I hope you will answer:
1. What nozzle are you using (size, material, etc)?
2. Have you thought about putting an all-metal hot end on that printer? This extruder will not screw directly on to the MicroSwiss hot end, so I was wondering if that might be the reasoning.
3. I'm assuming the retraction settings you mention are for PLA. Have you used PETG with this extruder? If so, what retraction settings have you used?
Thanks again for making these videos easy to follow and for explaining things that really help gain an understanding of what you are trying to accomplish.
Hi,
Take the printer of Ender3 v2 as an example, upgrade to our D1 or DM1 short-range direct extrusion printer:
The ideal retraction distance we recommend is 4mm. The recommended optimal retraction speed is 30mm/s.
Note: This is the ideal result tested with an Ender3 v2 printer for various retraction distances and speeds using a 0.4mm nozzle diameter and 1.75mm PLA material. If these factors are all different, different results may be produced, but the difference should be small.
I believe you need to change your vref on the motor, as it doesn't need the same *edit* **current** *(not voltage)* as the stock motor.
My stepper driver current is ~850mA, it's close to the recommended 0.8A, so I didn't adjust it and I think it should be fine. Thanks for the tips!
Even though the design is great, swapping filament with this extruder is hard if the filament is pulled back through a bowden setup. Any bulge at the tip of the filament stops it being able to be pulled back through the extruder. You have to remove the bowden tube from the extruder and cut the filament on the reel side so the remaining piece of filament can be pulled forward and out of the extruder.
Amazing!!!!
I use this extruder on my Ender 5 pro for quite some time and it works great. Would have liked your video back then to help my installation, but still, I can learn a lot from your video. I also added a quality nozzle and the print quality and speed improved a lot. What I like most however is the ease of filament change. Again, your video is very well made and presented. FAN-TAS-TIC
Yes you are right! I also like the ease of filament change especially when you print a 3d model with multiple colors :)
The lighter weight is and direct drive is great, but I’m still not sold on the value of two serial gears, and I’m definitely not sold on the price. However, well done review.
I’m trying a $13 upgrade kit to simply move the extruder to to hot end after I have already done dual Z upgrade, y’all should do the same for a video.
I made a DIY direct extruder upgrade video, please check it out:
th-cam.com/video/pafW4MMwWRk/w-d-xo.html
Less pressure needed to grip the filament with two, more surface area engaging the filament. Should enable faster and cleaner retracts with less chance of grinding up the filament. Also if one slips on the filament the other is a redundancy. Should be a great extruder for softer filament.
I'm printing tpu and tpe on Bowden ender 3v2. I use my petg settings and reduce speed to 20%
Very nice video.
That said, I have had overwhelming success printing TPU with my bowden setup.
Of course I am printing 95A shore TPU. This may be different for something like Ninjaflex at 65A shore....
That said, it is incorrect to state that TPU can not be printed on a bowden tube printer.
Hey Aurora. I recomend you an Orbiter V1.5 or V2.0 when you look for an extruder with a lot of power and leightweight class too. You never won't regret your choice to assemble an Orbiter. And its a lot cheaper as your OMG DM1 Serial fighter ^^. Make your next Video with an Orbiter. Well done and keep it up.
FYI you can print with TPU easily on the ender 3 V1 by just adapting the stock extruder. (thanks Chep)
Is it compatible with creality cr10v2?
That's a lot of dialog to read. Well done! Will this work on the ender 6se?
Nicely explained. For your next mod can you consider installing a bimetal heatbreak? I am looking at this mod for my ender 3 pro and would like to see your experience and whether it allows for easier printing of higher temp filiment.
ive stuck one in recently, and so far its been good :). i had clogging issues with pla the titanium heatbreak from triangle labs i was using before, but this time i also used high temp thermal paste on every part as its meant to help with bimetalic.
Good review. Nice attention to detail through the steps of assembly. One thing… Did you turn the current down for the smaller extruded stepper motor?
The current of my stepper driver is 800mA, so I didn't adjust it. You may need to if your current is 1000mA or higher.
can you please make a video tutorial on 4 filament extruder for colorfull 3d prints
thanks for that video, a great explaination and example of improvement!
My question would be.. would that also fit to CR-6 SE / is it advaisable? I want to be able to print TPU/Nylon and this looks promising with the pancake motor!
The CR-6SE uses breakout board to connect the hotend and extruder stepper motor, some extra work is required as the stepper connector is integrated with a flat ribbon cable, you need to extent the existing extruder stepper motor cable to the pancake extruder, I think you need an matching extension cable or solder some wires.
@@AuroraTech thank you very much for that detailed explanation!
Did you need to change the retraction settings for this extruder?
sehr gutes Viedeo, danke
How is the performance with flexible filaments?
Hi, tell me is the engine very hot or not?
do you need a dual z axis with something like this?
Did you find you needed to grease the wheels on this extruder? Thanks for the video :)
No, I didn't grease them, I am using 3 of them on 3 printers, Ender-3, CR-10S Pro V2 and Ideaformer IR3 belt printer, they work great, zero maintenance.
My only concern is how the hot end mount will handle all the mechanical stress of the weight applied on a mount that was designed just to hold a couple grams of aluminum.
Is it working with an MK10 extruder? You've mentioned it only works well with MK8 ( 2:10 )
How much current in mA do you need to set for this motor?
I don't speak English very well, so I want to ask what motor was used,Or is the original Ender engine removed?
Great video with very clear steps. Just finished installing mine, but when I proceed to test the extruder after setting my E-steps to 760, move axis - extruder does not do anything. in both the positive and negative values, the extruder doesn't move at all! Is there something I'm missing? Or could I have gotten a DOA motor? Bought the DM1 kit from DIYMARIA on aliexpress, installed on my Ender 3-Pro w/ BLtouch
Stock Ender-3 Firmware has built in protection to prevent the extruder from running if the nozzle is not up to printing temp, but does not show it on screen. This was what was causing my issue.
On a side note, running the extruder at stock Vref (0.735V?) made the motor run very hot! Too hot to touch for >5s! Calculated the Vref based on the stepper specs and am now running it at 0.535V with no issues. Provided some feedback to the omgextruder team, hopefully their instructions will be updated to consider this.
This looks like a nice upgrade. Does this decrease the height you can print on the Ender? because the extruder is on top of the hotend now?
I even added the filament sensor on top of the extruder, the whole assembly is in front of the top gantry bar, so it won't decrease the max z-height. I re-printed a 241mm height Eiffel tower without any problems.
@@AuroraTech Thanks for the reply. I like the informative videos you make. Great work
I purchased the DM1 it will not direct mount on a Spider V3 hotend. Do you know of an adapter?
Does this extruder omg dm1 fit micro swiss hot end? Thanks
is this better than the microswiss