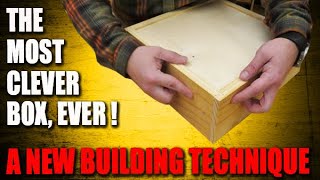
The one MUST HAVE tool for the router table. Plus.....perfect miters every single time

ฝัง
- เผยแพร่เมื่อ 3 ส.ค. 2023
- Today I will show you and demonstrate the most important tool you need to have for your router table. Its a tool I use every single day and I couldnt do without.
A coping sled for your router table is not just for making cabinet doors, but its the perfect tool for getting perfect miters every single time with minimal setup. #copingsled #routersled #woodworking
IF YOU WOULD LIKE TO SUPPORT THE CHANNEL AND PURCHASE THIS BOX OR ANY OTHER STUFF THAT I MAKE YOU CAN DO THAT NOW HERE. www.skylerewing.store
========================================================
Affiliate Links
=========================================================
The links in my video description are affiliate links, which means at no extra cost to you, I will make a small commission if you click them and make a qualifying purchase
LIST OF COPING SLEDS I LIKE
Woodpeckers Iron-Grip Coping Sled For Router Table, Precision Woodworking Tools. amzn.to/47ln4jO
Woodpeckers Precison Woodworking Tools Router Table Coping Sled. amzn.to/45jR0Ln
Rockler Rail Coping Sled for Router Table - Round Handle Router Sled for Firm Grip - Toggle Clamp Features Easy, Tool-Free Adjustments - Maximum Workpiece Dimension (5” Wide x 1-1/4”) - Router Jigs. amzn.to/44UXBvS
Fulton Rail Guide Coping Sled PRO For Cutting Profiles Into The End Grain Of Your Stock | Ideal for Cutting Precise Clean Joints for Cabinet Door and Drawer Fronts. amzn.to/44UXGzG
WoodRiver Router Table Coping Sled. amzn.to/3Yp2bAb
FAVORITES CHAMFER BITS I OWN
Whiteside Router Bits 2306 Chamfer Bit with 45-Degree 1-1/16-Inch Cutting Length amzn.to/47gC7v1
Whiteside Router Bits 2310 Chamfer Bit with 45-Degree 1-1/2-Inch Cutting Length. amzn.to/3KuFGUG
Whiteside Router Bits 2305 Chamfer Bit with 45-Degree 5/8-Inch Cutting Length. amzn.to/3KxrmdV - แนวปฏิบัติและการใช้ชีวิต


![ตัวอย่างภาพยนตร์ Venom: The Last Dance [Official - Sub Thai]](http://i.ytimg.com/vi/DHPjvAwmnRE/mqdefault.jpg)

I commend you for your skill and presentation. I also applaud your persistence in producing content in other than your original language. Those who focus on your appearance are missing the point of your work. Keep it up!
Appreciate that
I always pick up a couple of pointers watching these videos. Thanks. 👍🏻
Glad to hear it!
Lol I see what you did there
Is your shop cold?
Great advice
Excellent job
Ill buy one.
Cool sled idea that keeps the sacrificial board with it. Nice!
Thanks Skyler for the demo! 👌 I haven’t tried that bit on a 45 but after seeing this I’ll give it a go! Thank you for sharing and the info!
You are very welcome. Yes, it works great with 45degree chamfer. Perfect miters
Pre cut a 45 degree on miter box or table saw
Then make final cut on router
You will put much less stress on router and router bit
Excellent tip! Thank you
@@woodworkingwithSkyler your welcome! Be well
That router was struggling on that cut. A 3hp-5hp shaper with a 4-5-6 inch cutter would be much better
I made a comment just like yours. Even a shaper will struggle a little or stress the wood on a full cut.
@@brucemiller1696 going slower gets you their faster lol
And safer
Shapers are scary as hell I own one and use it ,but for most a scary machine . I’m involved with startup
Woodworking school/ makers space upstate ny ,and the one machine we agree on not having is a shaper
Nice table !!!
@SawdustandSplinters once again thanks for your knowledge! I was unaware of this sled. I finally have a router and enough wood to create my router table. I happily received free wood and plexiglass recently so I now know what I need thanks to you!
I really enjoy your videos. Thank you for taking the time and thanks for the tip. I will give it a try.
Thank YOU for watching
Your videos are always very informative. I always learn something.
Hi @jm7247! So glad you enjoyed the video
Finally used my router table after many years of only using my hands and jigs. I had to put together a rough piece similar to what you demonstrated. It helped, but needed more support. So, a future project, is to build coping jig similar to the one you showed in this video.
Good idea, I wouldn’t have thought of using a coping jig that way
What a great idea. Pleased I found your site.
Thank you
You are awesome 😊❤
Skyler, you are a very good teacher. I will use this technique on my next project.
Awesome. Please come back and let me know how it went
Great information.
Glad it was helpful!
Job Well done, clear and concise, I love my coping sled.
Thanks
You are a natural instructor, thank you.
Thank you
Excellent video very well demonstrated, thank you for that, I did subscribe and look forward to additional videos 👍
Love your videos
Thank you Joe
Great video. Like others commented, I didn't know these devices existed. I will definitely look into making my own. One feature to add to a DIY one is some way to take smaller cuts with several passes. I have some ideas concerning this. It would make the final cut even smoother, and be less stress on the bit and motor.
Good point. Makes sense and provides a quality result.
Thank you . Nice work.
Glad it was helpful!
Definately learned something new!
So glad you found it useful
Nice job. Thanks.
Thank you for watching. Did you already own and used a coping sled?
@@woodworkingwithSkyler Nope. I have never seen one before. It is a cool tool.
I find your videos very informative and detailed. Thank you very much.
You are welcome!
I'm new to the router table, and haven't come across the coping sled before - it looks like a really useful tool, and one that can be easily made in the workshop.
Thanks for showing its use.
You are very welcome
i have this exact coping sled…its really a great piece of kit! remember to use friction tape on sacrificial block…and use s block same depth of stock👍
A competent presentation.
Thanks
Very informative . My job site saw can't make consistent miters either . I purchased a coping sled like yours . The price of the Woodpeckers are just insane . Please continue your videos .
Excellent video, as always, thank you. I have a coping sled from infinity tools, pricey, just under $300 with the miter bar accessory and auto adjust clamps. Not perfect, but very good, I like using it. You are absolutely accurate, I use it for other than cabinet doors (which I have never built).
Very nice! I looked at that sled a few times. Looks well build
Good idea, I’m going to follow u. Ty
Awesome! Thank you!
Hi Skyler - I came across your videos a couple of weeks back whilst I was searching for info on box making. Not only are your videos extremely instructive they are presented in a very professional easy to understand manner and I have already learnt a lot watching them. Additionally you present lots of cool tips such as in this particular video regarding the use of tools to assist and improve your woodworking skills. Thanks you for the time taken to produce and share them with fellow woodworkers and budding craftpersons. I look forward to catching up on your past videos as well as viewing future ones. Thank you very much!
Oh, wow! I love reading this kind of comments and keeps me going on doing what I love! So glad you found the video helpful! Thank you
I agree totally!
What a great idea! I mostly do lathe work and some flat work. This is an idea i have not seen before for making boxes with mitered corners. Thank you for this video and keep them coming.
Glad it was helpful!
I love tips and tricks. They can save hours doing it the dumb way. 😖 Thanks, Skyler.
You are very welcome @timmienorrie
An excellent and informative video. This is very useful information and I will use this. Thanks for sharing this.
Glad it was helpful!
Thank you
You're welcome
I was at Dr appointment watching this today. What luck. The Houston Rockler store is right on the way home. Luckily, it was on sale too👍😊
That’s awesome. I think they started 20% off today on select items
I use a similar sled, but home-built. It has 3 toggle clamps; one to hold the sacrificial bit of wood and one to the left and one to the right of the piece you are milling. The base is a bit of HPL, which works fine. My fence does have a series of holes to change the distance between the base and the table fence. A sees of holes gives less problems with adjusting the fence te be parallel to the table fence.
Milá Skyler, jste fantastická a pracovitá žena, která nezná žádné překážky a vaše pracovní nasazení je jedinečné ok.👍❤
Thank you for your kind comment
Very informative on beautiful to !!
Glad you think so!
Thank you
Interesting. I watch a LOT of workshop videos and have never seen anything like that. That makes a lot of sense.
Glad you liked it!
@@woodworkingwithSkyler Definitely. My next project is to build/buy a router table. This looks like it's going to be, as you say, a critical addition.
Looking forward to trying a router for miters. I cut lots of miters on the table saw now. I've started to set the blade at 44.9 or 44.8 degrees so that any gap will be hidden on the inside but the outside of the miter always will be closed instead of showing an obvious gap.
I make a lot of boxes like you but take a different approach to miters. I have a 45 degree jig that runs in the table saw slot and cuts perfect miters with the blade set at 90 degrees. It clamps the wood in securely as well and I think creates a smoother cut as the saw blade is not hogging off the entire waste as is the router bit. It’s consistent every time and does not require setting the blade at 45 degrees. You can make this jig from some scrap MDF and a toggle clamp for Pennies. I get perfect miters every time.
Great info. I just discovered your channel and have subscribed.
Welcome aboard!
I have this sled. What I did to work around the fixed distance acrylic shield was to build my own, with slotted cutouts for the hold down knobs. Not perfect, because of the need to square the sled to the table after an adjustment, but I got used to it. I still use the fixed acrylic shield for 90% of my work. I also replaced the supplied clamp with two that have smaller pads. I felt like the smaller pads increased the downward clamping force.
Great tip! Thanks for sharing
This video was very useful for me, Skyler. I never considered that chamfer bits could be 100% accurate for making box miters. I'll use this method from now on. Keep up the good work. Thanks!
Thank you Erick!
Best to precut some of the mitre on the table saw or mitre saw. Cutting a full mitre on maple of harder woods is a lot of strain on the router and the bit. Use the router bit to clean up the last 1/32".
Hi Skyler. I really enjoyed this video about the router sled. I just found your channel and I have subscribed. Best of luck with it! 😊
Thanks for the sub!
Thank you for this video. This is a much safer option than a table saw. Stumpy Nubs has an old video showing a kickback from cutting a 45* angle on a table saw. The waste piece went through 2 walls (dry wall/sheetrock) in his shop.
Oh, wow! That sounds scary. I had kickbacks from cutting miters on table saw but nothing too bad
45° mitres work out beautiful if you know how to do it with no kick back or pieces flying back. I do.
Skylar rising in the views and polls! Thanks and God bless.
Shims for the win.
Good vid and explanation. One point I'd add is that you don't have to make the cut in one pass. I make shallower passes on bigger cuts by free handing with the clear plastic guide away from the fence. I then make one or more additional passes the same way, or just finish with the guide against the fence as you demo'd. This takes some burden off of the router and helps avoid burning.
Great point!
Skyler, your video 9:20 lighting always looks good. Will you share you method and equipment used?
I sub to your photography channel and I had no idea this channel existed. I too build my own sets, surfaces etc.
That’s awesome. Welcome to the channel
An alternative to this Sled method is a Sub-Fence. The Sub-Fence must be thick enough to bury the bit. The miter gauge can then be used for the end grain cut. Burying the blade is also used with your table saw blade. BTW, I'm a 77 year old man and I appreciate the way you fill my screen!
Wakodahatchee Chris
Thank you
Good job. You made me buy a Woodpecker.
Good choice!
I love your idea, but don’t know if the tow wood blocks that your work in between were thicker and cut 45 degrees longside thin lock your work between with the wider side of the blocks up, would that be fine? and will cancel the need for the toggle clamp?
I really love woodworking but I don’t do it.
Thank you for sharing this video 💐
I use the Incra sled. don't forget to slow down the router for large bits.
I make jewelry boxes for a living but with a bandsaw and firewood. I do make a small amount of normal boxes too. This is great. What I would do though is I would cut a 45 degree cut on the table saw first leaving about 2 mm of extra wood. You could make the first 45s with a sled, hand held really fast not having to worry about how accurate it is. The point of the table saw 45 would still be a 90 degrees a tiny bit so it would register against the fence solidly. When you then do the finish cut with the router there would be almost no stress on the wood or the router bit making an even smoother more perfect cut. I bet the router bit would stay sharp a lot longer too. This would be especially important if you are making a large batch of boxes as I do.
That a great idea! Will try to cut on table saw first
what kind of bit do you use to make your miter
I have one of these that I bought for making doors and it was ok at best. I found the setup was time consuming and the sacrificial board was was even worse. They should of made it with a simple hold down so you didn't have to screw it in each time you go to move it. I ended up buying a router lift and set up for making doors became super easy. I can see where this sled would be handy for very small parts but I would never consider using it for a miter since I have a miter saw.
I can never make accurate miters for small projects on miter saw
This gadget certainly works for stock dimensions that she used.
Never knew such a jig exist.Thanks for sharing.Will surely build me one, cause if I have to buy it will cost me over R2000,00, which I don't have, but I have all the material and hardware to build me one.The router is the only tool that still intimidates me.😢
Good luck! I know you can do it. Router is not that scary. The more you use it, the more you will love it. Just stay safe
I'm going to do the same. I have a piece of acrylic that is just begging to be useful. You won't believe how many times it has hovered above the bin until I decide "No it could be useful some day". This is the perfect project that will save it's life.
Great explanation of the coping sled!
Thank you. Glad you liked it
You can easily modify your sled (the one you have there), like cut a larger piece of plexiglass and make it adjustable.
I do that kind of thing with almost all my tools, especially "helper" tools like that shed.
I would almost always lean toward a less expensive "helper" tool like that sled, then modify parts of it to work the way i prefer.
Comments on the video:
This video was over 10 minutes long. But you spent several minutes at the beginning telling us what you were going to demonstrate, and how it was better to demo than to describe with words!
I agree that a demo is better, but why did you spend so long talking about it? Most of that could've been edited out.
Other than that, good video.
You've convinced me that i should use a router for ALL my bevels!
I have lots of experience using the table saw for everything, but without best results. So, I learned a good lesson!
Thanks! 😎
That is a lot of tool to do a simple job? I guess if one isn't experienced with using a table saw it would be the way to go? I have a cabinet shop and been retired many years now. I have no earthly idea how many miters I have cut?
Do you account for the base of the sled thickness by raising the cutter height ?
Yes. I raised the bit and made a few test cuts first to make sure the fence is at correct position and I am cutting without eating from the top part of material.
Thank you for sharing this with us. Definitely a useful jig. Everyone stay safe, happy and healthy. From Henrico County Virginia
You are very welcome Norm
Now let's see that bandsaw video! hehe
Of course the Woodpecker is better. It seems those guys make everything just a bit better. But, like you said, you gotta pay for it. Great video, btw.
lovely accent! The vid is good also.
Thank you! 😃
What router bit do you like for this? I see that it is a 45 degree, but is there a particular brand/type that you find works best? Also, since you recently showed that you have a laser, couldn't you use it to cut the acrylic to the size that you need for larger bits?
Hi Mike. Added some of the chamfer bits I own and love to the description. They are all whiteside brand because is my go to brand when it comes to router bits. The size depends on what thickness materials you are using. The bigger ones can cut thin and thick material while the smaller ones are cheaper but limited in cutting size. I have not tried the laser on acrylic yet. I am sure I can figure out how to cut the acrylic just not sure I can build a solid jig to go with it. Thats why I bought mine.
@@woodworkingwithSkyler Thanks Skyler for your quick reply!
Hey, What ever happened to that bread cutting board you made ? Are you going to do that project ? Thanks.
Yes, I could. Didnt film that one, but I could make a new one
@@woodworkingwithSkyler Cool, Thanks.
Very good video, Thank You!
Accent from germany or east europe?
Romania
Maybe a Miter Saw for doing miters?
Miter saw is an exelent option. But router table can do so much more them miters
Maybe there's a way to modify that clamp so you don't need shims and also seems like there's room enough to add another clamp.
There is a way to adjust the clamp but its kind of a pain the way it works.
@@woodworkingwithSkylerthe 2 nuts should be tightened together though, so the Clamping foot is not loose. That is a dangerous set up.
Dang
Couldn't you easily add a second clamp to that fixture?
I have that sled made by woodpeckers. But ive not had time to use it yet. So you recommend it huh?
Woodpecker tools are well known for quality and precision. What I like about that one is the fact that the acrylic fence is adjustable so you can use it with really big router bits. If you use most normal size bits and coping sleds will work. Even the non brand cheap ones
Gee, I wonder how well a MITER SAW would work. I'm guessing that with the word 'miter' in its name, it might just get the job done. The Rockwell jig has lots of use for smaller parts, but for just a pure miter cut, I'd probable take a pass.
It really depends what tools you have. Only a really good miter saw can make an accurate joint unfortunately and I learned this the hard way. Miter saws are complicated tools with lots of joints and moving parts, they are difficult to make accurate. I actually find I very rarely use a miter saw in the shop, i switched to a portable only one since I use it mostly while fitting trim or for cross cuts on a job site type environment.
Why not use the saw that was made for cutting miters? The miter saw.
I can never make accurate miters for small projects on the miter saw. Maybe I dont have it calibrated properly/
those are very large bits indeed
Tip… If you’re presenting yourself as an authority on some topic (which is what you are doing) there is no need to say “this is used for something I’ve NEVER DONE”. Especially for something as fundamental to woodworking as making cabinet doors If someone asks… be honest… but don’t diminish your value as a teacher.
:) Great tip.
Skyler! As mentioned, you are awesome! :) Miter cuts are always a P.I.T.A, but in the meantime, I have just acquired a router table for a very good price, so your video could not be more timely :)
Thanks again for all that you do (and don't think I haven't checked out your photography work as well!!) Looking forward to your next one 💘
That is awesome! I used to have a really bad router table and never used it. Now I use it all the time and is one of my favorite tools in the shop
I do believe that Woodpecker's quality is very good, but at the same time, it is like going to the Rolls Royce dealer to buy an air filter for your Ford... Waaay overpriced.
I totally agree. That’s why I bought the Rockler
You can do the same thing for a whole lot less with your table saw miter gauge and cutting miters on your miter saw like most people do.
true. But for accurate miters takes a bit more time to set up properly. Especially if you work with a job site table saw like me
@@woodworkingwithSkyler I use my miter saw for miter cuts like every woodworker or finish carpenter does. That's what it's for. As in "miter" saw.
Those tools/bits look heavy/big? Not that anyone is complaining.
What’s wrong with the miter saw the jig is useless
Men of culture... We gather again
Skyler, besides your obvious alluring womanly charm you also have a beautiful smile. That smile brings your natural beauty to the next level.
Awww, thank you 😊
Nice tool..beautiful body too! Yum
😢those are some big blue eyes.
NICE rack!
Best chest on TH-cam. Oh come on. I was talking about her blanket chest.
Far too much talking
Good technical advice. I would also, respectfully, offer that it's a distraction to have the eye drawn to you and away from the subject matter. Your videos almost exclusively feature the same V-neck. They are a lovely attribute, but they do take focus away from the topic at hand.
Sex Sells... Specially the nipple protrusion!
I follow for both. She has very good content. But also better than watching an old, wrinkled man tell you the same things. 😉
@@GaryHarwood😂
Pathetic😂you guys are so deprived
@@JohnColgan.I don’t even have a router table and I watched 😊
Where are you finding those large bits ? Thanks
I bought mine on Amazon. Links in the description