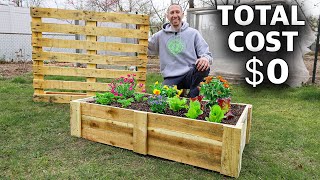
How to Build a RAISED BED Using PALLETS, FREE Backyard Gardening

แชร์
ฝัง
  • เผยแพร่เมื่อ 4 ต.ค. 2024
  • Today I want to show you how to easily build a raised bed using FREE recycled pallets so you can be eating fresh veggies without breaking the bank.
    → My Garden Shop: jamesprigioni.com
    Amazon Store: www.amazon.com/shop/thegardeningchannelwithjamesprigioni
    MY FAVORITE GARDEN PRODUCTS 🧰 💯
    →Amazon affiliate link: amzn.to/2z7NIRQ
    → Sulfur Dust for Fungal Diseases: amzn.to/2VETaXP
    → UV Resistant Marker: amzn.to/3oUevXb
    → 40% Shade Cloth- amzn.to/3vrAYNF
    → Coco Coir: amzn.to/3uAyV9J
    → Vermiculite: amzn.to/311woeH
    →Perlite: amzn.to/33uUJHQ
    →Mykos Pure Mycorrhizal Inoculant: amzn.to/2WCZfRX
    →6 Mil Greenhouse plastic: amzn.to/39m1YCQ
    →Row Cover: amzn.to/2GR12h5
    →Neem Oil: amzn.to/2NgXfta
    →Insect Netting: amzn.to/2DbJ9I7
    →BT Spray for Brassicas: amzn.to/3erdkss
    →Pruners I use: amzn.to/2QsNCtT
    →Tomato Clips: amzn.to/2YxoaGr
    →Square Foot Gardening Book: amzn.to/3bUwCVo
    →My Boots amzn.to/2NZq5Pe
    ALSO FIND ME ON
    →Facebook: / jamesprigionigardening
    →Twitter: / jamesprigioni
    →Instagram: / jamesprigioni
    →Contact: (Business Only) thefranchisse3@gmail.com
  • แนวปฏิบัติและการใช้ชีวิต

ความคิดเห็น • 2.5K

  • @mylessakers
    @mylessakers 3 ปีที่แล้ว +278

    I would check the pallets, before hand, for a stamp. Some are treated with harmful pesticides. Look for HT (for heat treated), and you should be fine

    • @3dp_edc
      @3dp_edc ปีที่แล้ว +8

      great tip!

    • @maynmom6975
      @maynmom6975 ปีที่แล้ว +2

      I was wondering about that. Thank you.

    • @Anon-xd3cf
      @Anon-xd3cf ปีที่แล้ว +5

      Great advice.
      There are too many people who don't know this stuff.

    • @GabbyJimenezTunez
      @GabbyJimenezTunez ปีที่แล้ว

      Yo how’d I know?

    • @horatiohuffnagel7978
      @horatiohuffnagel7978 ปีที่แล้ว

      Pressure treated won't rot though.

  • @zoanyway
    @zoanyway 4 ปีที่แล้ว +438

    I LOVE how you get to the information flowing extremely quickly - no blabbering on, no long slow stories, just, BLAM. Edit out or timelapse the slow tuff, and give that great info, delivered fast. Do you sound a little cracked out sometimes? Eh, maybe. Hah! But I feel like my time is respected, even while I'm getting all this great information for free. New subscriber. Feels like I stumbled on a gold mine.

    • @Dennis27613
      @Dennis27613 4 ปีที่แล้ว +1

      069xp z.
      M.j c s

    • @Dennis27613
      @Dennis27613 4 ปีที่แล้ว

      44 54z.n
      P4y

    • @ipadtarun1850
      @ipadtarun1850 4 ปีที่แล้ว

      Dennis27613
      lol?
      L
      Slip.
      Pql llkla
      .

    • @Mightiflier
      @Mightiflier 4 ปีที่แล้ว +4

      You said it!! Ditto! Thanks!

    • @brusselsprout5851
      @brusselsprout5851 3 ปีที่แล้ว +6

      and we get the math too. Down and dirty, simple. Makes me think I can do it.

  • @dch.projects
    @dch.projects 3 ปีที่แล้ว +9

    Dude, your energy is infectious. It's 1:46AM (at the moment) and I want to go outside and do this now, ha!!

  • @HelpfulTipsfromChris
    @HelpfulTipsfromChris 3 ปีที่แล้ว +81

    Great garden bed and great video, I typed it out to make it easier for myself. Hopefully this helps someone else:
    First you will need enough pallets to make a 4 x 8 foot bed. That would be enough to make around 56 boards to cut to 16 inches.
    You need a circular saw to cut them evenly and efficiently. When cutting the pallets, leave the boards on each end to use as bracing later
    Use a measuring tape, drop saw, and square to cut the boards square. Once you make one side square bump it up against something flat to make the other side square to make them 16 inches.
    Once you have the 56, 16 inch boards (or whichever length works). Cut the end boards off the pallet in half longways so you can use them to brace the borders you'll be making.
    A straight edge and some clamps on a couple of cement block raised 2x4's is what he used to align the boards to make the walls evenly. Put the wider boards at the end.
    You will now need a power driver to predrill holes in the braces and to drive the wood screws. Place the bracing on the back, predrill, and reinforce with 10 or more screws. Make six sections.
    Take two sections cut them exactly to four feet and combined them together with another bracing piece to create a 8ft wall. Do this twice.
    Take some lint seed oil and brush every side of each section liberally to protect the wood.
    Figure out where you want to put and be sure to clear it out and make it level before you start assembling.
    He uses corner clamps to hold the corners of the sections together so that he can attach a small block of wood behind the corners to hold them together. To do this he pre-drills and then puts a couple of screws to hold them in. Repeat for all corners.
    Get two 8ft 2x4's, linseed oil them, pre-drill and attach them to the top of the borders for railing. Be sure to put screws where needed to make it flush with the wall. Take the last 2x4 board and cut it to length and attach to the last two edges.
    Once you're done fill it with organic material.
    Exactly what you will need to do it like the video:
    3 or 4 pallets
    Circular saw
    Drop saw
    Measuring tape
    Square
    Straight edge
    Two clamps
    Power drill
    Screws
    Linseed oil
    Brush
    Level
    Corner clamps
    four small wood blocks
    Three 8ft long 2x4s
    Did I get everything?

    • @DawnEdwards6267
      @DawnEdwards6267 2 ปีที่แล้ว +1

      Thank you so much!

    • @nathaliep8512
      @nathaliep8512 2 ปีที่แล้ว +4

      YOU ROCK! Thank you for taking the time to type this all out. This was a great video and a great idea, given the crazy price of wood these days. :)

    • @suziestubebrown5397
      @suziestubebrown5397 2 ปีที่แล้ว +3

      Hi, just watched this vid and it is totally cool-have a patio that has cracked concrete beyond use and repair. Just figured out my project for the summer! Also, I might suggest that at each corner, even with the top of the pallet boards, you might want to add maybe a 3" waste piece of 2x4 for added support...the connections there would be much stronger with the top rail. Just a suggestion-with my luck, the entire raised bed would fail once the soil is added if I did not line up the screws perfectly through the top rail and thin pallet boards! Thanks for the info!!

    • @rladublin1
      @rladublin1 ปีที่แล้ว

      So helpful to have it typed up. Thank you

    • @dmeek20
      @dmeek20 ปีที่แล้ว +1

      You are a hero

  • @j.f.6072
    @j.f.6072 2 ปีที่แล้ว +5

    The little dog's escapades in the background are a treat to watch!

  • @ericplatt6884
    @ericplatt6884 4 ปีที่แล้ว +78

    Great project! Thanks.
    TIP: Where I and many people live a gopher mesh (wire mesh) underneath before you fill in the soil is essential, otherwise the buggers come up form under the bed and eat eat eat.

    • @edwinters4538
      @edwinters4538 2 ปีที่แล้ว +5

      Thank you so much for that tip. I have lots of them, and do not want to kill them, but do want them out of my vegetable garden. Blessings.

    • @bweaver760
      @bweaver760 2 ปีที่แล้ว +1

      Where are you located? I have never heard of anyone having gophers here in southeast Texas gulf coastal areas(Houston). Every place is different, for sure!

    • @ericplatt6884
      @ericplatt6884 2 ปีที่แล้ว

      @@bweaver760 Southern California, just North of San Diego.

    • @frankolivas8593
      @frankolivas8593 2 ปีที่แล้ว

      @@ericplatt6884 Same here, Riverside County, we should have been named the home of the Gophers. I just want them out!

    • @danielleayoub487
      @danielleayoub487 2 ปีที่แล้ว

      Would cardboard work for this too?

  • @briantrieber4112
    @briantrieber4112 3 ปีที่แล้ว +21

    Just finished building . . Needed 6 pallets. About 60 slats you need for the 4x8. Looks great. Going to be a gift. Great vid. Watch you all the time.

    • @adamkauffman9311
      @adamkauffman9311 ปีที่แล้ว +1

      Cool! How long did it take you to make?

    • @briantrieber4112
      @briantrieber4112 ปีที่แล้ว +3

      4/7/23-Just made another one as a gift . Took about 3 1/2 hrs . Thanks again

    • @jamessmith1218
      @jamessmith1218 ปีที่แล้ว

      How many years can you get out of them? I have oak pallets and pine pallets and I know pine does better outside than oak.

  • @tomjustice7610
    @tomjustice7610 3 ปีที่แล้ว +132

    I was a little over half way done with my first raised bed when I saw this video. I ripped the whole thing apart and started over with your design. Thanks! Awesome work!!

    • @alfonsomunoz4424
      @alfonsomunoz4424 2 ปีที่แล้ว +3

      I'm really considering doing the same thing!

    • @eduardovenegas294
      @eduardovenegas294 ปีที่แล้ว

      curious to see what design you originally came up with

    • @sierrabaker9046
      @sierrabaker9046 ปีที่แล้ว

      I’m gonna take my half finished one and also do this

  • @stephennagle8318
    @stephennagle8318 2 ปีที่แล้ว

    All these years I've been tearing pallets apart and pulling nails to create boards that usually get cut down. thanks. To help anchor the bed and keep it from shifting, I suggest screwing 4X4's cut about 4" longer than the sides are tall, in the corners and in the middles of the long sides.

  • @chrishad95
    @chrishad95 2 หลายเดือนก่อน

    I made one of these 4 years ago and it is still in great shape. Watching this again today because I am going to make another one. Thanks!

  • @markp7736
    @markp7736 3 ปีที่แล้ว +16

    Awesome video James. Just one word of advice when using a circular saw, always wear safety glasses. It's all fun and games until someone loses an eye.

    • @racang
      @racang 3 ปีที่แล้ว

      and hearing protection.

    • @jaredhopkins5642
      @jaredhopkins5642 7 หลายเดือนก่อน

      Might be cautious about where you set down the saw after using it too. About set the still spinning blade on the extension cord.

  • @Nohoana45
    @Nohoana45 4 ปีที่แล้ว +47

    Love the down to earth, layman instructions. Easy to understand and follow. I’m so excited to build my first pallet wood raised bed.

  • @ericschumacher7507
    @ericschumacher7507 2 ปีที่แล้ว +15

    Dude I made five 3ftx9ftx12in raised beds last year from pallets and it almost killed me with trying to pull every nail. This is such a better concept! Going to make five more like you did this spring! My lower back thanks you James!!!!

    • @markstokes7110
      @markstokes7110 10 หลายเดือนก่อน +1

      next year just grind nails off with grinder😜

    • @joerambo4977
      @joerambo4977 7 หลายเดือนก่อน

      Use a Sawzall with a metal cutting blade and cut the nails in-between the wood

    • @Broken_dish
      @Broken_dish 5 หลายเดือนก่อน

      pulling nails out of pallets sucks.

  • @andiincali.4663
    @andiincali.4663 2 ปีที่แล้ว +4

    Just what I was looking for. Something cheap or free and a simple design that is not over engineered! Not too deep. Also nothing touching the soil that you don't want absorbed by the plants. It's very zero waste and eco friendly. And it looks great too. Love it.

  • @wandamcknight786
    @wandamcknight786 3 ปีที่แล้ว +2

    Watching this program daily on my tv on youtube. Love Tuck too!

  • @ivanhoe011
    @ivanhoe011 4 ปีที่แล้ว +397

    Just a little tip from woodworking: When you wipe off the excess linseed oil with a rag be careful where you leave that rag afterwards - because it might spontaneously start a fire. When linseed oil is exposed to the air a chemical reaction starts that emits a lot of extra heat. This can cause rags soaked in linseed oil to sometimes, just out of nowhere, catch on a fire totally spontaneously. So NEVER throw away the rag in the garbage, it might burn your house down. Always keep used rags in a metal bucket or bury them to naturally decompose, or dispose of them somewhere else safe.

    • @verdis23rdoperaunballoinma39
      @verdis23rdoperaunballoinma39 4 ปีที่แล้ว +22

      Just put the linseed oil used rags in a metal container or someplace where CANNOT let fire spread--go outside and just safely burn them yourself--only way that ensures they are absolutely "safe" ...

    • @billtelarana4341
      @billtelarana4341 4 ปีที่แล้ว +10

      you can put them submerged in a bucket of water, too.

    • @kimdavis5849
      @kimdavis5849 4 ปีที่แล้ว +17

      Feeling like I was born yesterday, don't know SQUAT.. Recovering stroke survivor, lovin every minute. Need all the side tips and info I can get. TY ivanhoe011, good lookin out. I mean that from my HEART. TY

    • @stillaliveandwell5291
      @stillaliveandwell5291 4 ปีที่แล้ว +33

      I never totally believed this so I did a test when staining some floors. I took the rags outside in 90 degree heat in a metal can and within an hour they caught fire.

    • @trustbirthaugusta
      @trustbirthaugusta 4 ปีที่แล้ว +5

      @@billtelarana4341 or in the OIL CAN itself too!

  • @stevek6486
    @stevek6486 ปีที่แล้ว +14

    Multiple coats of oil on all 6 sides of boards before you assemble for better protection. Also space boars slightly using a couple of small nails as spacers between boards when assembling - this allows the wood to swell a bit without buckling as well as dry out between boards a little better.

    • @diego_villena
      @diego_villena ปีที่แล้ว

      What kind of oil?

    • @Legit_SuperFall
      @Legit_SuperFall ปีที่แล้ว

      @@diego_villena linseed oil
      Dont use boiled linseed oil unless you know its safe. Most BLS has added chemicals
      You can easily make bleached linseed oil by adding water and leaving it in the sun for one to three days
      The advantage is that it cures much faster
      Be careful will used rags/paper. They can spontaneously combust. Just leave them spread out for a few days before throwing them in the trash

    • @LexGear
      @LexGear ปีที่แล้ว

      How often would you need to re-oil?

    • @Legit_SuperFall
      @Legit_SuperFall ปีที่แล้ว

      @@LexGear the more coats it has the better.
      As long as you give each coat time to cure you can keep piling them on
      Raw linseed oil will take quite a few days to cure, so wait at least a week between coats
      If you bleach it you can wait much less, depending on how long you bleach it for

    • @Legit_SuperFall
      @Legit_SuperFall ปีที่แล้ว +2

      But personally, i dont have the time or patience to give more than two. Maybe only one lol we'll see

  • @rich7934
    @rich7934 2 ปีที่แล้ว +14

    Suggestion: Use a Sawzall to cut apart the pallets, just slip a 12" metal cutting/demolition blade between the plates and stringers and cut the nails. it will be easier than the circular saw and you get to use the already square cut ends.
    When you assemble the panels into the box, put your corner block flush with the top, so you can screw the top plate into the nice thick block, instead of the thin side board, and do the same with 2 middle blocks on the long walls and 1 middle block on the short walls. If you do the previous suggestion then the stringers can be cut to make these blocks.

    • @3dp_edc
      @3dp_edc ปีที่แล้ว

      or could just use a square and/or straight edge with the circular saw.

    • @ThistlesGarden
      @ThistlesGarden ปีที่แล้ว

      May have to do this for the last couple of pallets.

  • @caroleminnich8884
    @caroleminnich8884 3 ปีที่แล้ว +45

    I think this is a great idea, but I would have lined it with landscaping fabric before putting in the compost. That way your raised frame will last longer. Another couple of ideas that I have used for the base of my beds is first I put in a layer of gravel for good drainage (we get a LOT of rain) and the I put in hardware cloth to keep out the moles and gophers. Next the landscape cloth, and finally the compost and potting soil.

    • @redeye2938
      @redeye2938 3 ปีที่แล้ว +1

      Thank you!!!!!

    • @hippiegirl5167
      @hippiegirl5167 2 ปีที่แล้ว +3

      Actually if you put fabric down the plants roots cannot grow through it.

    • @caroleminnich5697
      @caroleminnich5697 2 ปีที่แล้ว +4

      @@hippiegirl5167 I have never had roots reach down that far. I guess it depends on how deep you make it and what you plant.

    • @annanelson6830
      @annanelson6830 ปีที่แล้ว +1

      Thanks. Hardware cloth will solve my vole problem!

    • @collette2908
      @collette2908 5 หลายเดือนก่อน

      I would think the worms can’t get through the landscape fabric.

  • @unclenash6103
    @unclenash6103 ปีที่แล้ว +33

    I take apart pallets all the time, from my job and build all kinds of things, including raised garden beds. If you want to save time cutting things more than once and creating waste, stand your pallet up, lean it on some work surface, use a reciprocating saw, cut down between the boards and 2x4 of the pallet, thru the ends of the planks, right thru the nails. You end up with full boards in a few minutes. Then you can make your cuts however long you need the pieces. The circular saw method takes too much time and cuts useful wood up needlessly.

    • @froglobster
      @froglobster ปีที่แล้ว +4

      Oh yeah- just a metal blade on my sawzall thanks!

    • @unclenash6103
      @unclenash6103 ปีที่แล้ว +4

      @@froglobster no problem! Hate to see a braddah use up valuable beer and barbecue time😅

    • @froglobster
      @froglobster ปีที่แล้ว +3

      @@unclenash6103 Well how the heck did you k ow about my beer and bbq 😆

    • @adrianejohnson5695
      @adrianejohnson5695 ปีที่แล้ว +1

      Hey there! Do you have a video showing what you’re describing. I’m a novice wood worker and I’m just learning about various tools and techniques. 😅

    • @unclenash6103
      @unclenash6103 ปีที่แล้ว

      @@adrianejohnson5695 sorry I dont. But I have seen videos of that on youtube.

  • @corey1788
    @corey1788 3 ปีที่แล้ว +3

    Just found your channel. Cool planters. 1500+ comments too many to search through but just wanted to give a warning. Be careful when choosing pallets to use for gardening as lots can have chemicals that were shipped and spilled on them. Also lots of pallets are heat treated to allow them to be used in air transport. If they are marked with HT(heat treated) or DB(de-barked) they are fine for use. Avoid anything marked MB as those were treated with methyl-bromide which could be hazardous for gardening. It will be marked somewhere on the upright outer sideboards not the flat cross boards and looks like a square with large letters stamped on the wood.
    Safe gardening!

  • @majoroz4876
    @majoroz4876 3 ปีที่แล้ว +4

    This is how you make a how-to-do-it video. Clear, concise, no BS or yak-yak, and no boring repetition. Well done.

  • @thelipstickfarmer
    @thelipstickfarmer 4 ปีที่แล้ว +121

    1:38 in..."Already you can see it coming together" (holding up 3 pieces of wood 🤣) Totally infectious enthusiasm! 💄🌱💋

    • @anduong6595
      @anduong6595 4 ปีที่แล้ว +1

      hahahaha

    • @TerryMcGearyScotland
      @TerryMcGearyScotland 3 ปีที่แล้ว +3

      :) Iknow exactly where he is coming from. When I started making my (totally rubbish) shed door I though 'my door!' when I had just slid the bits together.

  • @isabeauskorski9961
    @isabeauskorski9961 3 ปีที่แล้ว +2

    Loved the Yorkie, too! I had a tea cup yorkie for 11 yrs. she only weighed 2.7 lbs full grown. I miss her a lot. Nice to see the repurposed wood! Great job!

  • @serapbee
    @serapbee 3 ปีที่แล้ว

    Absolutely love your work. No nonsense talk. Straight to! Will be making these summer time!

  • @Michele-bs6hb
    @Michele-bs6hb 3 ปีที่แล้ว +5

    I enjoy all your videos, but most of all you get me motivated to get out there and plant. This is my first year and I’m excited thanks to you and Tuck.

  • @kathylamb6232
    @kathylamb6232 2 ปีที่แล้ว +5

    My first time in watching you. I was SUPER IMPRESSED!!!! You are an incredibly smart, innovative, and really great at planning. Keep growing young man!!!

  • @Alysialw
    @Alysialw 4 ปีที่แล้ว +13

    I'm SO gonna make my garden beds like this! I love how all of the wood is not all the same color, and is FREE! 🙂🙃😉

    • @loturzelrestaurant
      @loturzelrestaurant 3 ปีที่แล้ว

      Good video, but not as education PLUS Fun (epic combi) as
      the new video about Vaccines from 'Hbomberguy'!!
      As well as his old video about Sherlock, the TV Show!

  • @smithy4121
    @smithy4121 3 ปีที่แล้ว

    Hi James I hope your going to continue doing you tube videos. We are just on cutting down pallets to make some of these. Its a fantastic way of making a taller raised bed which I need with my back without breaking the bank with the cost of the wood. Thanks

  • @diannahb8741
    @diannahb8741 2 ปีที่แล้ว +1

    If i were doing that I would build a ramp for the wheel barrow fill to dump into the bed. But i'm 100 lbs and an old lady that doesn't want to do all that shoveling though I certainly understand your reasoning in having stability of the pallet frame trump the work involved in filling it! Thank you for your precisely innovative and inspiring videos! Let's get growing America!

  • @dereka8041
    @dereka8041 4 ปีที่แล้ว +97

    James is multi-faceted: Tuck's father, organic gardener, TH-cam artist, and now add carpenter to the list.

    • @funky-landscaper
      @funky-landscaper 4 ปีที่แล้ว +3

      Derek A is there a tool he doesn’t have?

    • @duskmoss
      @duskmoss 4 ปีที่แล้ว +1

      Dremil shop vacuume

    • @funky-landscaper
      @funky-landscaper 4 ปีที่แล้ว +2

      @@duskmoss lol, right?? -- Stay tuned as Tuck will certainly need a haircut during his extended quarantine.

    • @duskmoss
      @duskmoss 4 ปีที่แล้ว +1

      Funky Coldmedina also if you need help with plant related things go leave a comment on one of my videos or here and I will respond I am just waiting to do something

    • @duskmoss
      @duskmoss 4 ปีที่แล้ว

      Funky Coldmedina I saw you did and I will but do you have any plants you would like a video on just give a random one please I am really bored

  • @missthang4770
    @missthang4770 4 ปีที่แล้ว +5

    James! So good to see you and Tuck again! Great video. I look forward to your generous sharing of your gardening knowledge with us this growing season.

    • @OncuFarm
      @OncuFarm 4 ปีที่แล้ว

      very inspiring.😊

  • @ASocialCommentary
    @ASocialCommentary 4 ปีที่แล้ว +38

    Bless you for talking fast and getting straight into the content. It's so informative, and even though I have 2 humble 4x4 beds they've been like little work horses thanks to you 👍🏾

    • @susielove6012
      @susielove6012 4 ปีที่แล้ว +3

      Yes, I thought the same - got to it the meat of it quickly. Thank you. !

    • @AM-lz2jr
      @AM-lz2jr 4 ปีที่แล้ว

      Doesn't your type belong on tiktok?

    • @ASocialCommentary
      @ASocialCommentary 4 ปีที่แล้ว +1

      @@AM-lz2jr I have no idea what you're on about

    • @AM-lz2jr
      @AM-lz2jr 4 ปีที่แล้ว

      @@ASocialCommentary go do your tiktok dance videos

    • @ASocialCommentary
      @ASocialCommentary 4 ปีที่แล้ว +1

      @@AM-lz2jr oh I see what's happening, but I don't quite understand. This is a difficult year, and everyone across the globe is experiencing some sort of stress. I'm not being patronizing I truly hope that whatever situations are negatively affecting you in this season are eradicated soon. You have a lovely name, and your time is valuable, you are above instigations and incitements!!!

  • @fabienlem4766
    @fabienlem4766 2 ปีที่แล้ว

    Hi thx for your videos. I like the enthusiasm you put in it and the fact they are very explained. I'm from Normandy, north west France. I like to watch gardening videos from other regions of the world because it brings brand news ideas.

  • @mikeandsuzannegeorgiamount6036
    @mikeandsuzannegeorgiamount6036 2 ปีที่แล้ว

    Great way to recycle, repurpose and get a great raised bed with little cost. I made one of my raised beds using old roofing panels, and lumber I had. The metal was rustic red, stained the lumber, and it matched the shutters on the house. Didn't have to buy anything. After watching this, my next one will be out of old pallets. Thanks

  • @shineyrocks390
    @shineyrocks390 4 ปีที่แล้ว +59

    That's awesome 👍
    I actually built a cabin and a lean-to out of pallets. I spent out of pocket $270 for the entire project. Pallets were free but nails, screws and shingles was all I chose to buy. Simple even though everyone thought I was insane and said it couldn't be done. I did it 😁.

    • @shineyrocks390
      @shineyrocks390 4 ปีที่แล้ว +1

      @J B lol not if no one is there to see you pee in it 😜

    • @Christine-wi1dl
      @Christine-wi1dl 4 ปีที่แล้ว +3

      @J B I used to tell my Ex to go pee in the Compost bins when ever he was outside, instead of coming in the house to use the bathroom LOL because Urine adds bacteria to the compost pile to help it speed-up the break down of the items we put in it to be composted.

    • @meuandthelot
      @meuandthelot 4 ปีที่แล้ว

      @@Christine-wi1dl Great advice, Nitrogen.

    • @surefiremushroomsmicrogreens
      @surefiremushroomsmicrogreens 4 ปีที่แล้ว

      meuandthelot your pee contains urea and eventually makes ammonia, I have watched a guy add one can of cola and a can of beer and then he adds household ammonia spays his pile down and he has useable compost in 14 days. 7 days sitting and then turning once a day for a week and watering everyday.

    • @doodlebug6933
      @doodlebug6933 4 ปีที่แล้ว +1

      Wow, I wish I had the skills and patience,
      Love the gardening idea,Awesome, And if you could build a cabin from these pallets for little of nothing Truly Awesome. Some very crafty people in this world. I love watching these videos wishing I had something nice like this. Or even a cabin built from these wow.👍👍

  • @TheComputec
    @TheComputec 4 ปีที่แล้ว +7

    Love this !!! The passion for growing and the positive upbeat delivery... Not overdoing the cautionary tales and "don't do's"... It's clear that you just want to get growing and the beds are just a means to an end... exactly as it should be !!

  • @reedamanda814
    @reedamanda814 4 ปีที่แล้ว +9

    It turned out so pretty! Brilliant time saver to cut them rather than pulling a million nails. This is for sure on my agenda.

  • @juliaoconnell9947
    @juliaoconnell9947 3 ปีที่แล้ว +1

    HI thanks for this - amazing. I like to re-use and make stuff myself but I'm not sure how to use a drill or electric screwdriver so end up not doing more things. Sorry this is a basic question but is there a youtube you or your viewers could recommend to me re using the drill etc? Many thanks Julia (when I was at school it was only the boys who got to do woodwork/metalwork so I'm playing catch up!)

  • @cherylgrosso
    @cherylgrosso 6 หลายเดือนก่อน

    I love the simplicity of how you build! So Awesome! Watching others on videos do angle cuts etc and then seeing you create the way I was wanting to just made me so happy!

  • @staceywysongmccray1187
    @staceywysongmccray1187 3 ปีที่แล้ว +6

    We made a raised bed out of pallets this past weekend. Thanks for the excellent instructions!

  • @kathrynmccormick1990
    @kathrynmccormick1990 4 ปีที่แล้ว +17

    Brilliant presentation and design! I really like the vertical board positioning. I live on an acre, and just as you said in the video, I plan to fill it as much as possible with your pallet beds. Love the linseed. Here in Riverside, Ca., the climate dries out the wood. Now I know how to preserve it. Thank you so much, so glad I discovered you!

  • @wideopennoklahoma7014
    @wideopennoklahoma7014 2 ปีที่แล้ว +28

    Would love to see un update on how this raised garden has lasted 2 years later

    • @grimsworld
      @grimsworld ปีที่แล้ว +5

      i would be very surprised if it lasted 2 years without repairs

    • @alexiscausleywaabagiizhigo8606
      @alexiscausleywaabagiizhigo8606 ปีที่แล้ว +3

      Had a few pallet ones in Northern Ontario.. 6 years now.

  • @seedhound
    @seedhound 2 ปีที่แล้ว

    The beds look so nice. I put a thick layer of rotting tree limbs, cardboard and rked leaves in the bottom to save compost. Thanks for sharing your great ideas.

  • @dereklonewolf9011
    @dereklonewolf9011 ปีที่แล้ว +1

    Very good use of pallet wood young fella 👍 I lined the inside with waterproof lining so the wet garden earth wouldn't rot the boards as quick. I made 2 raised beds 8ft x 6ft last year with a good crop of veg so I made another 8ft x 8ft late fall. I share my crops with family n friends 🍁 73+ Manitoba hunter Yorkshire expat

  • @sagefool5786
    @sagefool5786 4 ปีที่แล้ว +6

    James!!! I'm so happy to see you! Springtime - YAY! Another great resource is the local mattress recycling place. In my town they give away free the box-spring bases, which are way easier to take apart than pallets and great for trellises. Also the springs make amazing scaffolding for beans, peas and tomatoes...or any vines.

  • @RogerSmith83
    @RogerSmith83 3 ปีที่แล้ว +4

    I used this technique this weekend. The bed from an aesthetics view is sharp. A ton of drilling and screws but nothing beats being outside!

  • @alanmcrae8594
    @alanmcrae8594 3 ปีที่แล้ว +13

    Awesome! We want to try this ourselves. I think we may put the screws in from the outside so that vertical boards that start to go bad can be easily replaced without digging out any soil. Also, the narrow support for the top plate looks a little weak to us, so we'll probably add a furring strip or something to spread the load more when sitting on the edge of the beds. Overall, this looks like a great system for creating raised beds quickly & cheaply.
    Question: does anyone know how long these beds will last before the weather takes its toll?

  • @janworkman7828
    @janworkman7828 2 ปีที่แล้ว +2

    This is the best video! You made this so easy! I was very overwhelmed trying to figure out how to build a raised garden bed and just stumbled onto your video researching DIY Wood Pallet Raised Garden Beds! Thanks for doing this video!

  • @randyman8984
    @randyman8984 3 ปีที่แล้ว +1

    I went today and to get some pallets and scored 5 pallets, Then when I started cutting on them I noticed that cedar smell! Score!! I was sctrahing my head how heavy each one of these was. Now I know why lol I am going to make smaller annual flower beds with this method except I am going to do 4 boards x 3 boards. I think I will have enought to do 7 beds with these 5 pallets.

  • @pittbullcustomleather6509
    @pittbullcustomleather6509 2 ปีที่แล้ว +4

    I’m glad I watched. I have a stack of old pallets that were here when I bought the house & land. Mine may not end up as nice looking, but should serve the purpose. I love the idea of using boiled linseed oil. I use it for treating wood handled for tools, but never thought of using it in place of a water sealer. Thanks for your tips. I will put them to good use.

    • @mikecomeau2561
      @mikecomeau2561 2 ปีที่แล้ว

      Hi. Do you need the boiled linseed oil? Is the one that is not boiled not good? The boiled one here in Nova Scotia, Canada, is $13 per 1 Litre bottle (about 4.5 Litres = 1 gallon), so it is very expensive. A large can of the unboiled kind (around a gallon) is around $43 + taxes (Canadian). They do not sell the boiled linseed oil in a 1 gallon can.

    • @pittbullcustomleather6509
      @pittbullcustomleather6509 2 ปีที่แล้ว

      @@mikecomeau2561 I honestly don’t know that much about it, but I haven’t researched it. I’m on the cheap side, so I used some old stuff I’ve had for years. If it was me, I would try the less expensive stuff by doing a test on a small piece of wood. If it wasn’t as good, I would put in in an old pot & boil it outside. I don’t know if that would work, but it’s just an idea.

  • @J.walker6308
    @J.walker6308 4 ปีที่แล้ว +53

    I'm not even going to be doing any gardening and I couldn't stop watching.

    • @kevinwirth4767
      @kevinwirth4767 4 ปีที่แล้ว +1

      Very good stuff!

    • @yasminhusain213
      @yasminhusain213 4 ปีที่แล้ว +1

      Lol I was mesmerized too. I want to start gardening now!

    • @THEJONESFAMILYCHANNEL
      @THEJONESFAMILYCHANNEL 3 ปีที่แล้ว

      hahahaha.. that's funny.

    • @loturzelrestaurant
      @loturzelrestaurant 3 ปีที่แล้ว +1

      @@kevinwirth4767 Hi, i know this is random but
      i try to legit gather people for what you could call a "Good Cause".
      Its to help TH-cam get less hate-filled and harmful and unsafe.
      Would you like to hear more?

    • @MrDisgruntledGamer1
      @MrDisgruntledGamer1 3 ปีที่แล้ว

      you should try to tho, its the most relaxing mind clearing hobby ever. Its just great

  • @TheVicjbaldwin
    @TheVicjbaldwin 4 ปีที่แล้ว +8

    Thank goodness y’all are back! We need Tuck’s pawsative garden personality (Good seeing you too James)!

  • @jaylee5639
    @jaylee5639 3 ปีที่แล้ว +1

    That raised bed is gorgeous. I cannot believe you made it for basically free, including the compost! Thank you for the wonderful idea.

    • @tedtolentino4955
      @tedtolentino4955 3 ปีที่แล้ว +1

      I was considering using wood chips (we had a terrific ice storm this Winter that caused much tree damage, hence, a tonnage of tree limbs in our city which was turned into wood chips) which are being offered to the public for free. Are wood chips useful in preparing a raised garden bed? Using these chips would there be any risk of attracting unwanted insect pests?

  • @stephenrobinson5949
    @stephenrobinson5949 3 ปีที่แล้ว

    Your enthusiasm is infectious. I am going to build this to go with the U shape 8x12 I built last year. The tech teacher in me wants to add however, please wear safety glasses; always, but especially when cutting up pallets because the nails sometimes fly when you recycle this resource! keep growing! keep posting!!

  • @briansheehan3085
    @briansheehan3085 3 ปีที่แล้ว +4

    I haven't time to read through all the comments, so sorry if this has already raised. When I made a similar sized raised bed, I used heavier timber on each corner to which I attached the two long sides and one end side. This made it much easier to fill with soil as I just wheelbarrowed it in, and when full, add the end panel. Much better than shovelling soil over the side.

    • @elizaehrlich
      @elizaehrlich ปีที่แล้ว

      Haha, he actually mentions this approach at 11:31

  • @Gamewithstyle
    @Gamewithstyle 4 ปีที่แล้ว +5

    You're the man. I just found your stuff because my wife and I want to start our backyard garden. We were already upcycling pallets from the construction in a new phase in our development, and I just found 3 fresh ones today! Going to use the technique from this to build a microgreen growing table and maybe our first raised bed.

    • @JennTN411
      @JennTN411 2 ปีที่แล้ว

      Any updates?

  • @murrayl2125
    @murrayl2125 4 ปีที่แล้ว +17

    Your enthusiasm is totally inspiring , going to start raised garden build this season for sure!
    Keep the videos coming.

  • @sylvianolastname6606
    @sylvianolastname6606 2 ปีที่แล้ว

    I just discovered your channel today. I was searching how to propagate from my fig tree. And boy! When I saw your Yorkie? I was in tears and happy at the same time. 😍
    My Yorkie, just passed away May 26th. He was 14 years old. And it's been very difficult and I cry everyday because I just miss him so, so, much and it's been very difficult. 😢 He was my baby and my best friend and companion. I believe God, somehow, helped me in guiding me to click on your video, when there were so many that came up in my search. Watching your dog, his feistiness, behavior and cuteness; it feels like I'm seeing my dog again and you have no idea, how this has helped me and for the first time? I actually smiled seeing a Yorkie.
    Thank you so much. I'm going through your videos and hoping your dog is in ALL of them so that I can smile again. God bless 🙏😊❤️

  • @scottleavingweakness7602
    @scottleavingweakness7602 2 ปีที่แล้ว

    Thanks for getting straight to the point on how to make this happen…. No bullshit side stories or pointless dialogue. Great content boss!

  • @0anant0
    @0anant0 3 ปีที่แล้ว +13

    Very beautiful! I would add a cross-connector or two (parallel to the 4 ft side) in the middle to prevent bulging of the bed in the middle -- learned it the hard way, esp when there are no posts to 'anchor' the bed in the ground.

  • @diannaa9495
    @diannaa9495 4 ปีที่แล้ว +7

    James, I love watching your channel, it's very informative. I have a small side garden in California, so I've really tried to maximize my space, thank you for all your great ideas and planting tips.

  • @amylosee9461
    @amylosee9461 ปีที่แล้ว +3

    I would have added the cross bars connecting the pallets at the top and bottom, this would give something to screw into when adding the 2x4 on top. This would probably increase the number of pallets needed but would result in a more secure end result. I also would have added a full 12 inch 2x4 in each corner to give more strength in the corners. Also lining it is a good idea that others have suggested if that is in the budget.

    • @jeffzapatka1926
      @jeffzapatka1926 ปีที่แล้ว

      Yeah, I was thinking the same -- a cleat at the top would help with installing the cap

  • @laurietumer3216
    @laurietumer3216 13 วันที่ผ่านมา

    Hi James, Of all the raised beds I've seen, I like yours the best! So pretty. how the oil brings out these different colors. Thanks for going through the process. I'm really enjoying your videos! Carry on! Laurie (in northern New Mexico).

  • @vickisingh5997
    @vickisingh5997 3 ปีที่แล้ว

    I'm an Urban Farmer. You are talking to the choir regarding pallets. Been sold years ago. With 53 square & rectangle beds in my yard and a squares smaller beds on my east west south property line, looking to do 17 more. Honored your efforts with Tuck🐾🐆 as a subscriber.
    Retired H.S. English teacher in 2018. Milwaukee Public School. I liked your instructions with a 🗣"conservation of words" explanation.
    Ty🎵Mrs. S.🎶💕

  • @glenns8418
    @glenns8418 4 ปีที่แล้ว +41

    Great idea for used pellets...... it's best to only use pallets that are heat treated. Any pellet not marked with HT... don't waste your time they might be treated with chemicals. Thank you for the awesome content!

    • @benjamincrossman5937
      @benjamincrossman5937 4 ปีที่แล้ว +5

      Absolutely! Some of them are treated with really nasty stuff.

    • @joprinn1
      @joprinn1 4 ปีที่แล้ว +4

      Just curious because none of my pallets have anything on them that i can see (they were free and slightly older but still sturdy) how do you tell otherwise

    • @benjamincrossman5937
      @benjamincrossman5937 4 ปีที่แล้ว +9

      @@joprinn1 they have a stamp on them usually at least the ones I get here in Australia. I avoid using any that are marked MB for Methyl Bromide, which is very toxic stuff. It's a fungicide that will probably affect the health of soil or compost it touches. A quick Google search will find you lots of sites with the various stamps and codes. Regulations differ from place to place I suppose, and what is required here might not be in some other places.

    • @glenns8418
      @glenns8418 4 ปีที่แล้ว +9

      @@joprinn1 check out 1001pallets.com they have plenty of info about which pallets are safe. Not all unmarked pallets are treated with chemicals but I myself wouldn't use any pallet for the garden that wasn't marked with the HT code. The HT code is the best way to guarantee that no chemicals were used to treat the pallet. Most disposable pallets are built cheaply/ weak. Those are the pallets usually treated with chemical. They are kinda one time use pallets and are usually given away for free. The reusable pallets are built very study and most of the time aren't given away for free because companies will reuse them for as long as possible. Hopefully the link helps.

    • @nathangant7636
      @nathangant7636 4 ปีที่แล้ว +7

      PTP (pressure-treated pine) is also bad, it looks like you're using that for the top pieces. Most lumber is treated with toxins if sold for building. These kinds of chemicals leach into the soil of raised bed, creating a poisonous cocktail in soil to stunt the growth of whatever plants you're trying to grow. The wood rots away before the chemical is dissipated. Use cedar or some other wood without artificial preservatives. Even natural pine longs have resin which contains turpentine and isn't going to help your garden grow.

  • @DeeFromBrooklyn
    @DeeFromBrooklyn 4 ปีที่แล้ว +4

    I love the fact that you're right here in Jersey. That inspires me to build in Brooklyn. Thanks for all your projects

    • @jamesprigioni
      @jamesprigioni  4 ปีที่แล้ว

      Let’s Goooo! You’re welcome my friend. I’m glad you’re enjoying them 😁❤️

  • @digitallion3861
    @digitallion3861 3 ปีที่แล้ว +6

    That raised bed looks absolutely beautiful. I'll be doing some gardening this year and now, thanks to you, I'll be able to build all the beds I need. Great job, I'm subscribing

  • @hjd832
    @hjd832 2 ปีที่แล้ว +1

    It looks very attractive with the stripey wood .

  • @shobalmani1
    @shobalmani1 3 ปีที่แล้ว +1

    Brilliant use of recycled wood. Organic food grow at home. I love your work.

  • @JessyJoyOfficial
    @JessyJoyOfficial 4 ปีที่แล้ว +27

    Hey from your neighbor in PA! You're at 399k subs while writing this comment. An early congrats to you on 400k! Thanks for providing amazing, helpful content and an array of how-to garden videos. You've simplified so many of the seemingly challenging aspects of gardening, and you've inspired me to start growing my own food this season. Hearts for Tuck ♥♥♥♥♥

  • @cleveoliphant3151
    @cleveoliphant3151 4 ปีที่แล้ว +5

    The raised bed was great. Your step by step instructions are very practical and doable. You make it look easy. Thanks for the video. They're not just informative, They are inspirational. Hey, What kinda dog is Tuck? He is so chill. Give him a 'WAZZZZUP' scratch for us.

  • @maloryt6010
    @maloryt6010 3 ปีที่แล้ว +7

    Love this!! Was looking for a more cost effective and environmental way to make my raised beds! I am totally doing this this year! Thank you! I love the coloring that the oil did too!

    • @KonnorTCrewe
      @KonnorTCrewe 2 ปีที่แล้ว

      It's not very environmental as pallet beds are treated with all sorts of chemicals not safe for consumption. So although it's recycling, it's with woods that are treated with things like insecticides and not food safe wood treatment.

  • @mariaadizaslastadizas5380
    @mariaadizaslastadizas5380 2 ปีที่แล้ว

    For my relaxation, backyard gardening gives a complete satisfaction and I admire your work. Art and gardening. Admirable.

  • @amwartwork
    @amwartwork 3 ปีที่แล้ว

    IM IN THE FOREST OF DEAN uk. england. I ued reclaimed pallete wood then did what you did with the outside walls but with oak slab crate wood. . Looks gorgeous when wet. its not been warm yet so cant wait to see it in summer. Builsing beds was fun. so important to prep the surface though all you end up with cock eyed looking sides. I enjoyed and learnt alot. great to see you doing this. your very passionate. not many people full of beans like you around. need more of them.!!

  • @jovanny253
    @jovanny253 4 ปีที่แล้ว +19

    Finally glad to see your doing more videos. I love them so much. Any chance you might do a container series? All I have is a nice size balcony :( one of these days I will get a nice big yard.

    • @jamesprigioni
      @jamesprigioni  4 ปีที่แล้ว +2

      Thank you my friend. It's amazing how spot on you are Jovanny!! 😉

    • @athenamorales7321
      @athenamorales7321 4 ปีที่แล้ว

      You and I both are waiting for our backyards.

  • @PurePondering
    @PurePondering 3 ปีที่แล้ว +4

    Just saw this. So much quicker and more efficient than the way I've been building them! Thank you!!

  • @barbarapeszle3693
    @barbarapeszle3693 3 ปีที่แล้ว +3

    It's the perfect solution for extending my raised garden bed's growing season! Thank you for an inspiring & simple project!

  • @Doc1855
    @Doc1855 2 ปีที่แล้ว +1

    We bought part of a mtn here in WA state.
    In order to get flat areas for gardening, we had to build retaining walls into the mtn . Basically they are 3 sided “raised” planter beds. They make it so much easier to garden in.

  • @terrykunst3883
    @terrykunst3883 3 ปีที่แล้ว +12

    James and Tuck, This is an awesome project! Thank you so much for everything you bring to us.

  • @ireneb3433
    @ireneb3433 4 ปีที่แล้ว +21

    "Hope you got something out of this video" HELL YEAH!!! A tonne of INSPIRATION! This is absolutely BeAuTiFuL!!! Thanks for sharing!

    • @loturzelrestaurant
      @loturzelrestaurant 3 ปีที่แล้ว

      Hi, i know this is random but
      i try to legit gather people for what you could call a "Good Cause".
      Its to help TH-cam get less hate-filled and harmful and unsafe.
      Would you like to hear more?

  • @sac3958
    @sac3958 4 ปีที่แล้ว +13

    I make a lot of stuff out of pallets and you want to be careful making a planter with them. Chemical are shipped on some of those pallets and they get spilled on them. If you don't know then it's best if you use a heavy sheet of plastic to line it.

    • @Bee_Healthier
      @Bee_Healthier 3 ปีที่แล้ว +2

      Wouldn't the plastic leech into the soil? Or the plant roots break the plastic up and give you micro plastics? Trying to learn more about which sheet would be best. thanks for any info.

    • @redeye2938
      @redeye2938 3 ปีที่แล้ว

      @@Bee_Healthier right, it's like what's worse huh!? Plastic or some mystery chemicals... such a shame everything is so toxic😑 we're working on being as organic as possible on our homestead. Its not easy, especially when you learn about plastics breaking down and chemicals in places they shouldn't be. 🤗

  • @message3381
    @message3381 2 ปีที่แล้ว

    You are the man sir. I've been following your channel for years and have learned a grteat deal on my journey to gardening and homesteading greatness. I am going to make one of these beds this coming weekend now that I have the space to do it. Keep moving forward brother and give Tuck my love...lol. Let's GO!

  • @mq9413
    @mq9413 ปีที่แล้ว

    I love it❤️ I am on it. Thank you for sharing. No nonsense, simple instructions, this gal will get er 👍 done.😊

  • @silkydforlife5333
    @silkydforlife5333 4 ปีที่แล้ว +7

    Outstanding job - you’re brilliant! I appreciate you explaining how you planned and wrapped it up. You rock, brother!

    • @loturzelrestaurant
      @loturzelrestaurant 3 ปีที่แล้ว

      Good video, but not as education PLUS Fun (epic combi) as
      the new video about Vaccines from 'Hbomberguy'!!

  • @pamelaadams3649
    @pamelaadams3649 4 ปีที่แล้ว +118

    That raised bed was gorgeous. Very ingenious!

    • @jamesprigioni
      @jamesprigioni  4 ปีที่แล้ว +8

      Thanks Pamela 😄

    • @sherrylynn3304
      @sherrylynn3304 4 ปีที่แล้ว +5

      Yes it was!

    • @therealrobbdee672
      @therealrobbdee672 4 ปีที่แล้ว +2

      @@jamesprigioni I always worry about chemicals that we're used on the pallets. Is this an issue! Love ur vids and Energy! Tuck rules too!!

  • @cabercabe677
    @cabercabe677 3 ปีที่แล้ว +3

    Wow, that looks gorgeous. Actually looks better than if I had gone to Home Depot and got the wood and assembled it myself.

  • @FringeWizard2
    @FringeWizard2 3 ปีที่แล้ว

    Watching this again 7 months later and you've solved a problem for me... I have tons of palette wood cut to three foot length right now but I need to make a 4 feet by 4 feet planter yet don't have enough 4 foot long boards, I'll just orient the three foot boards the way you have it, and then nail one or two 4 foot long boards onto the back.

  • @carolexo7269
    @carolexo7269 6 หลายเดือนก่อน

    I made your first raised bed. Took me a day to get the first pallet apart (I was clumsy with all the tools and weak). Then I evened out the boards. (You make it look so easy) It took me an additional half a day to finish the box. It's SO cute and now my prototype.
    This second one looks gorgeous, and I am going to try it. Wish me luck.❤❤❤❤❤ to Tuck!!!
    P.S. thank you so much 🇨🇦

  • @servantofgod5642
    @servantofgod5642 4 ปีที่แล้ว +8

    PERFECT!
    Timber here is so expensive that one might just as soon hire a stone mason or bricklayer to build a bed out of the finest marble, and a metal version is $ 250 - $500.
    Bet all the free sawdust helps too.

  • @CanadianPermacultureLegacy
    @CanadianPermacultureLegacy 4 ปีที่แล้ว +46

    Neat seeing these all come together nicely. You are one of the videos that got me to get started, both my own 1000 tree food forest and also making videos about them.
    Keep pumping out the awesome content. You are changing lives!

    • @klogjo
      @klogjo 4 ปีที่แล้ว +2

      This video only shows what people in Michigan can't have, any kind of garden, jail time, thanks to the democrats.

    • @CanadianPermacultureLegacy
      @CanadianPermacultureLegacy 4 ปีที่แล้ว +5

      @@klogjo I know right! All these politicians selfishly trying to stop a global pandemic!

  • @RenatukasP
    @RenatukasP 3 ปีที่แล้ว +17

    These are absolutely beautiful and amazing raised beds. Inspiring!

  • @christinalynn8143
    @christinalynn8143 2 ปีที่แล้ว

    The finished product on the thumbnail is beautiful! A beautiful garden. Earthly love!

  • @tedtolentino4955
    @tedtolentino4955 3 ปีที่แล้ว +2

    You are obviously a very enthusiastic gardener! I wish I had the space you have but raised gardens don't necessarily require a lot of space. And for most of us one raised bed such as yours, for example, can grow plenty of food for a family for 4. Thanks for sharing your expertise and tips.

  • @KhalidMarzouk
    @KhalidMarzouk 4 ปีที่แล้ว +5

    My 6 years old daughter loves to see you saying (let's go). She watched this over 30 times. We love your dog

  • @Audiotorium87
    @Audiotorium87 4 ปีที่แล้ว +4

    I’ve just bought a house and wanted to grow my own food, so this is a great introduction to growing. I will definitely subscribe and in hope find a video about composting and dirt for growing but please post if you don’t have any! Thanks 👍🏽

  • @KyleenDrake
    @KyleenDrake 3 ปีที่แล้ว +6

    You know how kitchen cabinets have a space at the bottom where you can put your feet in and belly up to the counter? I always thought a raised bed with this feature would be handy.

  • @daniellesimone7769
    @daniellesimone7769 2 ปีที่แล้ว +1

    Absolutely amazing! Naturally beautiful, utilitarian, and easy on the budget. Thankx for sharing

  • @garykos1308
    @garykos1308 3 ปีที่แล้ว +1

    Loved the smile on your face when you brought in the seeds. Awesome job on the bed.

  • @OncuFarm
    @OncuFarm 4 ปีที่แล้ว +20

    this is very good. very inspiring how to make a raised bed. I also like gardening in my yard. Greetings from Oncu Farm in Indonesia. 😊👍🏼

    • @DapurUtie22
      @DapurUtie22 4 ปีที่แล้ว +6

      i also like gardening. this video is very inspiring.👍🏼

    • @jejaklangkah4789
      @jejaklangkah4789 4 ปีที่แล้ว +5

      it turns out it's easy to make raised beds. I want to try to make it at my home too.😊

    • @urbanfarm3561
      @urbanfarm3561 4 ปีที่แล้ว +1

      is amazing. This is a good raised bed with a simple material..😊