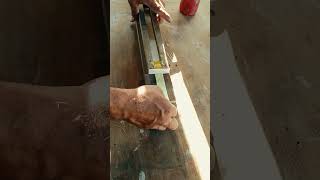
How to Make Simple Plywood Edge Banding

ฝัง
- เผยแพร่เมื่อ 20 เม.ย. 2018
- Watch me show you how I make plywood edge banding real quick.
www.shaunboydmadethis.com
/ shaunboydmadethis
/ shaunboydmadethis
/ sbmadethis
Tools I Use:
● SawStop 3-HP Professional Cabinet Saw: amzn.to/2GL2MCF
● Festool Domino Joiner DF 500: amzn.to/2LqxfcU
● Festool Track Saw TS 55 Req: amzn.to/2s3giNv
● Bosch 2-1/4 HP Plunge and Fixed Base Router: amzn.to/2x6odyz
● Makita 18V LXT Sub-Compact Drill & Driver: amzn.to/2x6sBxD
● Dewalt Jig Saw: amzn.to/2Lm2gOS
● Ridgid Oscillating Belt & Spindle Sander: amzn.to/2s0Nu8u
● Dewalt Random Orbit Sander: amzn.to/2s1Kusi
● Makita 3” x 24” Variable-Speed Belt Sander: amzn.to/2IK89E6
● Jet 16-32 Drum Sander: amzn.to/2xdeuX0
● Grizzly 2-HP Canister Dust Collector: amzn.to/2kk4Loz
● Titebond III Wood Glue: amzn.to/2IGVQfM
Camera Gear I Use:
● Canon EOS 77D Body: amzn.to/2s3Znue
● GoPro HERO5 Black: amzn.to/2s1La0O
● Canon 10-18mm Lens: amzn.to/2IHCYsQ
● Rode Videomic Pro-R+: amzn.to/2IENnK6
● JOBY GorillaPod: amzn.to/2LohJyd
Logo by Tim Lautensack
www.behance.net/timlautensack
Music:
Frenchman Street - Otis McDonald
Wild Pogo - Francis Preve - แนวปฏิบัติและการใช้ชีวิต


Loving these tip style videos!!! So helpful
Awesome to hear! It is always fun to share the bit of knowledge I have.
Thanks for talking us through these steps! I look forward to these videos! Keep them coming !
Now you can try it on your own!
Great vid as always. I’m liking these ones where we get to know you a little more and your process. Keep em coming!
Thanks, man! I'm having fun making these videos, so I'm glad you dig them.
best vid yet for a 1st and second fix tradesman (ie. me) looking to produce a bit of tasty finish work at the right price.
Thank you for this video. it really helped me out. especially with the table saw measurements
I am going to keep watching these just for the sayings at the end. Love these videos!
Haha, right on! Thanks! I will keep working on them.
I'm digging the new instructional videos. I've already learned a few things!
Awesome! Glad you are getting something out of them. Thanks for watching!
I really love the trick with the tape and the router, will definitely give that a try next time!
It definitely can be a life saver!
Nice video! Very informal, short and simple!
Thanks, glad you enjoyed it!
So cool to watch your videos. I learn so much. The results here are fabulous. Thank you!
Really appreciate it! Glad you are able to get something from them!
That quick-and-dirty miter sled is awesome!!
Yep, I use sleds like that all the time. Super easy, and they work great!
Love the tape for the router idea. DEFINITELY going to use that . tnx
Yeah, that can be a lifesaver, for sure!
I love the tip videos. I'd like to learn more about your shop - not just what's in it, but what it is. It looks like it's in some kind of larger building with other similar garage-type environments.
Really appreciate it! Yeah, it is a small industrial building with 8 units in it. 2 of them are single units like mine, and the other six are two units with the dividing wall taken out. I always have a desire for more space, but it is a great size for what I do right now.
Yes! Thank you. Thin edge banding on plywood, in my oppinion anyway, looks drastically better than thicker stock. Thin stock disappears and it looks more like solid wood, which typically is the goal. Thick edgebanding screams, thin whispers. Nice topic. Thumbs up for uncomfortable closing statements......
Driftless Joinery
Hey there! I love your videos and rambling talks! You really deserve way more subscribers! I'm looking forward to seeing more videos from ya....!
Totally agree, and the nice part about making it yourself is you can decide exactly how thick or thin you want it to be. Thanks for watching!
Great job thanks for sharing ur skills
Im also a huge lover of plywood, and its edges, There is a guy here in NZ who makes what he calls 'Tussock Board'. Its basically ply made from ply, with all the ends on the top. Its magical and saves me a ton of work!
Very cool! Didn't know anybody made an actual product like that. Now if only I could get a few sheets shipped over from NZ.
Tape idea is great! Thanks
Nice method cheers for posting
Just as i was looking for. Thanks Sr Shaun. the common edge banding using an iron tips of after sometime
Thanks for watching, Michael!
Belo trabalho mr.shaun,muito bem explicado.👍👍👍👍
Obrigado!
This is amazing! I enjoyed this so much! i did too
Very nicely done, thank you
I apreciate what you teach to us thanks
beautiful. appreciate this.
i like your humour !! and your work as well !!!
Right on, really appreciate it! Thanks for watching!
I look forward to your "as always" part of your videos. Quite funny!
Right on! I'll keep working on it, but no guarantees they will get any better.
Awesome! You should make one explaining how you come up with the angles and and cuts of your modern nightstand and just modern legs In General
For sure, that is actually on my list of things to cover. Thanks for watching!
Hi Shaun, Just ran into your channel. Thanks for the edge banding idea. Really enjoy the pace of your videos both in execution and your speech... it's kind of relaxing. I'm a new subscriber!
Right on! Glad you are enjoying them. I have been told my whole life that I sound pretty chill no matter what the situation.
First, thank you for good background music. Your fellow TH-camrs have much to learn from you about mixing your speech and vocals, and avoiding too much repetitive beats/refrains in the background.
Second--I usually don't apply my edgebanding at the end of my project. I've found that if I apply it to my rough-cut pieces, my miters, rabbets, or any other joint become part of the edge-banding, and more a "real" part of the carcasse. It also means I don' thave to add 1/16 to the finished dimensions of my product (or reduce my rough-cut pieces by 1/16).
Anyhoo--thanks for the good insights--always good to see how someone else does things!
Thanks, really appreciate it! Yeah, applying the edge banding first is another great way to do it. Sometimes I will go that route, especially if it is an intricate piece, so I don't have to take into consideration adding it later.
Just found your channel tonight.. Your doing amazing things .. just earned a new subscriber my friend...
Really appreciate it! Thanks for the support!
What did you put on the wood for the final finish
You have an amazing body language and style, Shaun!! Rock star……
How do you get your plywood to stain some nice? I use a pre-stain before I put my oil based stain on it and I still don’t like the look. that’s exactly how I do my edge banding, but I use my bandsaw. It’s so nice to be able to make your own edge banding.
Cool tips as always! Thanks bro :)
For sure, thanks for watching, Matt!
Could you do a video on how you make templates for projects like the credenza or modern bench? I do a lot of car audio builds and can see it crossing over into furniture but there's always tips and tricks to learn. Thanks and keep up the beautiful work.
For sure, I have had a couple people ask about that, so it is definitely on my list. I can definitely see your skills crossing over into furniture. Thanks for watching!
How do you route the edge of the overhanging edge band when it's on end.? Doesn't the router tilt and become unbalanced? Do you do anything special to insure the banding adheres well to the end grain of the plywood??
Awesome video and great technique. You got a subscriber.
Awesome, thanks for watching!
WOW Shaun! Is that a solid piece of walnut??!! LOL that was funny! Keep that plywood looking solid!!.....
Haha, just trying to keep it light. Glad you enjoyed it!
This was nice and funny as well! Thanks Shaun!! :) :D
Glad you enjoyed it!
Thanks for the edge trick
Great video. Thanks for sharing. Fantastic ending!! :)
Thanks for watching!
Awesome. Thanks for posting.
Thanks for watching!
Great video. Thanks for sharing. I clicked like and subscribe.
This is timely... I'm knee deep in edge banding 6 cabinets.... Just used iron on, but doing it again this would have been the way to go
Right on! I'm not a huge fan of the iron on stuff, so this is definitely my preferred method. Are you making a video for this cabinet build?
Yea, its a two-month build -- 6 surround cabinets and a built-in bed and headboard. So there were some efficiency considerations with iron-on. I definitely got better at using it, but for anything smaller, I think I'll be using your approach in the future.
Awesome, man! Looking forward to seeing it all.
it fails overtime. iron on stuff
@@africancichlids3011 True. That self gluing edge banding chips easier and the glue can fail. Use Tight Bond II or epoxy to attach your own banding and it's not coming off without divine intervention.
Awesome!
Do you find that you just make more than you need? That way you have some already cut for the next project?
Yeah, I will usually make a bit more than I need just to be safe. It is also nice having thin stuff already on hand for other things, especially the cutting board classes I have been doing.
Hi Shaun 🙂 I'm impressed with your work. You show in one of the videos "How to Make Simple Plywood Edge Banding". This video helped me a lot. I saw you cut walnut slats. In the next shots the color of the plywood was almost identical to the edge. Is it due to the choice of stain or plywood? Best regards from Poland 🙂
+1 The plywood seemed to change colors in the video shots. Turned out great looking though.
I just tried walnut speed tape edge banding from FastCap... not a huge fan. I’ll be going back to the old fashion do it yourself method. I like to make mine about 1/8th but use the exact same method you demonstrated. Good explication man! Keep up the great videos.
Yep, I totally agree with you! Thanks for watching, glad you enjoyed it!
You can also take the sharp edge off with thicker banding
👍👍 . I’m keeping the the ply lookin’ good, but how do dial in a table saw fence? Mines the worse.
Haha, right on! But I know how you feel, I used an old table saw for years where nothing was square or parallel on it. Just took a lot of patience.
What kind of oil did you use at the end to brighten that up? Nice job!
Just some Danish Oil.
Hey! Nice video. Any thoughts on videos where we get to see you do some cad designs?
Thanks! Yeah, I am slowly learning more about CAD, and trying to incorporate it into my work. I'll try to show more of it in my videos.
Thank you Shaun 😊
For sure! Thanks for watching, Mahendra!
New catch phrase for sure. Ha ha. Good method for edge branding!
Haha, I'll keep working on it!
Yeah, Edge Banding! Thank you
Right on! Thanks for watching!
Best sign off yet! 😆
Haha, glad you liked it. I will keep them coming!
How did you edge bad the top/bottom surface? Wider hardwood strips or same thin ones jointed together? I'm not noticing any lines that's why I'm asking lol.
Those pieces were walnut veneered plywood, so that was done at the factory, not by me. Thanks for watching!
A nice video you are so fortunate here in the UK solid wood is expensive and we do not get the range of woods that you have access to.
Thank you! Yeah, we are pretty spoiled here with the selection of hardwoods.
Haha, flawless sign off.
Edge banding looked great!
Haha, thanks Glen! They are getting better by maybe getting worse.
Shaun, I tried edge banding on plywood as you do in your videos. Mine started to warp.....the middle would be stuck to plywood and edges lift up along the whole length of plywood piece? Any suggestions?
Are you cutting really thin strips? If they are really thin, the moisture in the glue will cause the wood to curl like you are saying. Otherwise, just be sure to use a lot of tape and make sure it is pulled down tightly.
Rockin'.
Can you talk about joining mitered edges -- i know you use the domino a lot, but any advice for those of us who don't have one would be great. Also, choosing types of wood -- how you decide on the material you buy for a project -- would be great, too.
Thanks! I like your style, dude.
Right on, those are both great ideas! I will definitely add those to my list. Really appreciate it, thanks!
I am finding that I do not always get perfect looking edge, in my opinion, when edge banding. Any treats to ensure perfect looking edging joints every time?
Hmm, I would say just overdo it with the tape or whatever you are using to clamp it down. It is very easy for gaps to appear where the edge banding wasn't properly clamped to the edge of the plywood. Hope that helps!
Thank you so much for posting this simple trick for thin edge banding. Love the use of painter's tape to hold edge banding in place - nice simple idea. Now we can make toy boxes out of 12mm Baltic Birch plywood with your thin edge banding idea.
Awesome, glad you enjoyed it!
Nice one!
Thank you!
Hi Shaun, what kind of sawblade do you use for cutting these stripes with such perfect edges?
I was using a Diablo 50 tooth blade in this video, but I just make sure whatever blade I am using is sharp and clean before I cut any edge banding, and I usually get really nice results.
Hey, thanks for answering that fast. I've no doubt about the quality of your results. By the way: using the tape while trimming the edges is as simple as clever!
Wow, unique way to edge band. Most of the videos used prefabricated strips. The craftsmanship here looks amazing. It didnt show in the video, did you chamfer or round over the edge?
Thanks! No chamfer or round over, but you certainly could if you wanted. You just have to be sure you make the edge banding thick enough.
like it!
Thanks, man!
was stain you applied as finish or something else??? what's it called??
No stain, just some Danish Oil.
@@shaunboydmadethis thanks sir. but i guess we dont have it here in my place. i wanted that because it looks pretty good. thanks sir
Hallo Shaun, thanks for sharing your knowledge! I'm about to finish a dresser entirely edged with your method (that I like 'cause it is effective and simple), but all the edges are beveled by 22.5°.
Edging is a challenge (you can't use a router for trimming). Can you please tell us if you have ever done things like this before, and how you do it your way (that I like!)?
I have also seen a video on how to edge banding a round edge. This was interesting! I recommend!
You could do this with a wider piece of edge banding in order to cut the bevel. Though, with a wider piece you potentially will notice the fact that it is not part of the plywood, unless you can get nicely matched solid wood for the edge.
@@shaunboydmadethis I completely agree! Thanks!
I guess edge banding/veneer is a great way to conserve on overall lumber costs. Seeing more and more of this in videos.
Definitely, it is also a huge timesaver. Instead of milling, and gluing up large panels of solid wood, I will use veneered plywood with edge banding, and save many hours of work.
Shaun Boyd Right on man!
I was under the impression that those 'solid teak' mid century Danish pieces really were solid teak. Nope, veneer over particle board. Even the company Skovby, that sells very expensive furniture, is using particle board and MDF. It's like learning there is no Santa.
Thanks man
👍👍
Отличная работа. В иделале клелим кромку, потом пласть.
Спасибо!
Looks great, worth the extra effort! 👍👌
Any chance of new videos from you? Cheers!
Thanks! I have been posting all of my new videos on the Foureyes Furniture TH-cam channel. Check them out there!
Curious why you're not a fan of iron on edge banding? Imo its 100x more material efficient, cheaper, quicker to apply & ends up with a better result as its so thin it disappears into the stock :)
I just prefer having that slightly thicker solid edge on the plywood, feels a little more durable. I would probably go with the iron on stuff if I was doing a huge amount of it, but for the most part making it myself with material I have on hand makes the most sense for me. Whatever works for the particular job!
How do you make edge banding if you don’t have a table saw?
What kind of polish was that?
I think that was just some Danish Oil.
Nice
Thanks!
Some talk on your design process would be great
Definitely, I like that idea. Just need to think of a creative way to talk about my creative process...
Looks very sleek! Do you American folks ever wish to be using SI-units? Two thirds, thirteen sixteenths sounds awfully complicated vs. just talking about millimeters.
Thanks! I think it is one of those things where if it is what you have been using your whole life, then it just becomes natural. I definitely understand why people love the metric system so much, though.
Love this but dude..... millimeters.... Did you say 3 32nds of an inch?
It's always fun watching Americans try to do maths with ye olde measurements
Great! So now you have a beautiful walnut roof for a dollhouse! 😍😀
Haha, you are right. I need to start thinking more like you!
Great content. Always learn something new n that’s y I never miss out your video ❤️ btw have you heard of “ rockler one sheet plywood challenge”?. I saw it from Chris salomone’s latest video. It would be wonderful to see you participate man.
Thanks, really appreciate that! Glad you are getting something out of it. I did hear about the plywood challenge, not sure I will have time to participate, but I'm definitely going to try if I can.
You use a lot of mdf templates in your build processes. I’d like to see a how-to on how you create them. As always... keep your templates sharp and your router bits... sharp.. er.
For sure, I have had a couple people ask me about that, so I definitely plan to talk about it at some point. Thanks for watching, and solid catchphrase there!
Brandon Perez I agree, I'd like to see that as well, I have trouble sometimes where the bearing will groove the template a bit and then it is no longer true to the shape. So beside making the template, I'd love some tips on putting them into use and preserving them so they don't vary with use.
Vow!
"playwood loking good" jajajajaja
Haha, I'm trying.
Alright
My invention would be end grain edge banding, then it would really look like a solid board, when it's on the naked ends.
You could be onto something with that!
If you're all about keeping it simple just use pre cut and pre glued edgebanding and use a iron
But then I would have to buy an iron!
Shaun Boyd true that
I have been using an easier method to make consistent edge banding. I made a sled to hold the stock I am using for the banding and cut the stock flush with the edge of the sled. Then I insert a full length spacer against the Fence of the sled and keep adding spacers as I remove each piece of banding.
Right on, sounds like you have it dialed in.
I don't know why you're cutting the edgebanding on the 'offside' of the timber. If you set the saw to the correct thickness you should be able to cut the same thickness every time, without resetting the fence. If the gullet of the saw table is too wide (most of the time it is), feed a piece of thin ply into the saw to reduce the gullet. That way the just-cut piece of edgebanding won't drop down the gullet, as it will be on top of the thin ply, blocking off the gap. fix the thin ply down with a cramp/tape/double sided tape/superglue so it's secure. Push the stock half-length into the saw, then pull it out, reverse it, and cut the other end to free it when the cut gets to the middle of the stock. However, your push BLOCK with a handle on top is not suitable for this method. Use 2 proper push STICKS, one for each hand, one to push and the other to put pressure against the side of the stock. You shouldn't need them for this particular process, but always have them to hand in case you need them.
Also, on the theme of 'keeping things simple' when I do these, I always mark off the angle with a square (mitre side of course) and pencil. Then I line up the edge of the edgebanding with the INSIDE face of the box/carcass (or just a hair over). Making sure to line the pencil marked mitre with the inner corner of the box. Doing it that way means you don't have to clean up the inside edge of the edgebanding on the inside face of the box. A light sand will bring it flush. All the waste removal is on the OUTSIDE of the box/carcass where it's easy to clean up. Then you can just take a chisel and cut on the pencil mitre line to cut it off. It's already lined up with the corner. So you don't have to align a mitre-ended piece of edgebanding with the corner. The last piece you put on, just cut a mitre one end, then roughly oversize on the other, and slowly bring the length down with mitre cuts to either end, to get it to match your size. if it's a bit undersize, that's fine. You'll just have a tiny bit more to clean off the inside face than on the other sides. If the mitres are matching both ends, it'll work.
Wish I could show you.
You should invest in a good bandsaw, you will waste less material when you cut it.
I usually cut mine 1/4", I find it doesn't come off as easily if it gets snagged.
how to make a new impeller in a upcoming video , lol ; )
Haha, now that is a good idea!
Keep those edges banded and plywood sanded.
Eric Haeselich
NOICE!!!
Oh dang! If I was actually good at coming up with catchphrases, this is exactly the type of thing I would say. Nicely done!
Nice thanks. You firing off all of those silly imperial measurement fractions makes me wish we used metric more. Just 3 and 7/8 eight freedoms + 1 1/6 eagles= about a furlong dinglehopper america gun.
Why not use solid piece of wood? Dont really like plywood...
There are many different reason to use plywood instead of solid wood (cost, time, aesthetics, etc.) but it really just depends on what works best for the specific situation.
Shaun Boyd I see..
Nice work, but turn that music down please
Today i'm talking....oh....i1m so hipster...
Speak mm plz 😂
I love your videos and work, but man, you're killing me with the way you speak so slowly. Like just say it!
Thanks...for...watching.
unsubscribing because of inches. Are you listening to yourself? what kind of self respecting furniture maker uses inches instead of mm's.
Next time I go to my lumber supplier I will ask for everything in metric and see what they say.
Nice
Right??!!!!!
Thanks!